Family Friendly Hikes Around New England
view from the top of Table Rock in Grafton Notch State Park in the summer
Looking for a mountain to get your family into hiking? This is our working list of hikes we’ve experienced, separated into five of the six New England states. (Sorry, Rhode Island, we haven’t found a mountain there yet!)
These hikes are perfect for getting the entire family outdoors. They all have pretty views, nothing on this list is too challenging, and each one will leave you feeling accomplished and happy because you just spent time in nature.
Our Family-Friendly Rating Scale-
We rate hikes on a 1–5 scale, with 1 being the easiest and 5 being the most challenging. No two families, mountains, or hikes are the same, so think of this as a guide rather than a rulebook. Each listing includes our 1–5 rating, mileage, elevation gain, and whether it’s a good spot for your four-legged family member.
5 – Advanced Family-Friendly
These hikes can be around 5 miles (sometimes less). They’re not for first-timers. They’re for families ready to tackle a bit more length, elevation, and challenge. You might be a little out of breath and sore the next day, but you’ll earn both the view and the workout. Some of these could have a bit of basic rock scrambles, but nothing you can’t handle if you’ve hit the trails before.
4 – Upper Moderate
Not quite advanced, but definitely a step up from a moderate hike. These trails have views, elevation, and miles (usually under 5). Consider these when you’re ready to move up from moderate hikes but not quite ready for the advanced challenge.
3 – Moderate
These hikes are around 3 miles or less with enough elevation to give you a workout and views to match. Perfect for when you want an adventure but still have plans later in the day. You’ll get your nature fix without being gone for hours.
2 – Easy
Great for starting your family hiking adventures! Ready to break in those hiking boots or get your younger kids some trail experience? These are perfect starter trails, maybe a bit longer or steeper than a “walk in the park,” but still very approachable.
1 – Super Easy
Kind of like a walk in the park (literally). Not sure how your kids will do on a mountain? Start here.
You know your family best! Always bring water (and maybe a snack or two). Nobody wants a hangry hiker! Stay safe and have fun!

Vermont Hikes
Mt. Philo
Rating: 2 Location: Charlotte, VT Miles: 2 Elevation Gain: 652 ft Bathrooms at trailhead Dog-Friendly
A beautiful hike with some stairs and great views from the top! Plus Adirondack chairs where you can relax and take in the Adirondack Mountains.

Gile Mountain
Rating: 2 Location: Norwich, VT Miles: 1.5 Elevation Gain: 387 ft No Bathrooms Dog-Friendly
A fairly short hike with lots of stairs and a cool fire tower at the summit. On a clear day, you can even spot the ski trails of Killington Mountain.
Mt. Pisgah
Rating: 5 Location: Orleans, VT Miles: 4.5 Elevation Gain: 1,660 ft No Bathrooms Dog-Friendly The most challenging on our Vermont list due to length and elevation. The viewpoints are stunning! Watch out for cliffs!

Rating: 3 (longer than our typical 3) Location: Manchester, VT Miles: 4.8 Elevation Gain: 954 feet Dog Friendly / No Bathrooms
If you’re looking for a family-friendly hike with a beautiful payoff, this is it. I rated this hike a 3, although longer than our typical 3 hikes, this trail was fairly easy. There is no scrambling or climbing required, just a peaceful walk through the woods leading to one of Vermont’s tallest waterfalls. And let’s be honest, when you’re hiking with kids, a big, impressive destination at the end is basically your secret weapon to keep them moving.
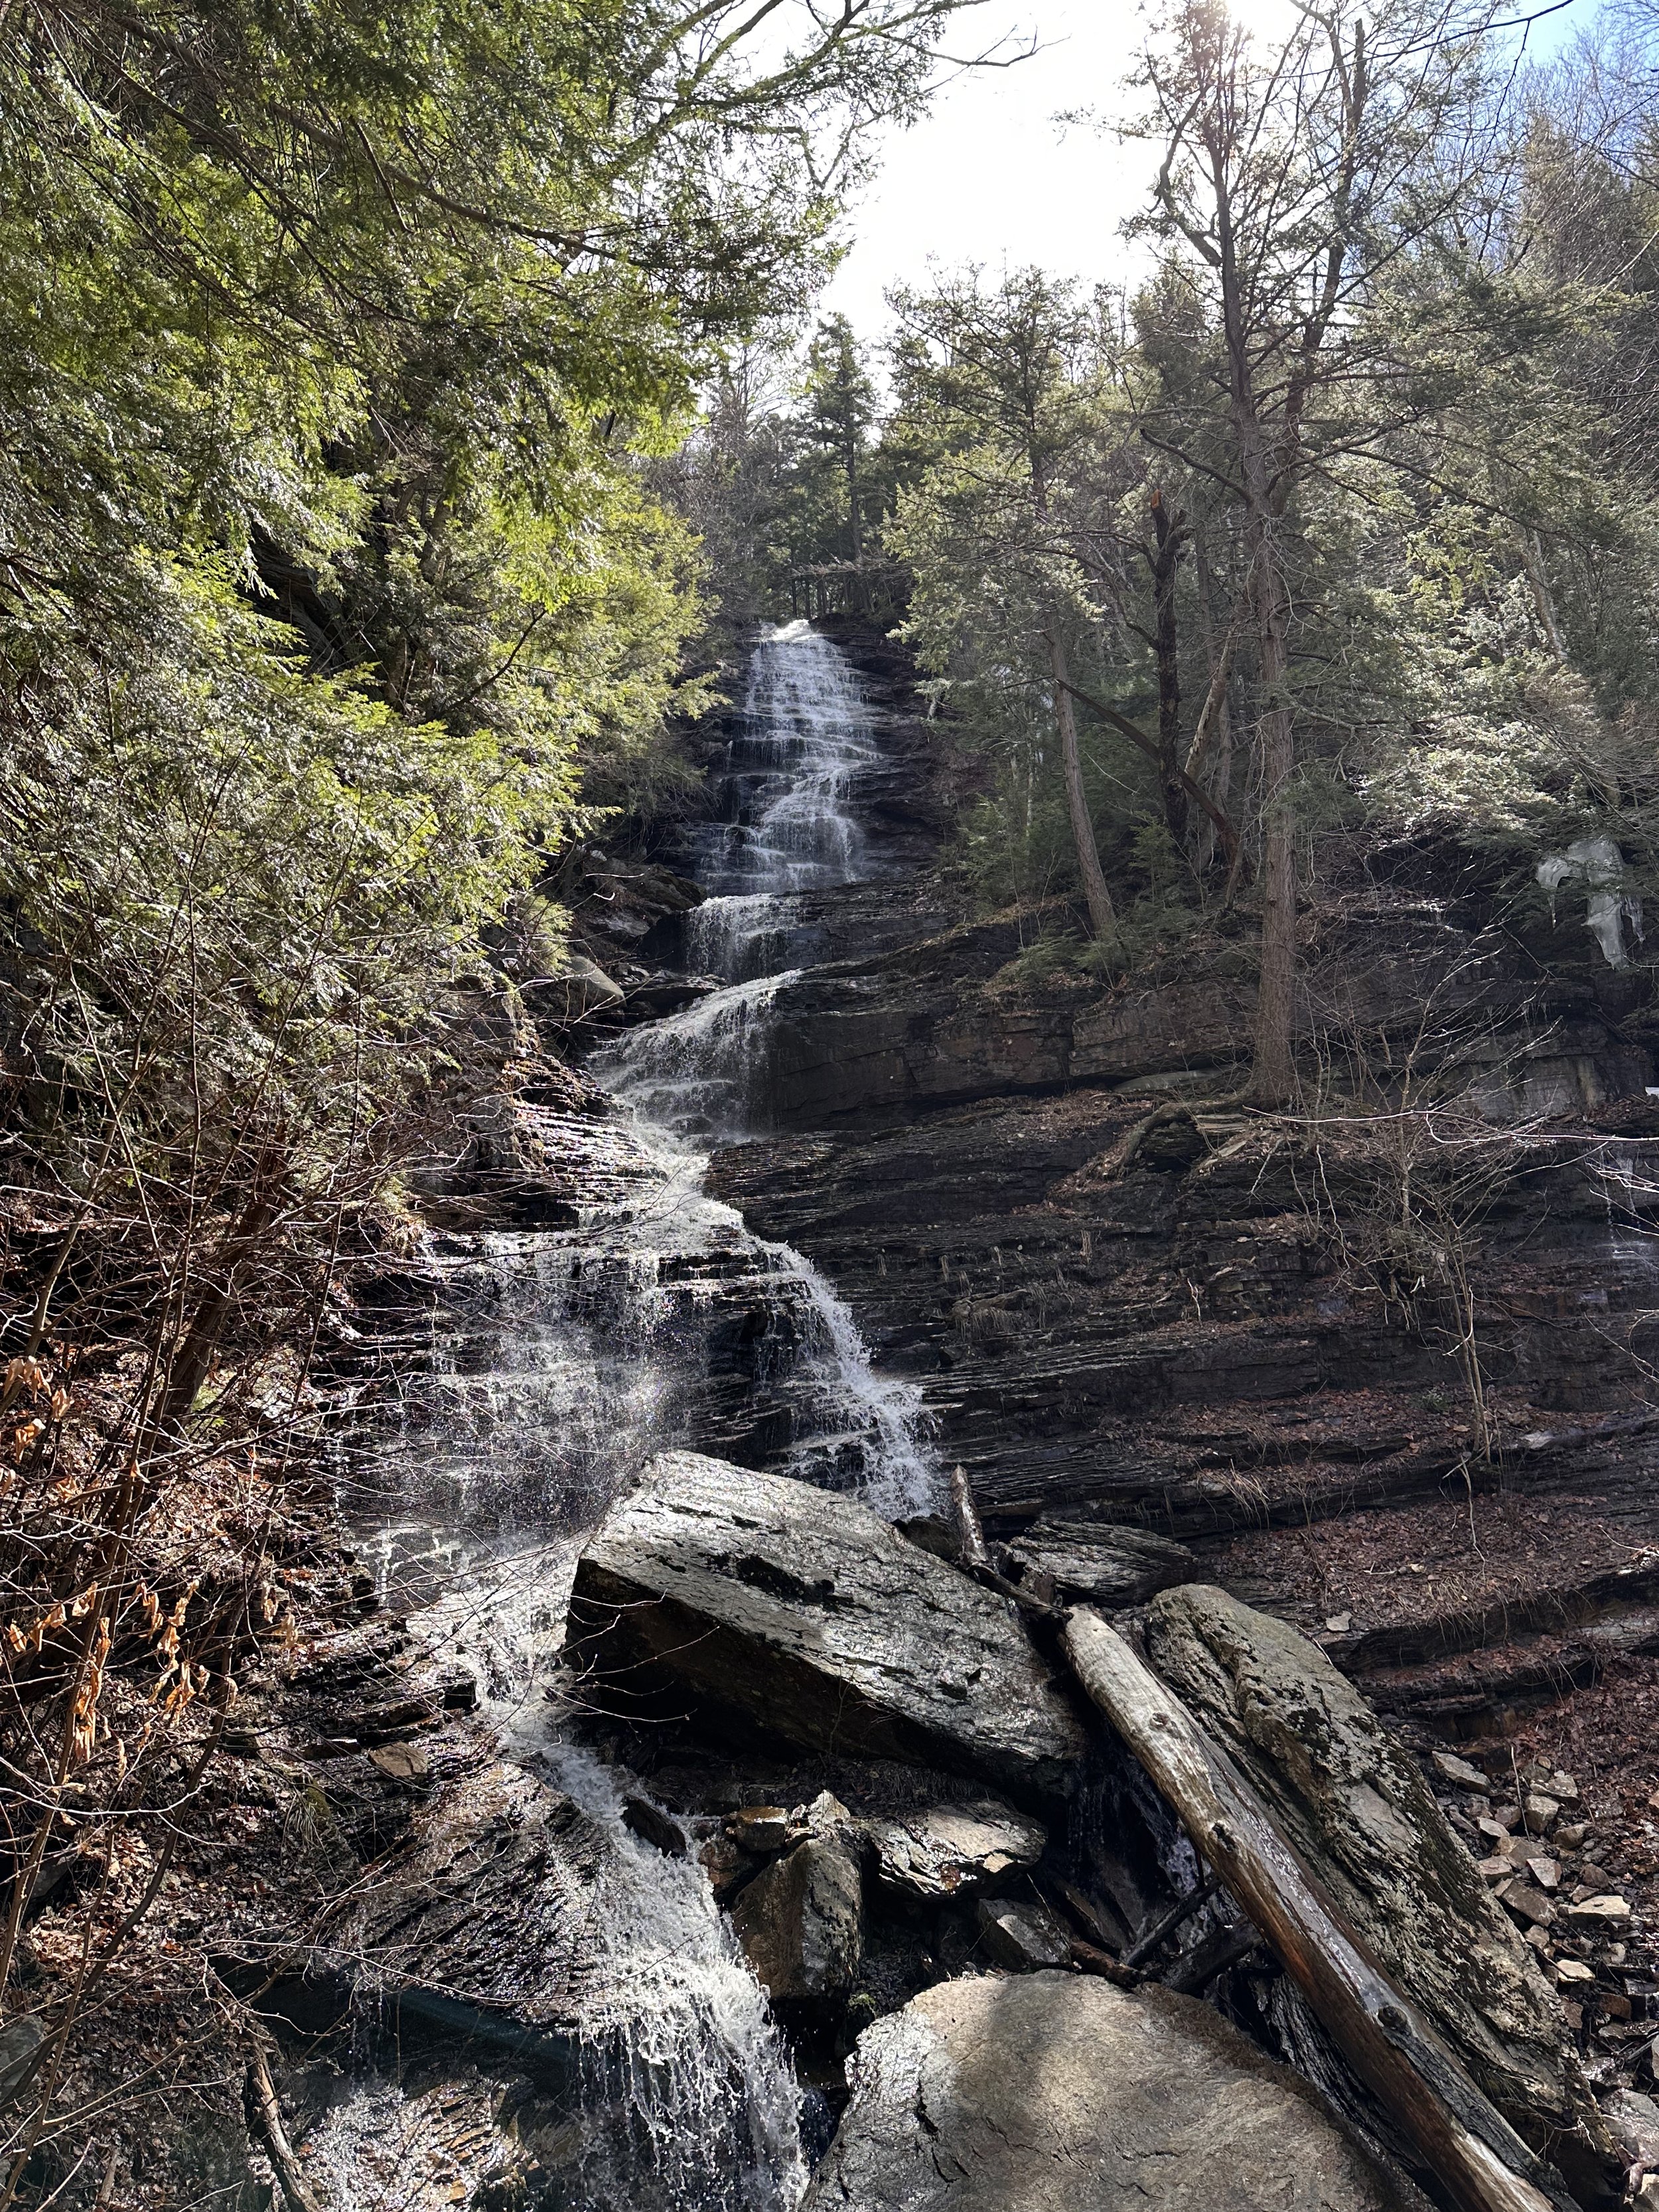
Lye Brook Falls the 125 foot waterfall in Manchester, VT
Maine Hikes
Mount Agamenticus
Rating: 2 Location: York, ME Miles: 1.5–2+ Elevation Gain: 350+ ft Dog-Friendly on a leash / Bathrooms at the trailhead and peak
A perfect first mountain for little hikers. There are a variety of trails here, choose your own adventure! You can make it short and sweet or extend your outing as you wish. On a clear day you can see Mt Washington and the Atlantic Ocean!

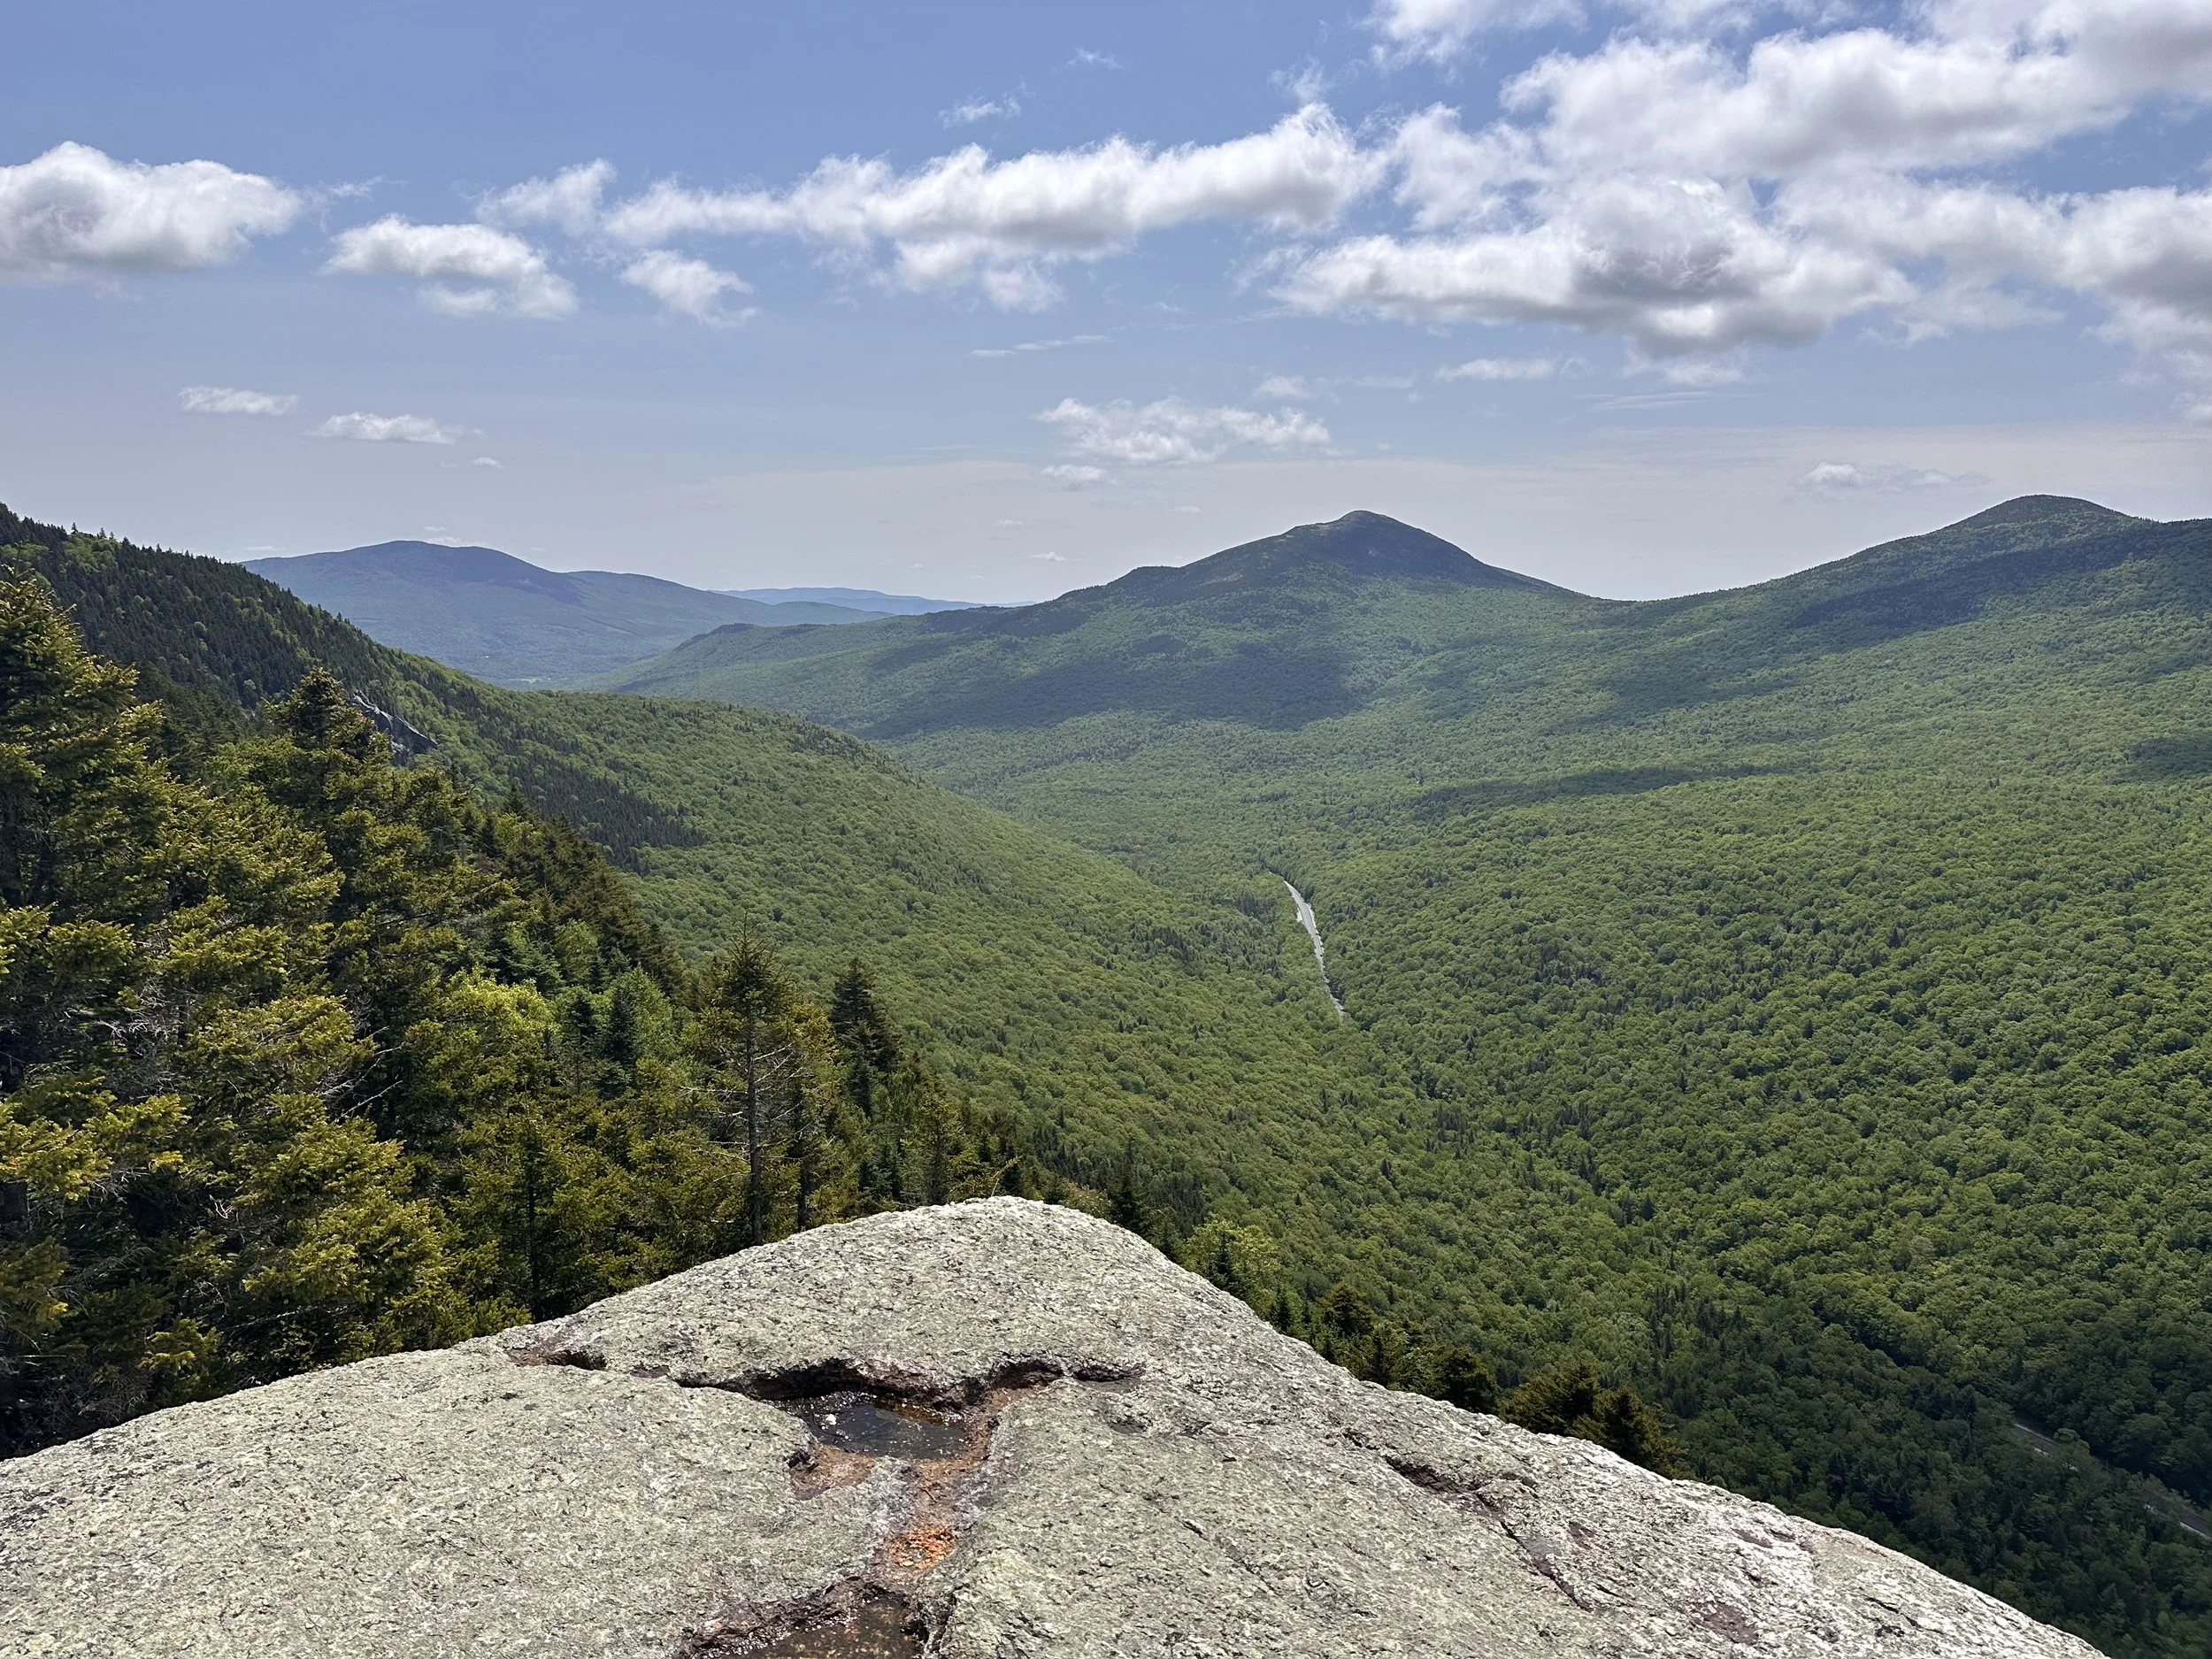
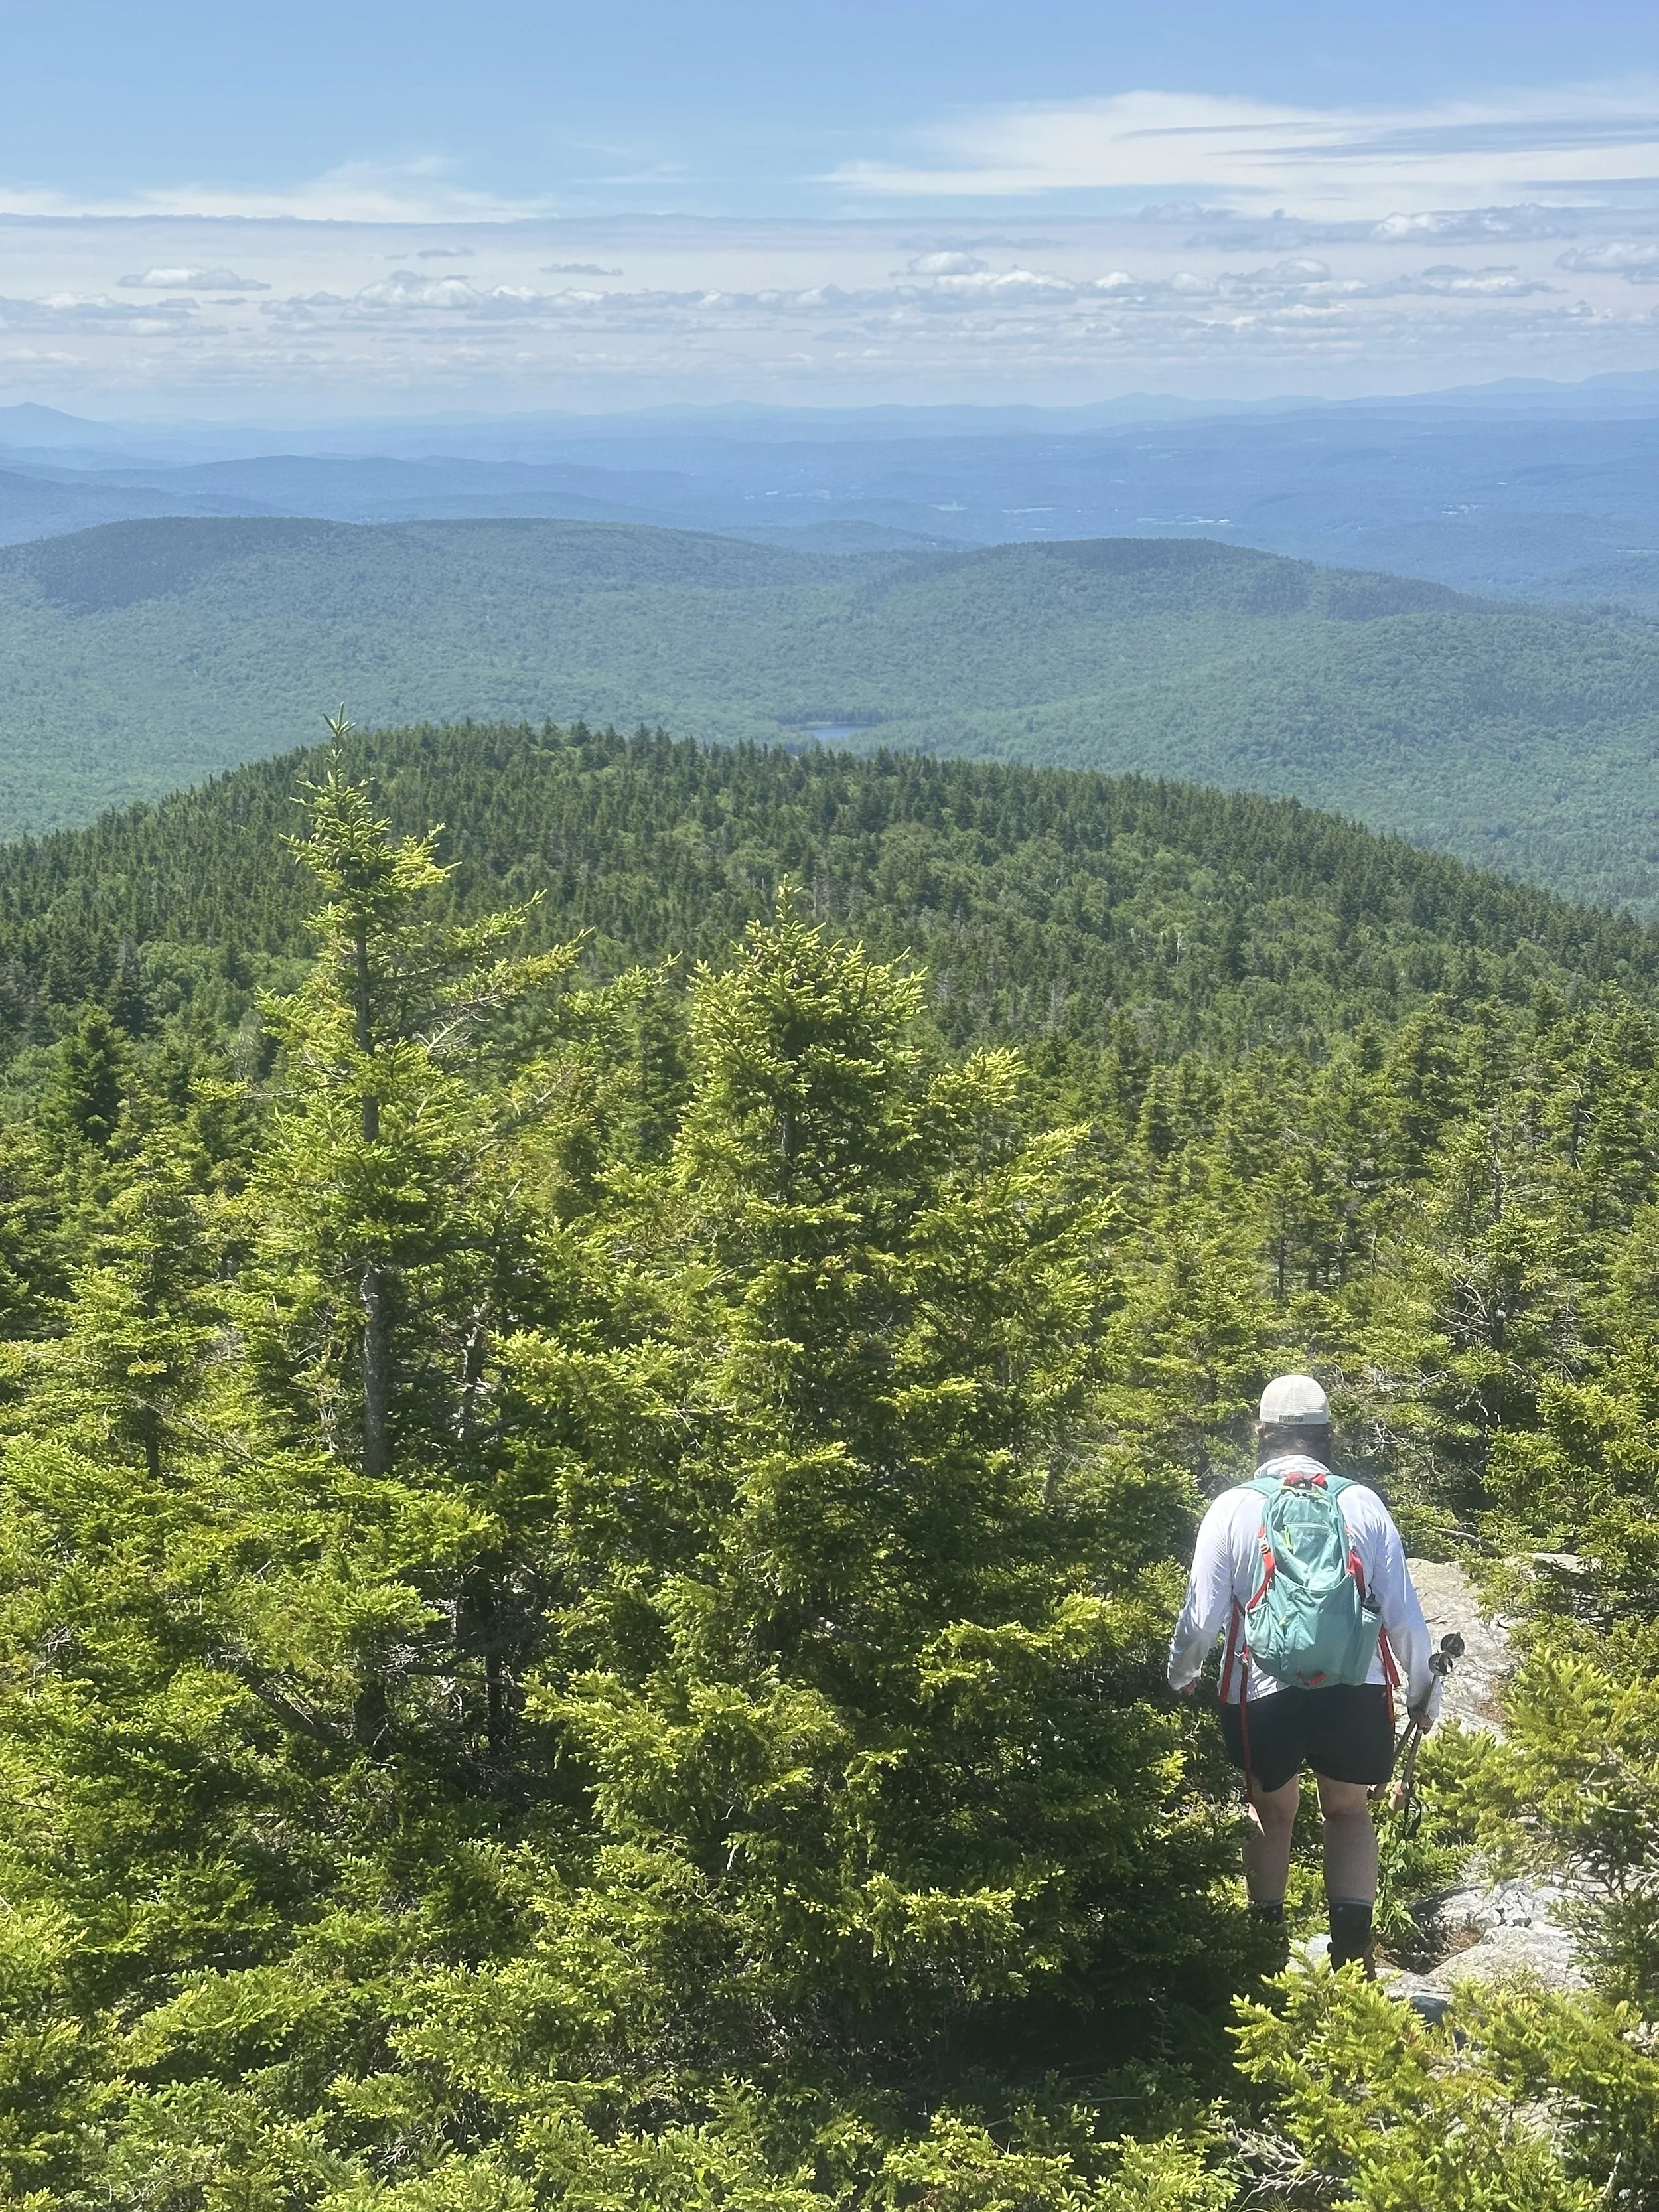
Table Rock
Rating: 3 Location: Gilead, ME Miles: 2.3 Elevation Gain: 902 ft Dog-Friendly/ Bathrooms at the trailhead
You can take the loop counterclockwise for the steep section first, or clockwise to avoid it and do an out-and-back. Either way, you’ll earn those views. The steep rocky part has serious fairytale vibes, beautiful and a bit breath-stealing (in both senses!).
Views from the peak of Table Rock in Grafton Notch State Park
Mt. Philip
Rating: 1 Location: Rome, ME Miles: 1.4 Elevation Gain: 338 ft No Bathroom / Dog-Friendly
A short and lovely hike. No sweeping views, but a wonderful family trail for kids and dogs alike.

When the leaves are off the trees you get pretty views at Mt Philip
Mt. Megunticook
Rating: 3 Location: Camden, ME Miles: up to 4.5 (can be under 3) Elevation Gain: 1,214 ft (varies depending on the trails you take) Dog-Friendly / Bathroom at the trailhead
Choose your adventure! Some solid elevation may leave you catching your breath, but on a clear day, the views of Camden Harbor are worth every step. You can even extend your trek over to Mt. Battie. (Sure, there’s a road to the peak, but hiking it is way more fun and that’s what this list is all about!)

Mt Megunticook on a cloudy day
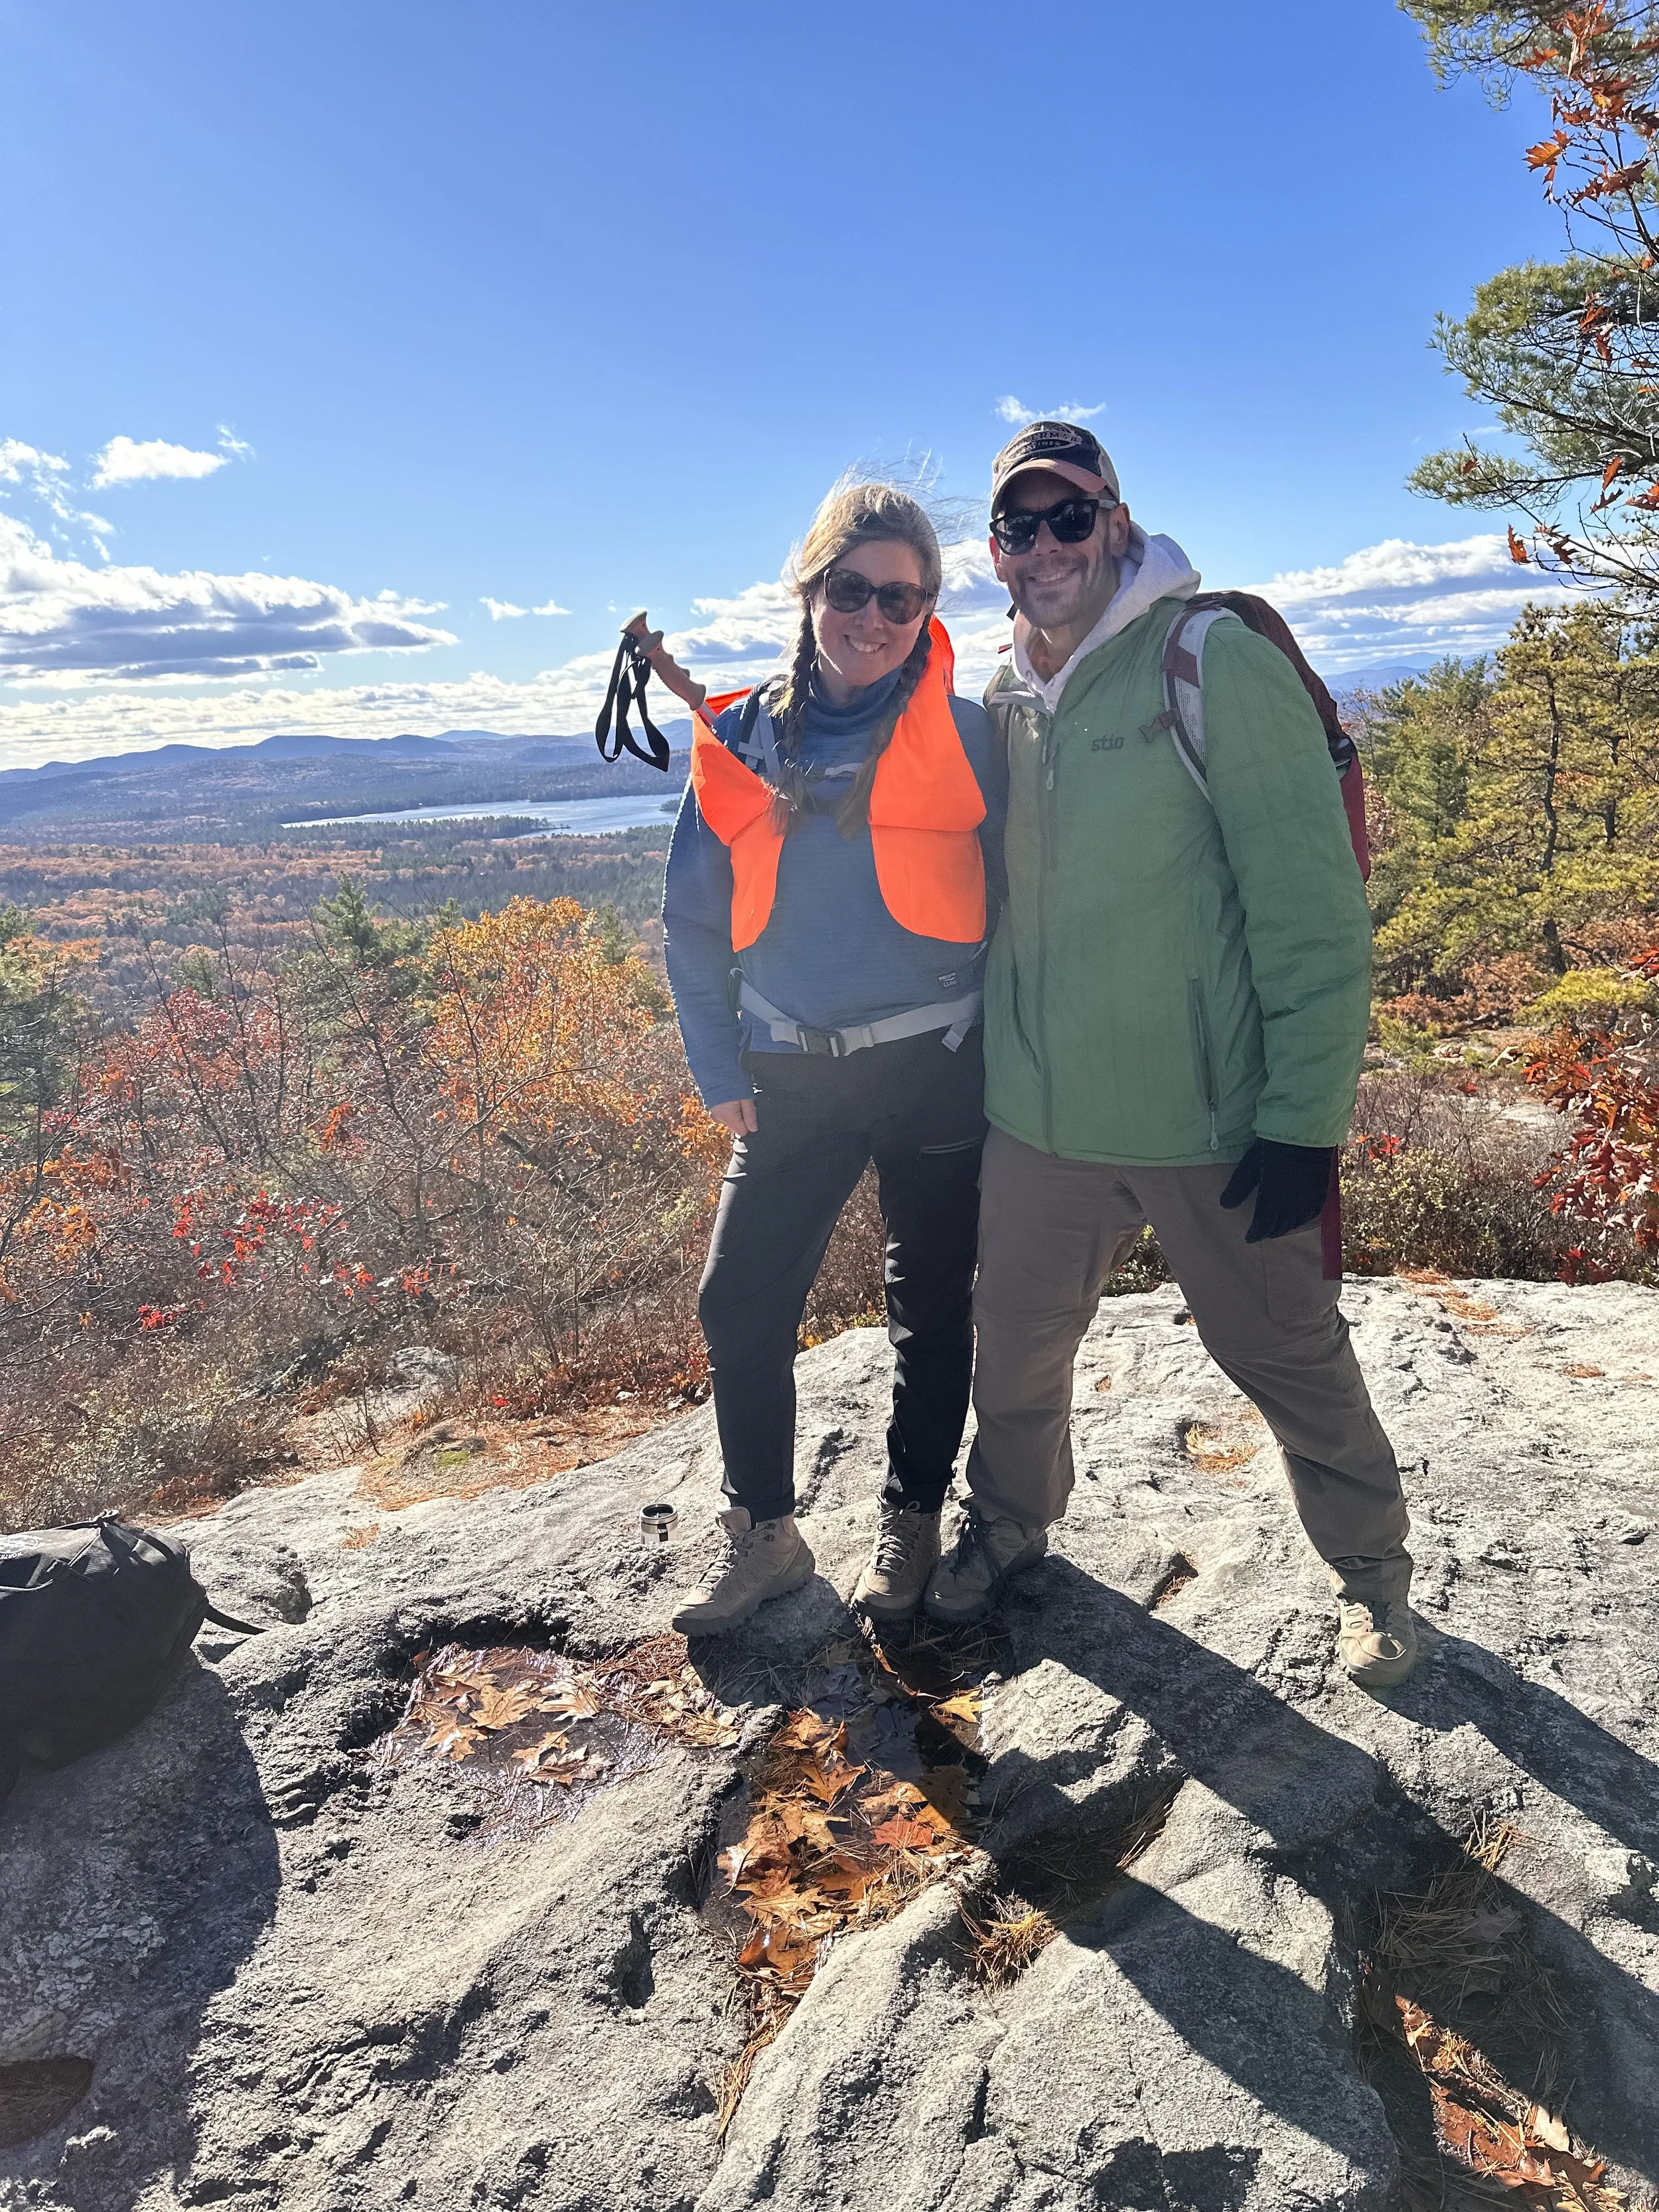
Rating: 2 Location: Bridgton, ME Miles: 3.7 (can be less) Elevation Gain: 833 feet Dog friendly / NO bathrooms
A very fun family friendly hike with some sneaky steep parts, they can be avoided. This is a choose your own adventure type of hike! Pro tip: hike in the fall (but make sure you have your orange).
New Hampshire Hikes
Mt. Major
Rating: 4 Location: Alton Bay, NH Miles: up to 4.5 Elevation Gain: 1,165 ft Dog-Friendly / Bathrooms at trailhead
A very popular hike, and for good reason. Depending on the trail you choose, you might find yourself scrambling over rocks or taking a longer but gentler route. Either way, the views of Alton Bay are stunning.
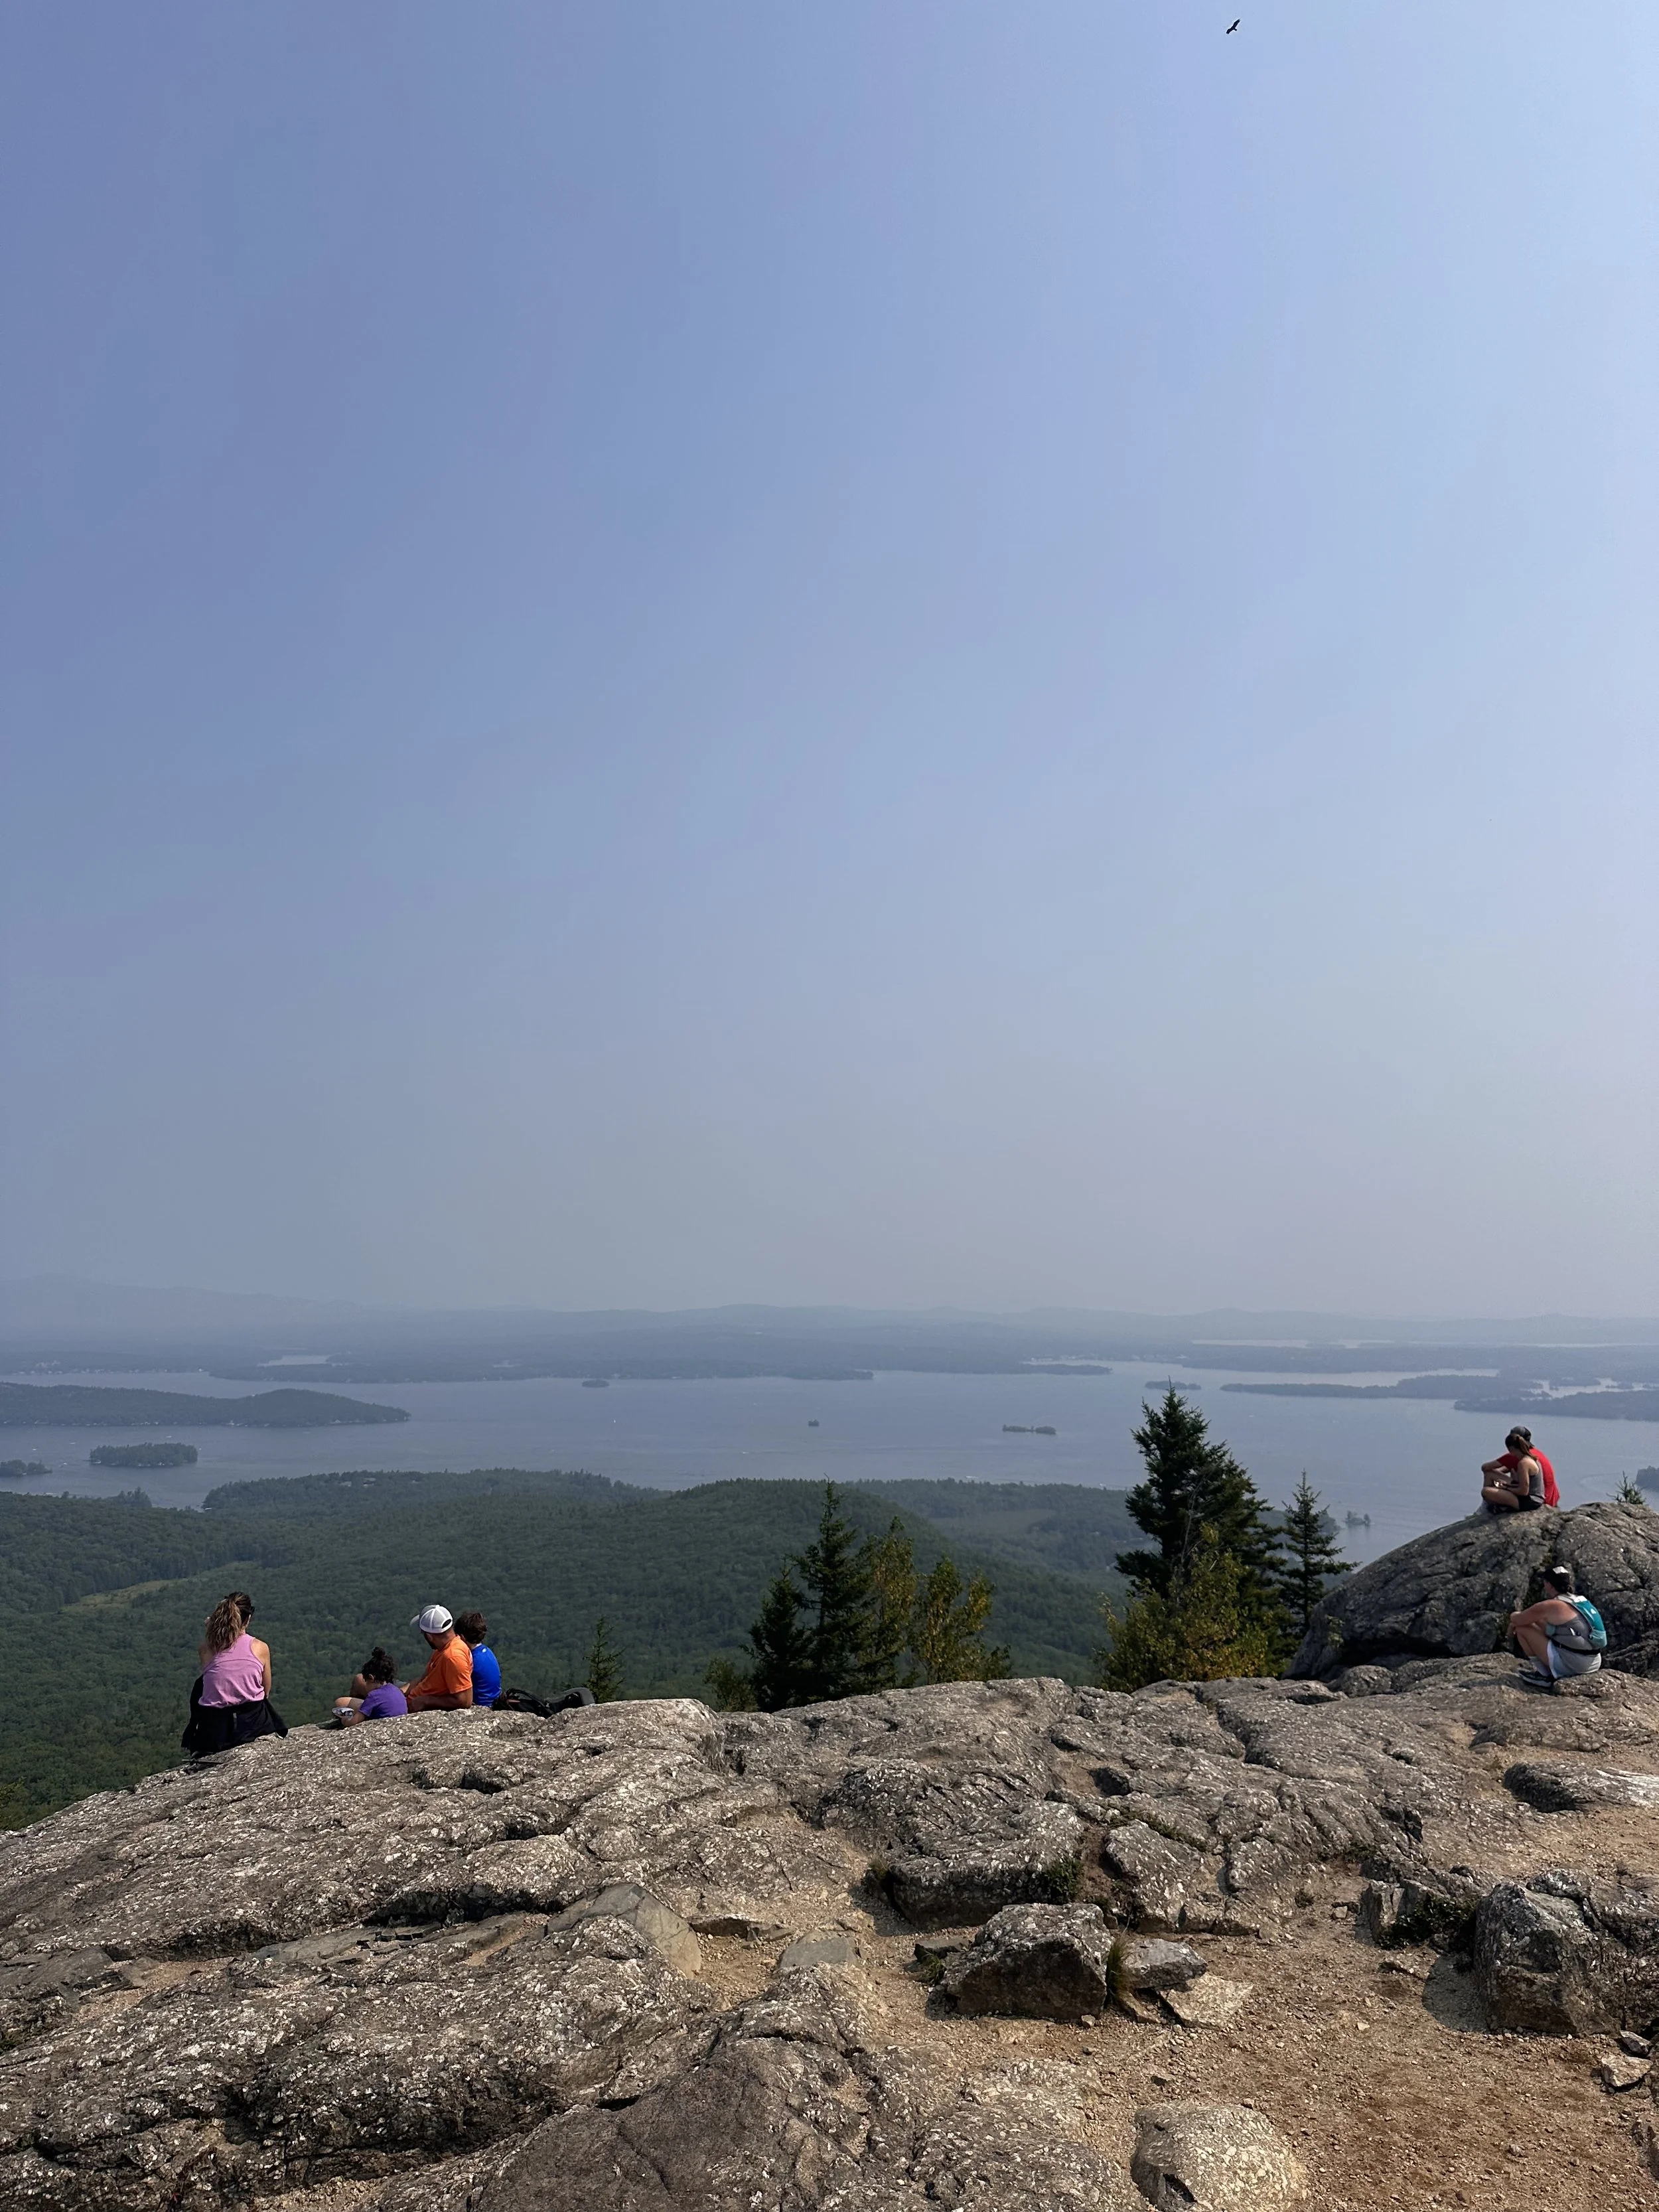
Hazy views from our end of summer hike of Mt Major
Mt. Monadnock
Rating: 5 Location: Jaffrey, NH Miles: 3.9 Elevation Gain: 1,772 ft Dog-Friendly / Bathrooms at trailhead
One of the most hiked mountains in the U.S., and for good reason. It’s a true New England classic. But don’t underestimate it just because it’s popular! Bring plenty of water and snacks; this one is a workout.

Mt. Pemigewasset
Rating: 5 Location: Franconia Notch State Park, NH Miles: 3.5 Elevation Gain: 1,260 ft Dog-Friendly / Bathrooms at Flume Gorge on season only
A fun family challenge with rewarding views at the top. We even tackled this one as a winter hike, it was a great way to test our gear!

Mt Pemi is even a fun winter hike!
Mt. Willard
Rating: 3 Location: Twin Mountain, NH Miles: 3.2 Elevation Gain: 912 ft Dog-Friendly / Bathrooms at trailhead and AMC Hut
A personal Around New England favorite. It’s a steady climb to the summit, with stunning views of Crawford Notch. Pack snacks and water, there’s no better spot for a mountaintop picnic.

Mount Kearsarge
Rating: 4 Location: Winslow State Park, Wilmot, NH Miles: 2.5 Elevation Gain: 1,115 ft Dog-Friendly (on leash) / Bathrooms at trailhead
Bathrooms at the trailhead (always a plus). There’s a small fee unless you have the NH State Park plate. The loop trail can be hiked either way. Go counterclockwise to tackle the steep part first and save your knees on the way down. There’s even a tower at the top you can spend the night in (first come, first serve)! A great family hike with a little challenge and a big payoff.
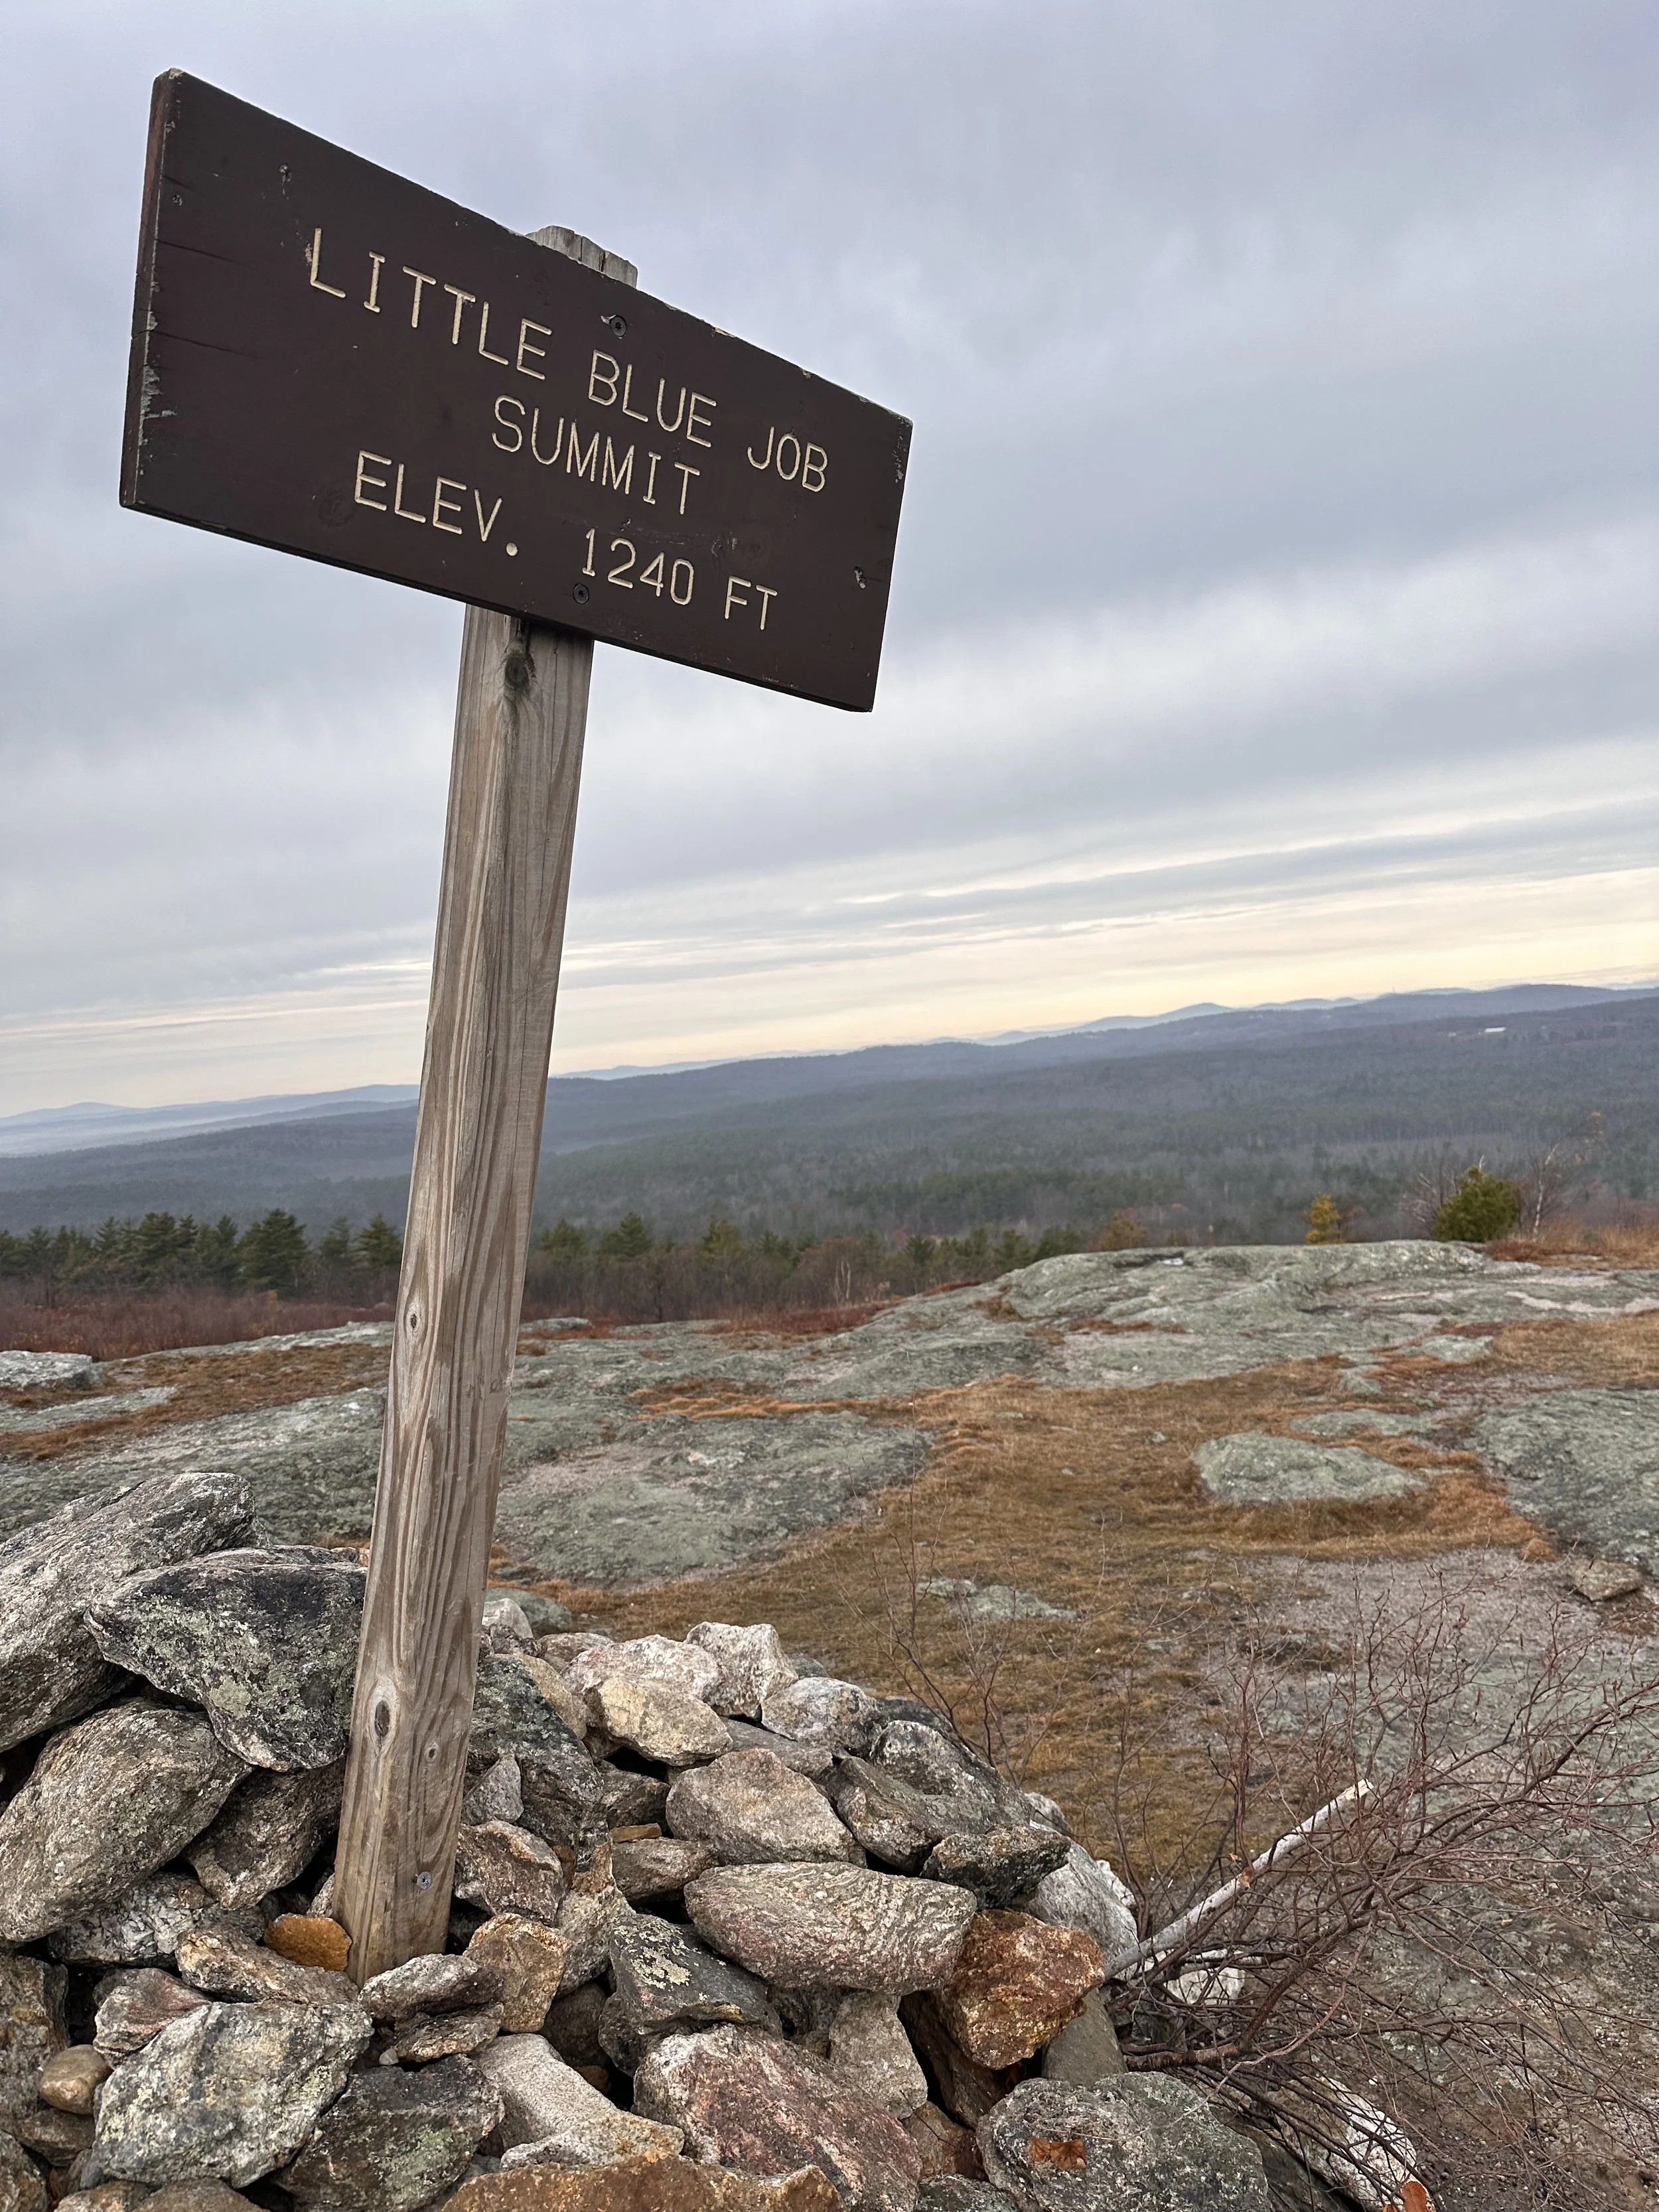
Rating: 1 Location: Strafford, NH Miles: 2 Elevation Gain: 430 feet Dog Friendly / No Bathrooms
Want to get your kids into hiking? This is a great spot to start. At only 2 miles Blue Job & Little Blue Job offers beautiful views on a clear day, or even cloudy we appreciated the views and a fire tower! Fun for the entire family.
Pro Tip: Be careful of the slippery leaves in the fall!
Rating: 2 Location: Franconia, NH Miles: 1.5 Elevation Gain: 367 Bathrooms available (seasonally) Dogs allowed
This is the hike you read about and see in the news. It is very popular and for good reason. It’s a fairly easy hike for the entire family to enjoy & you get great views of the notch and Cannon MT. You can do this out and back, but I suggest hiking the entire loop, especially on a busy day! Pro tip: hike on a weekday. The Fall will be the busiest time (for good reason see picture below). This is a great hike any time of the year!
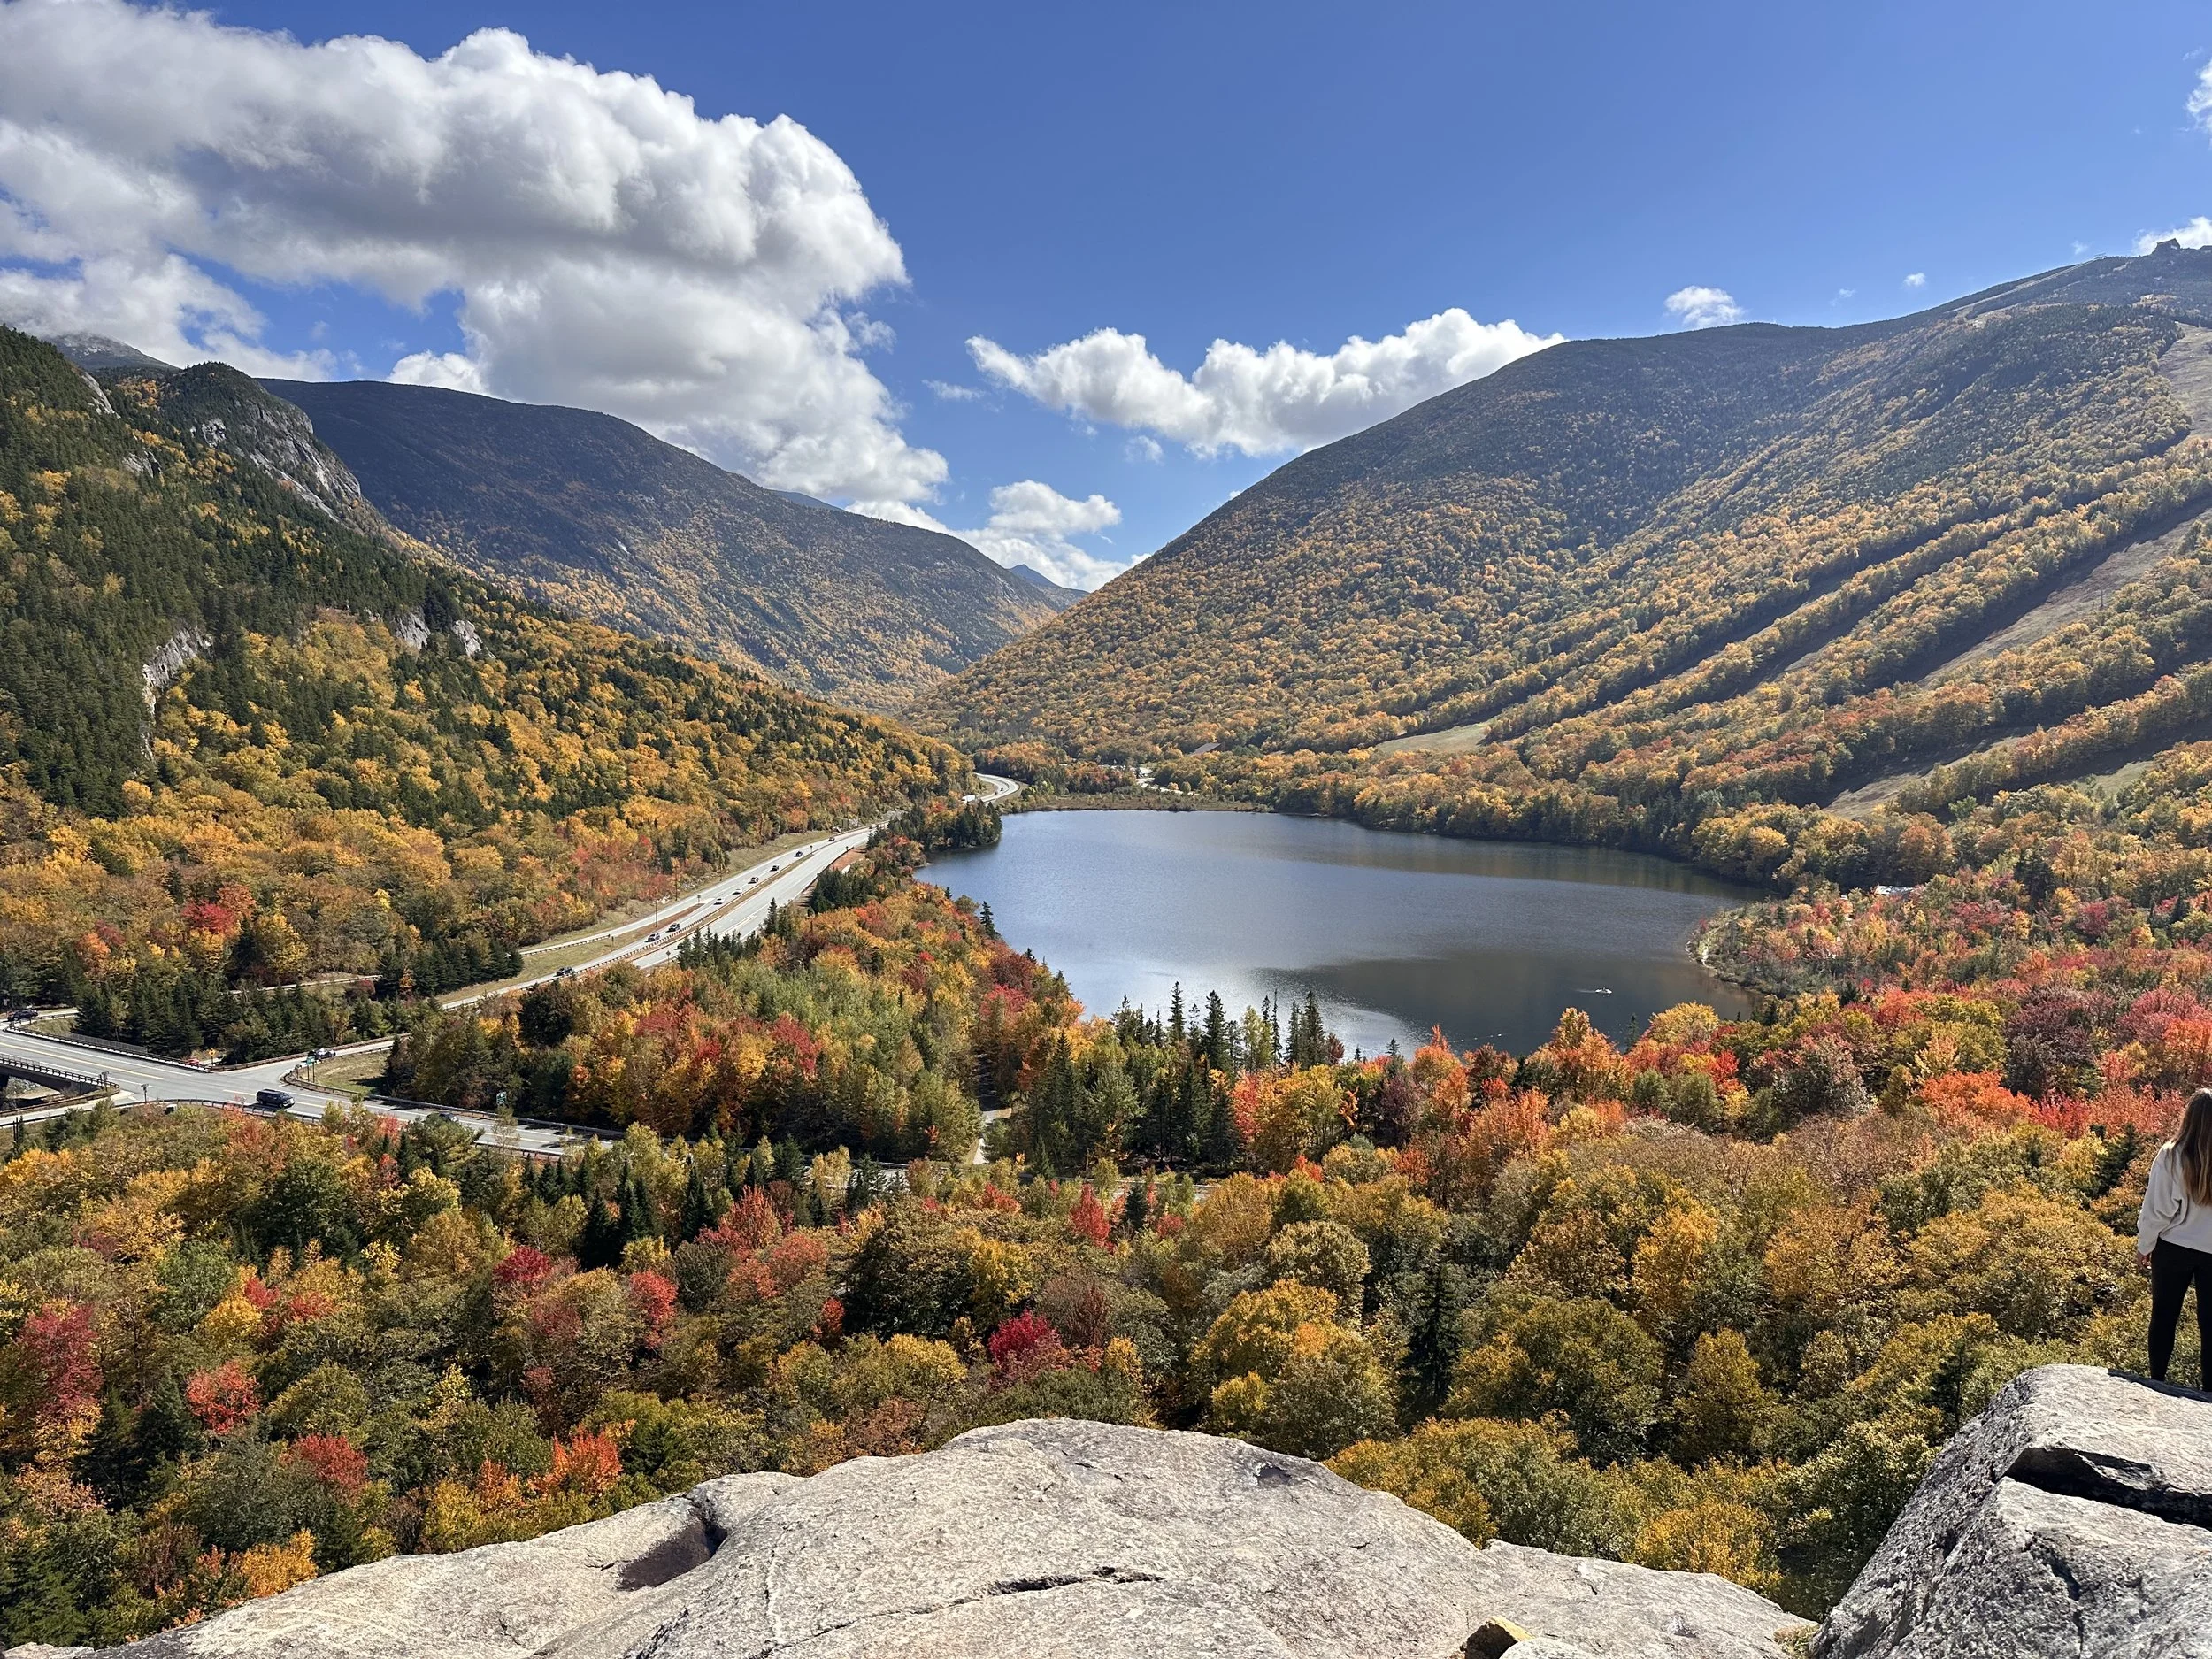
Beautiful views from Artist Bluff. You see Franconia Notch & Cannon MT on a clear day.
Massachusetts Hikes
Mt. Tom
Rating: 2 Location: Holyoke, MA Miles: 1.5+ Elevation Gain: 627 ft Dog-Friendly / No Bathrooms
A fun, fairly short hike with a few steep sections and some loose rocks. There are multiple trail options, so you can make it longer if you’d like. A great family spot if you’re in the area.

Wachusett Mountain
Rating: 3 Location: Princeton, MA Miles: 3.5 Elevation Gain: 974ft Yes Dog Friendly/Yes Bathrooms at trailhead
There are a variety of hiking trails for Wachusett. We picked one of the more popular ones, also not the longest one. It starts in the skiing parking lot. There are bathrooms and signs at the beginning of trail. You follow the trail to Balance Rock and then the trail turns into Old Indian Trail. No rock scrambles, one steep section otherwise a pretty steady incline with some short flat breaks. Cool views of Mt Monadnock, into Vermont, and you can see Boston in the distance. Great for families of all ages. You can also drive to the top if you would like, or ride your bike on the road.
Connecticut Hikes
Ragged Mountain Preserve
Rating: 2 Location: Berlin, CT Miles: up to 4.5 Elevation Gain: 620 ft Dog-Friendly / No Bathrooms
A peaceful and beautiful hike with more trail than parking — the lot is small! You can take a shorter route, but if you want those great views, be prepared for a bit of a longer trek. Some steep sections at the start, but totally worth it once you reach the top.

Always stop and enjoy the views! Ragged Mt Preserve has some beautiful spots!
Rating: 3 Location: Hamden, CT Milage: 3.2 (can be more) Elevation Gain: 597ft Dog Friendly/ Bathrooms available in season porta-potty in off season
This not so hidden gem is a great spot for your entire family. There are a variety of trails here, the most popular one is about 1.6 miles to the castle aka the tower. This steady incline on crushed stone is wide open and has spots to catch your breath while you enjoy a view. Hike this anytime of the year, but fall would be my pick. There is a fee to enter on season $15 for non CT resident on weekends (based on car registration) and $6 for out of state residents on weekdays. If you have CT plates you will be able to enter for free!
You can climb the tower and enjoy the views of Long Island Sound
We will keep adding hikes as we experience them and think they would be good for the entire family! If you have any we should check out please let us know! Happy Hiking!
Waterfalls Around NH
We have been busy exploring NH’s waterfalls. There are a lot more to discover but you have to start somewhere. We will add them as we discover them, let us know if there are any others you’d like us to cover.
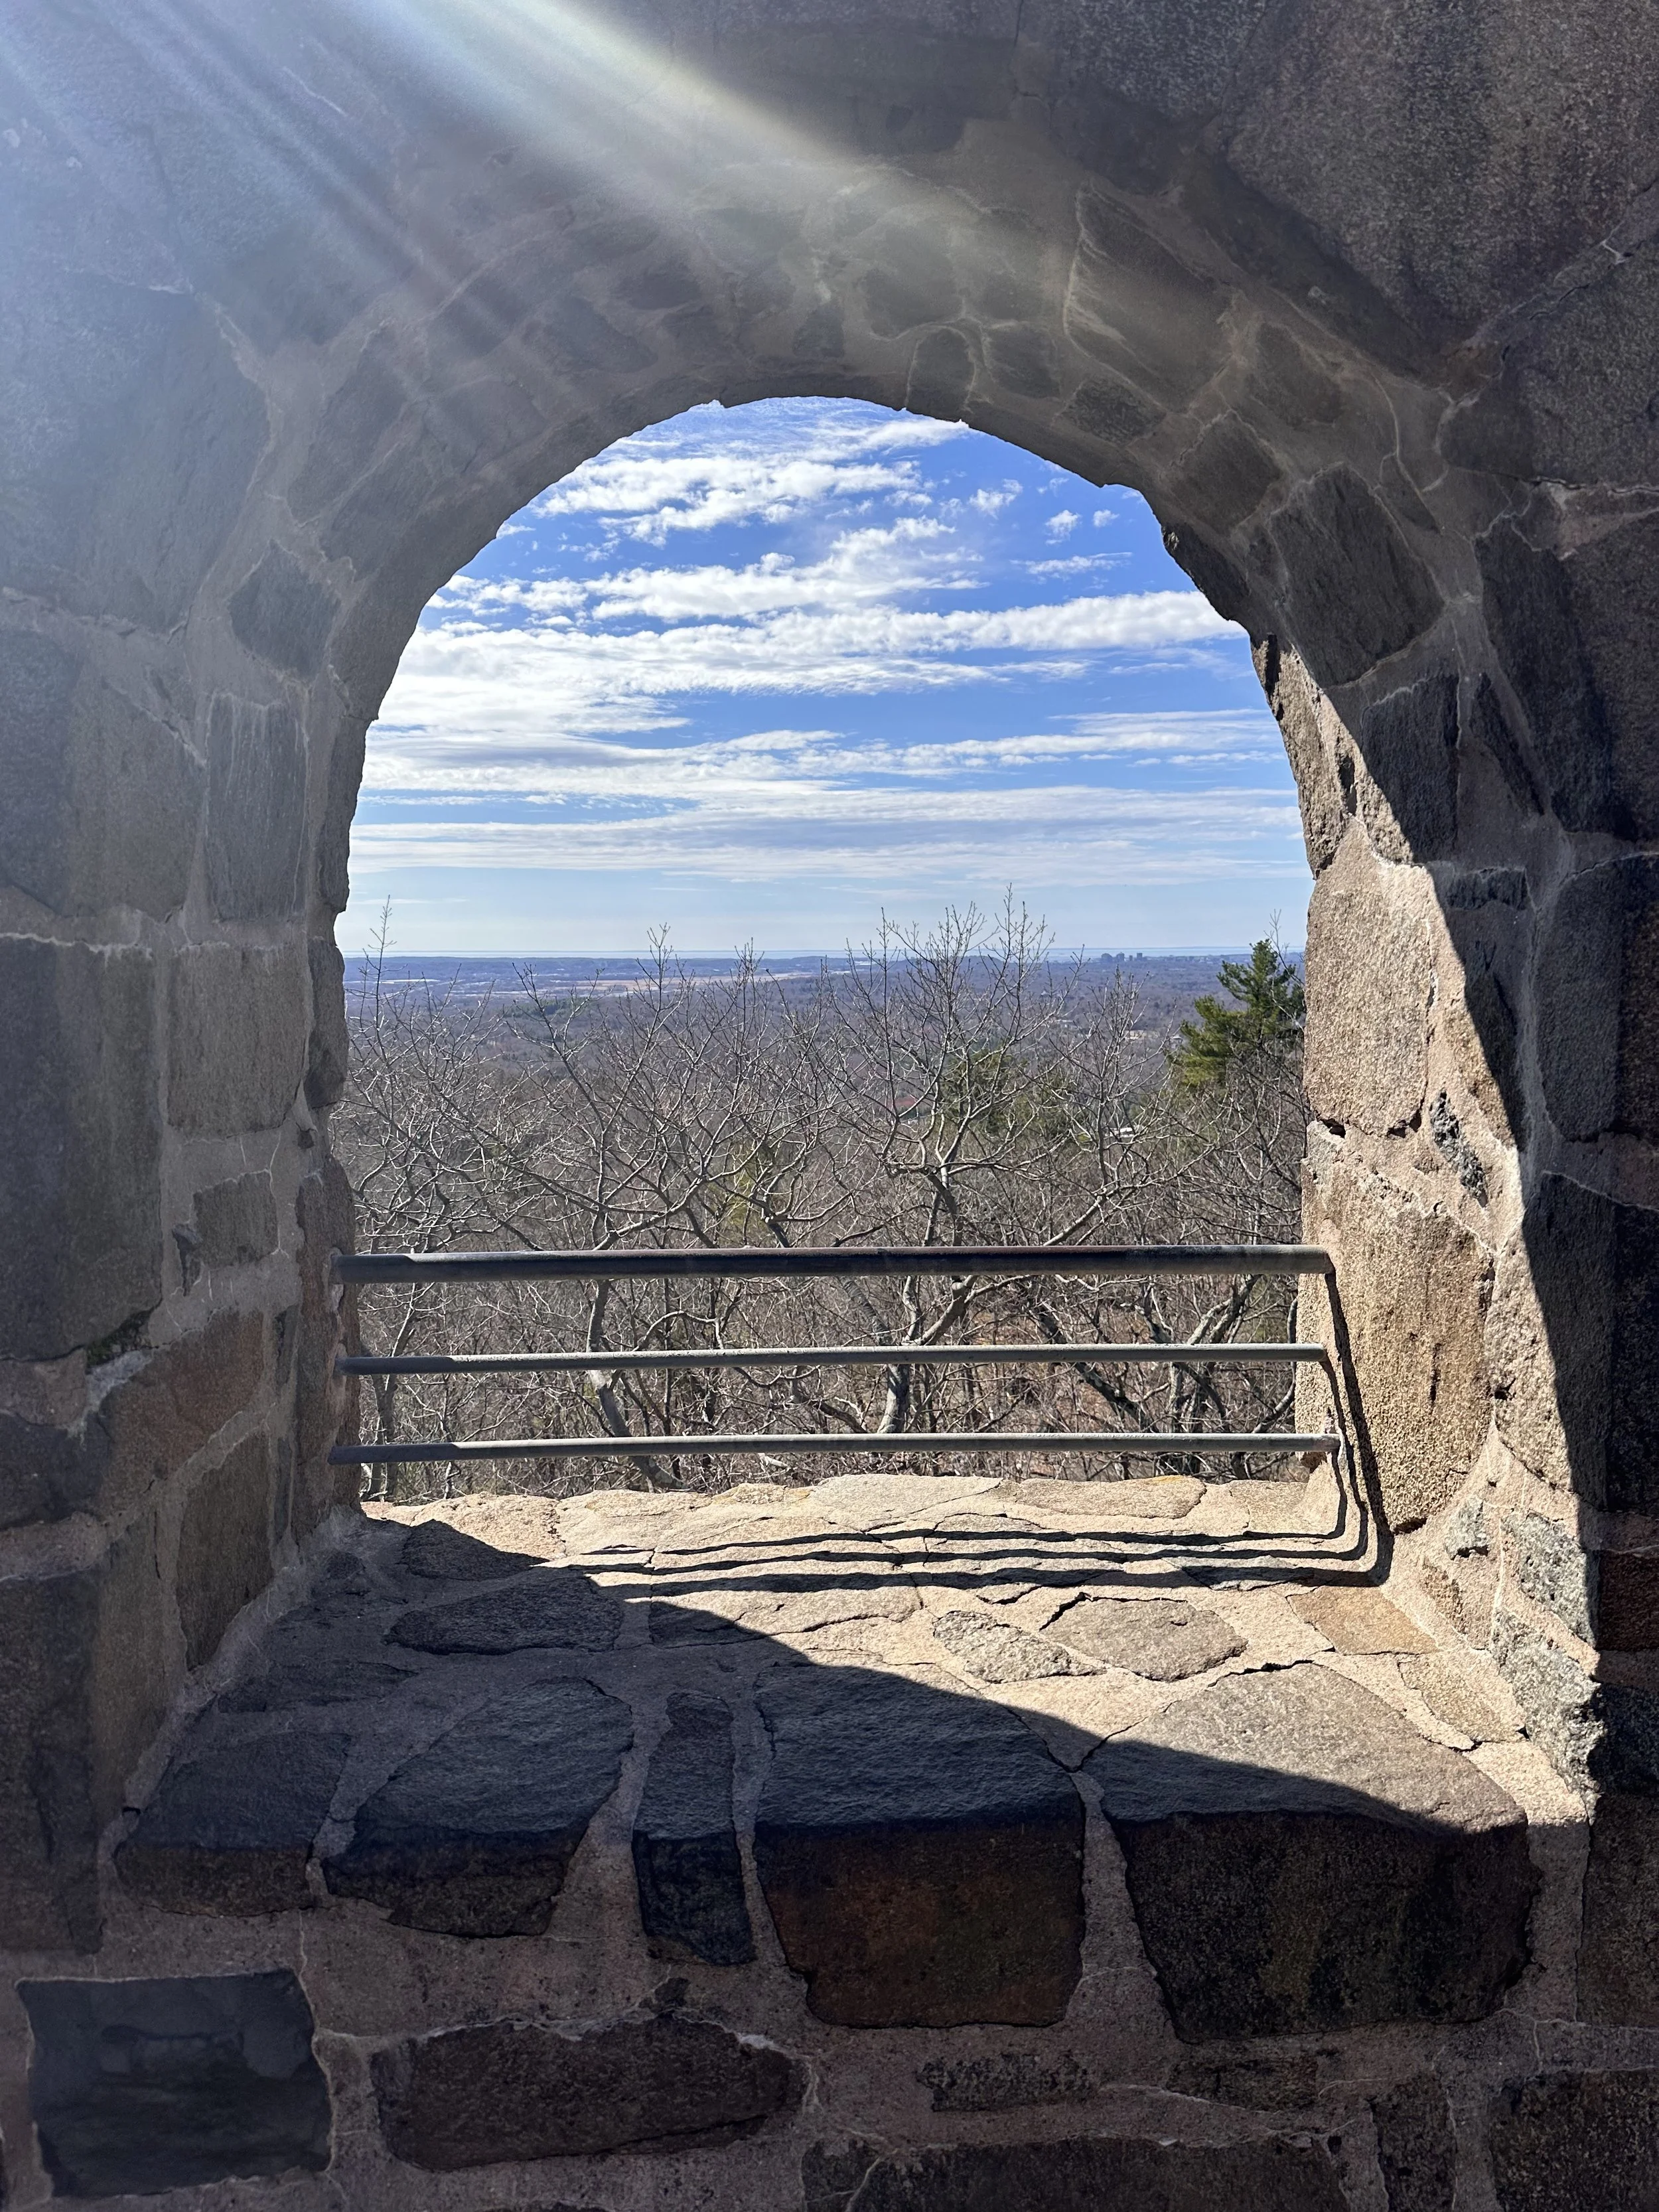
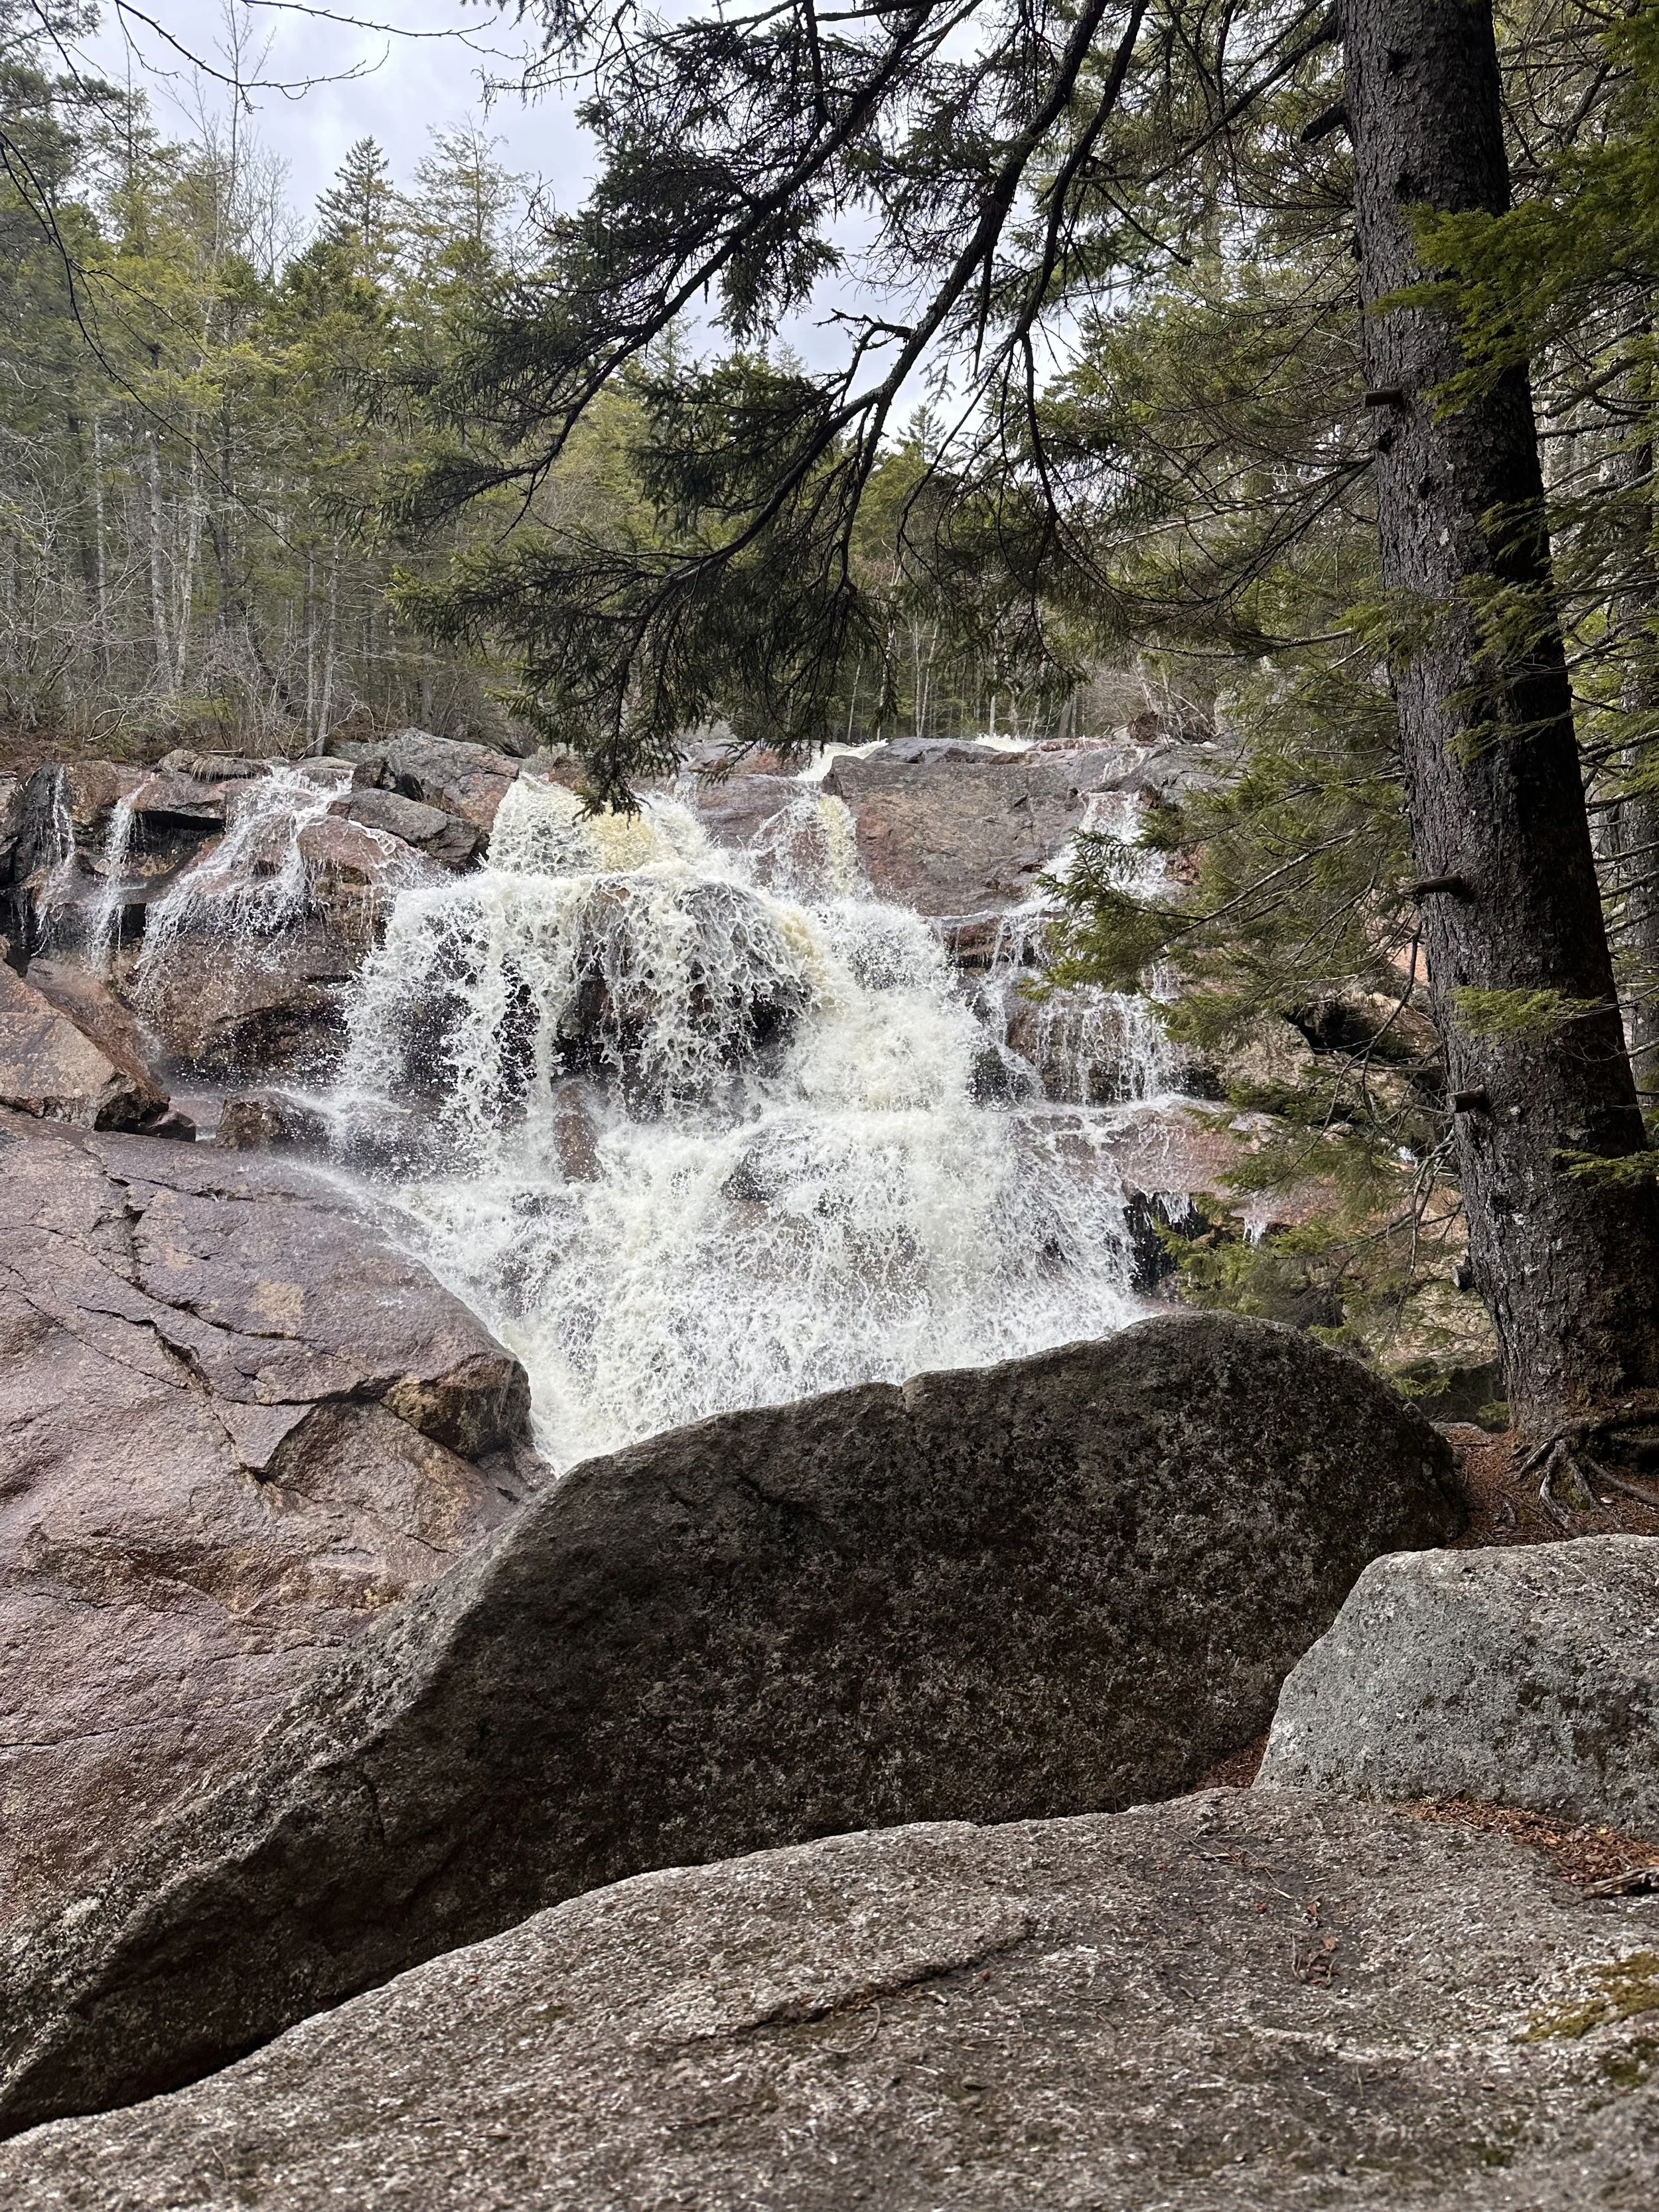
Walter/Newton Natural Area in Plymouth
1.6 mile loop easy/ family friendly
125 feet elevation gain
Small parking lot - free
No bathrooms
Dog friendly
Hike clockwise for the easy part first, could do this out and back for a real easy hike. It gets a little more challenging as you pass the waterfall & feels more like a hike rather than a walk in the woods like the first part, but nothing really hard. This hike is a hidden gem!! They have benches at the waterfall to stop and rest

Walter/Newton Natural Area
Bridesmaids Falls in Franconia Notch
1.1 mile total out & back
150 feet elevation gain
Very limited parking
Moderate/Some steep spots
No bathrooms
Dog friendly
Follow the GPS to the trailhead, there are no signs here. It is located in the Mittersill resort neighborhood by Cannon Mountain. The trail has blue blazes, sometimes blue and yellow sometimes blue and green. The trail can be narrow and single file most of the way.
Pro Tip: Push past the last water crossing for the best views.
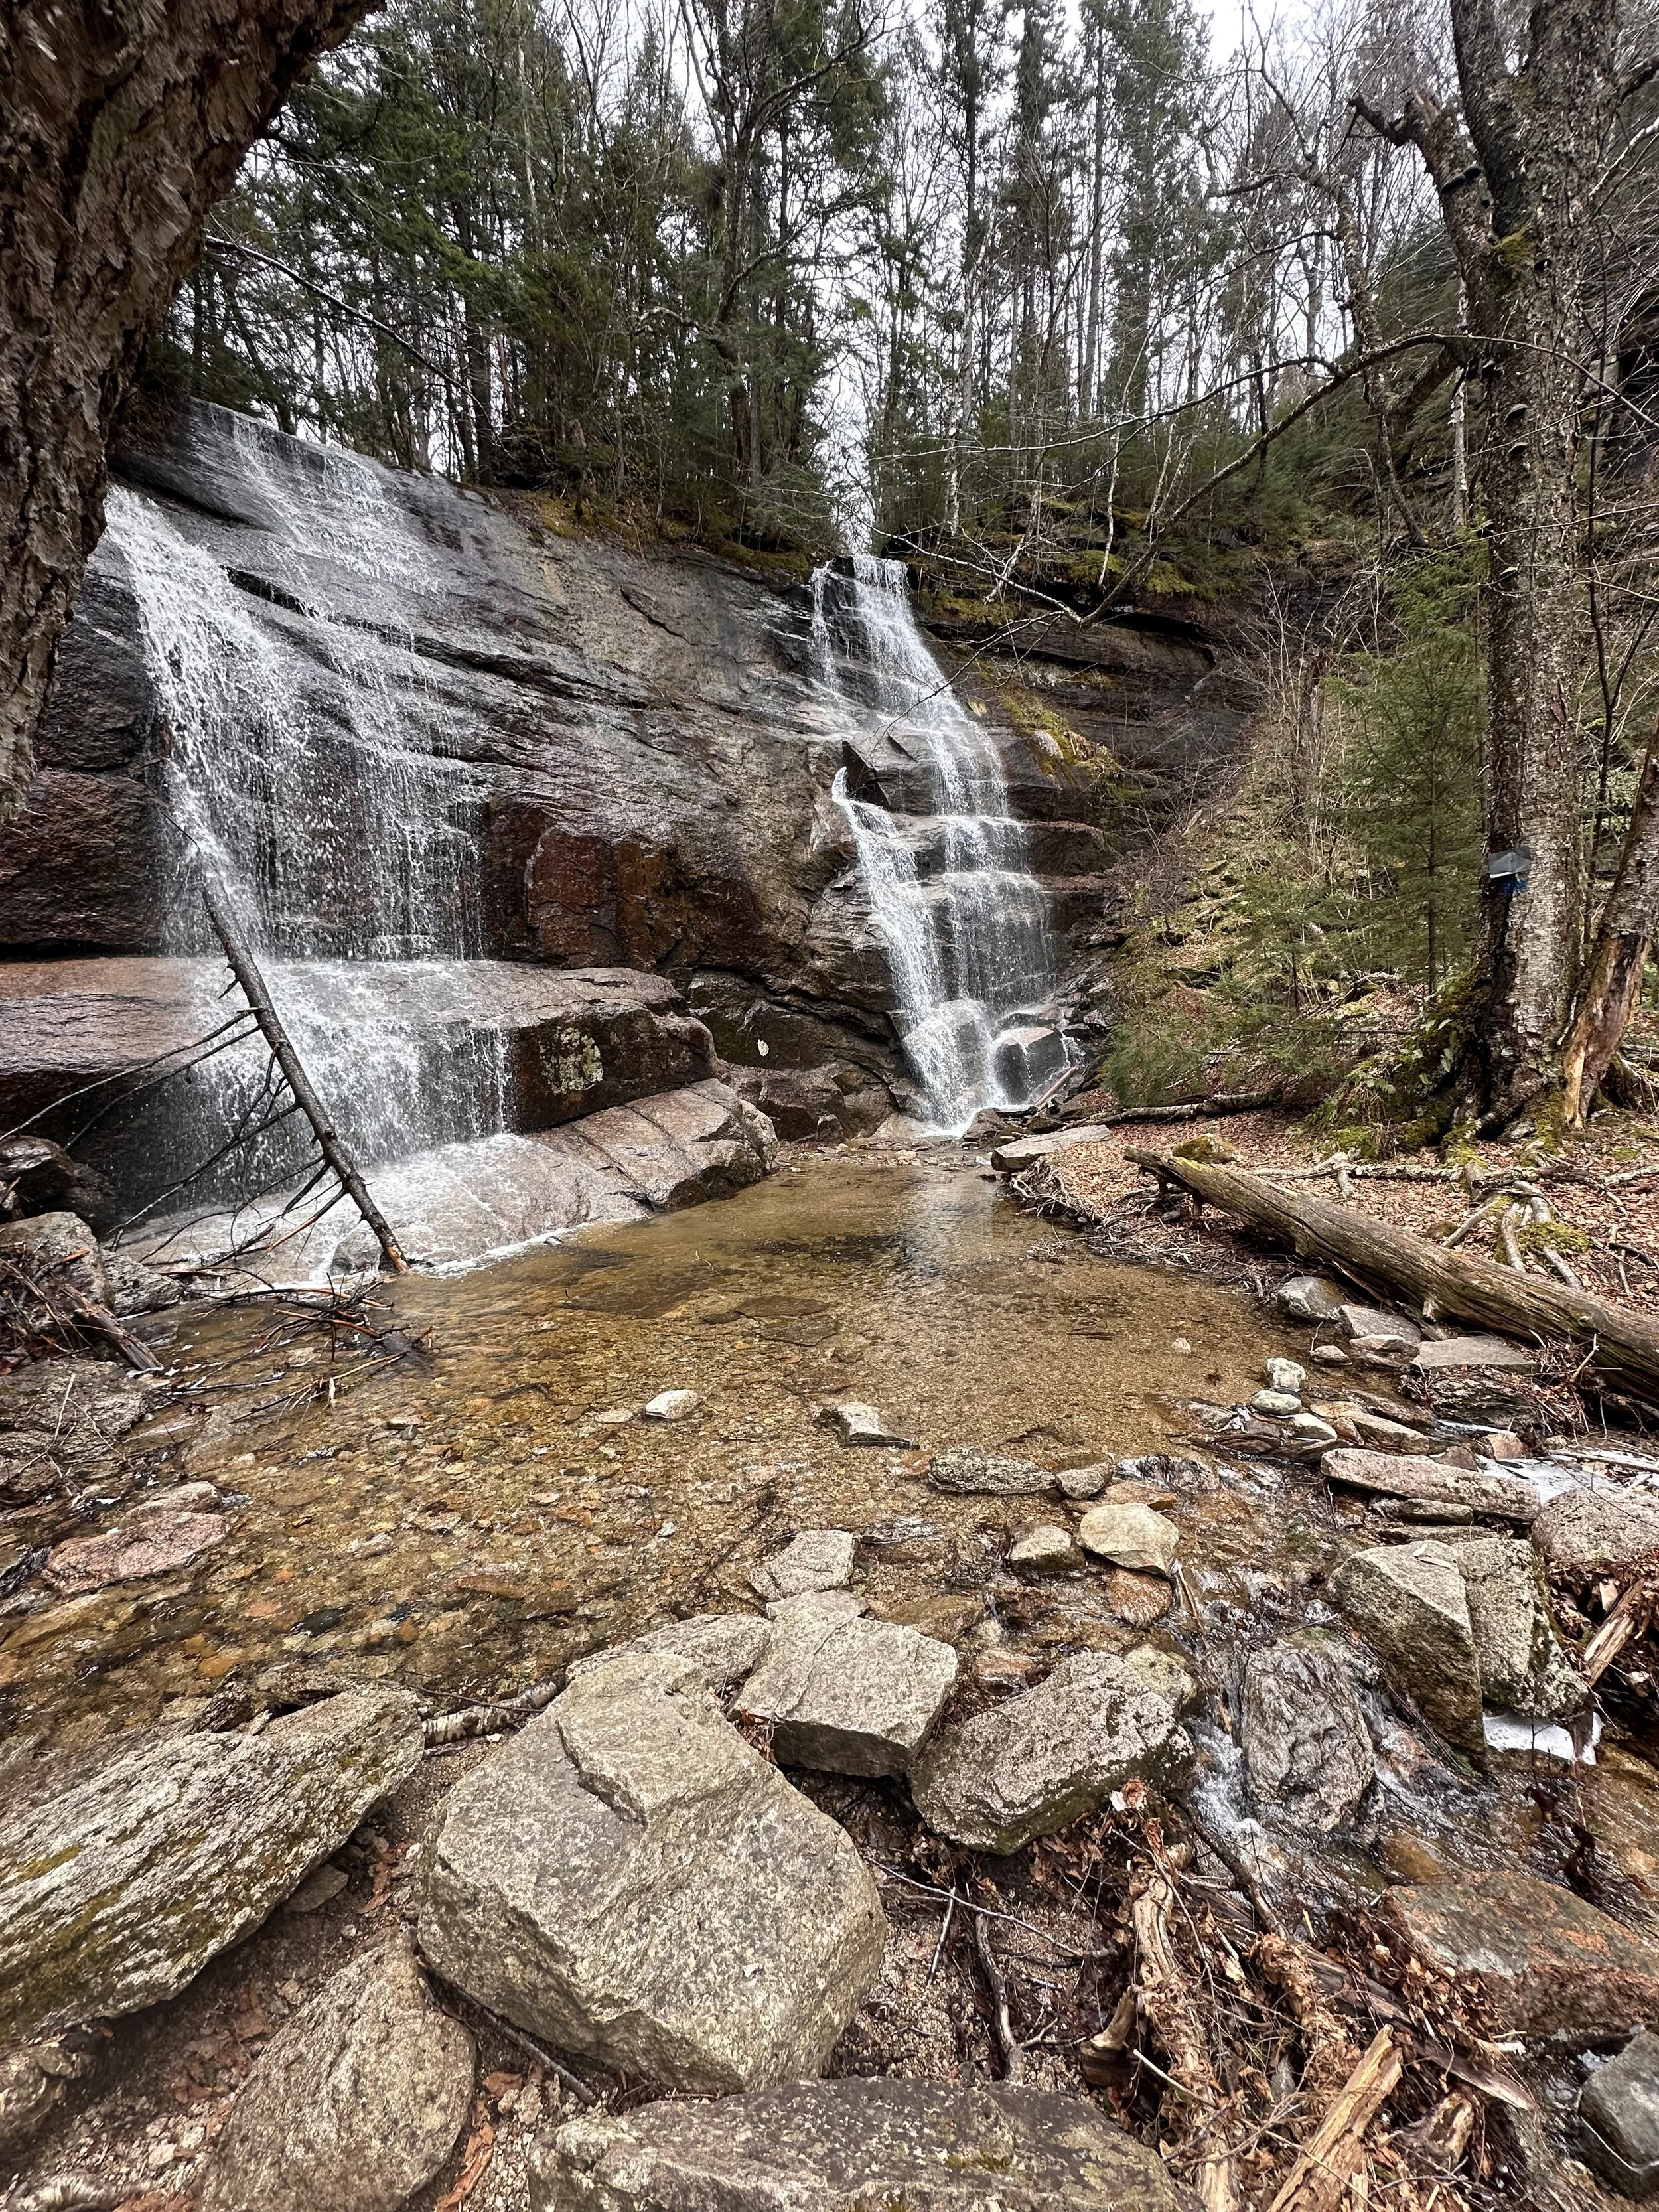
Bridesmaid Falls Franconia Notch, NH
Georgiana Falls & Harvard Falls in North Woodstock
2.5 mile total out and back
More challenging/ advanced family friendly due to the steepness and lack of signage
Over 700 feet elevation gain
Parking is a small lot at the end of Hansen Farm road off route 3.
No bathrooms
Dog friendly (for an experience dog)
Start the hike around the fence, there are signs here and most of the trail will have red blazes. Not always easy to find the trail marking. Follow the Harvard Brook for most of the trail, it is beautiful. You will want to stop and take pictures for this entire hike. You get to lower Harvard falls first and then Upper Harvard Falls. The trail goes beyond the Upper Falls Trails, but we didn’t venture pass this part because of the dog, it looked tricky for her to be able to handle.
Lower Harvard Falls
Glen Ellis Falls Gorham NH
Located close to the Pinkham Notch visitor center.
Under 1 mile total out and back easy/ very family friendly all ages
130 feet elevation gain
Steps & handrails.
Charge to park -on season
Bathrooms at trailhead- on season
Dog Friendly
From the parking lot follow the trail under rt 16. The trail is crushed stone and then more of a stone path. You can have two options to view the 64 foot waterfall the upper and lower level. This is a run off from Ellis Falls from Mt Washington!
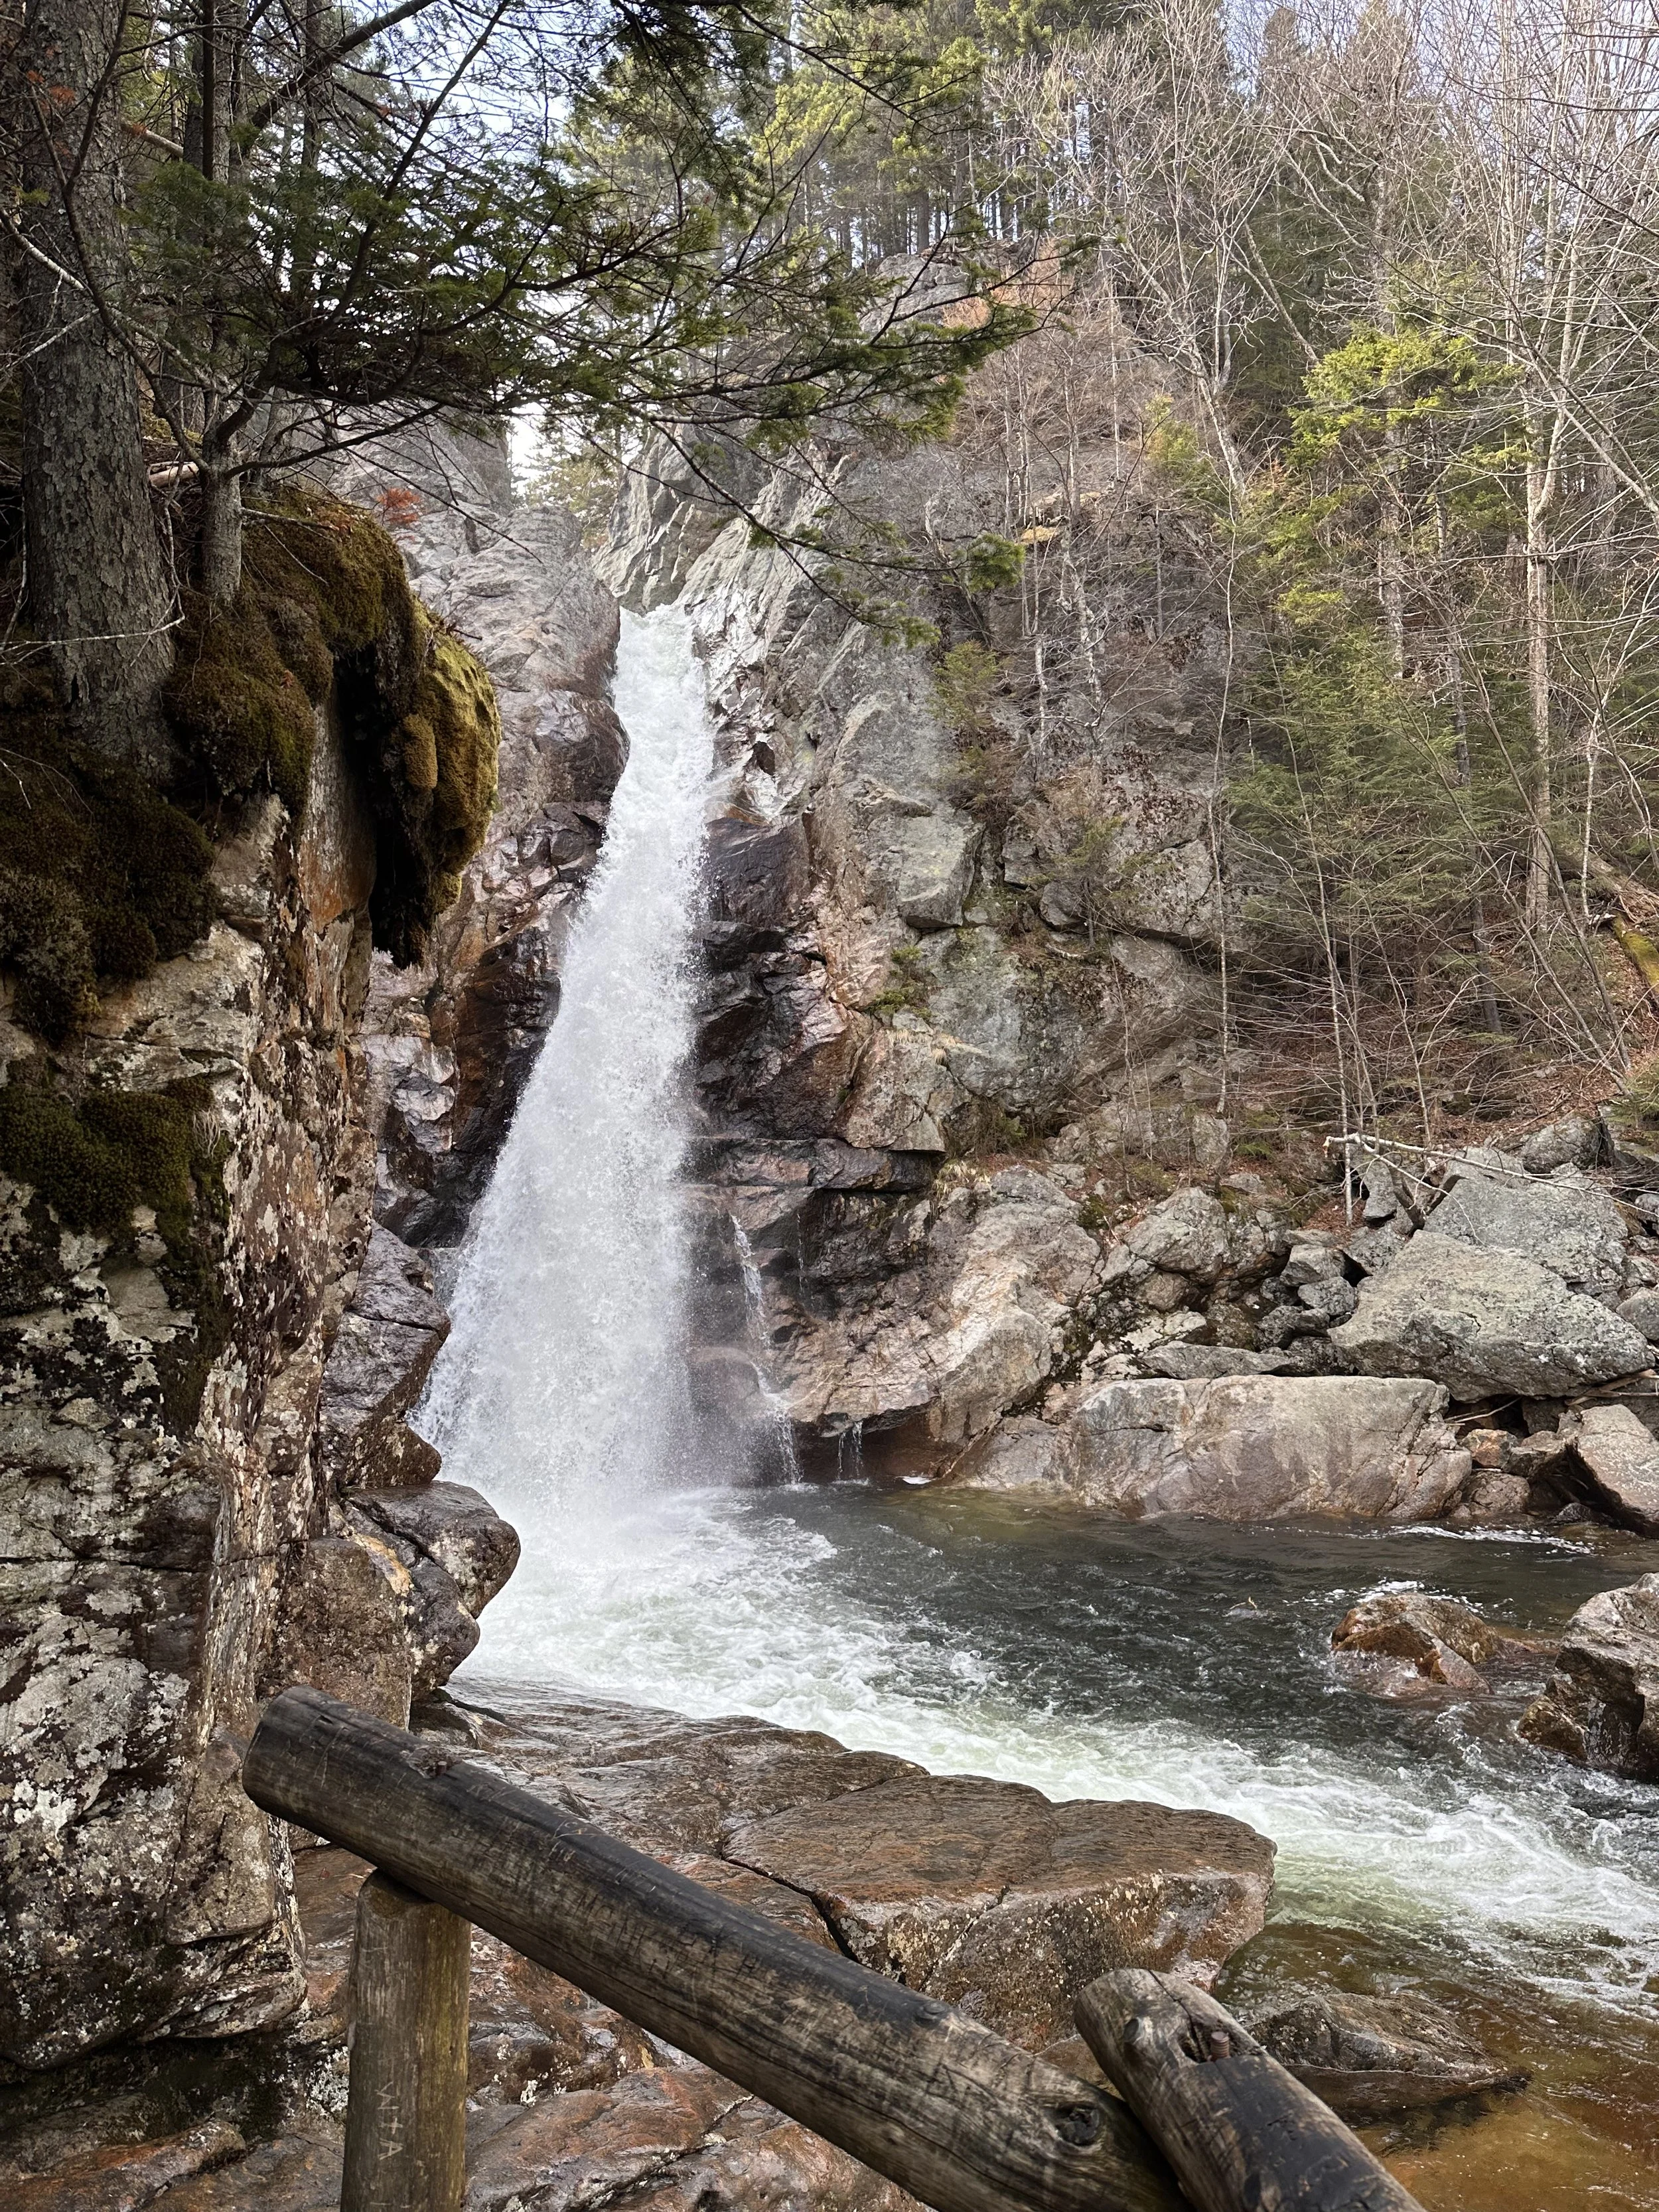
Glen Ellis Falls
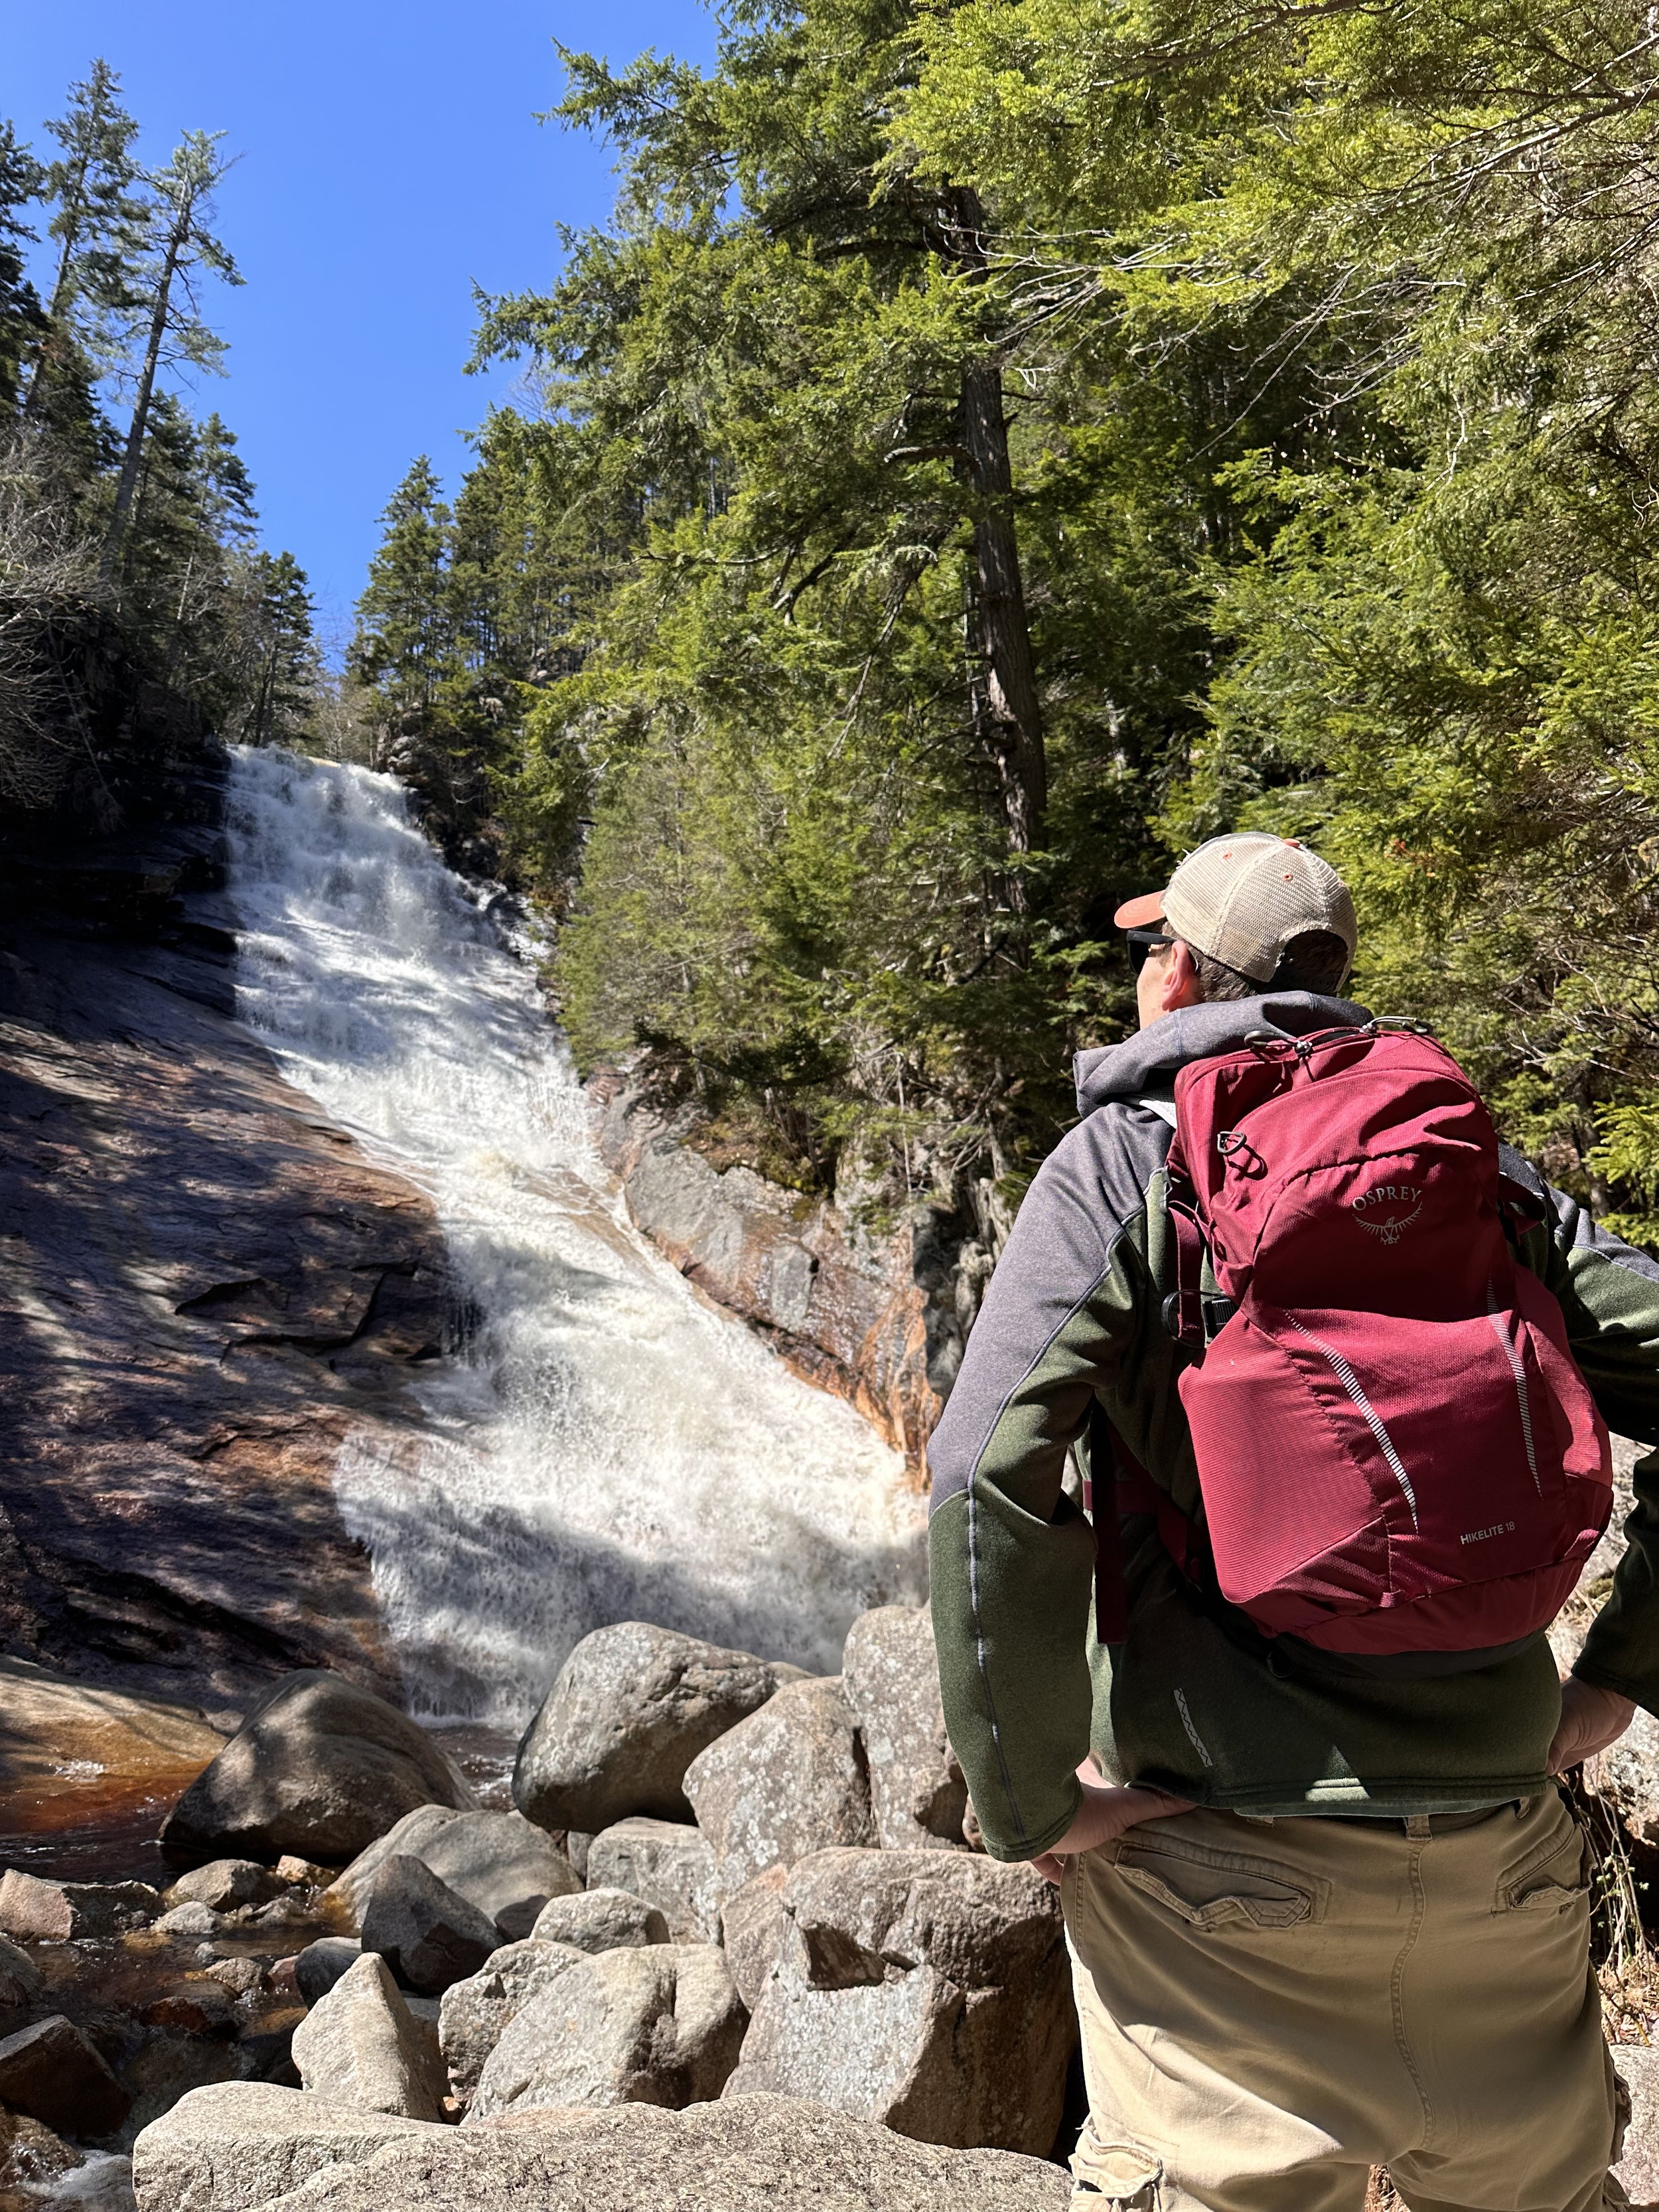
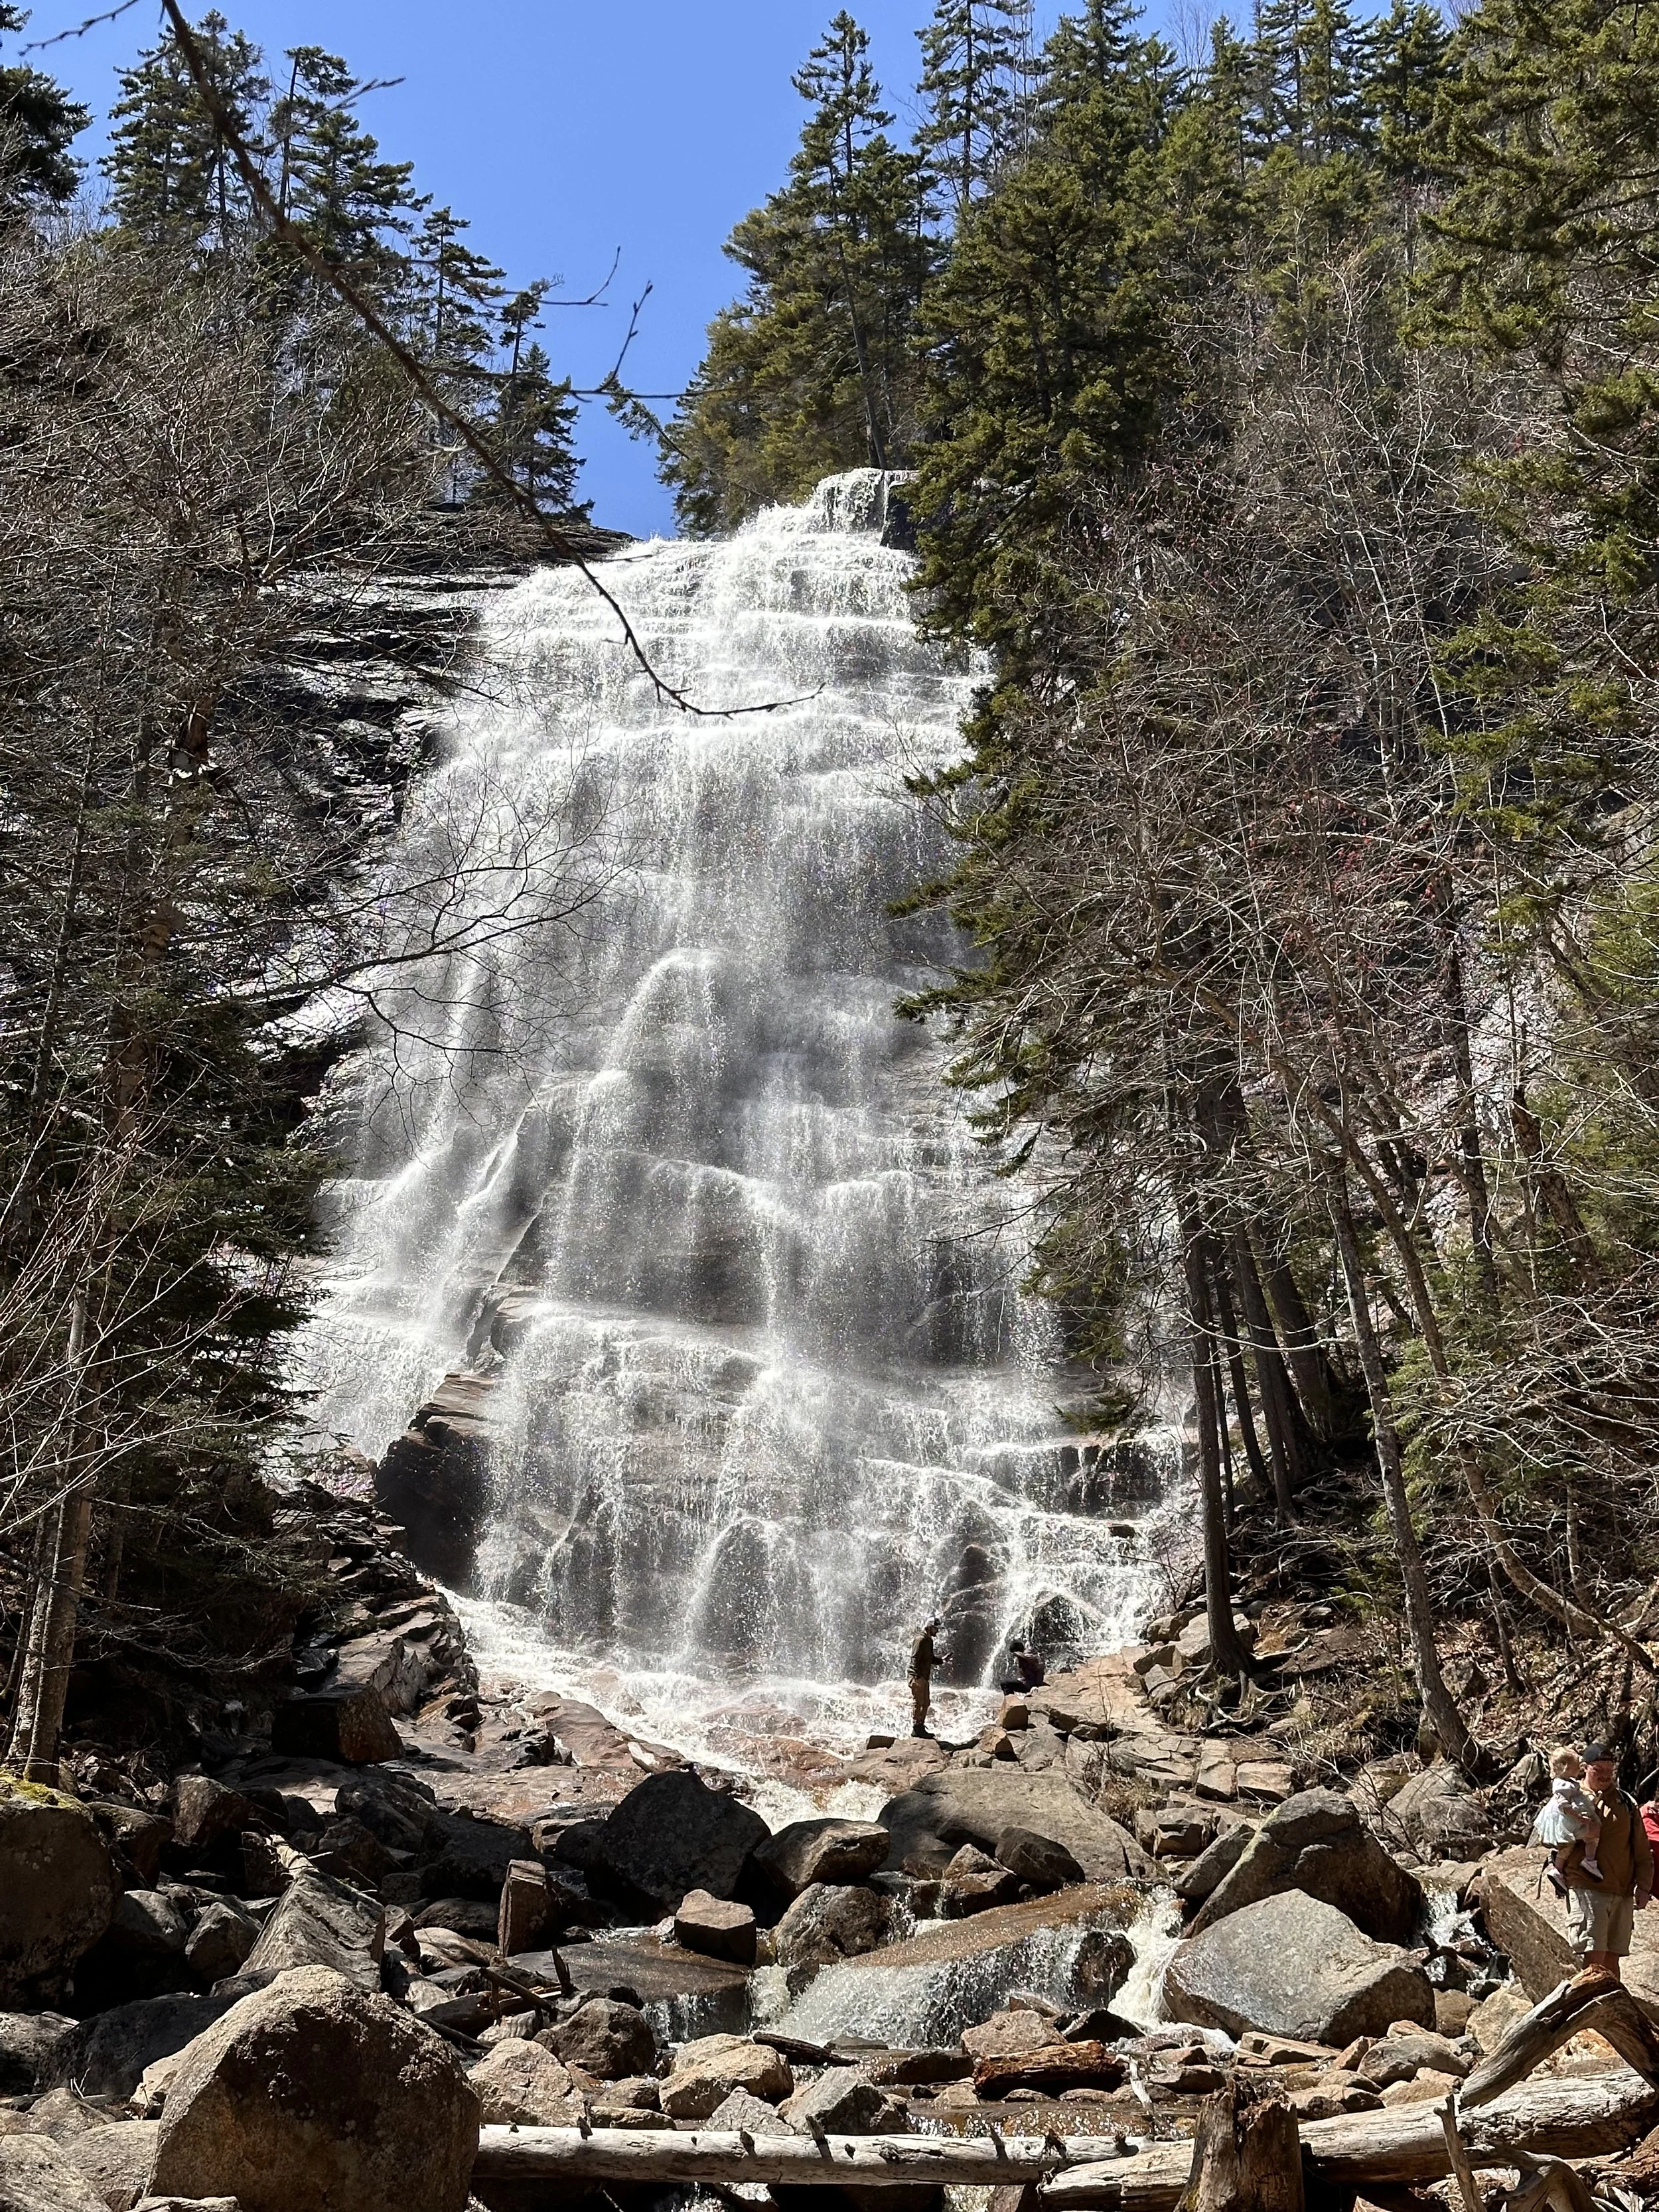
Arethusa Falls Crawford Notch
Tallest waterfall in NH at 160 feet
Moderate hike
Bathroom at trailhead on season
2.8 Miles mostly out and back
885 feet of elevation gain
Dog Friendly
There are two parking lots here the lower lot if bigger and will give you a good way to warm up to the hike as it is at the bottom of the hill. You can take a little side trek on the way up to Arethusa Falls to see Bemis Falls. I suggest doing this way first as it is steep and going down this way (lesson learned by us) was a little tricky.
Pro Tip: hike in the spring after some rainy days
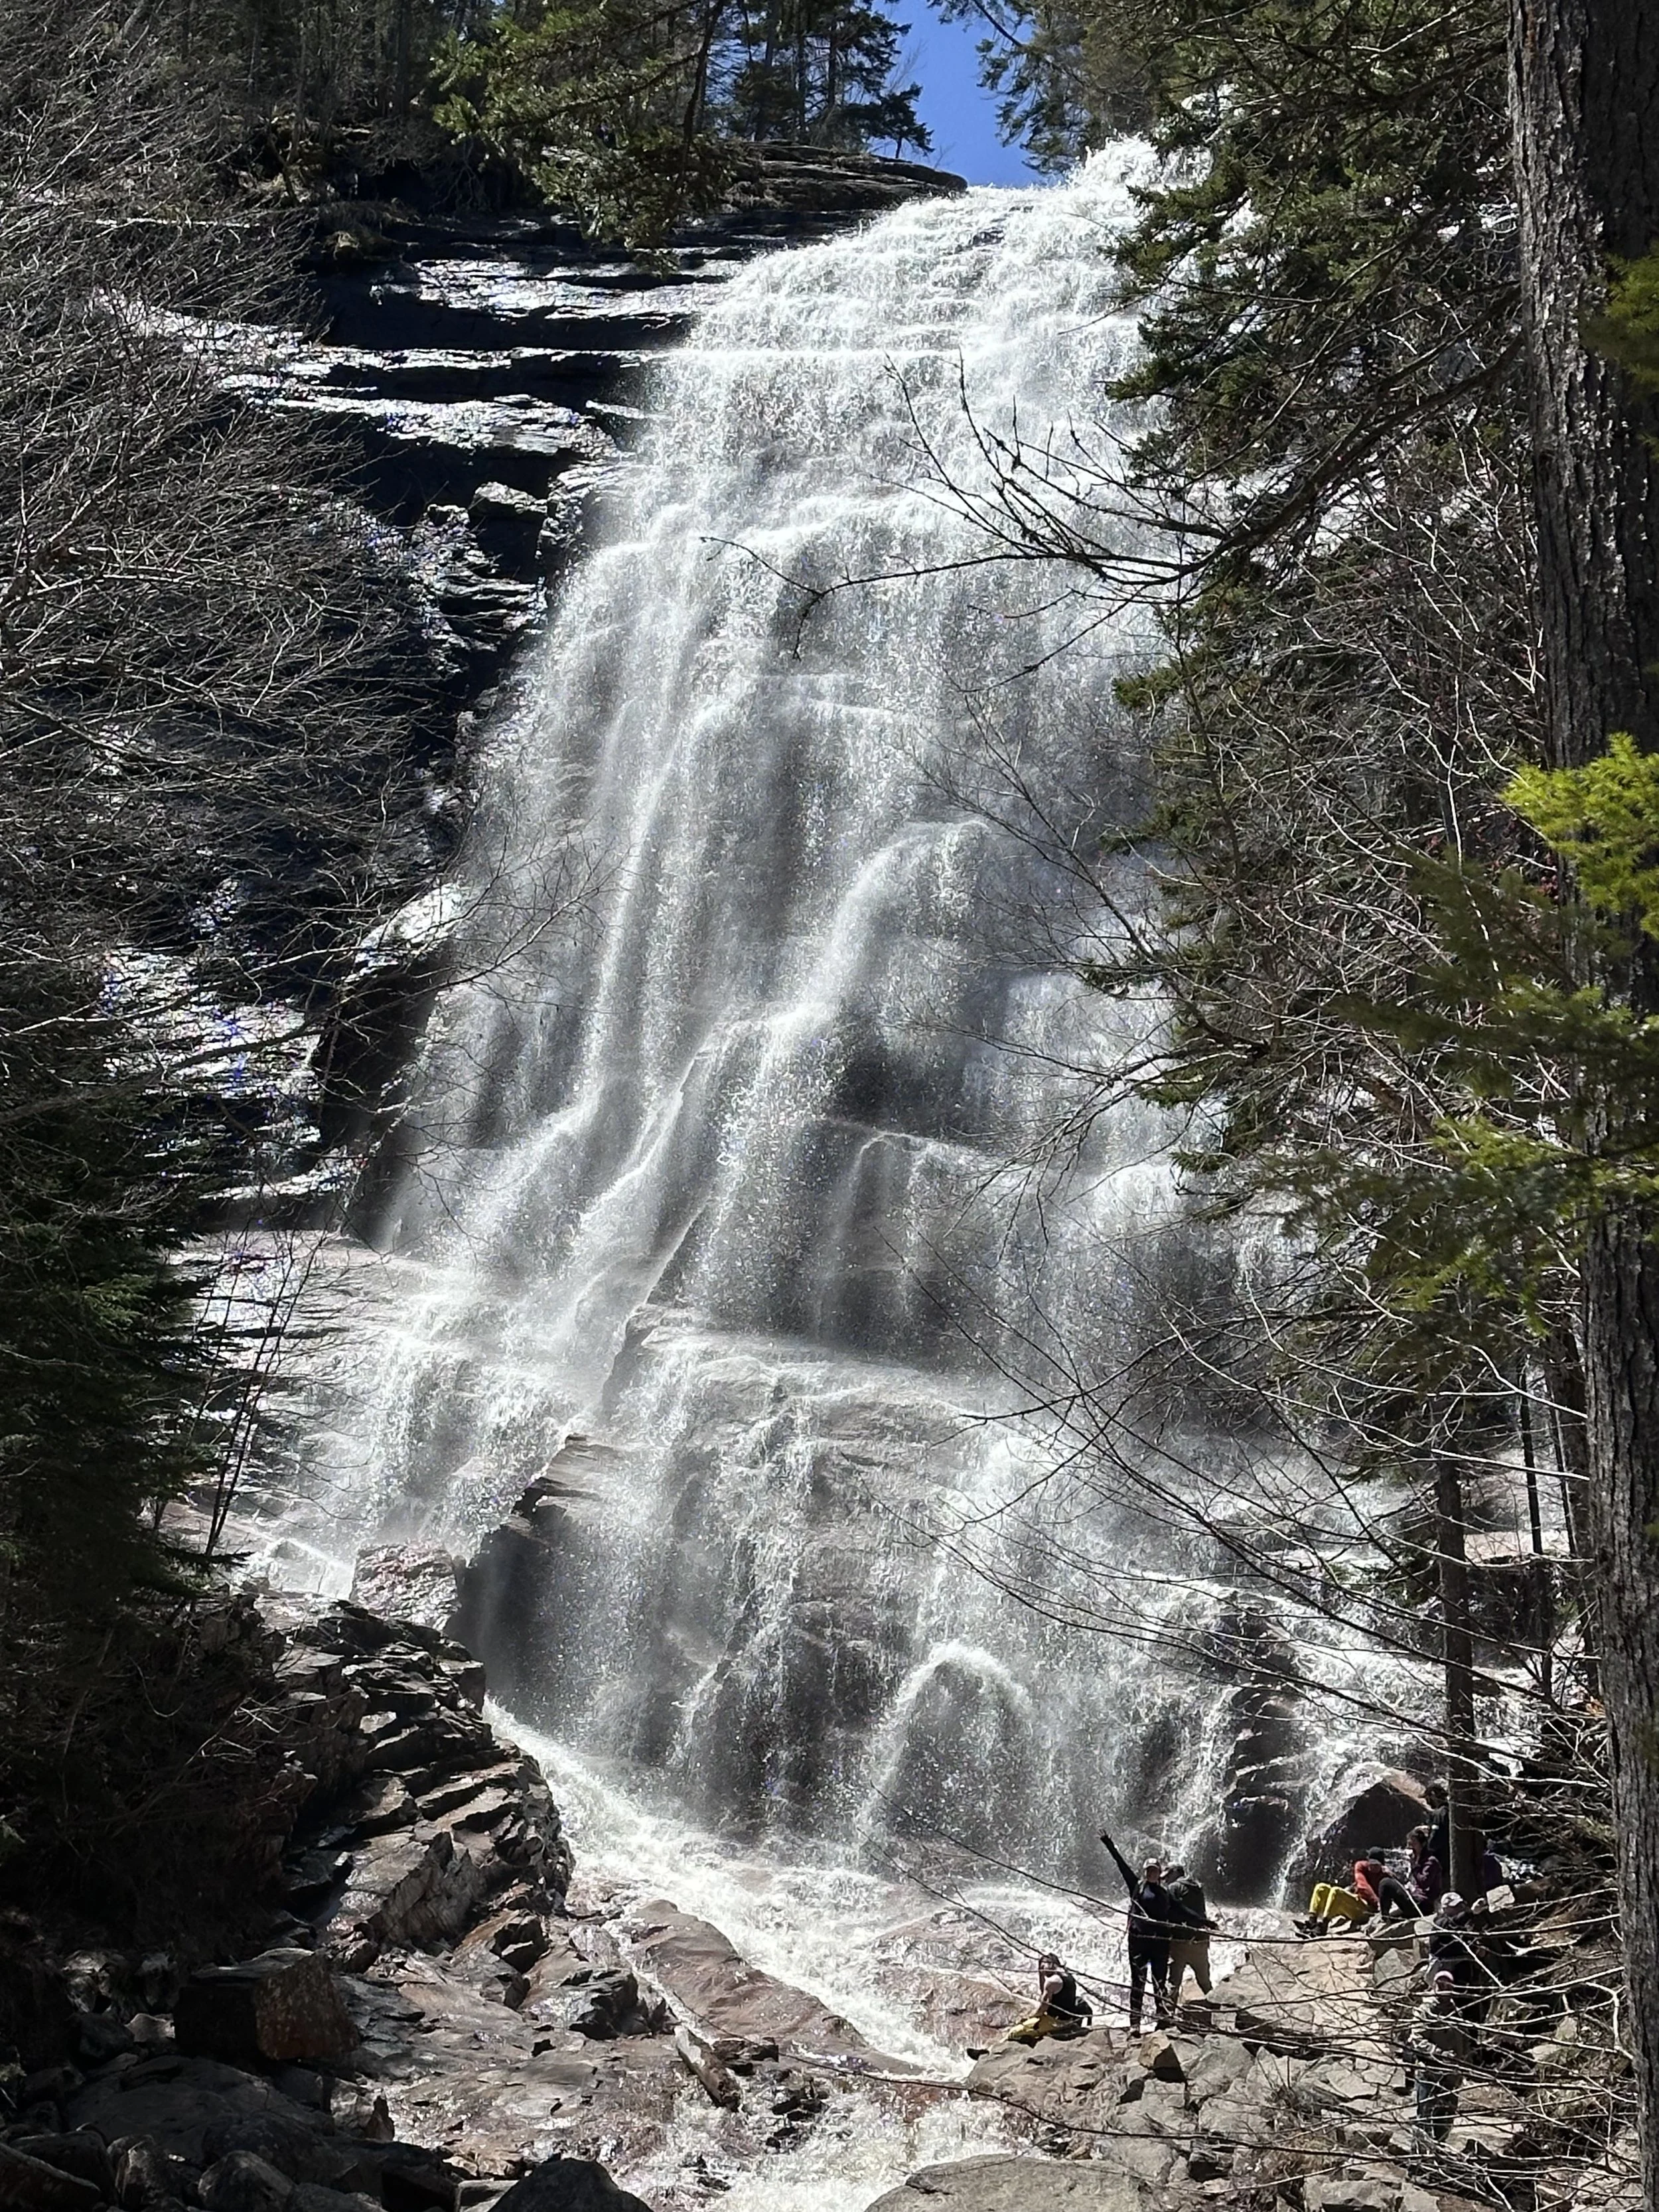
Arethusa Falls (me in the lower right corner I am 5’9” for scale reference)
Ripley Falls Crawford Notch
1 mile
Coincides with the Appalachian trail
No bathroom here
Easy/ moderate Family Friendly
Dog Friendly
308 feet of elevation gain
Start the hike by crossing the train tracks. Easy to follow path with some steep sections, nothing too challenging. Great short hike to do with the family can easily do on the same day as Arethusa Falls or together.
Ripley Falls

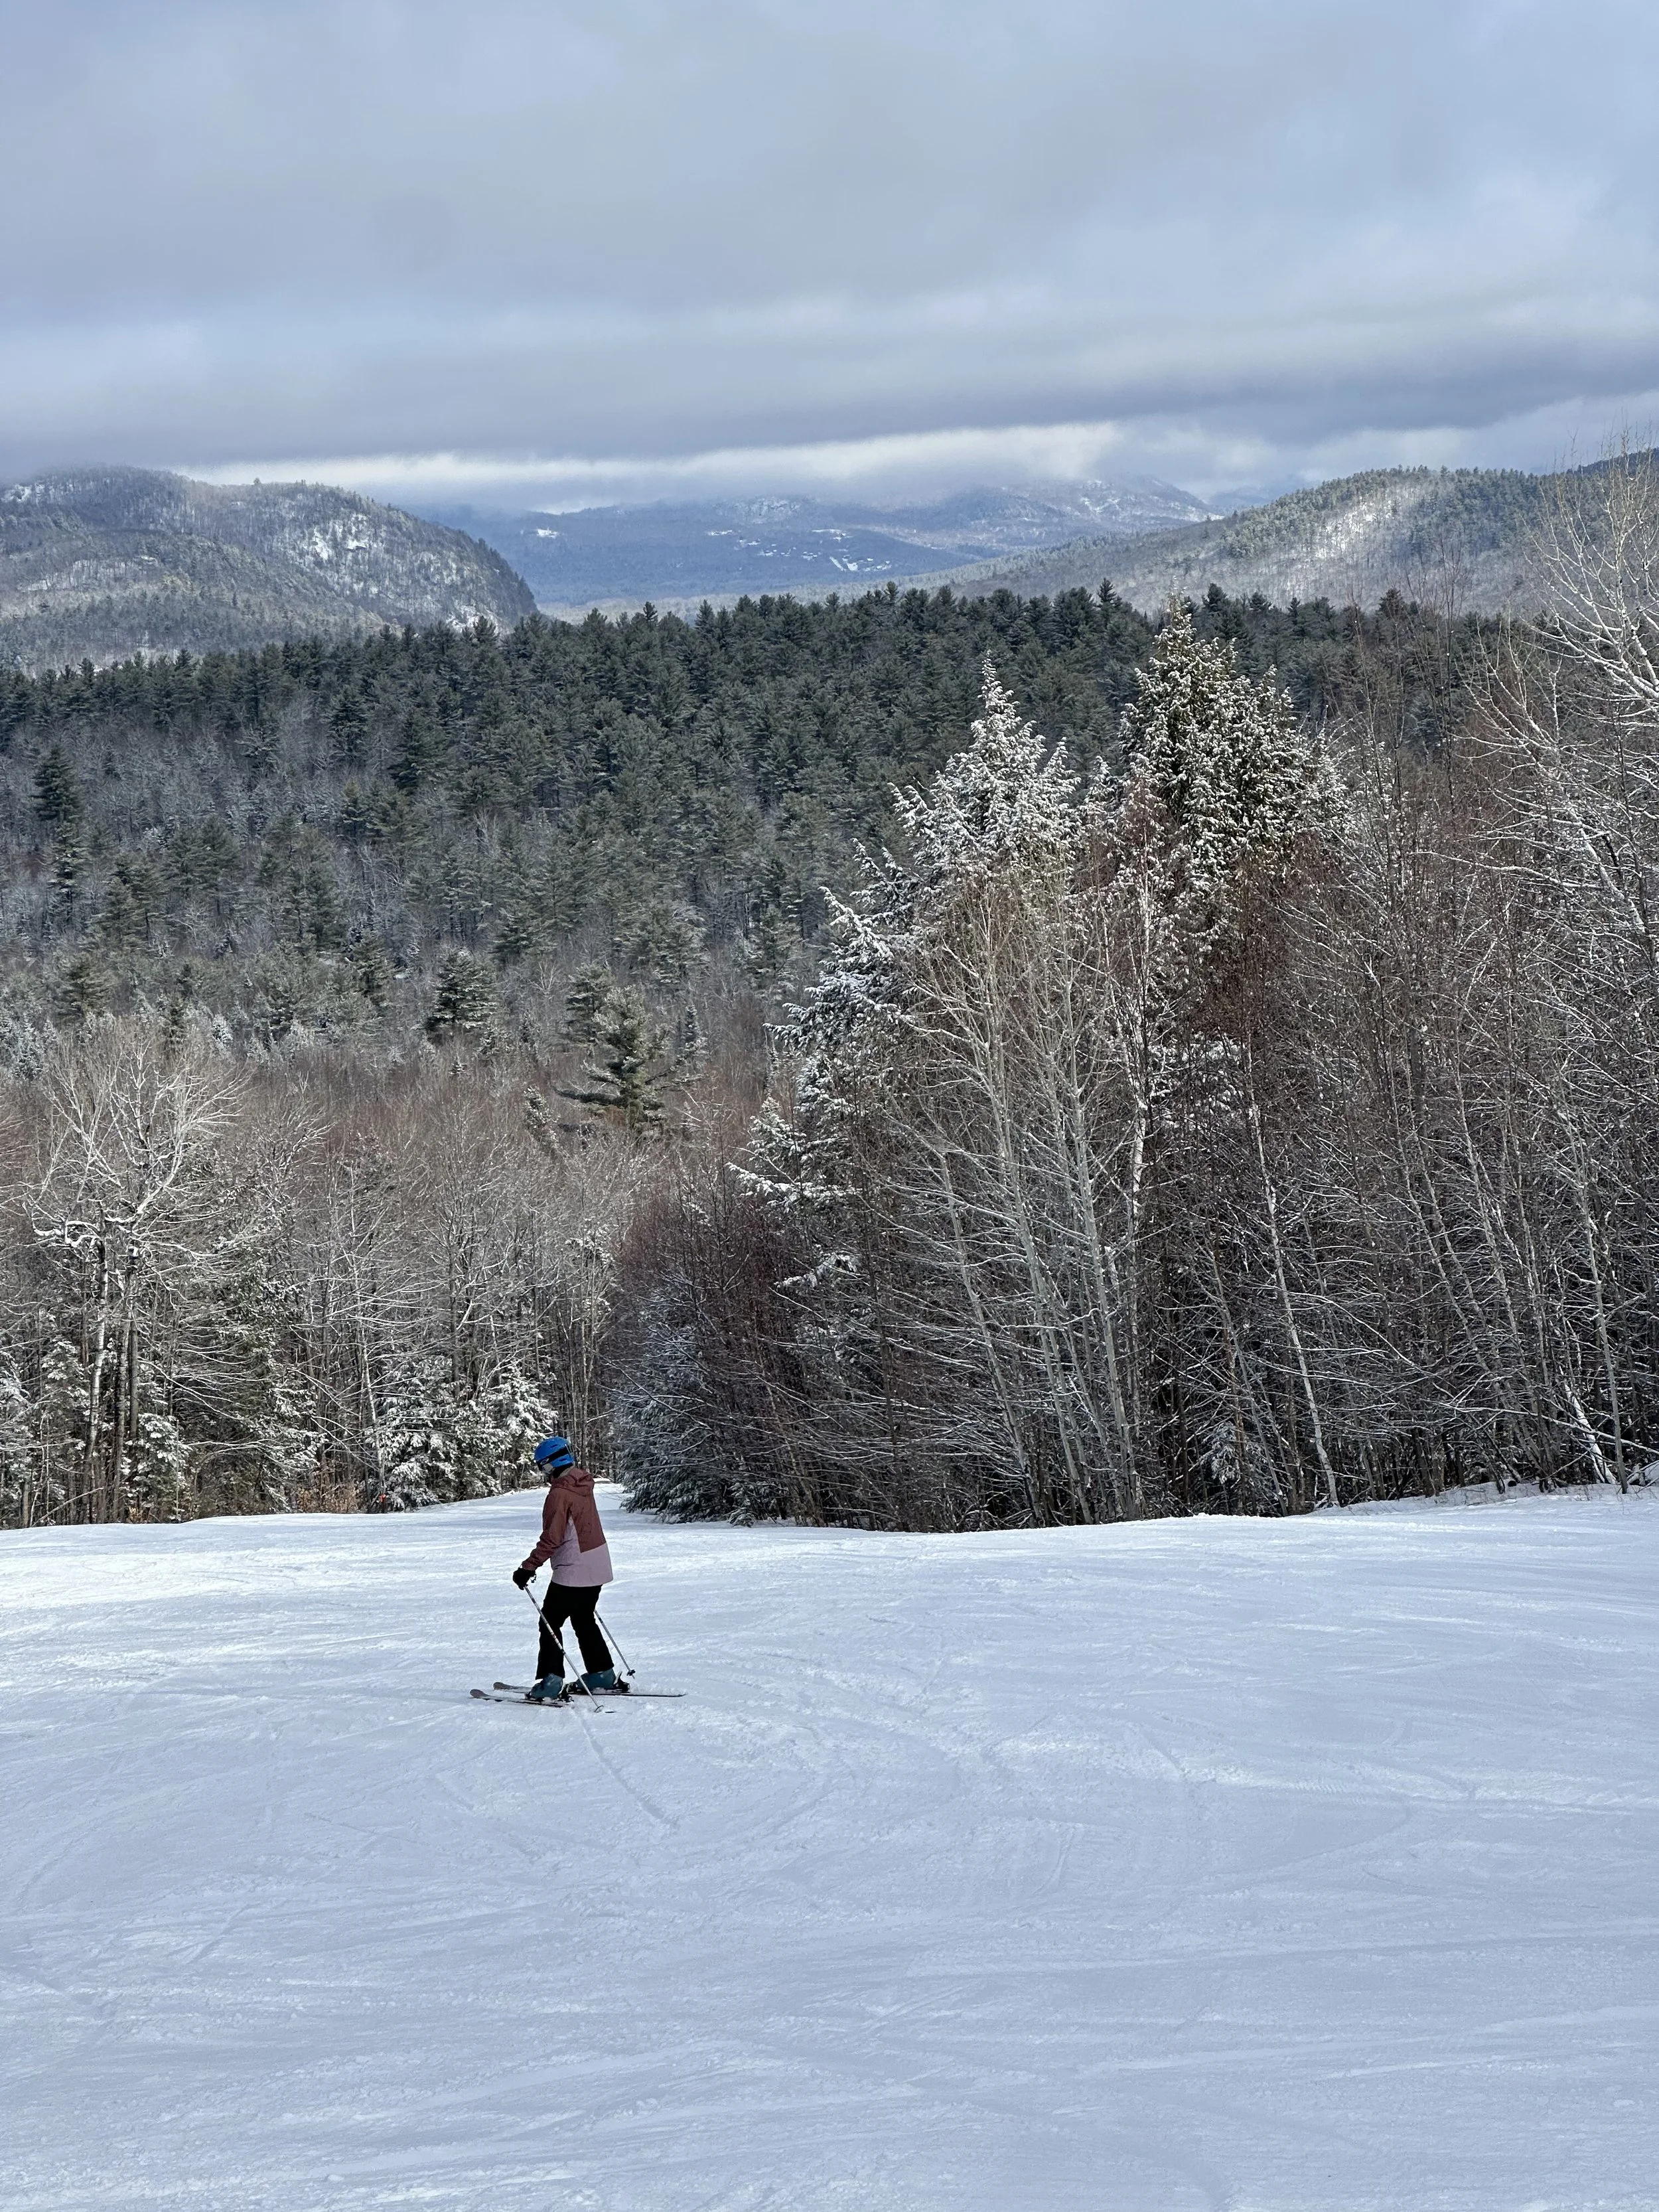
Indy Learn to Turn
Want to know more about the Indy Pass Learn to Turn? Check out our blog all about our experience and why we think it is a good idea, along with some tips to make it a great experience for you!
This was my first year back skiing in maybe 8-10 years, it has been a while. Not only has it been a long time, I was never a confident skier. I would stick to one trail (green) and most likely be the first one done for the day. Well, here I am in my 40's, an empty nester with a husband who’s favorite activity is skiing. I knew I was missing out on some fun and thought maybe if I got an Indy Pass and just practiced more I could be more confident and we could be out there enjoying winter together. Because being inside all winter is just no fun

When I purchased the pass the first thing Mike said to me was, you need a lesson, and it wasn’t going to be from him. In comes Learn to Turn. This was the first year they introduced this lesson package (for all ages) and I am glad I went for it. I wanted to share my experience, give you the pros and cons, and maybe a little advice, if you choose to accept.
Final lesson at Mt Abrams
The Indy Learn to Turn is for skiers or snowboarders. With the $189 price tag you get three lessons and rentals. We had a coupon and paid $149. Honestly this is the best deal out there to learn to ski. I took my lessons at three different spots. The price for each one would have been more than I paid for all three. Before you run out and purchase the Learn to Turn (which I think you should) read on for somethings to know and consider.
It is not every Indy mountain, just select resorts. For me being in New England there are enough that it made it worth it. I might do it again next year with a different mindset. What I wish I had paid attention to earlier on is some of the resorts only offer learn to turn on select dates. Like Waterville Valley I was excited to see them offer this, but I could only find Friday availability. Pats Peak another great mountain to learn, had all of January and February and some of December blacked out. By the time I realized Pat’s Peak was blacked out in December it was to late for me to start my season there.
Bolton Valley
My first lesson was at Tenney Mountain in Plymouth, NH. I was excited to be back. This spot was open when we were in college and I took a snowboarding class here my senior year, lets just say I am glad there were no cell phones back then and no evidence of that! With Tenney they recommend you have some knowledge of skiing before you come here to take a lesson. The other thing to know about Tenney is the top of the mountain has a nice gradual slope, while the closer you get to the bottom the steeper it gets. Lets just say this was something a little challenging for me as I might have face planted! But besides my face colliding with the mountain it was one of the best lessons I have ever had. Morgan was my instructor and I was glad she was my first ski instructor of the year. I took what she taught me to each ski day. Honestly this lesson, face plant and all, gave me more confidence to get out there again. The lesson was 2.5 hour and would have cost $175.
Tenney Mountain, first lesson in many years.
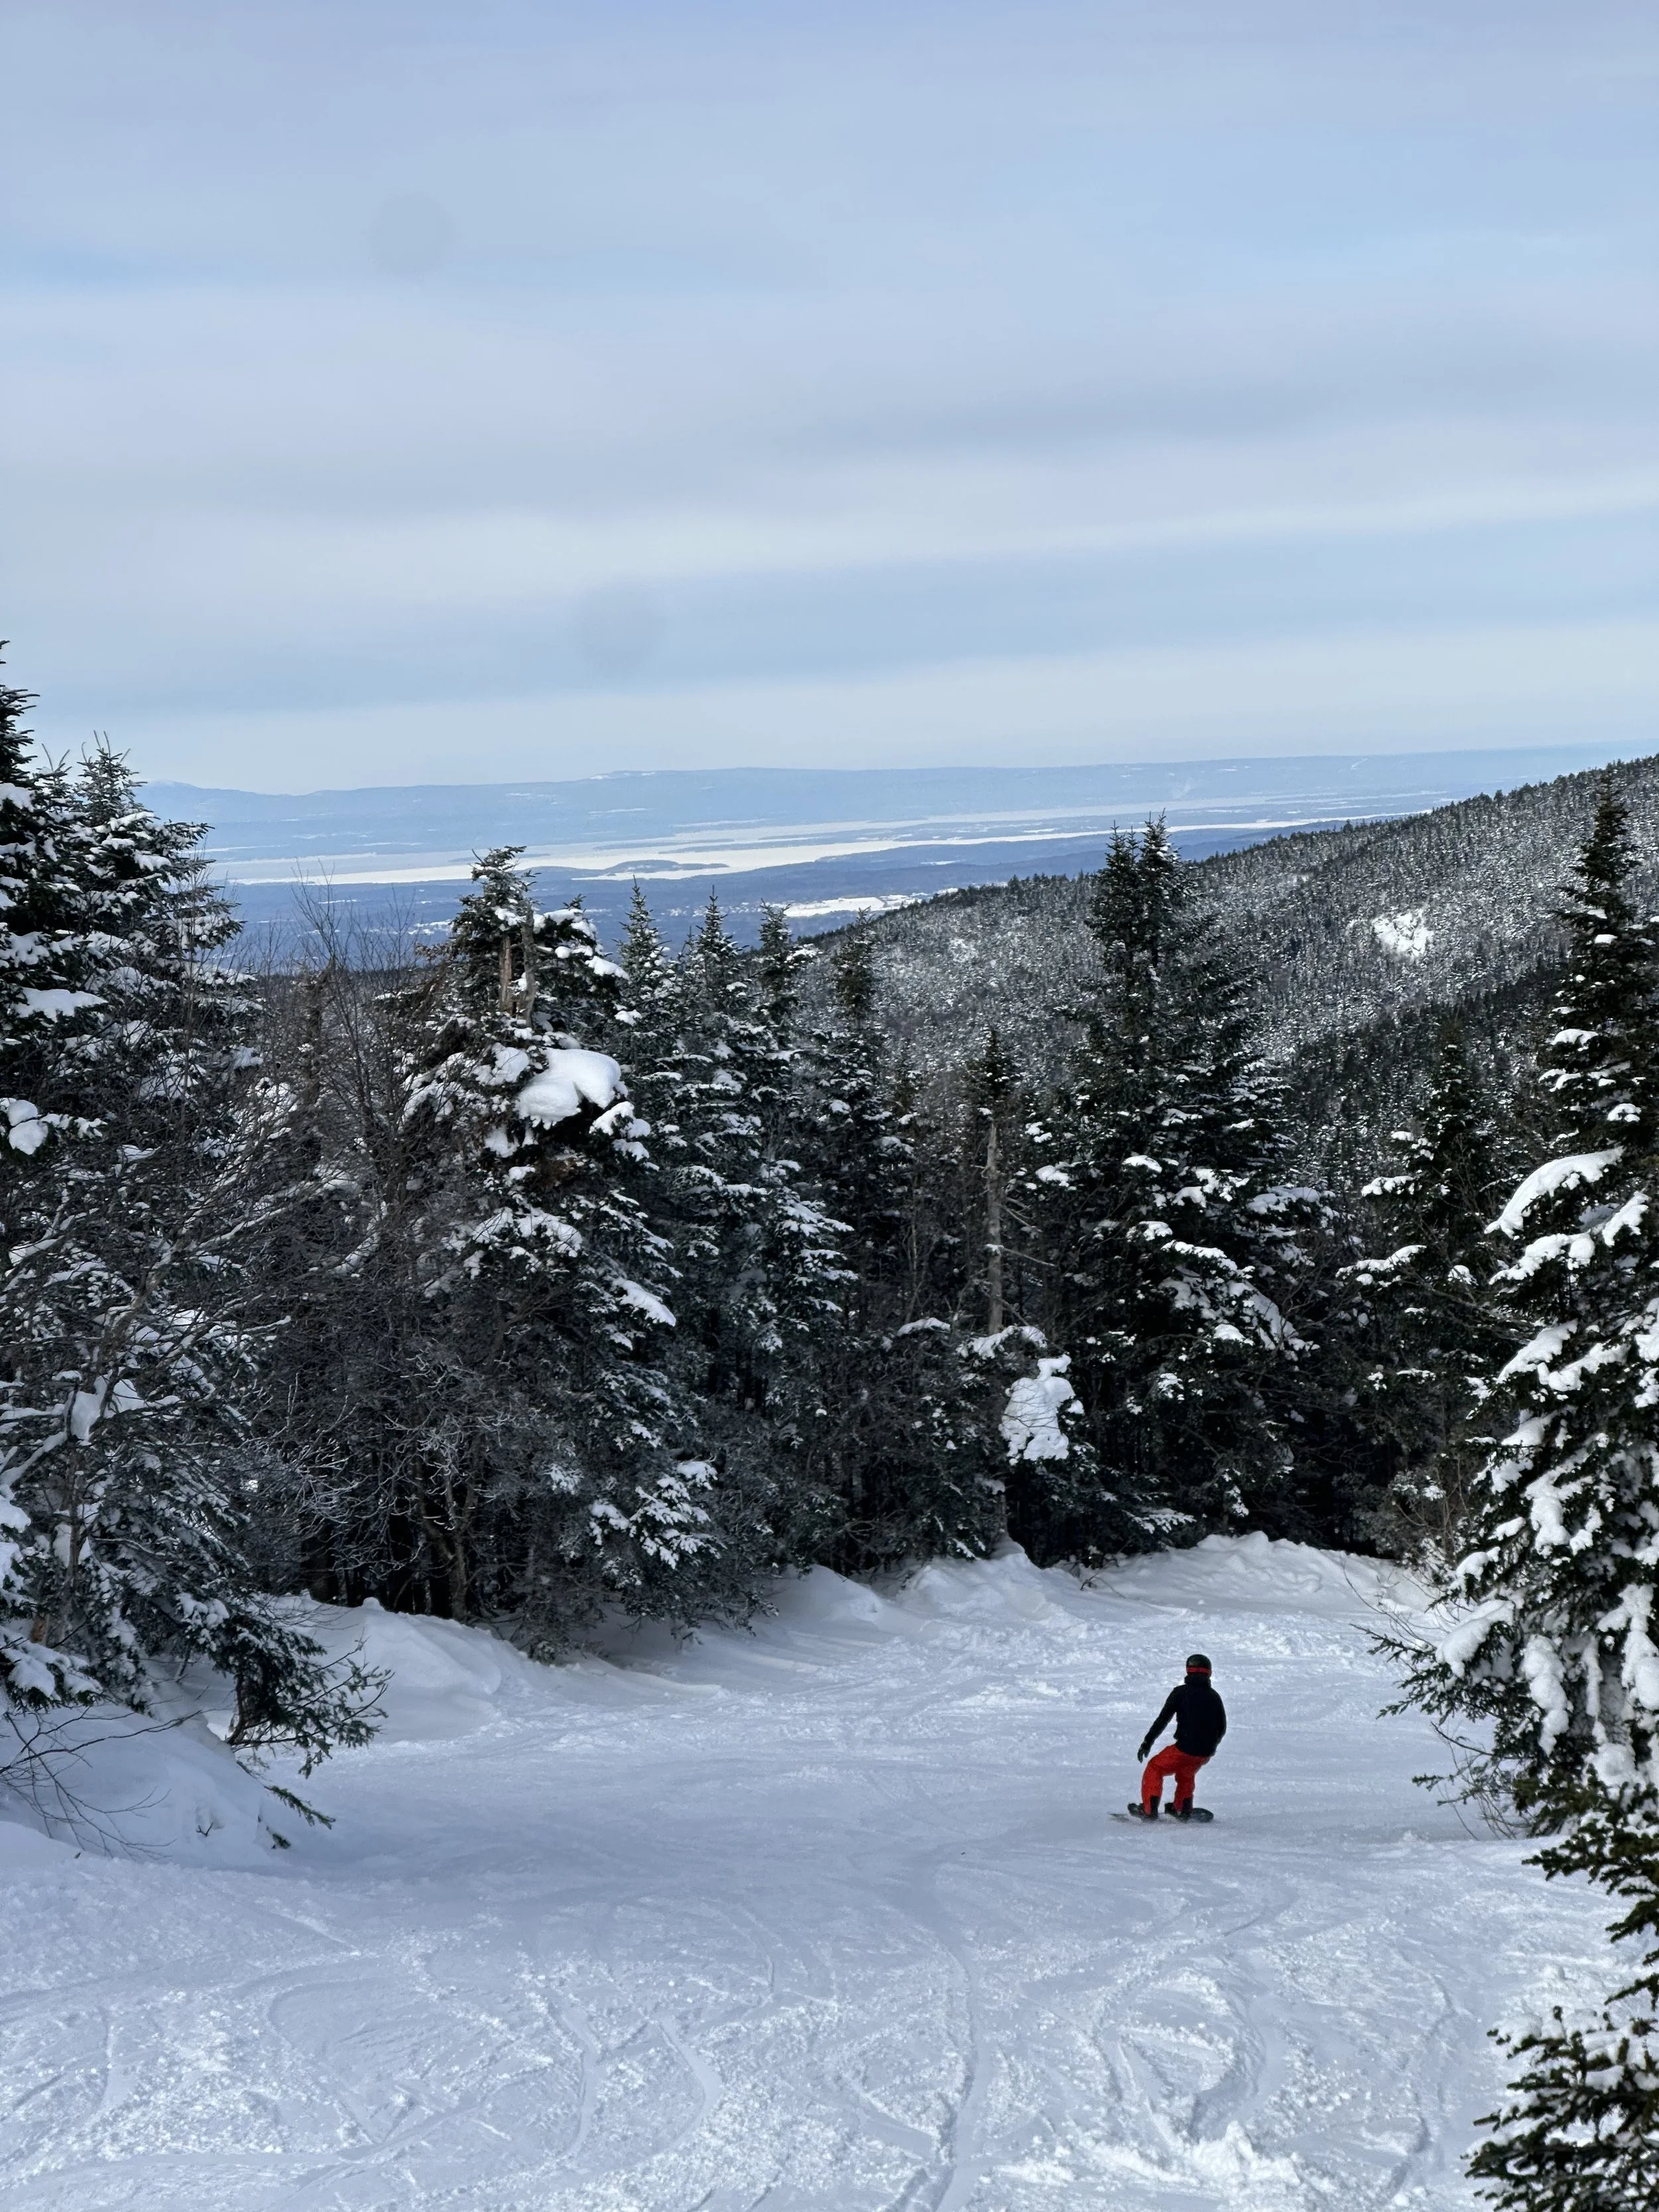
My second lesson was at Bolton Valley in Bolton Valley, VT. I was kind of nervous for this lesson. I didn’t know what to expect becuase I sat in the lodge last year when Mike skied and it just seemed like a hard mountain. Let me reassure anyone who is a newbie like me, there are challenging spots but this is a great spot to learn. On this day it was a small group lesson. With some people only have ever skied once or twice before. So we started at the basic level. I kind of always think it is nice to learn from the ground up. We spent some time on the magic carpet before hitting the chair lift. The thing about group lessons is you have to go at the pace of the newest skier, which as someone who wants to be safe all the time I appreciate. But wanting to get out of snowplow it can be hard to wait. I think Bolton Valley is one my personal favorite mountains, at least in the top three spots I visited this year. I loved how there is a beautiful green trail from the peak, yet they offer a variety of harder trails for those with more experience. They really do offer a great mix! Lesson was 2 hours and would have cost $199
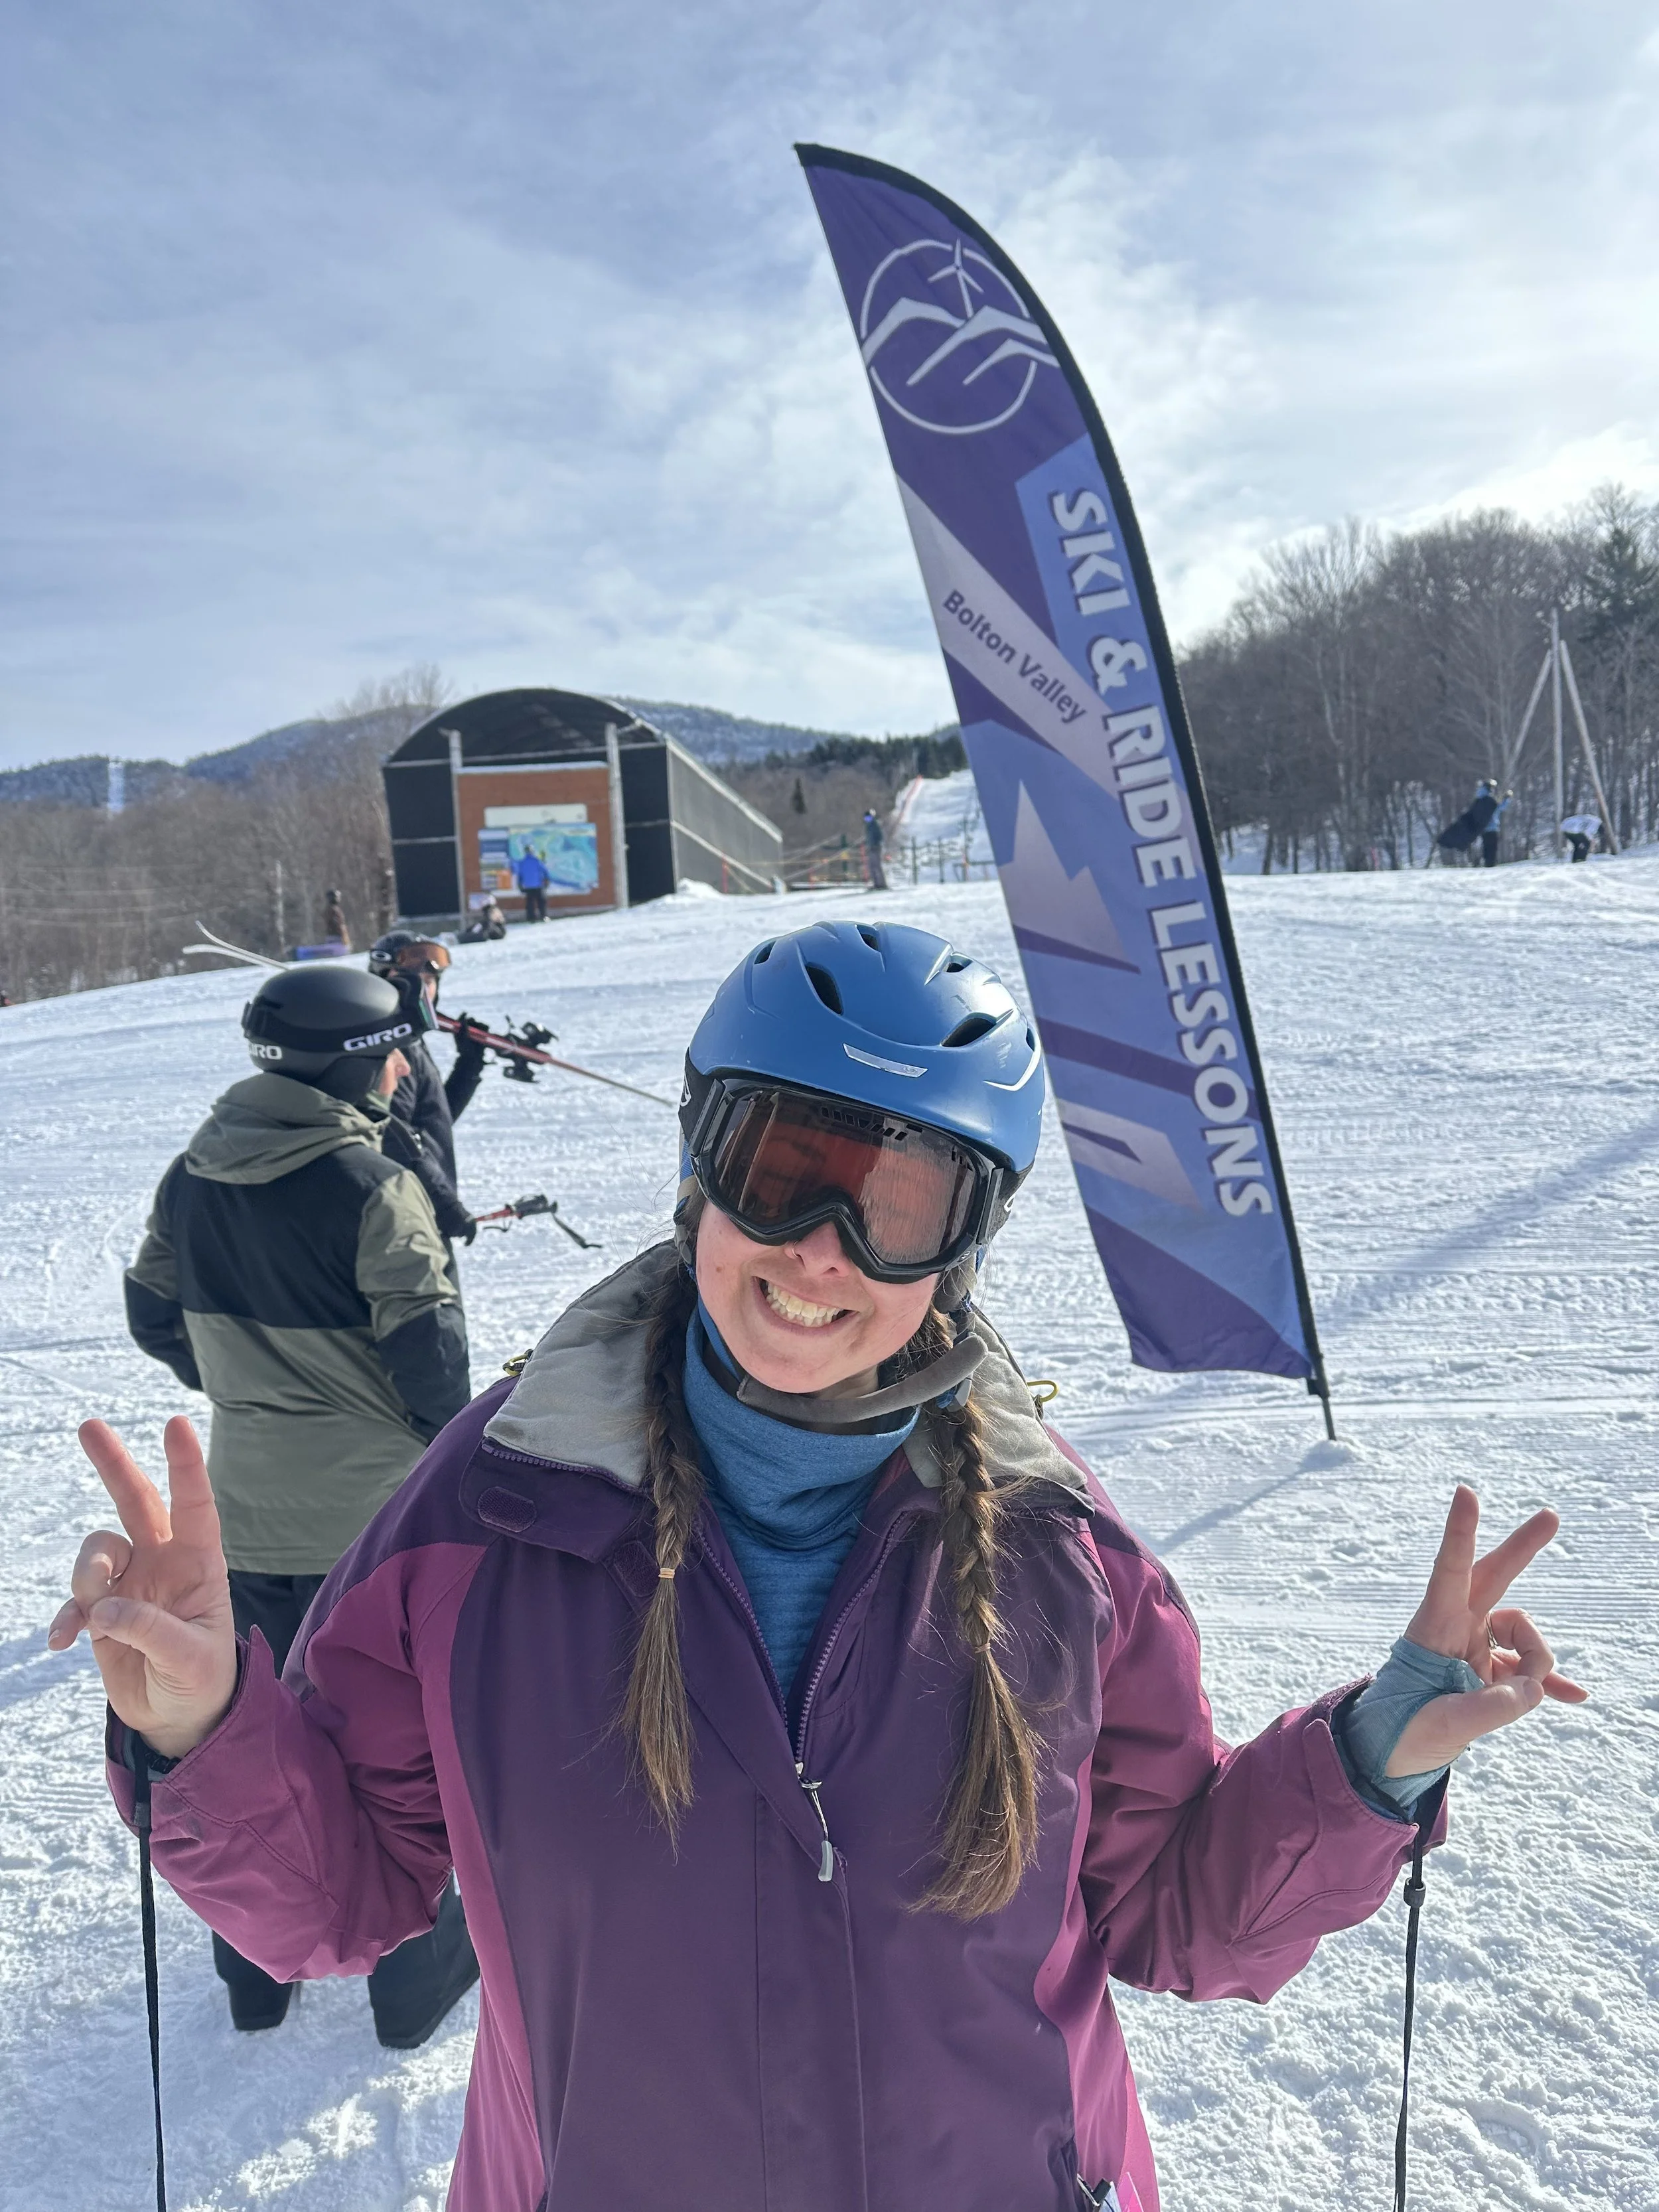
Beautiful day at Bolton Valley Ski Resort. I am gearing up for my lesson.
My third and final lesson of the season almost didn’t happen. I took my last lesson March 14th which is kind of late in the ski season and a bit of risk, but it paid off. My last Learn to Turn was at Mt Abrams in Greenwood, ME. Each mountain has their own reservation system for Mt Abrams they ask you to email them at least 48 hours in advance, and when I did they asked if I had skied before and what my level was. When I arrived to check in the instructor asked the other two people what their level was and where they were comfortable. They were new skiers. For one person, this was their 2nd time ever. So they split us up. I went with Mario straight to the chair lift. With what I had learned earlier, and been practicing since Tenney, Mario brought that to a new level I left that day wanting to take more runs and was just feeling more confident than before. I was even making some parallel moves by the end of the day. I would highly recommend coming here for lessons! Mt Abrams, like Bolton Valley has a good mix of terrain for a smaller mountain. I stayed on the learning side while Mike enjoyed the side of the mountain for the more experienced skier.
Lesson was 1.5 hours and would have cost $109.
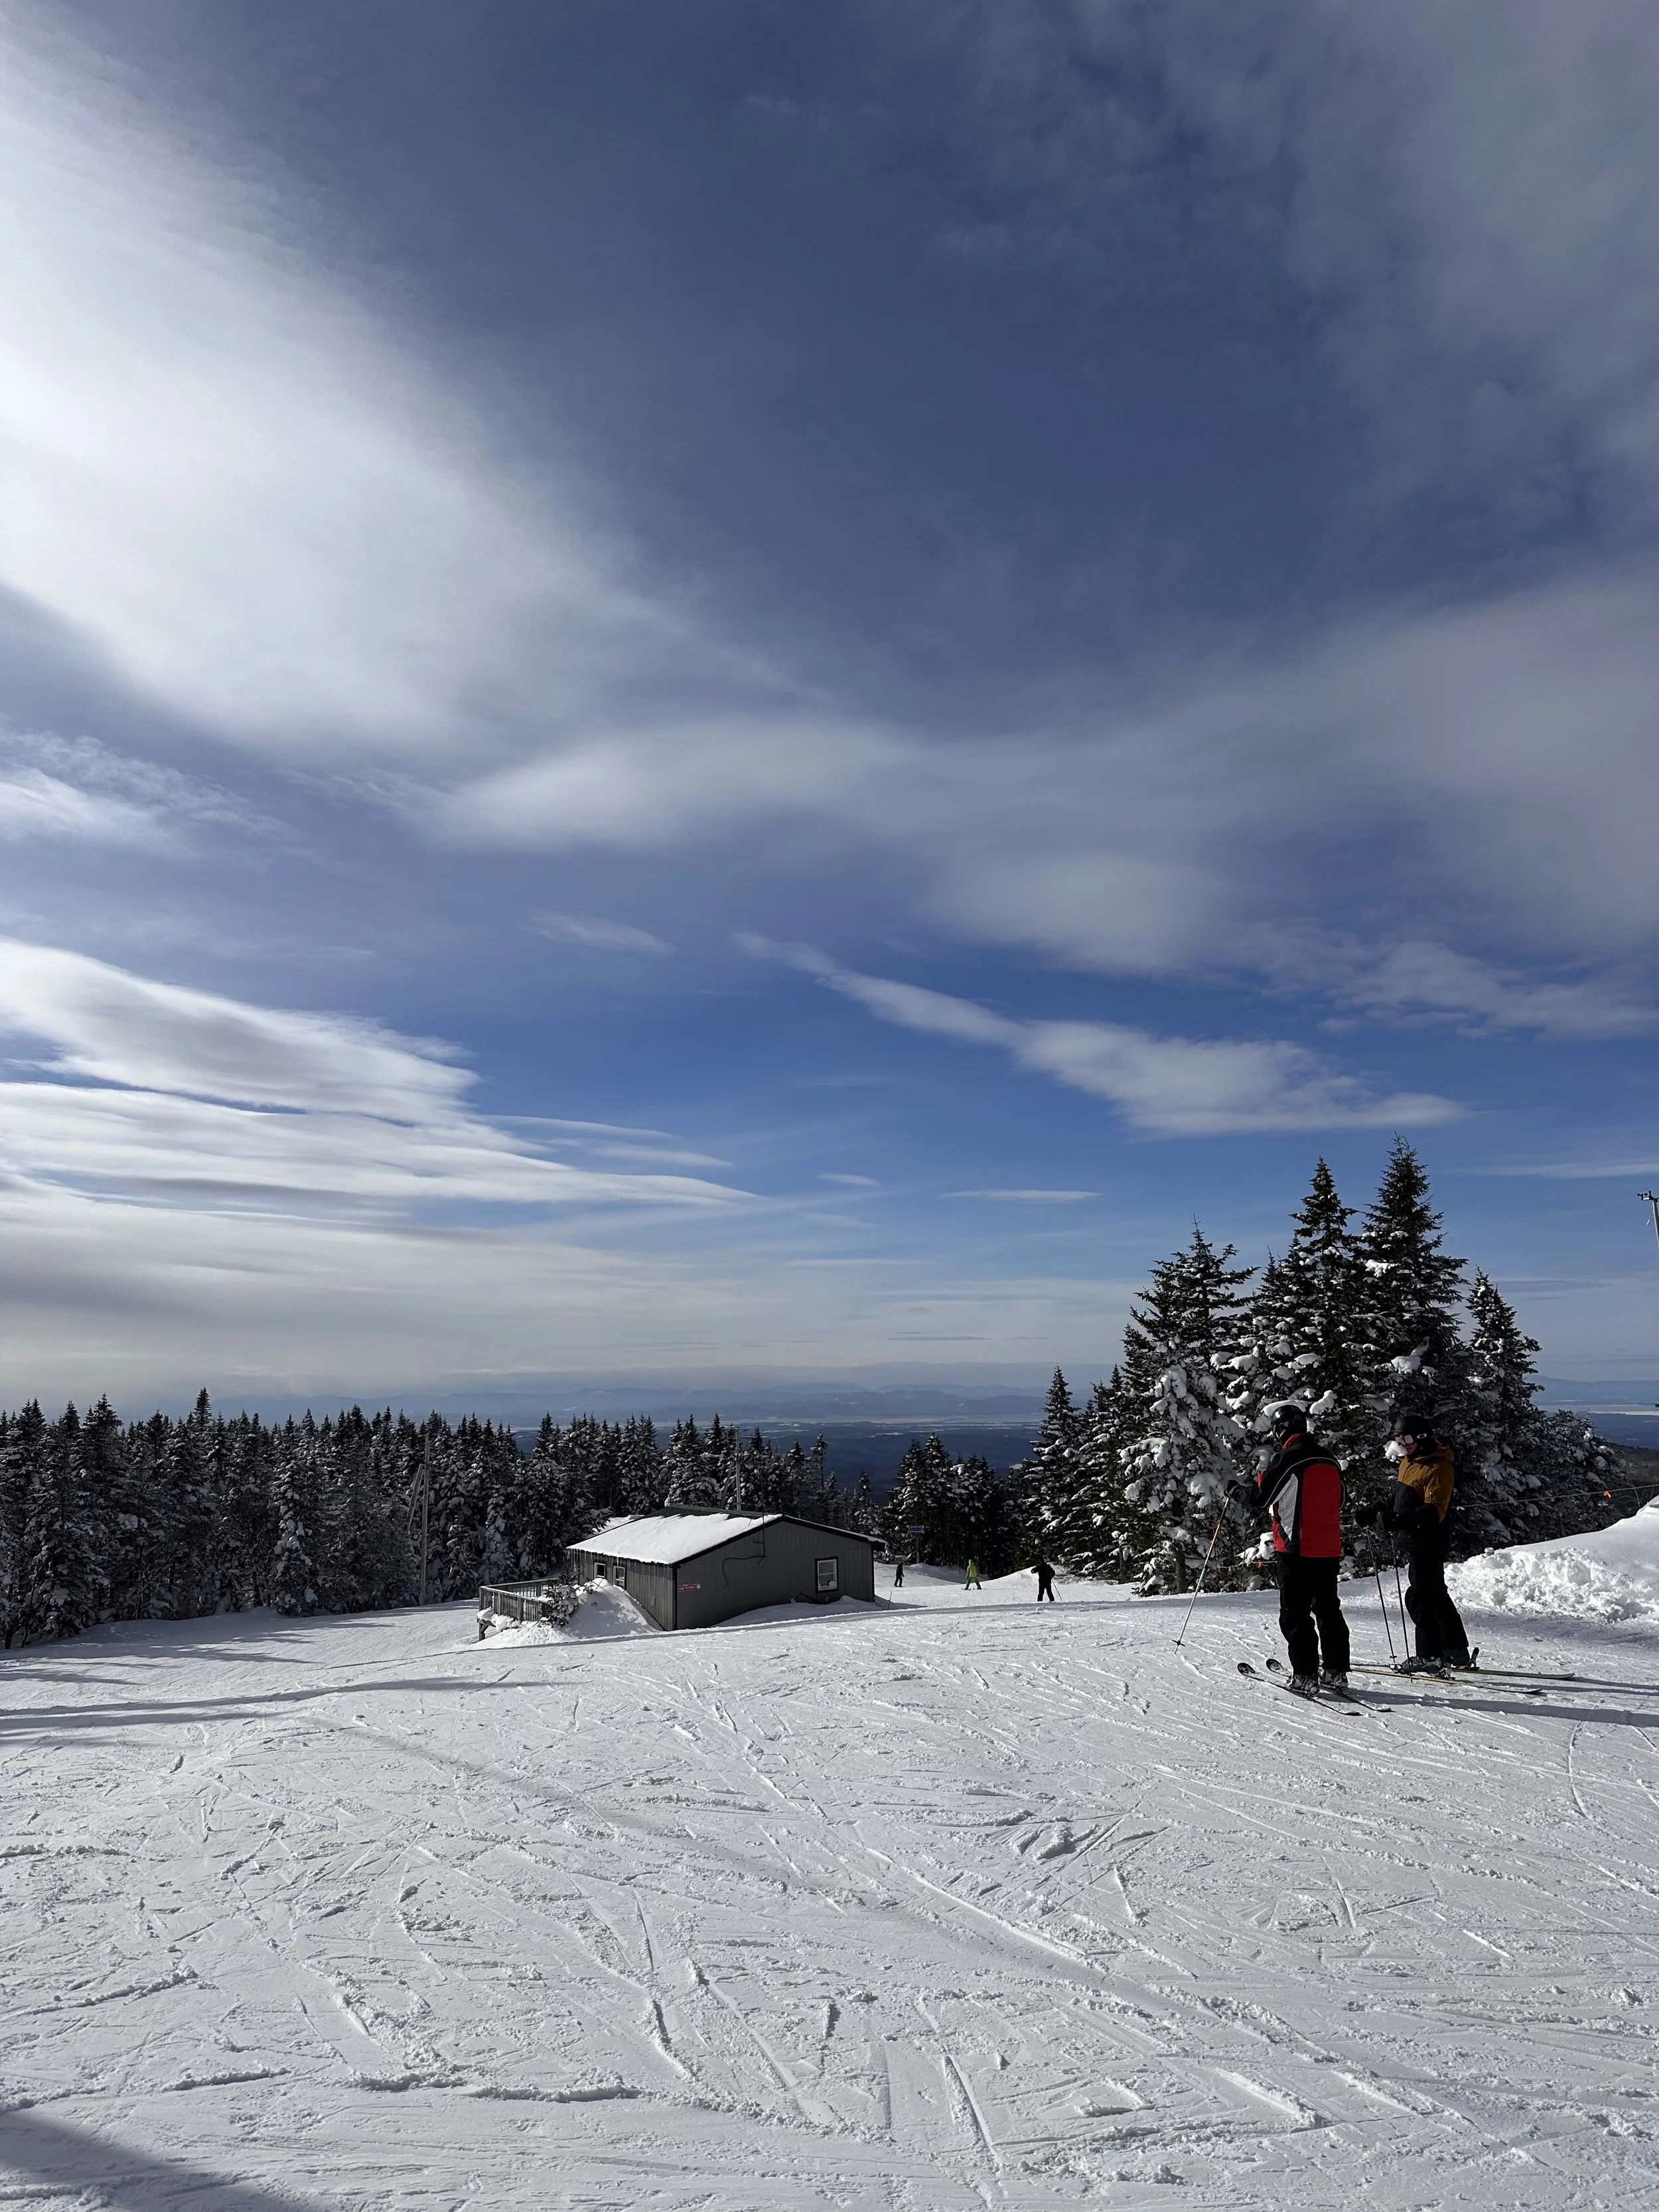
Peak of Bolton Valley
If you’re new or it has been a few years since you have skied/ snowboarded, check out the Indy Learn to Turn. My tips are-
Book your lessons earlier in the season
Go to a variety of spots becuase each instructor brings a different style and can offer so much.
Pay attention to the dates each mountain can offer the lesson as there can be blackout dates or only offered on select days
Take a private lesson if they offer it. This worked for me early and late in the season.
Take advantage of the rentals
Always wear a helmet
Some mountains give you an all day lift ticket to the entire mountain, while others give you a lift ticket to just the learning area.
If you’re looking to get back into skiing (or snowboarding) or try it for the first time, check out Indy Pass - Learn to Turn. It is a great opportunity to get out there and enjoy our winters! Happy Skiing! -G

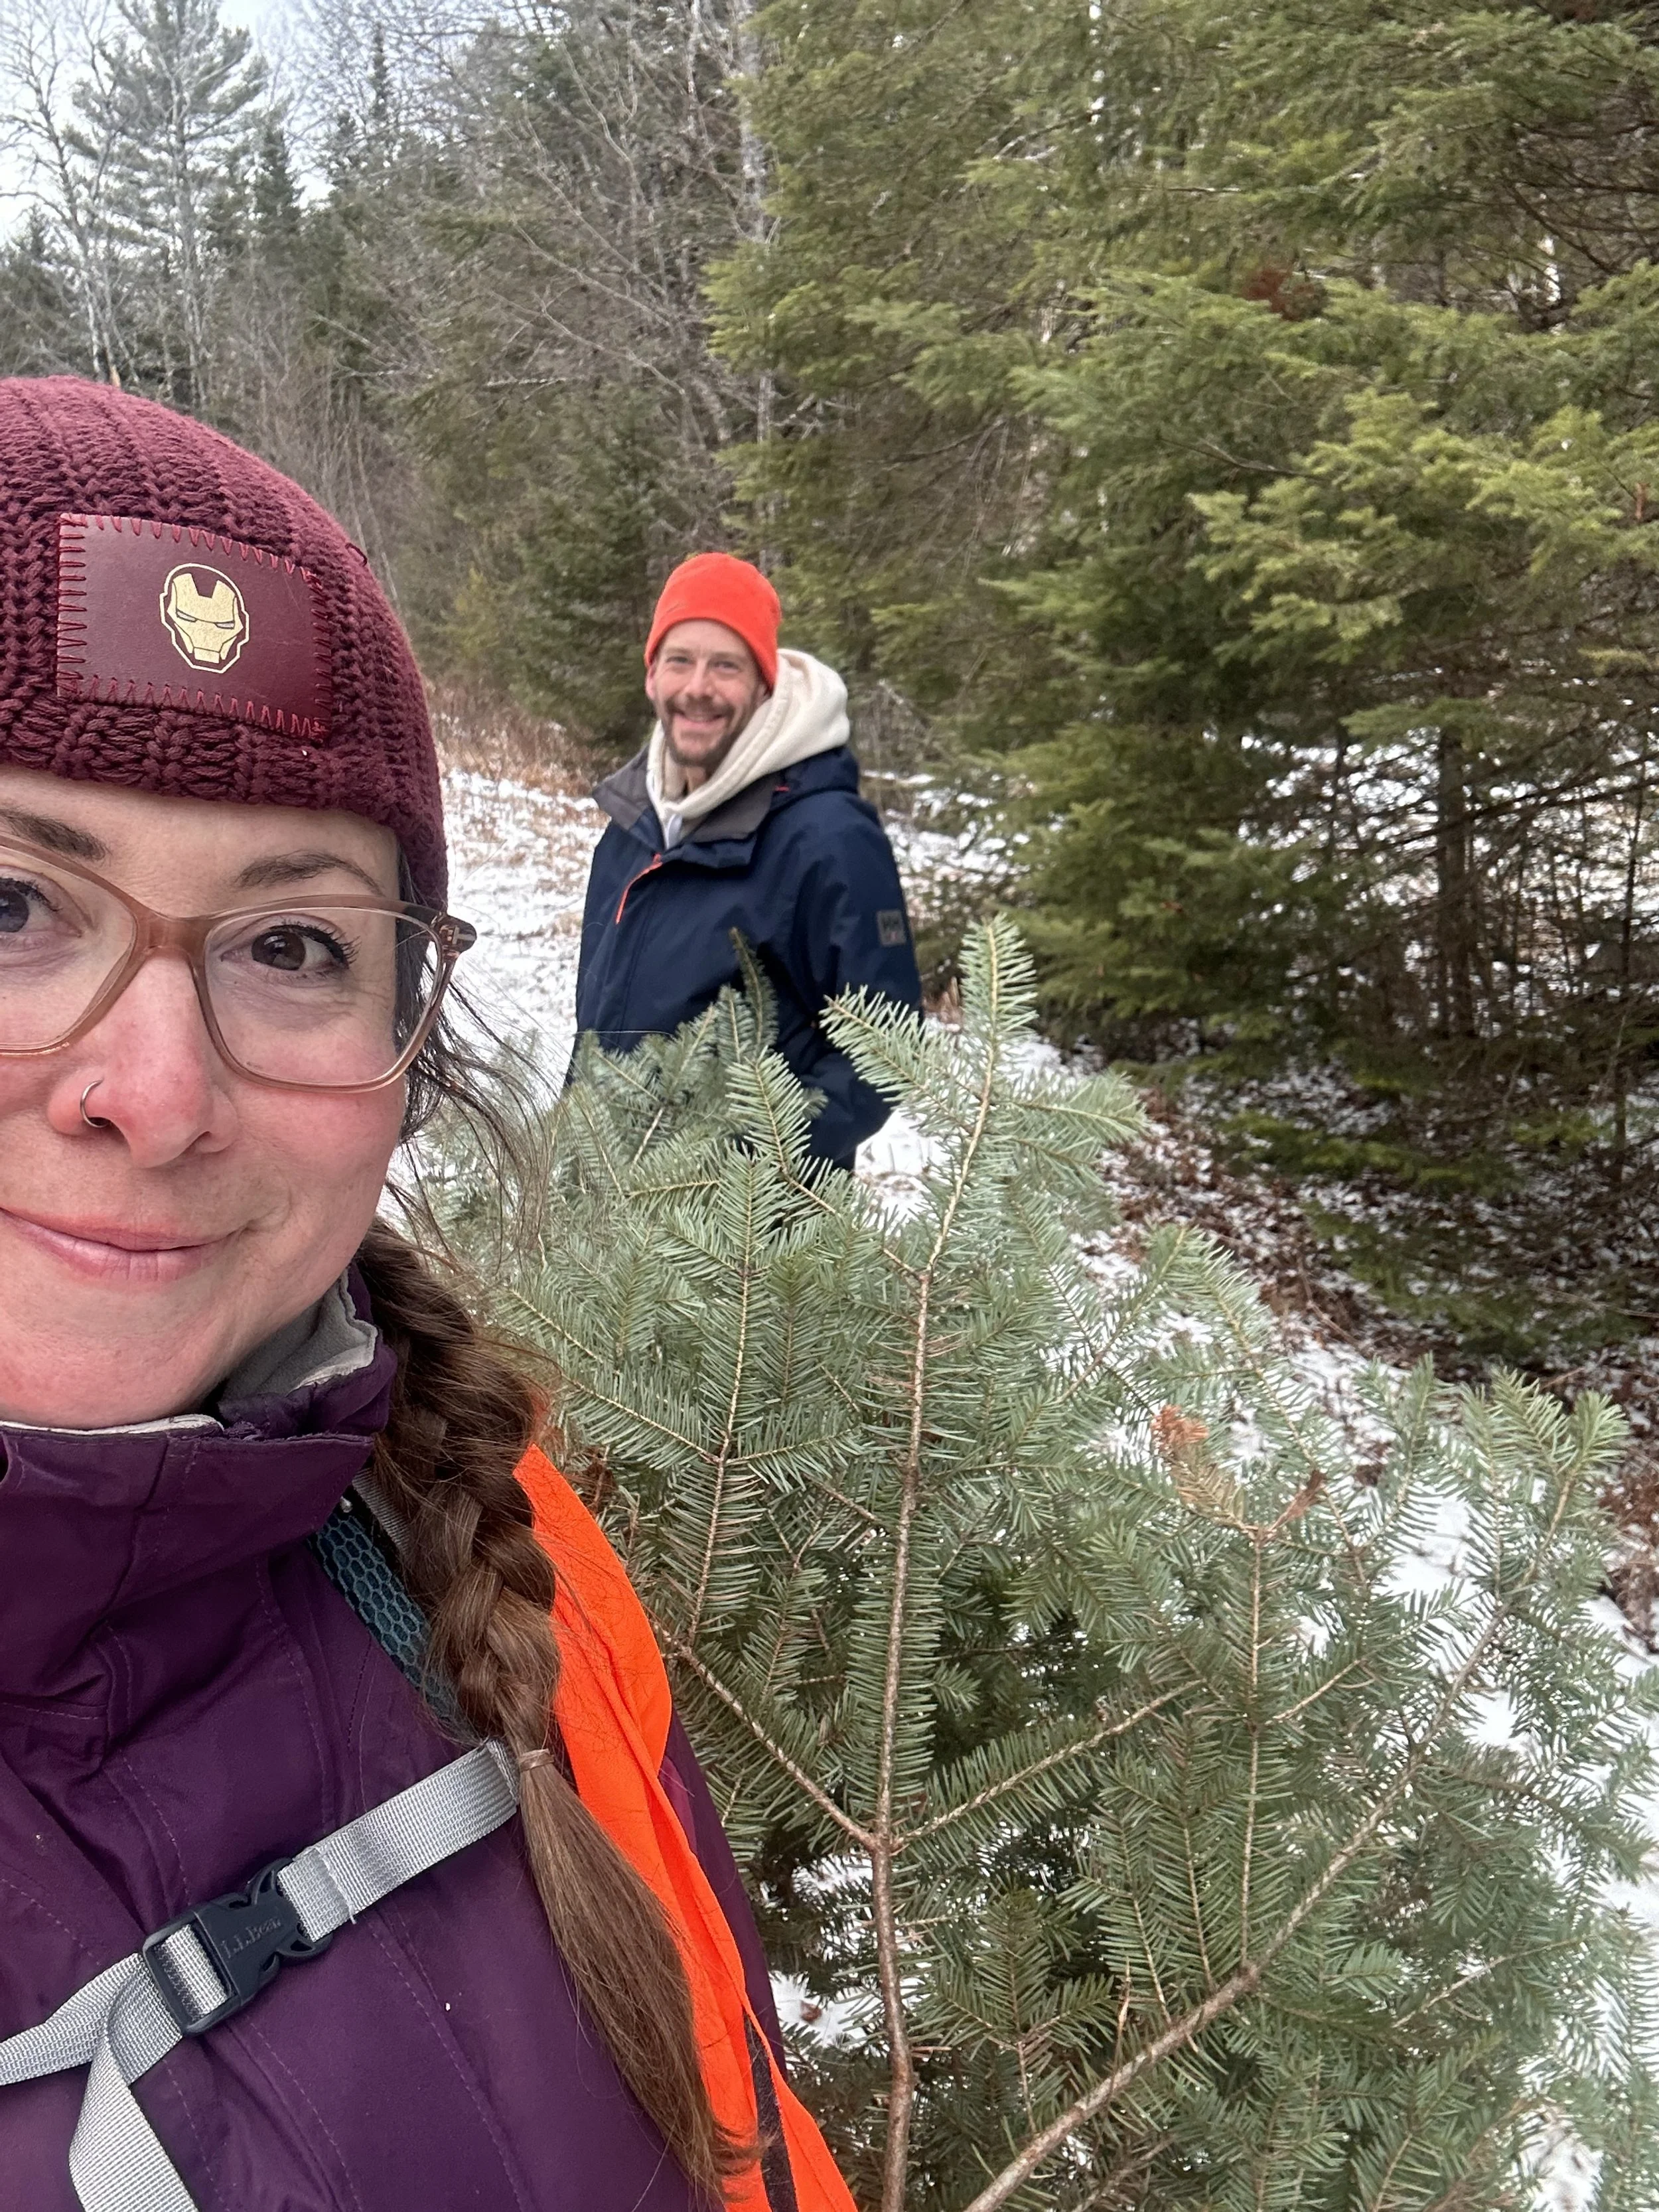
Cutting Down a Christmas Tree in NH White Mountain National Forest
Looking for your own Clark Griswold moment? I have the adventure for you! Our adventure had better results than Clark’s. We remembered our saw and the tree fit perfectly in our home. How do you do this and where do you go? Read on my adventure friends for tips so you will be able to create your magical holiday memories!
You need a permit to cut down your Christmas tree. They are easy to acquire through the White Mountain National Forest website or you can visit one of their offices. We had fun visiting the White Mountain visitor center in North Woodstock, NH (200 Kancamangus Highway). There is a lot of info to see here and the folks working were very helpful. The permit is only $5.

There are rules to cutting down your own tree. If you get your permit in person they will review them for you. If you’re a planner, like me, it is nice to know beforehand. Here are the rules to know in advance:
You have to be 100 feet from- a paved road, picnic area, campgrounds, trailhead or developed recreation areas, and water bodies.
You have to be 50 feet from a dirt road
No power tools hand saws only
Only one tree per household and they are not to be cut for resale
Trees have to be smaller than 6 inches in diameter at chest height
Leave the remaining stump less than 10 inches
Remember your hand saw or ax and ties for the roof! We used the ties for the surfboard and paddle board. They were great at getting the tree secured to the car.

Your tree will not look like the ones you get at a store. Think of the one you will cut down to be a more wild version of the tree farm tree. Ours and the ones we saw are a bit more sparse and maybe a little uneven in parts. I like to think that our tree has character. I kind of love that you can see the trunk, as it is not a very full tree. When we hung our ornaments it had more depth and its quirkiness was just perfect for us. Plus the memories you will have!

Bring gloves. Also something we learned from Clark Griswold. The trees have a lot of sap and the gloves helped us not be stuck to everything the rest of the day!

Most importantly have fun! It is a cool outdoorsy activity for the entire family.

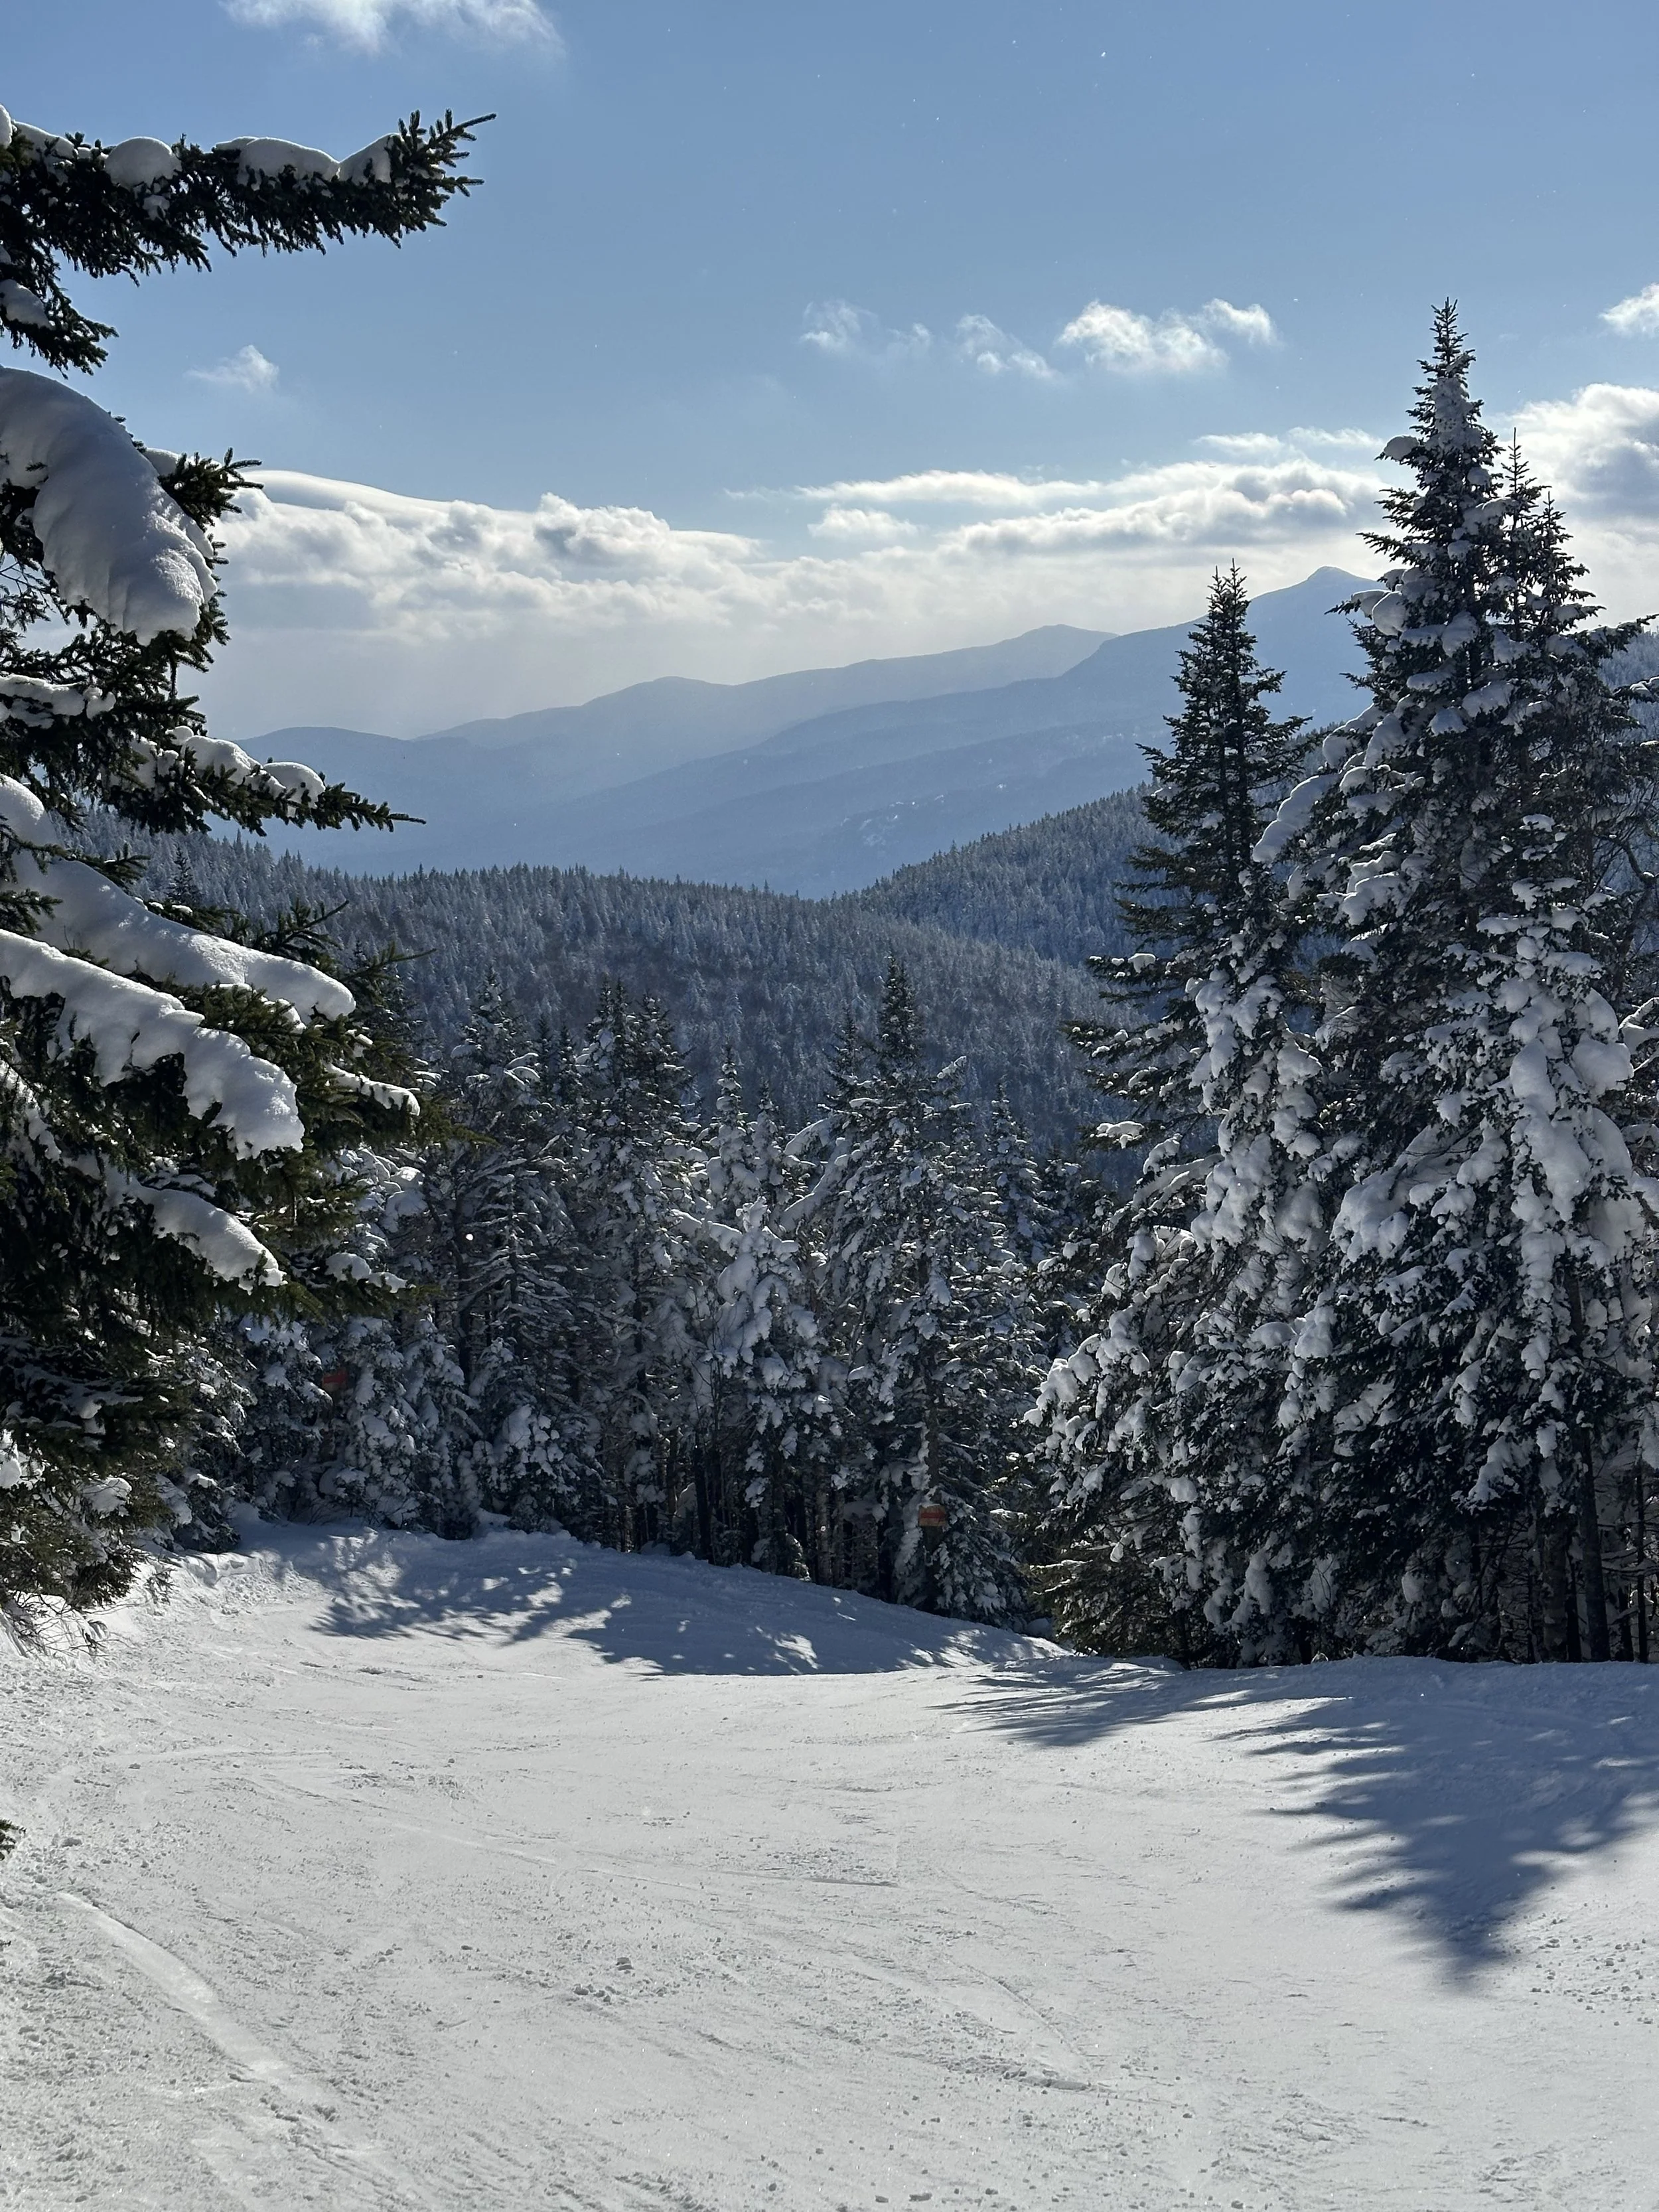
Be Prepared for Winter Hiking — Even in the Fall🍂
How to be ready for hiking in the white mountains this fall and winter
I know it might sound silly, it’s 50° at home, maybe even at the trailhead, the fall leaves are popping, and you’re ready to hit the trails. But here’s the thing: those gorgeous higher-elevation mountains? They don’t care what the weather is like at your house.
After a few recent rescues of hikers who were not prepared (clearly they haven’t listened to our podcast or read this blog 😉), it’s time to say it again: don’t underestimate the mountains, especially in Vermont, New Hampshire, and Maine.
If you haven’t already, check out Mike’s full blog on the Ten Essentials. I’m adding a few cold-weather and winter hiking must-haves to that list. But first, a quick refresher:
Map
Headlamp
Sun protection
First aid kit
Multi-tool or knife
Matches or lighter
Emergency blanket
Extra food
Extra water & purification method
Extra clothes
Now let’s talk about a few extra essentials for New England hikers heading out in fall or winter.

Layer Like a Pro (a Warm, Dry, Cozy Pro)
The right layers can make or break your hike. Here’s the golden rule: no cotton. Go for synthetic materials like polyester, or even better, merino wool, it’s my favorite when it’s really cold. Mike has a saying and I am adopting it: there is no bad weather only bad clothing, listen to him he is correct, this time. We have a rule. Start the hike slightly cool, you warm up as you hike. But always have layers ready to go. No one wants to be shivering! Here’s my layering strategy:
Base Layer: Something moisture-wicking.
My favorites are the Lululemon Swiftly Long Sleeve 2.0 Tech Shirt and the LLBean Women’s Cresta Midweight 250 Crew Top.Mid Layer: Something warm and breathable.
I rotate between old race long sleeve tech shirts and my favorite, the Patagonia R1 Air Fleece Hoodie. LLBean also makes some solid fleece options.Pants: I live in my Athleta Fleece-Lined High-Waisted Stash Leggings — warm, stretchy, I love these leggings so much!
Outer Layer: Something weather-resistant. My go-to is an LLBean Classic Puffer Jacket. Mine was an outlet find (of course), but this one is very similar to what I wear all winter.
Socks: Smartwool Hike Targeted Cushion Mid Crew Socks. Warm, comfy, and they last forever. I wear mine year round. It is also not a bad idea to have an extra pair in your bag.
“It’s Just Fall… Do I Really Need All That?”
Short answer: yes.
Even if it feels mild when you start, temperatures can drop fast as you climb. It might be a crisp fall morning at the trailhead and a snowy, icy wonderland at the summit. As I’m writing this, Mt. Washington already has snow!
So along with the ten essentials, toss some extra layers & winter extras in your bag just in case:
Microspikes: These should really be the 11th essential. If you listened to our Mt. Pemi episode, you know the rule — always carry a backup pair! If one breaks mid-hike, you’ll be glad you did.
Check out Kahtoola Microspikes from LLBean. We have scored deals at EMS or Amazon.It is the time of year to add your favorite hat and gloves to your bag. No one wants cold fingers!

Watch the Weather
Don’t just rely on your iPhone app. If you’re hiking in the White Mountains, check the Mount Washington Observatory Higher Summit Forecast — they’re the experts for a reason.
And if the weather looks questionable, turn around. Seriously. The goal is to get back to your car safely, not to make the evening news. The mountain will still be there next weekend!
Also, it gets dark fast this time of year. Bring a headlamp (and extra batteries) because “stumbling through the woods in the dark” is not the kind of adventure you want.
Final Thoughts
Always tell someone your hiking plans before heading out. Be smart, be prepared, and don’t be a statistic. Check out the NH safe card. This is only vaild in NH, Maine & Vermont do not offer this type of card.
The mountains are magical, but they can also be merciless. So pack your layers, check the forecast, grab your spikes, and get out there safely. Winter and fall hiking can be incredible, as long as you respect it.

Hiking the top rated hike in NH
Hiking Lincoln and Lafayette the top rated hike in New Hampshire!
Lincoln & Lafayette – Franconia Ridge Adventure
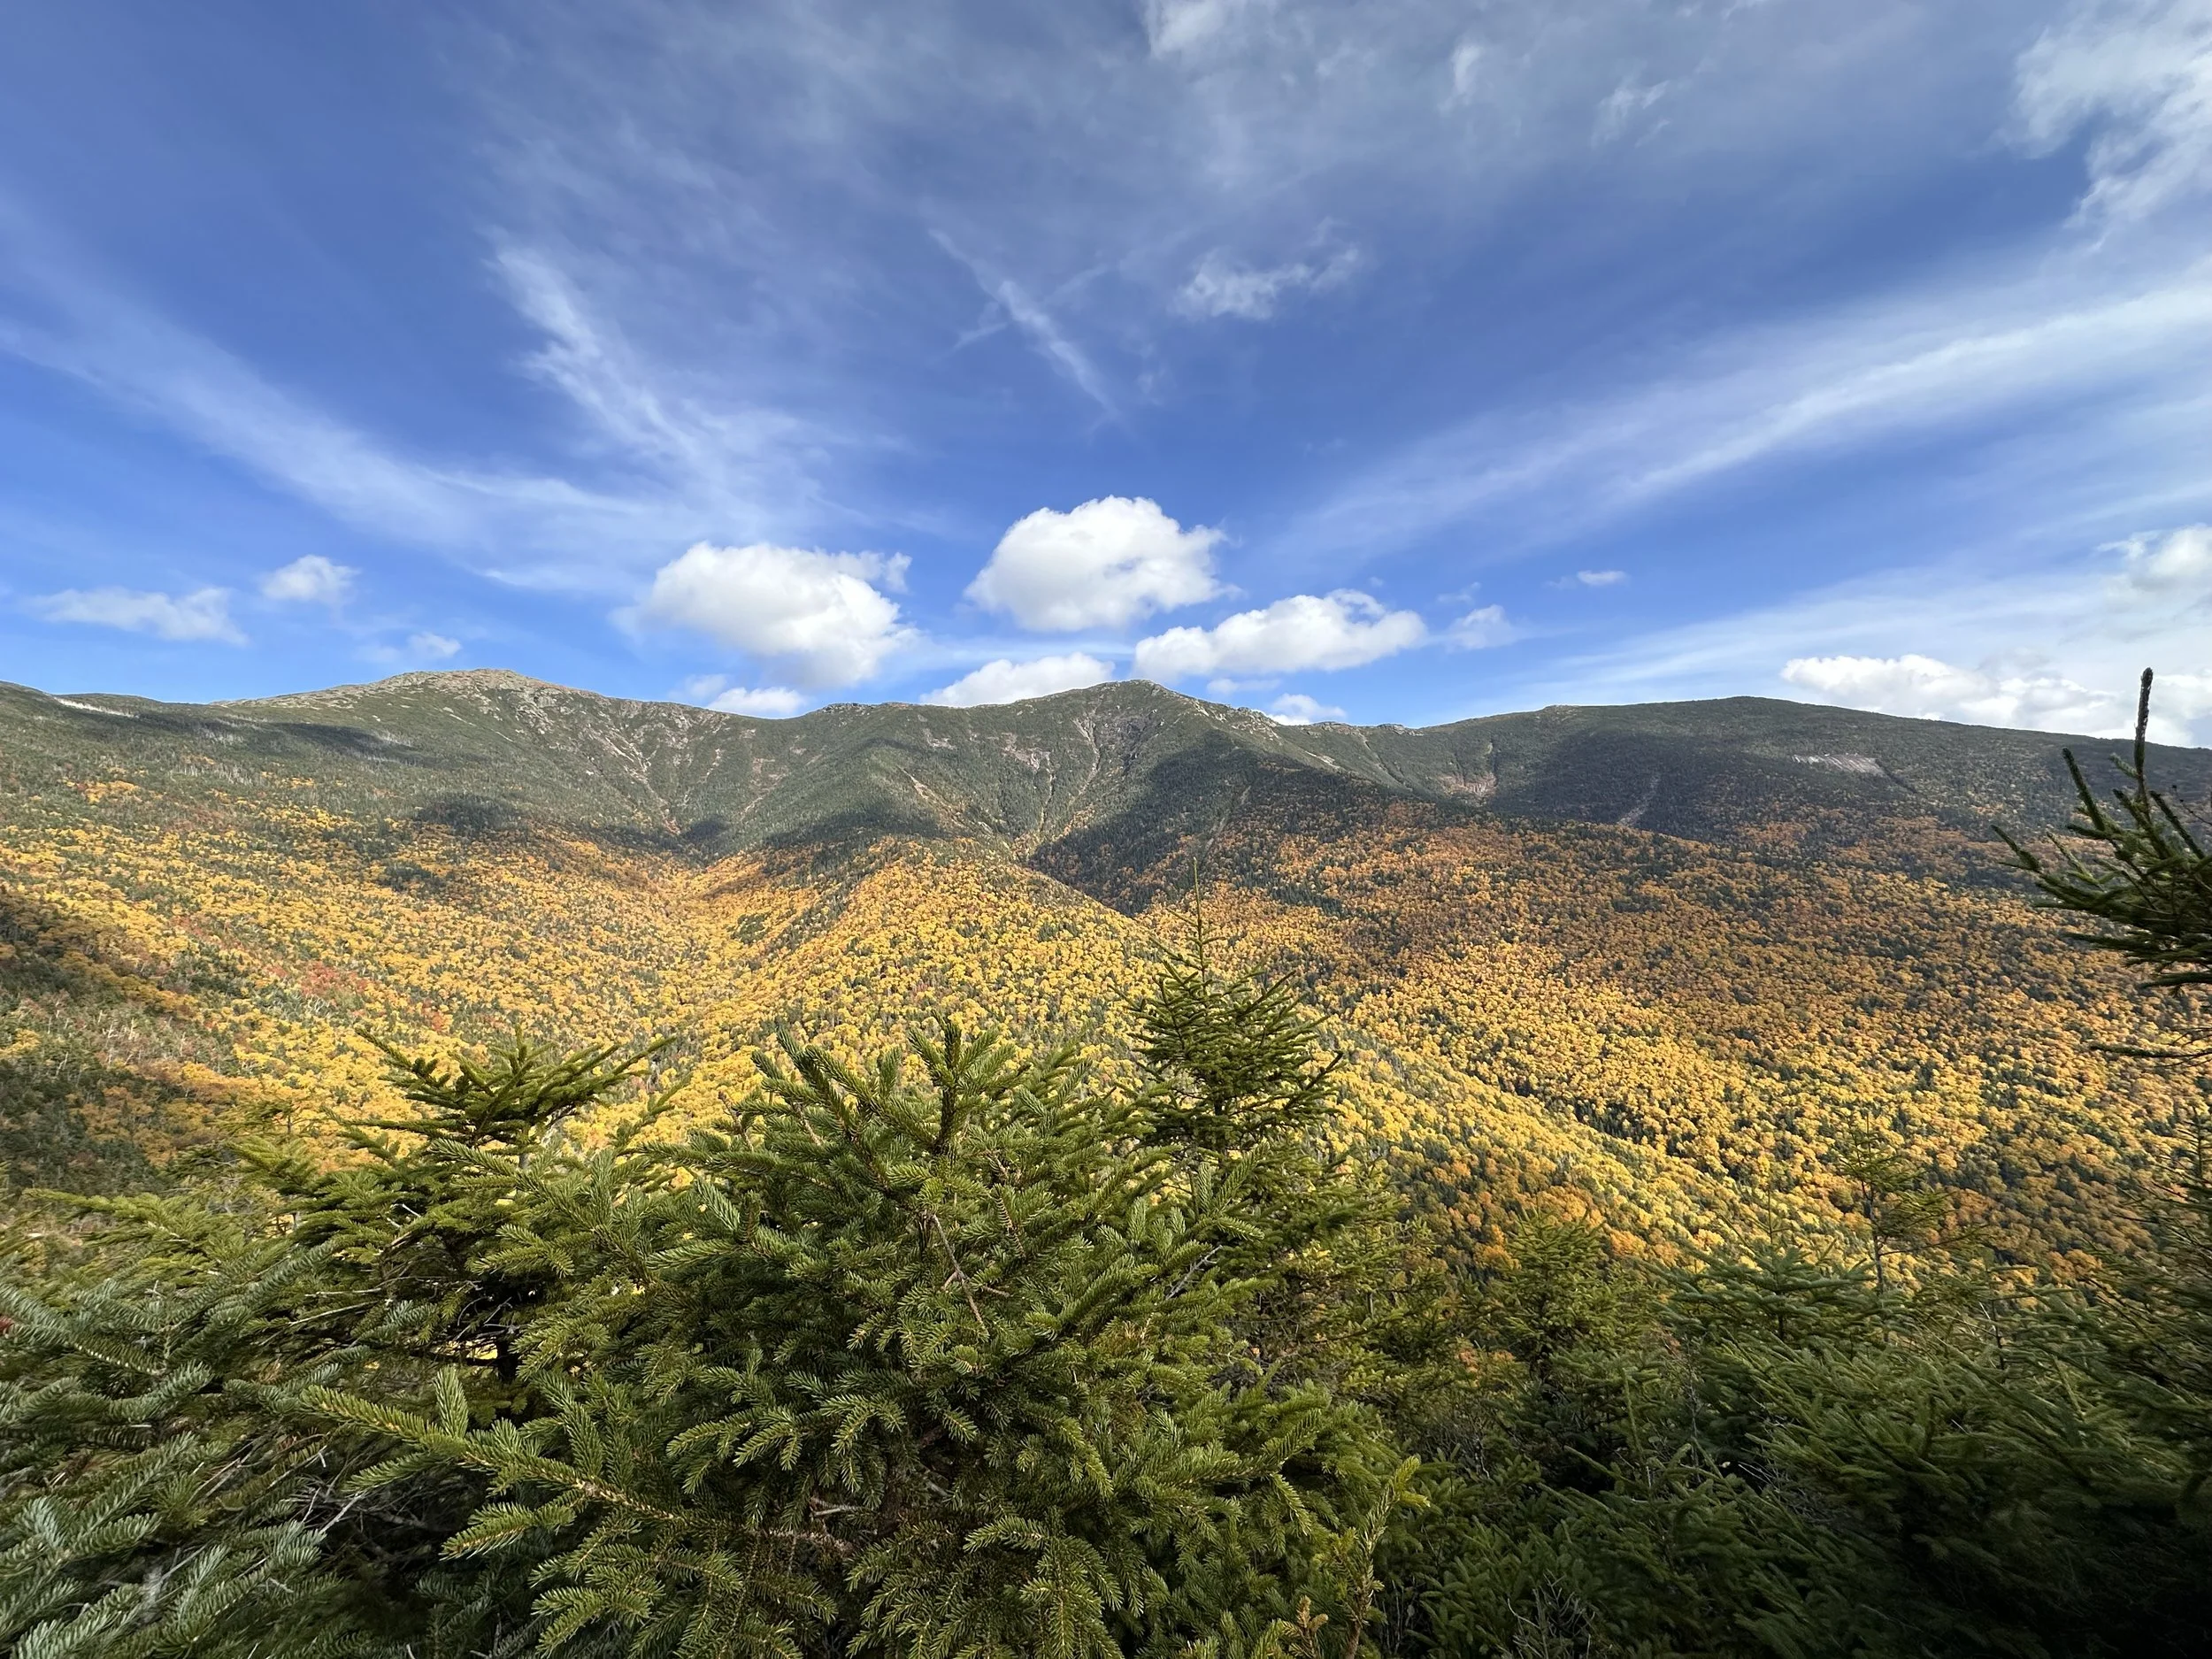
Lincoln & Lafayette mountains. The view of what you’ve hiked as you start to go down.
New Hampshire’s top-rated hike - Lincoln & Lafayette on the Franconia Ridge!
This was our biggest hike of the year, they’re two of New Hampshire’s tallest mountains, the 6th and 7th highest peaks in the state. These were also numbers 6 and 7 for us out of the 48 4,000-footers. We started this 4,000-footer journey about a year ago, saying we’d just “dip our toes in” and see how it went. We weren’t sure if we’d actually work on finishing the list… but here we are, checking them off one by one. Will we complete it? Only time will tell.
Let’s get into this incredible hike… and yes, it really is incredible!

We always take a picture of the trail head start sign, when we begin. Helps to know how long it takes us
Early Start
We started early. Because this hike is super popular. Like, “parking-lot-fills-before-sunrise” popular. We hit the trail around 5:45 a.m. with our headlamps on. Total hiking time: about 8½ hours (not counting breaks). I’m a slow hiker, so we planned for roughly a mile per hour, and for once, our timing was spot on.
Starting in the dark is always a little eerie, especially in northern New Hampshire. There are a few water crossings early on, and as the sun started peeking through the trees, we could see some pretty waterfalls. It’s been a dry year, so nothing too tricky, but the last waterfall (about 1.3 miles in) is the showstopper. That’s also your final water crossing. The rocks there are steep and could be slippery if wet, so I was very thankful for the dry day!


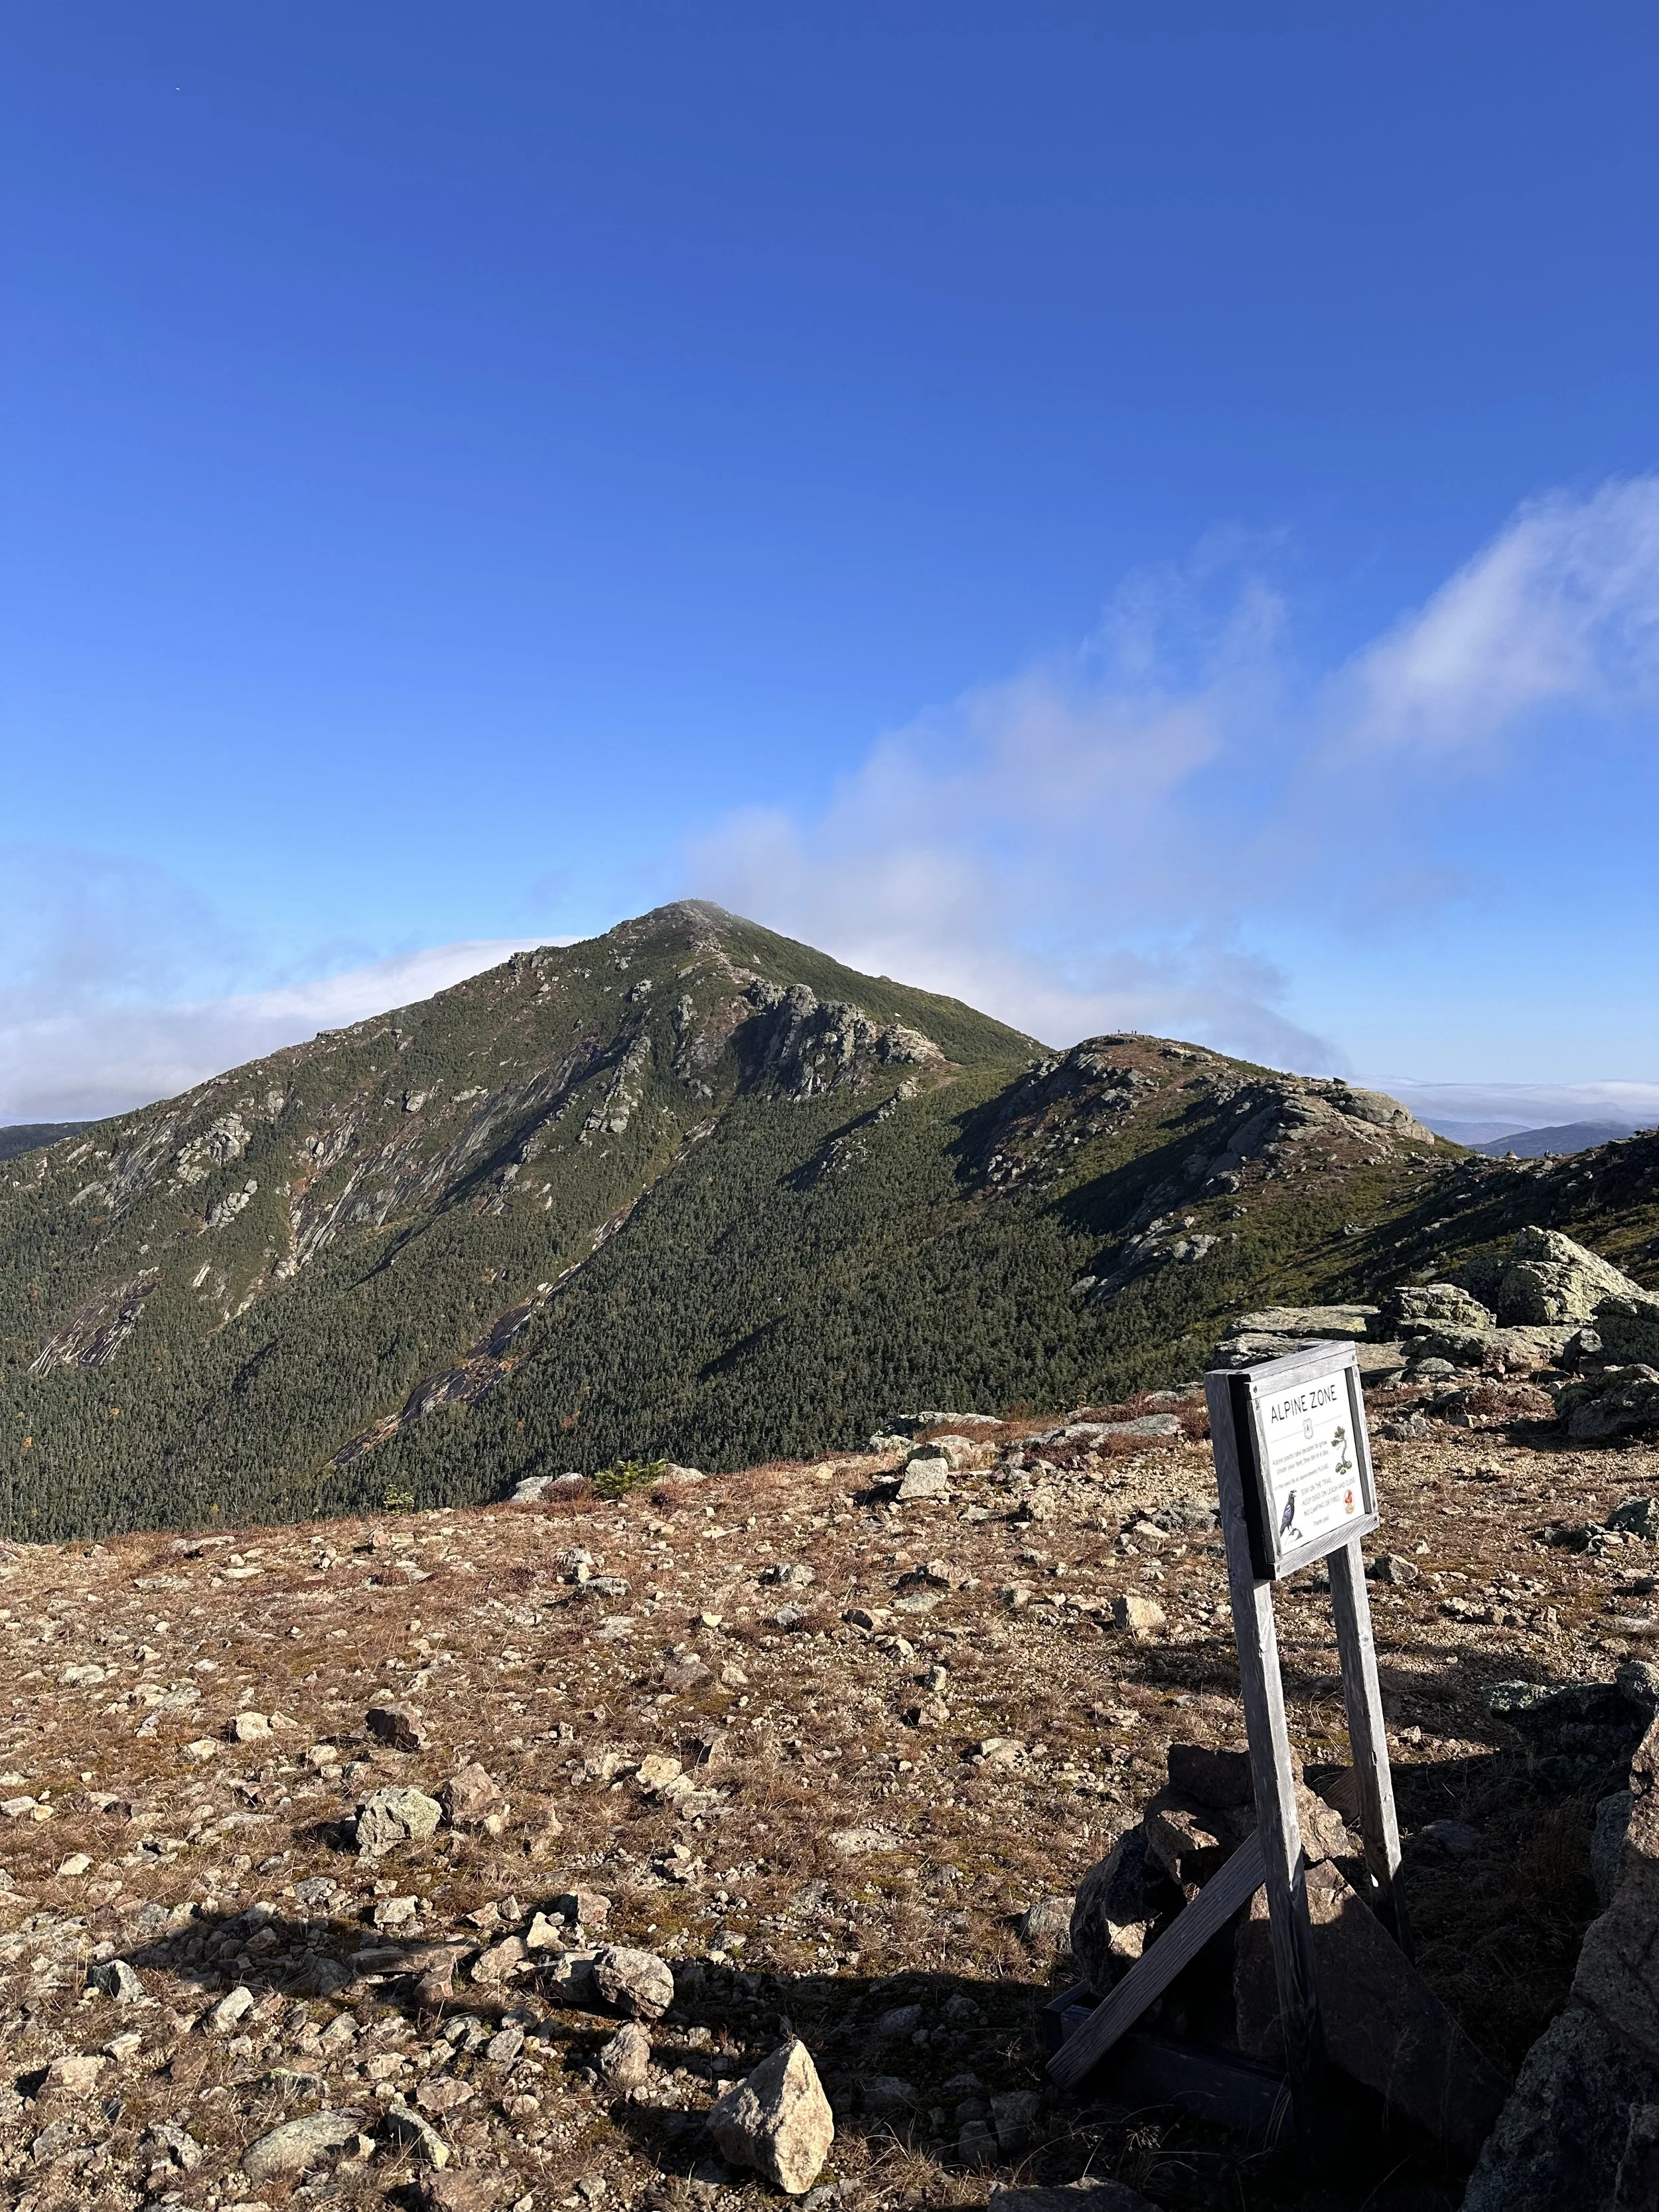
Climbing Toward the Ridge
At about 3 miles, you hit the alpine zone! Almost to your first peak (though not one of the official 48). You’ll reach Little Haystack around 3.2 miles in.
By this point, the faster hikers were catching up, and the trail started getting busier. Don’t forget to look behind you occasionally (one of my hiking tips) Cannon Mountain starts peeking through the trees here. Starting now, the views basically don’t stop for over 2 miles. It’s unreal.
Little Haystack doesn’t count as a 4,000-footer because it lacks 200 feet of prominence. From here, you leave the Falling Waters Trail and join the Franconia Ridge Trail, which is part of the Appalachian Trail, so you might spot a few thru-hikers!
This ridge is where my camera roll exploded. Mt. Lafayette was covered in a moving cloud for a while, and it was pure magic.


Mt. Lincoln
We didn’t linger long at Little Haystack (it was crowded), so we pushed on. The first official 4,000-footer of the day, Mt. Lincoln (5,089 ft), is about 4 miles in, the perfect PB&J break spot.
From here, we could see what looked like the next peak…but surprise! It was a false summit (North Lincoln), another 4,000-footer that doesn’t count. It’s okay though, the ridge is stunning, and sometimes a little scary with those sharp drop-offs toward Cannon. I was very happy for clear weather.


Peak of Mt Lincoln in NH
Mt. Lafayette
The climb to Lafayette gets steep, we even had to use our hands a few times. The summit, at 5,250 ft, comes around 5 miles in. We stopped for another quick snack but didn’t stay long; the crowds were really catching up by now.
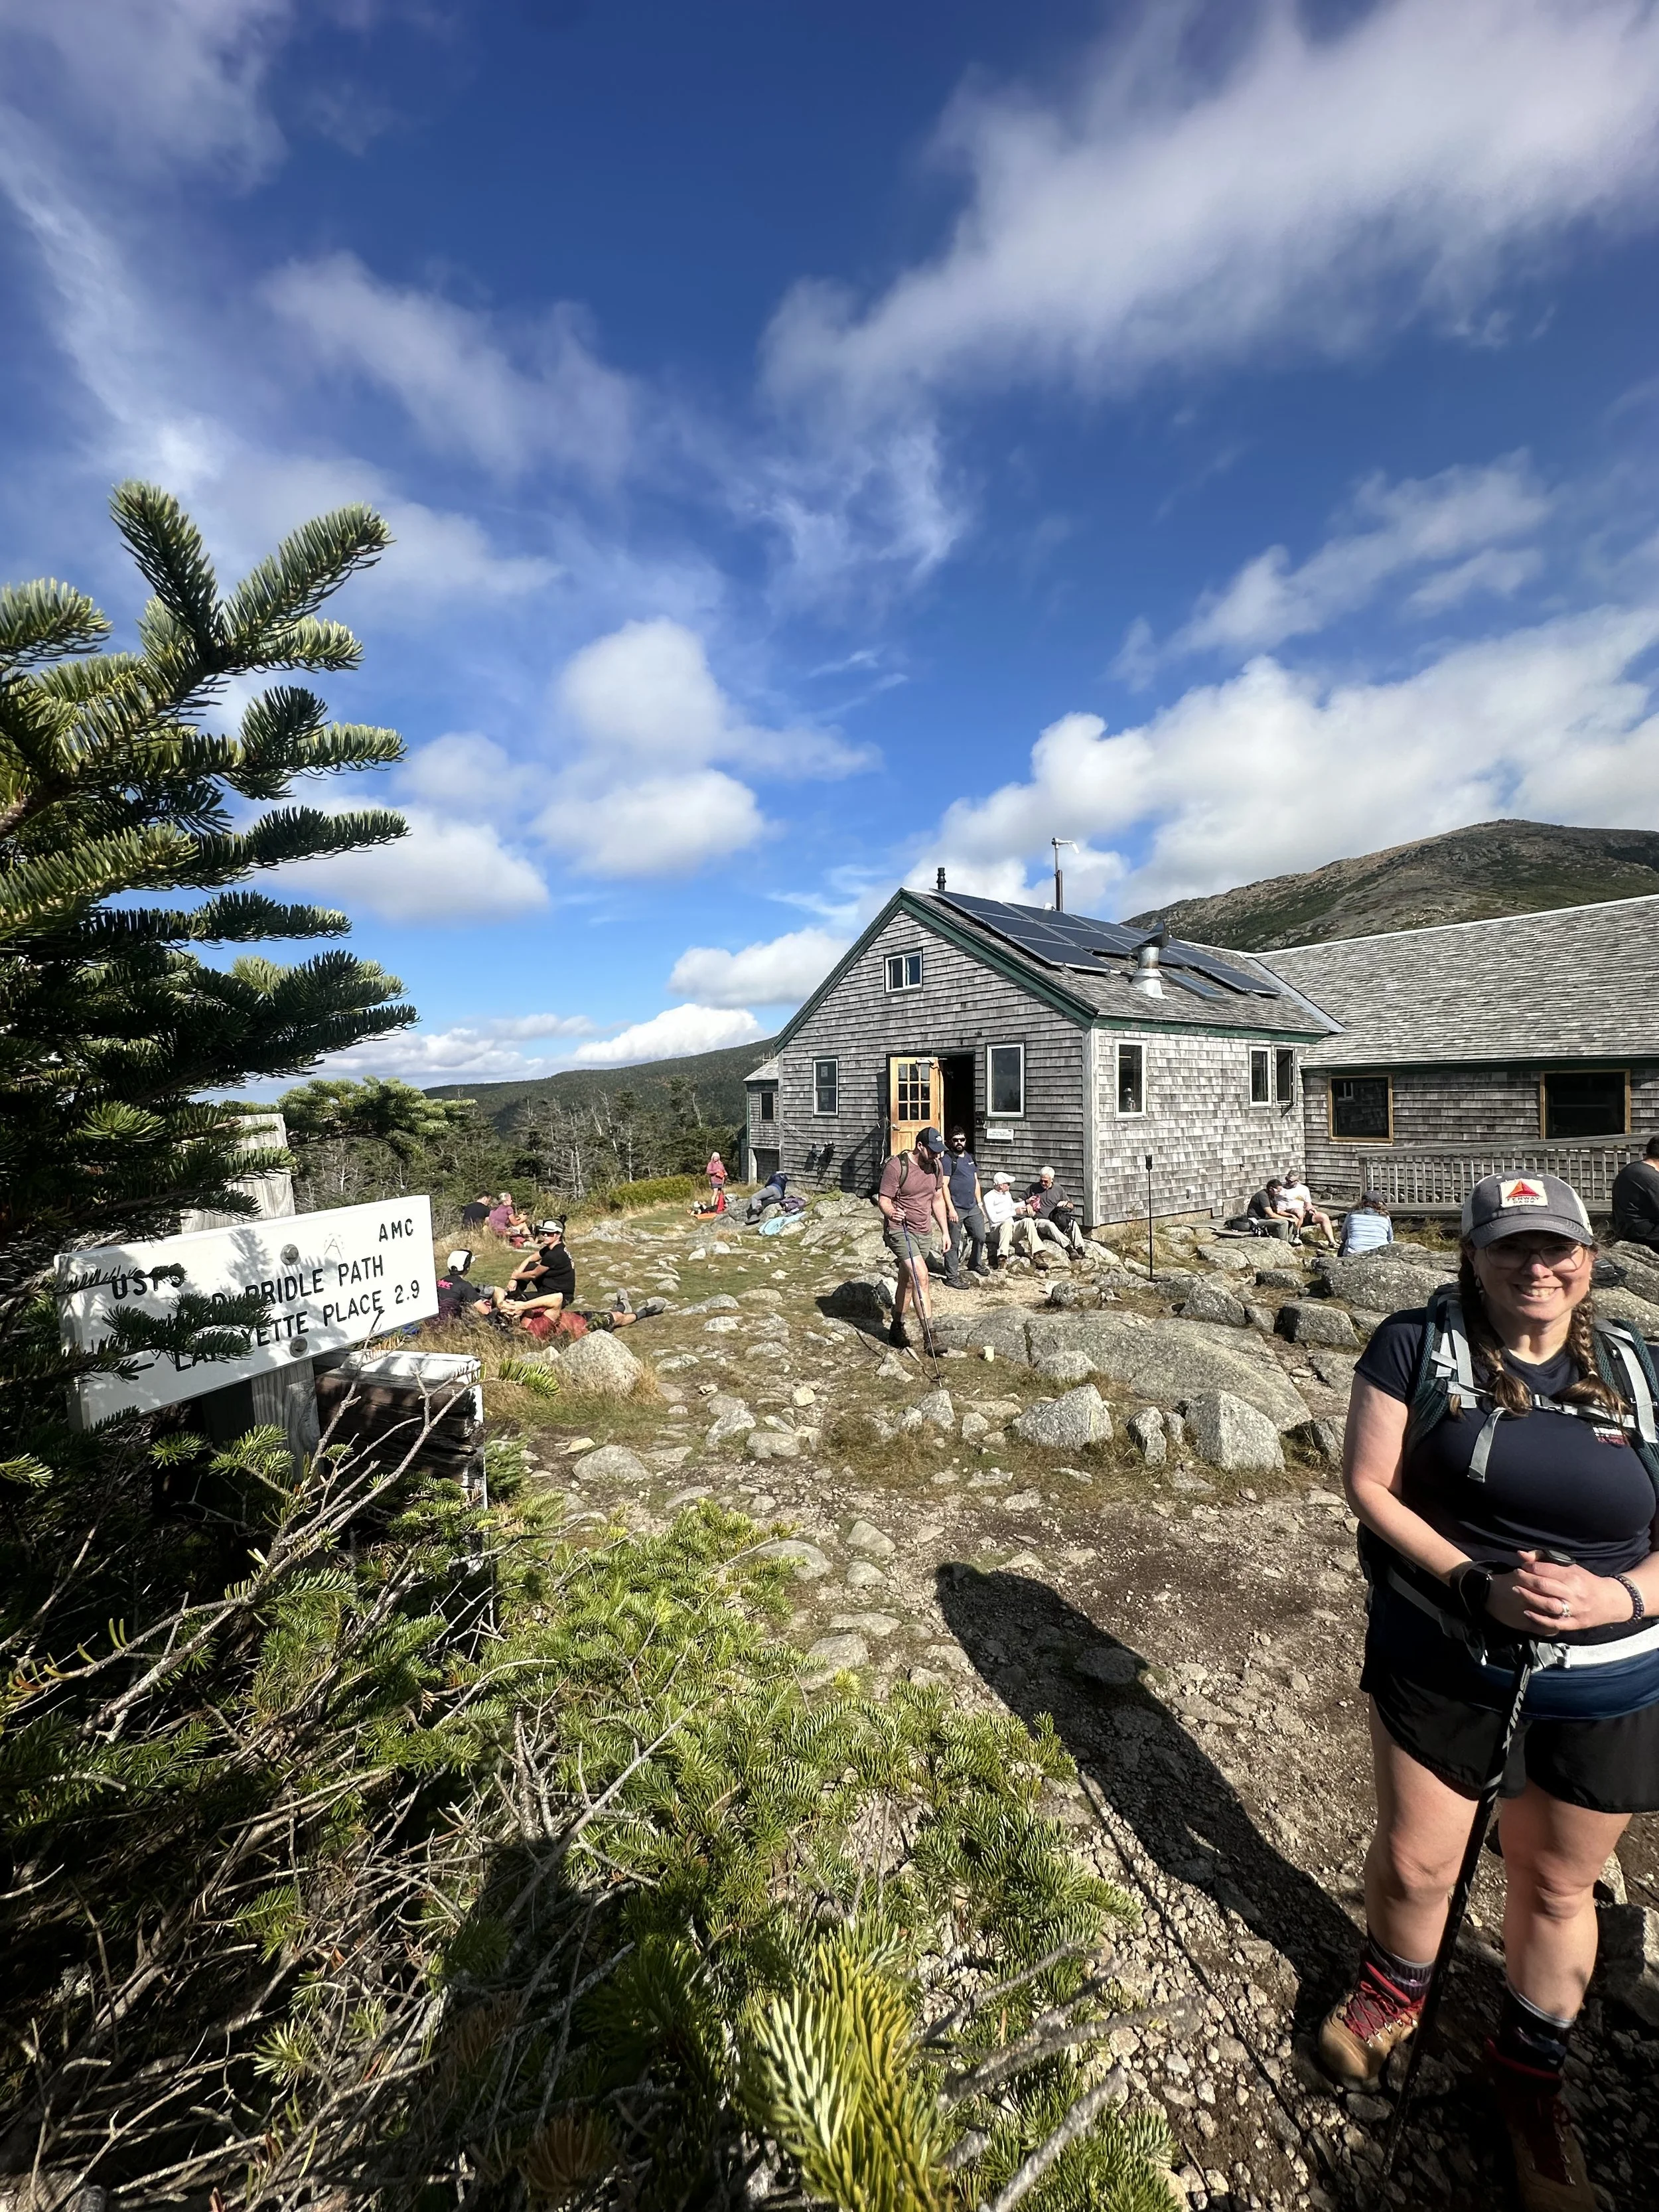
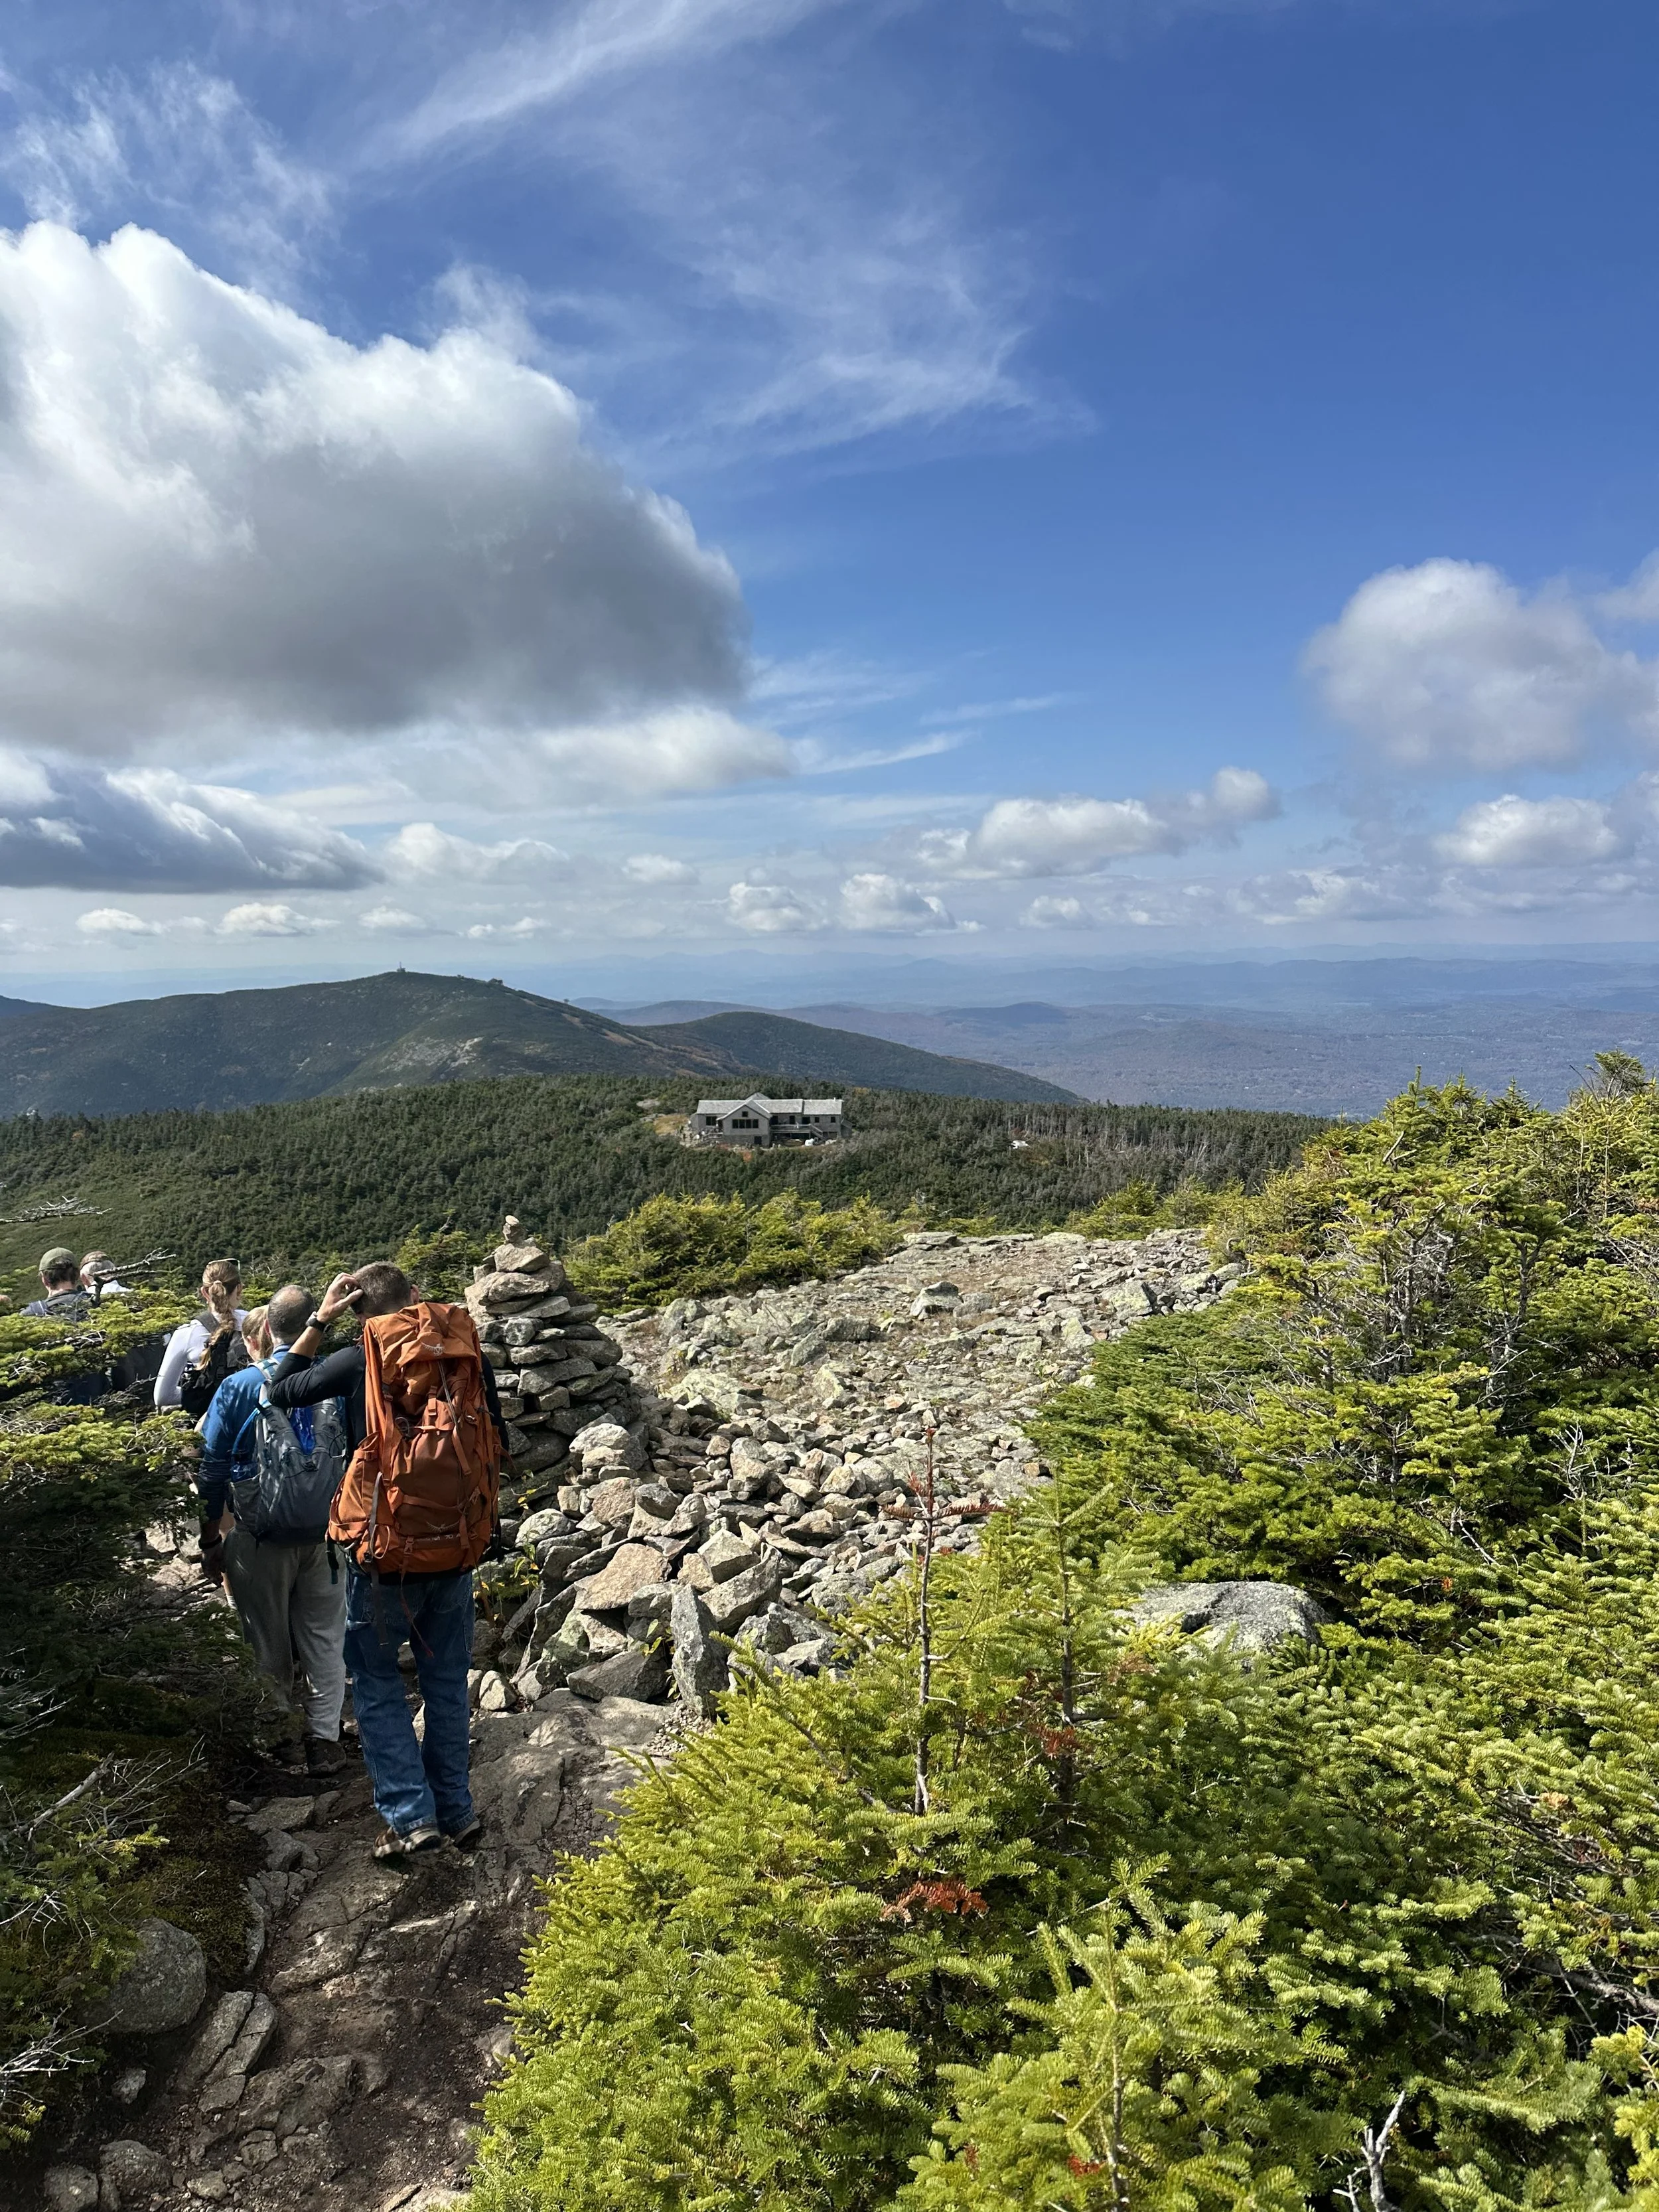
Then came the descent to Greenleaf Hut, about 1.1 miles away, though it looks closer (classic trail illusion). You go down, then up again (of course), before reaching the hut around 6 miles into your day.
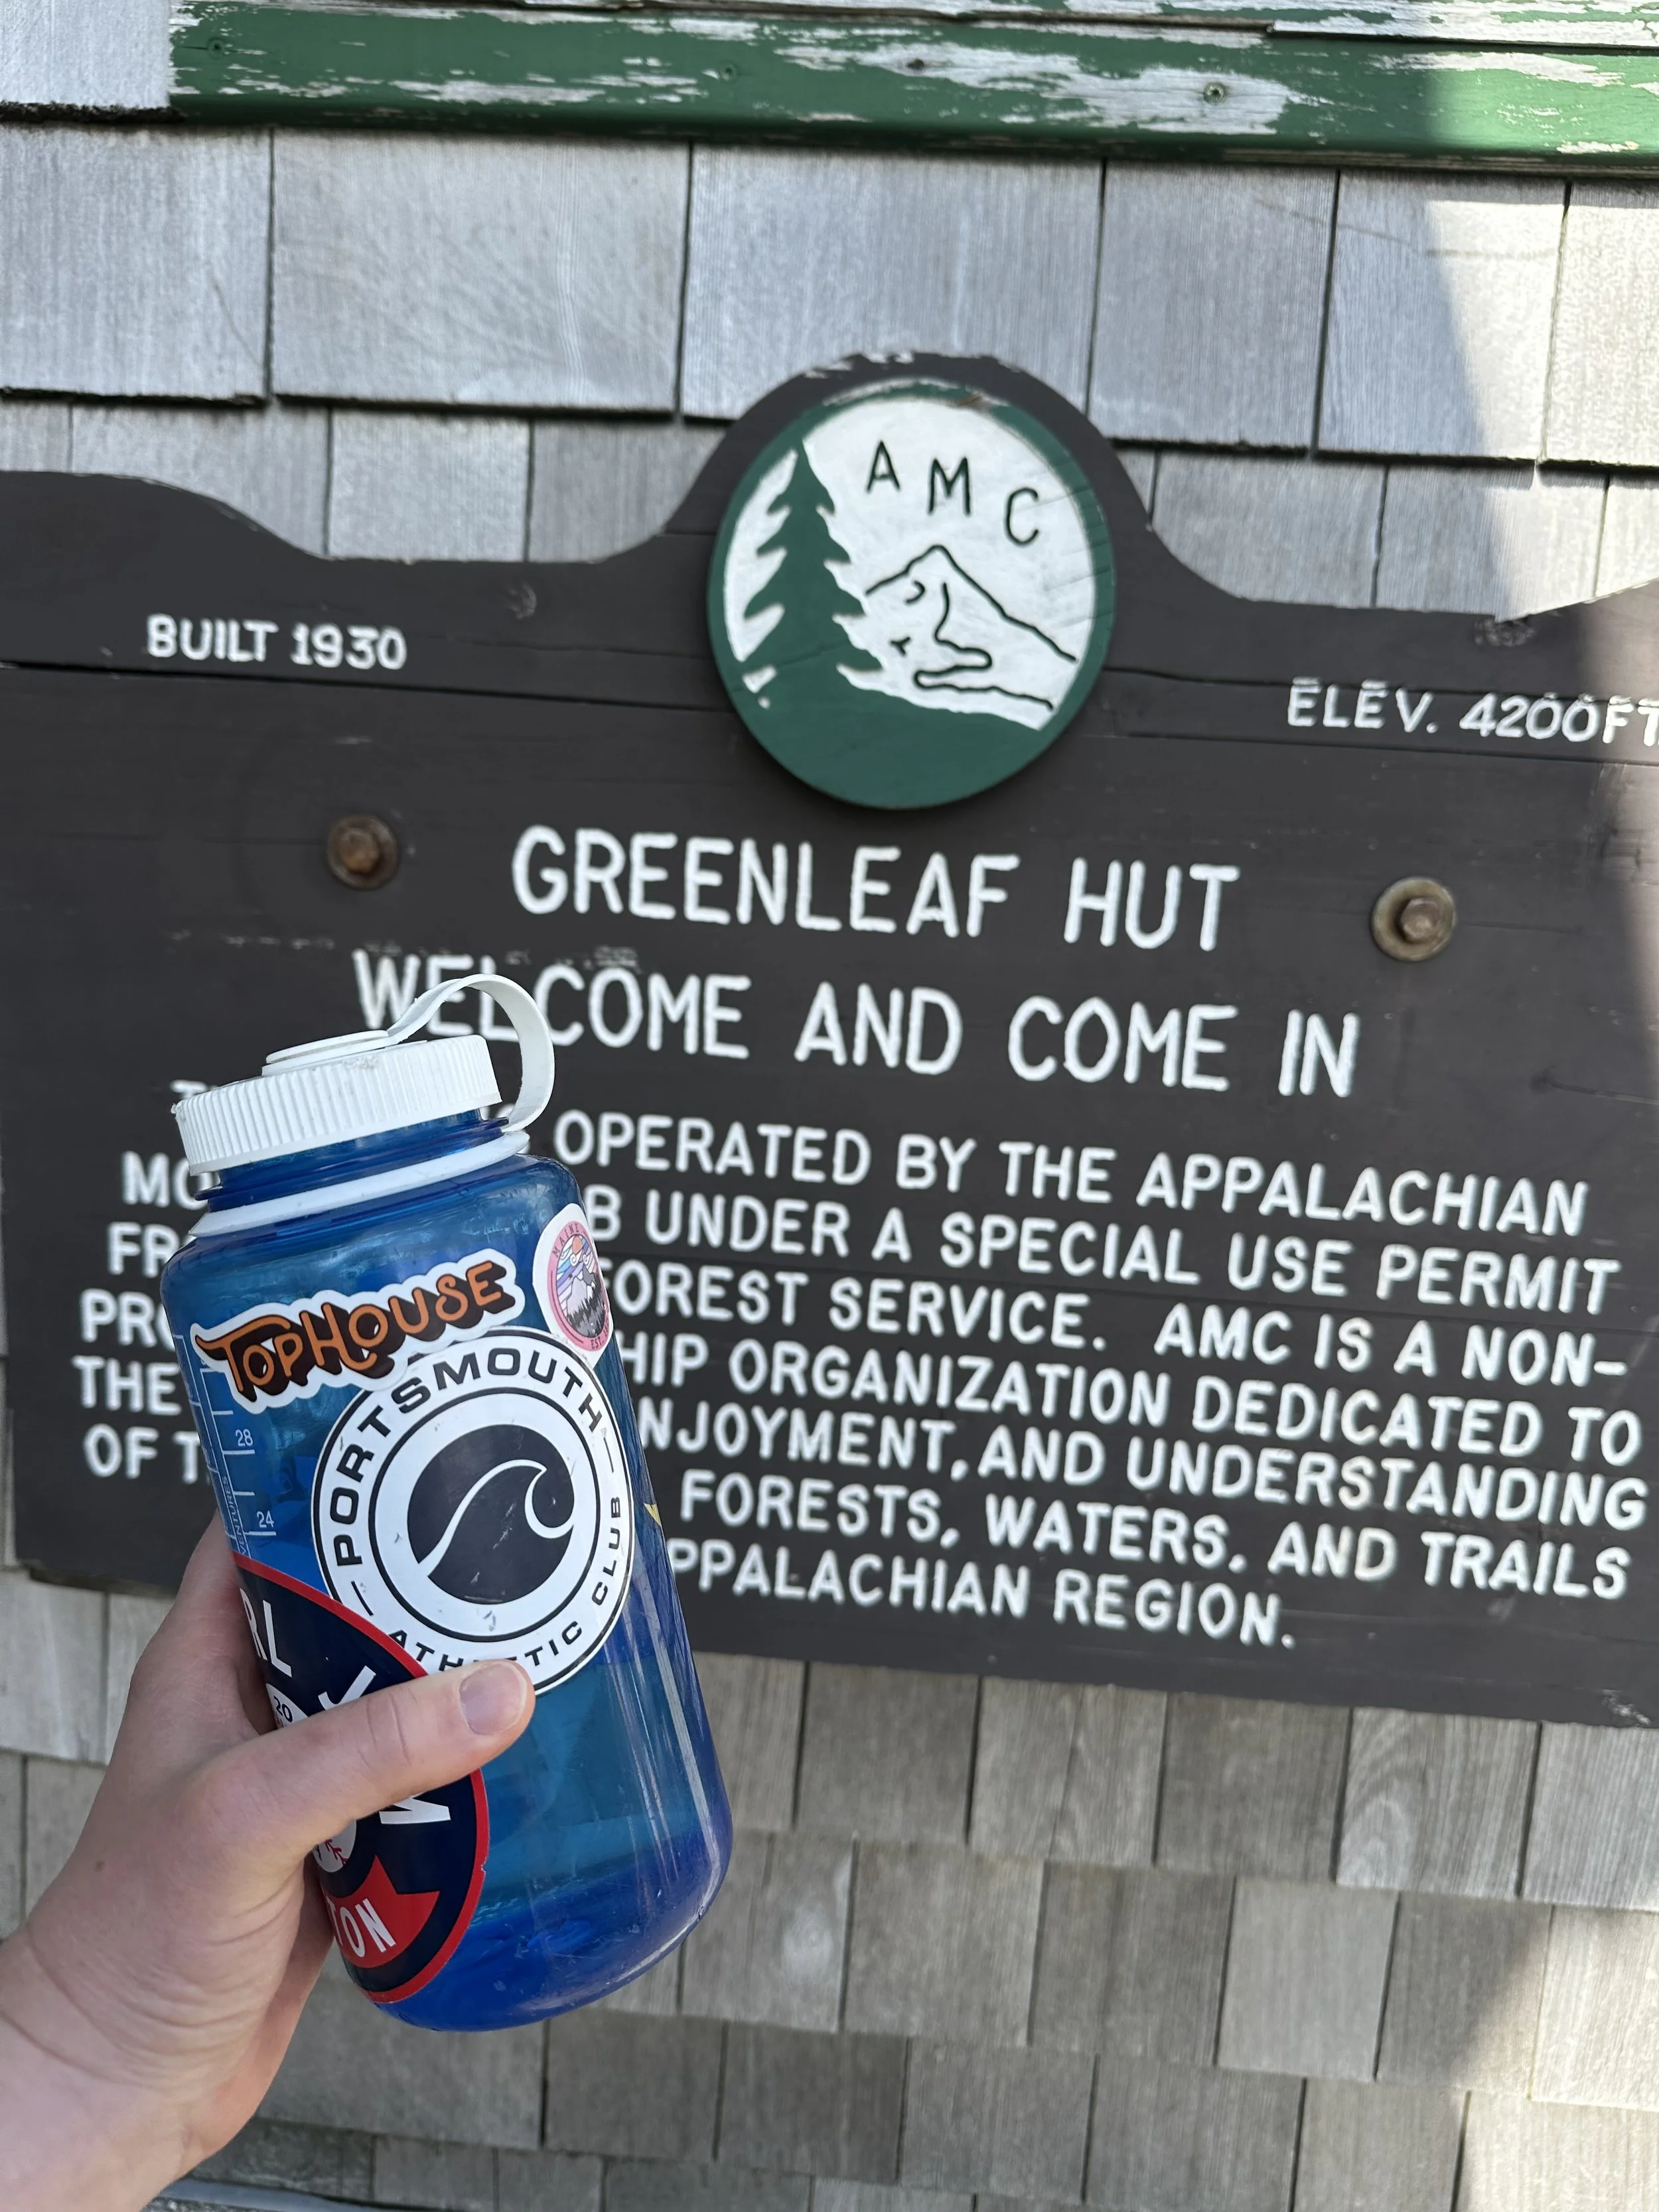
This seasonal hut is a gem, a great place for a bathroom break, water refill, or even a snack if they’ve got any left. The day we went, the baked goods were gone (tragic), but they were offering soup and cornbread for a small cash fee. Lesson learned: keep cash in you pack you never know when you can get trail treats!
They also have cold water refills. So refreshing after a hot climb.


The Descent
From Greenleaf, make sure you follow the Old Bridle Path down. Go the wrong way, and you’ll have a much longer day than planned. At this point, it felt like a hiker conga line, so I definitely wished we’d gone on a weekday.
You’re still at about 4,200 ft at the hut, which means there’s plenty of downhill left. This stretch follows Agony Ridge (aptly named), with slick, uneven rocks. I had a few “scoot down on my butt” moments here.
Being a slower hiker can be stressful when people are right behind you, especially when there’s no safe spot to step aside. One guy in particular had zero patience, basically flying past everyone. The next day I saw his post in a hiking group bragging about his speed. Let’s just say… I was not impressed.
If any speedy hikers are reading this I will pull over when it’s safe! Promise!


The Final Stretch
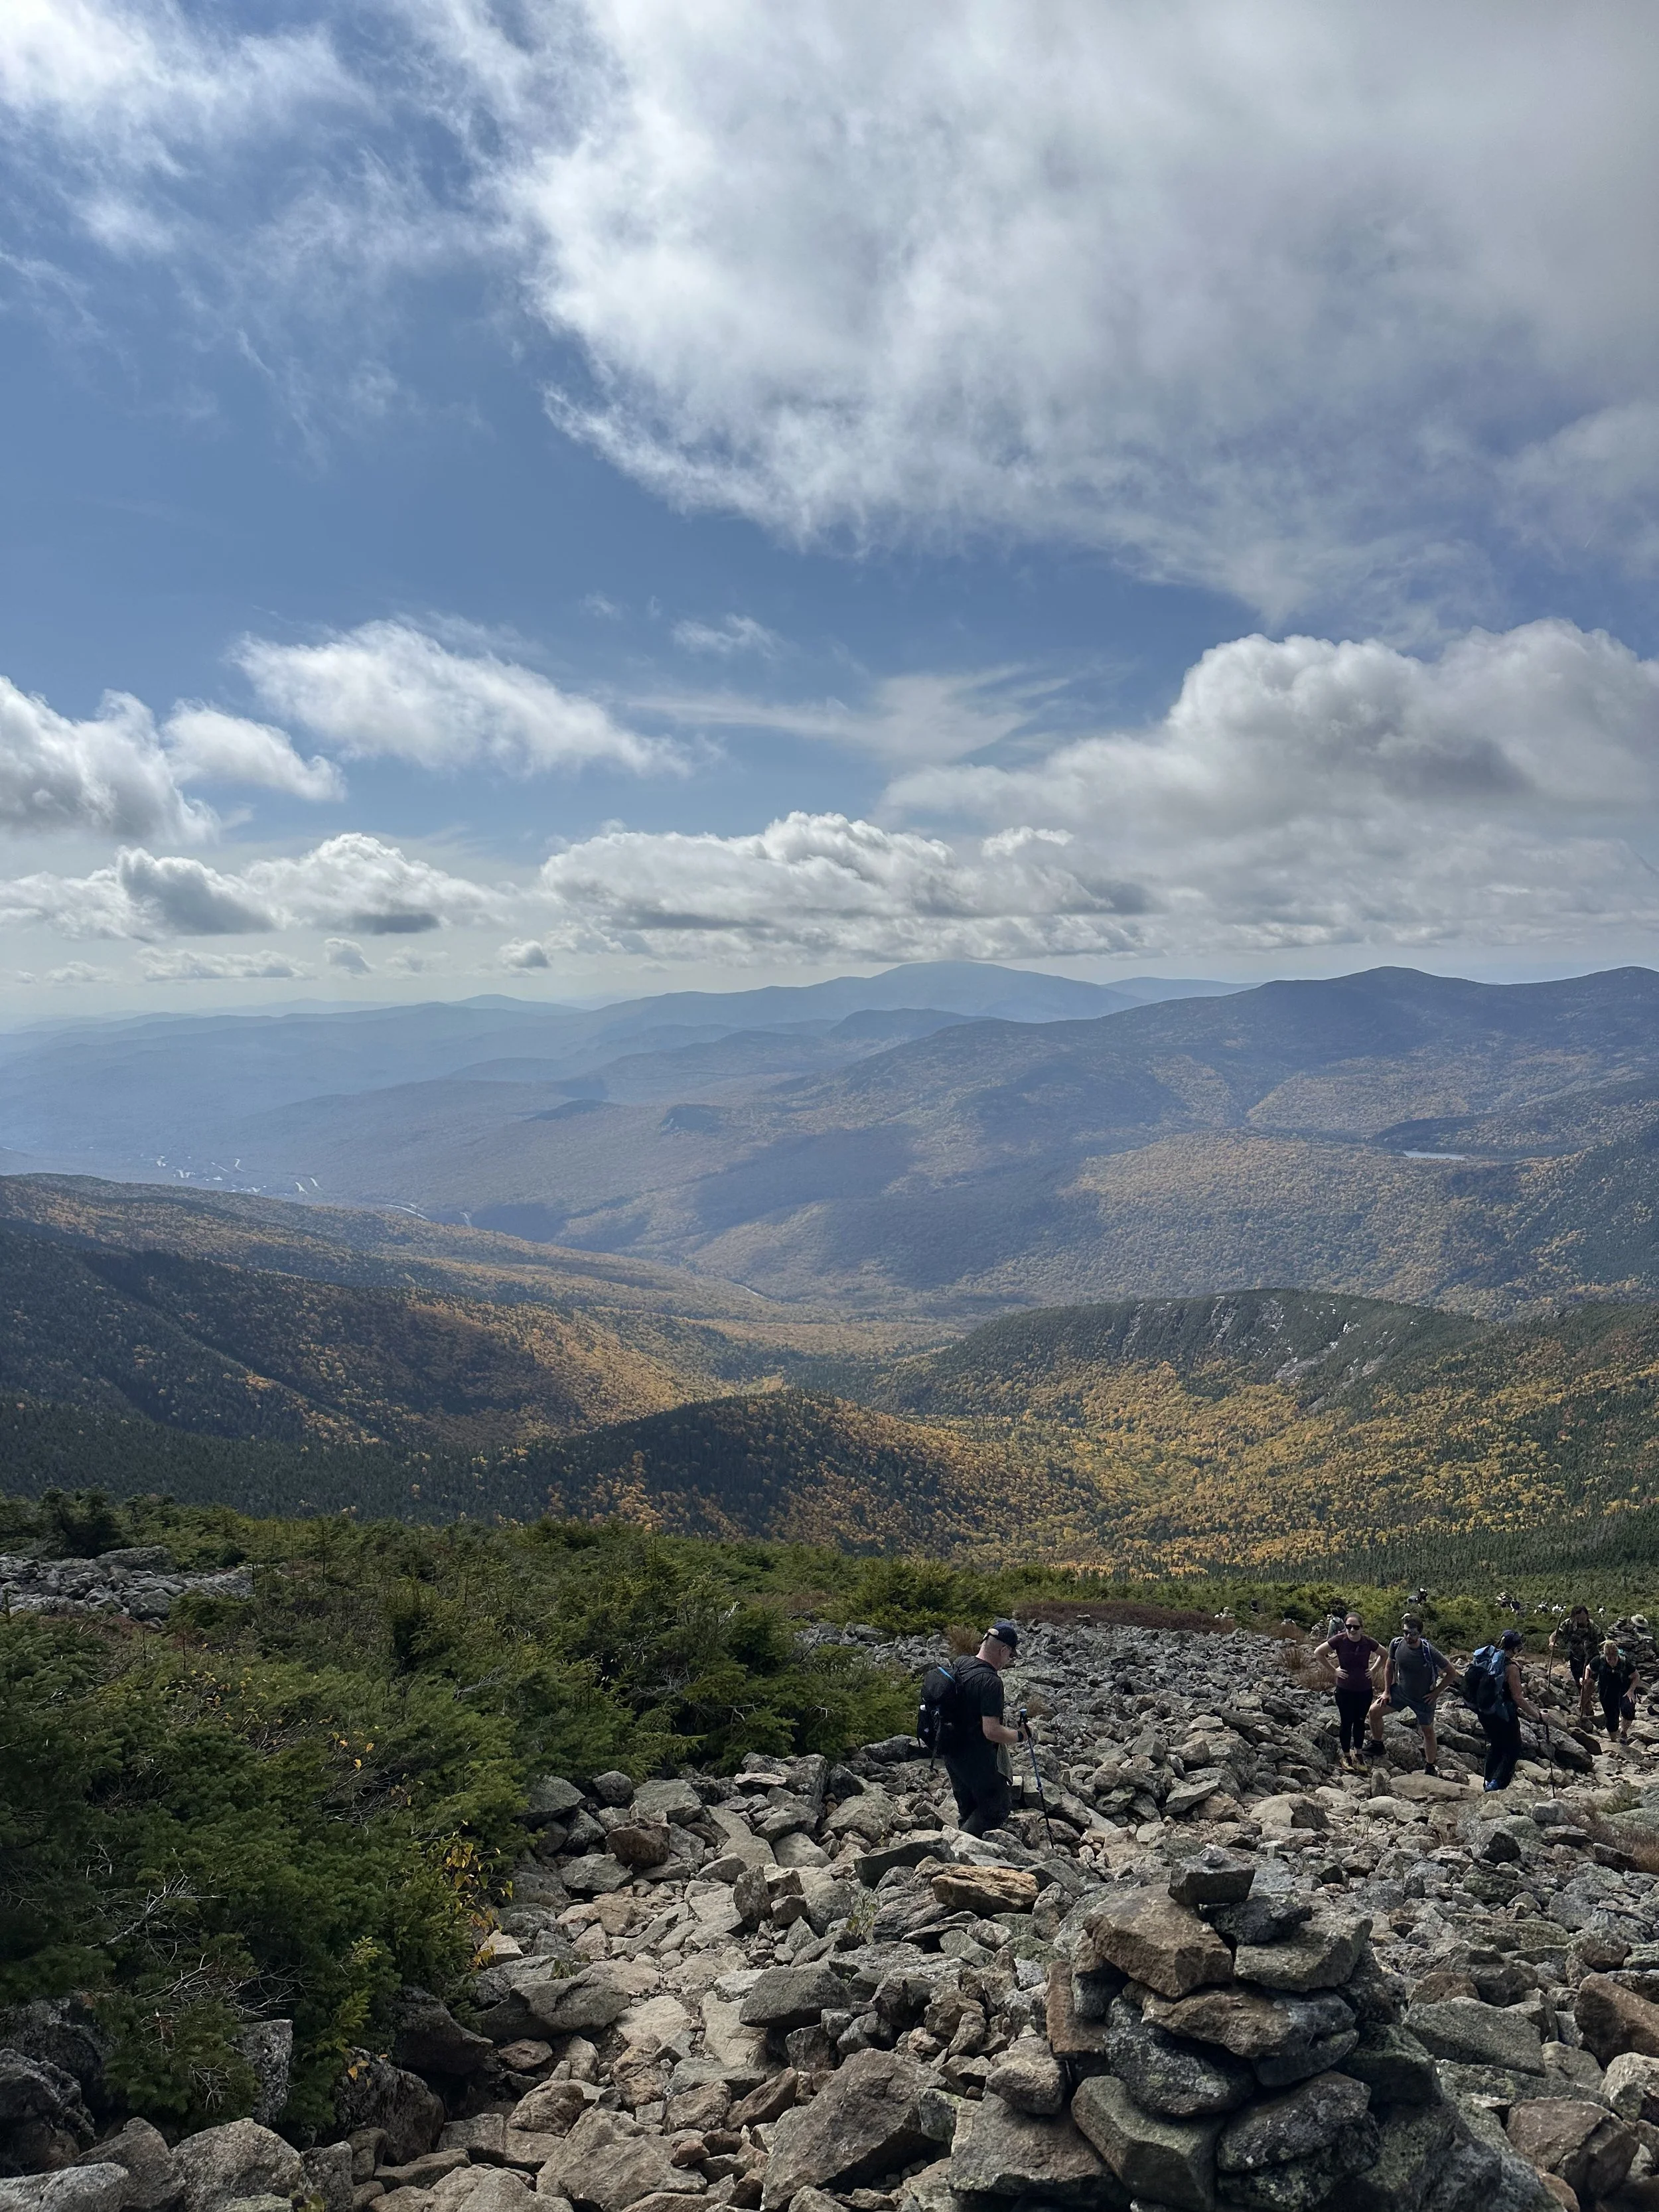
Before ducking back into the trees, you get one last stunning view of the ridge you just crossed. That “we just did that” moment? Pretty awesome.
At around 7.3 miles, you’re back in the woods and even though you think you’re almost done, there’s still 1.6 miles to go. The stairs on the descent tricked me into thinking we were close… but nope. Isn’t that always the case?
When we finally reached the parking lot, we saw the hiker shuttle vans that run between Cannon Mountain and the trailhead , a great option if the main lot is full (which it usually is on busy weekends).

What we just hiked behind us: Lincoln & Lafayette
Final Thoughts
This hike was absolutely amazing and I can’t wait to do it again, hopefully on a weekday next time.
Ratings:
⭐️ Views: 10/10 — jaw-dropping the entire way
💪 Difficulty: 9.5/10 — tough but not soul-crushing
🐶 Dog-friendly: For experienced hiking pups
🚻 Bathrooms: At the trailhead and at Greenleaf Hut
👧 Kid-friendliness: Not a beginner hike, best for experienced hikers or adventurous teens
If you love challenging hikes with unbeatable views, Lincoln & Lafayette deserve a top spot on your list.
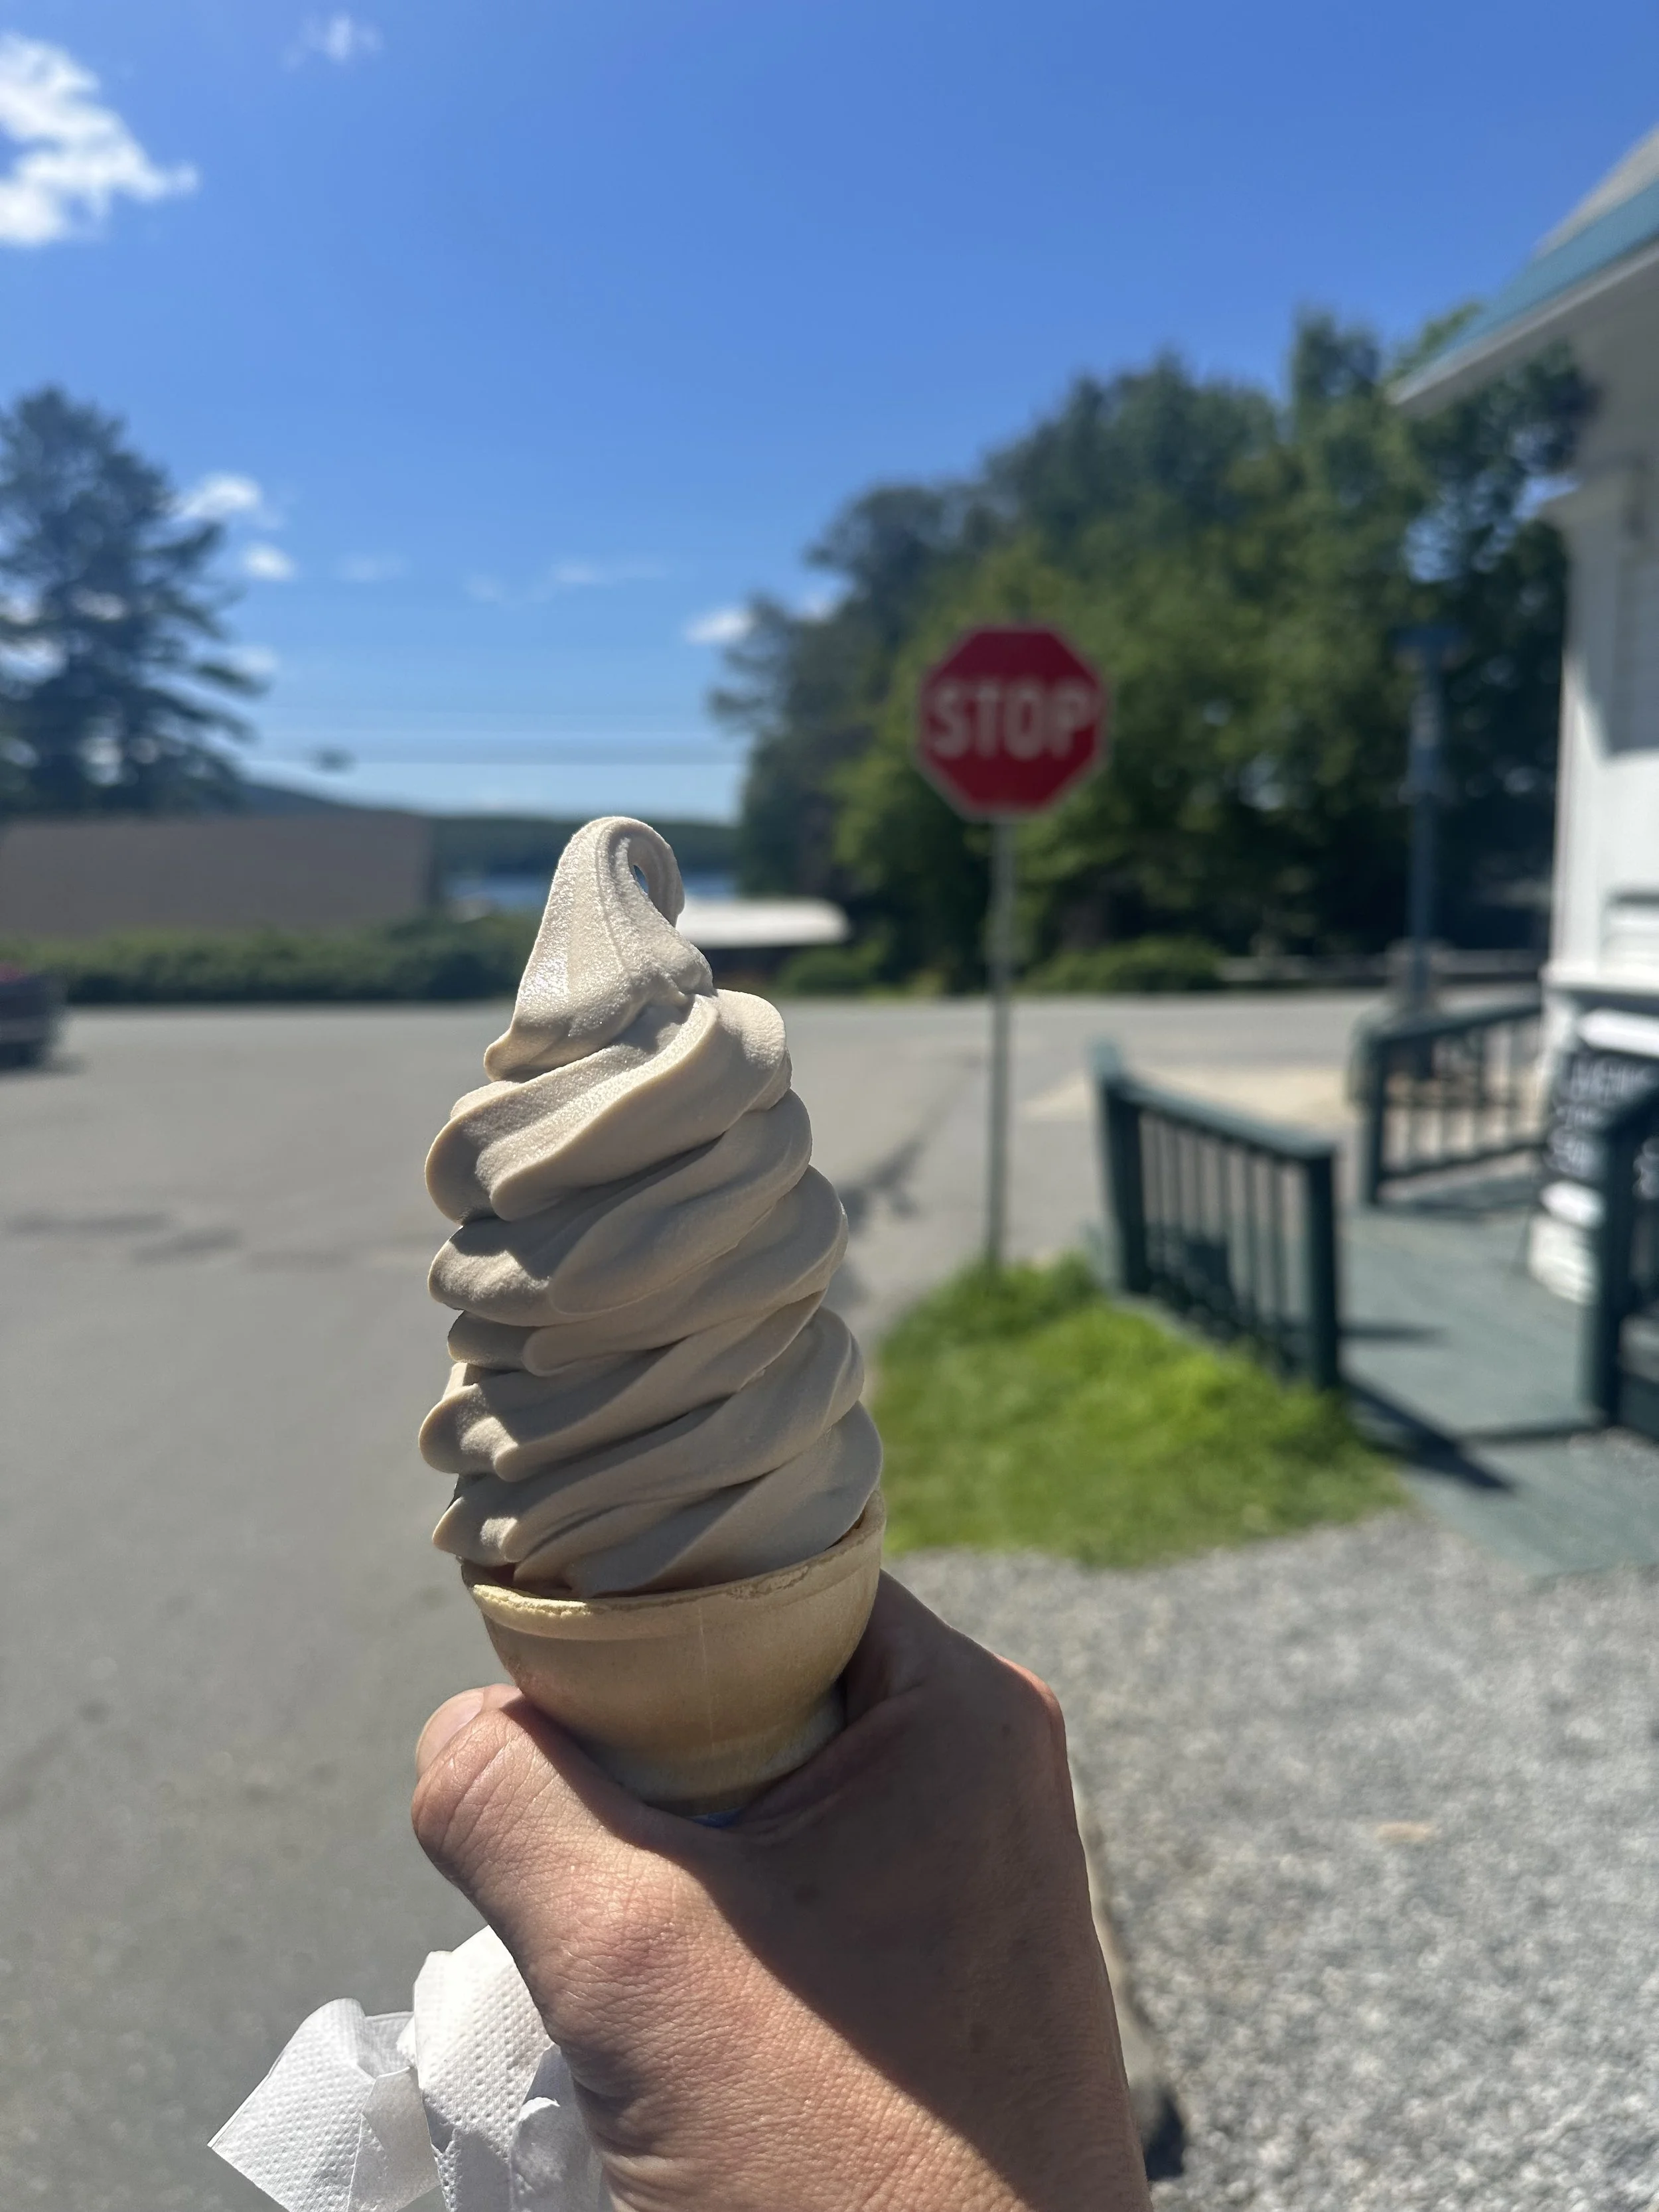
Maple Creemees, Where Have You Been All Our Lives?
What is a Maple Creemee? It’s perfection in a cone if you ask me!

Until this spring, I had never even heard of a maple creemee. Then we went to Vermont for Maple Weekend, and my world changed forever.
Once I learned what they were, a soft-serve ice cream made with pure maple syrup and fresh cream from local Vermont farms, I knew I had to try one. But here’s the catch: maple creemees are seasonal. Early spring isn’t prime time. My introduction would have to wait.
Apparently, they’re a Vermont thing. And maybe… they should stay that way. Hear me out…Vermont’s economy thrives on dairy and maple farming, so this beautiful combination of the two is perfect for the state. Plus, part of their magic might be that they’re not everywhere. Scarcity makes the heart (and the sweet tooth) grow fonder.

Now, calling them “soft serve” doesn’t quite do them justice. A good maple creemee is different, denser, silkier, and richer than your average twist cone. That creaminess comes at a cost though: more fat than typical soft serve. And honestly? If maple creemees were at every ice cream stand in New England, I’d be in trouble.
This summer, we made up for lost time and sampled several maple creemees during our Vermont vacation. You can find them at maple farms, roadside ice cream stands (some entirely devoted to creemees), and surprisingly often, in general stores. But beware: not all maple creemees are created equal.
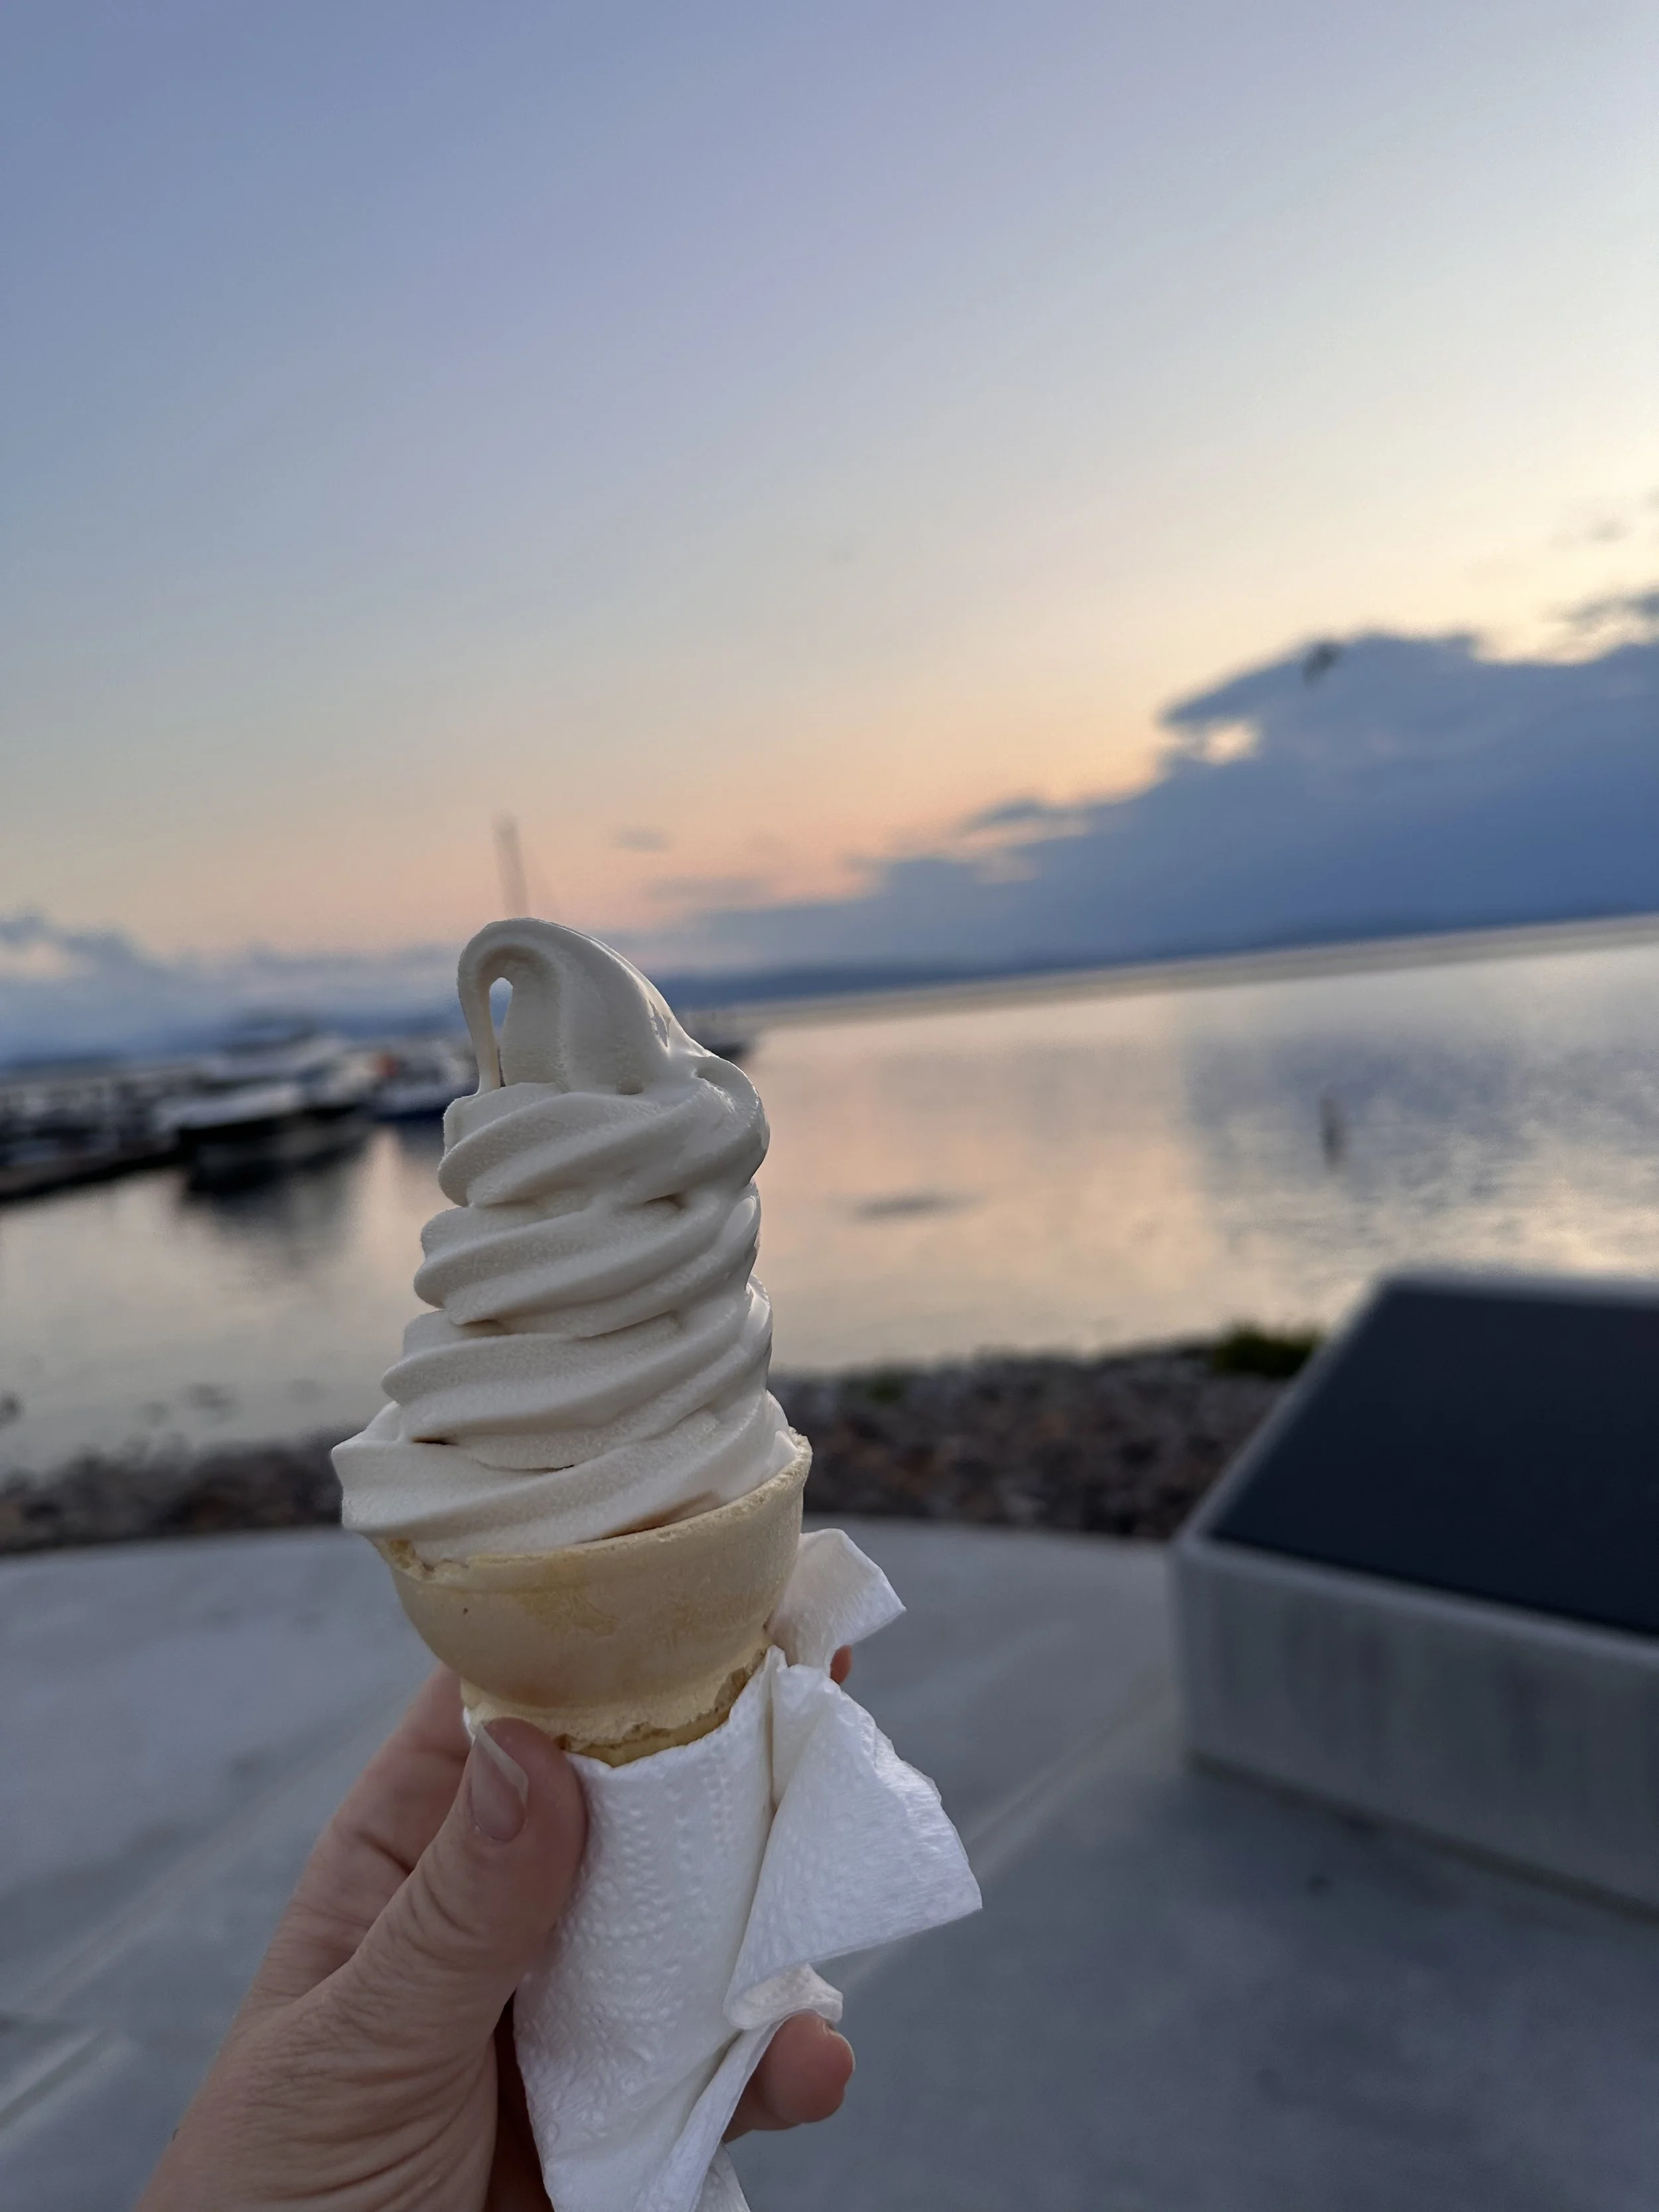
Two standouts for me: Cold Hollow Cider Mill and Willoughby Lake Store. Both were spectacular, but Willoughby Lake Store might have edged out the competition. Was it because we had just hiked Mount Pisgah and were starving? Possibly. But either way, it was heaven.
If you haven’t been to Vermont’s Northeast Kingdom, put it on your list. Between the hiking, the views, and the maple creemees, it’s basically paradise. Oh, and don’t underestimate the unexpected spots. One of the best we had came from a gas station/general store in Waterbury. Lesson learned: in Vermont, if someone’s selling a maple creemee, you say yes. Once you try one, you’ll be asking the same thing I did: “Maple creemees, where have you been all my life?”

52 With a View Hiking list
New Hampshire 52 with a view our list as we work on it and our ratings for views and difficulty.
When my hiking journey began 20+ years ago, my dad and I had one goal for every hike: great views and a little challenge—but not so hard that we’d be limping into work the next day. We used to search through a book called Foghorn Outdoors New England Hiking: The Complete Guide to more than 380 hikes by Michael Lanza, where the author rated trails 1/10 for both views and difficulty. And so, our quest began.
Little did we know about the 52 with a View list back then.
When Mike and I started hiking more, we also had goals—maybe we’d tackle the 48 4,000-footers one day. But before diving into those bigger challenges, we wanted to get our hiking legs under us. So, we set out to find hikes that checked the boxes: beautiful views with some challenge… but not 4,000-footer-level challenging—yet.
Enter 52 With a View
A friend eventually introduced me to Ken MacGray’s book: New Hampshire’s 52 with a View: A Hiker’s Guide. This list was originally created by the Over the Hill Hikers Club in 1990. Apparently, it took me a while to catch on! We love having a list of mountains with great views!
Funny thing? We’d already hiked some of these mountains before we even got the book! Now, we’re thrilled not to have to scour the internet for hike suggestions anymore.
In 2024, we officially started checking off these beautiful spots. In this blog, we’ll tell you all about each one, updating the list as we go.

Mt. Willard
We conquered Mt. Willard on July 4, 2024. It was a warm, beautiful day. We hit the trail early, and I’m so glad we did because that parking lot is happening! There are multiple trailheads in the area, and since it was a holiday, we knew it would be busy.
The trail itself is pretty easy—no rock climbing or scrambling, just good ol’ fashioned hiking. The views along the way are lovely, especially when passing Centennial Pool.
Rating:
🌄 View: 10/10
⛰️ Difficulty: 3/10
Family & Dogs: Dogs on a leash are cool. This would be a great hike for families with kids!
Location: Crawford Notch
Distance: 3.1 miles round trip
Elevation Gain: 895 ft

2. Mt. Cardigan
Another July hike for us—and I’m so glad we stumbled upon this one! It was a great hike with some steep sections. You can listen to our podcast where Mike talks about how he wasn’t sure he was going to make it off the mountain… spoiler: he did, and he’s fine.
There’s a loop section here, and if you know us, you’ll know we somehow got lost… not sure how that happened, but we made it! And, bonus: we took the correct way down. FYI, anytime we’ve gotten lost, it’s because we didn’t have the AllTrails app yet. Don’t make the same mistake we did—get the app. It’s a game-changer.
Anyway, back to the hike! It was a steady climb to the summit, and the views from the top were more gorgeous than I expected. There’s a fire tower at the summit that wasn’t open when we visited, but if it’s staffed, you can climb up, learn about fire spotting, and enjoy even more amazing views.
Rating:
🌄 View: 10/10
⛰️ Difficulty: 3.5/10
Family & Dogs: A little more challenging than Willard but doable for kids who aren’t afraid of heights. Dogs are welcome as long as they’re on a leash.
Location: Cardigan State Park, Orange, NH
Distance: 3.1 miles round trip
Elevation Gain: 1,194 ft

3. Mt. Chocorua
This was one Mike and I had both done before—just never together. I was so excited to show him the Brook and Liberty Trail, which is absolutely beautiful and never seems to be busy when I go. But this particular day? If you’ve listened to our podcast, you already know—it was a very challenging hike for me. If you want to hear all about my struggles, go check out that episode. Spoiler alert: I’d do this hike again in a heartbeat because it’s amazing.
As of writing this, I haven’t completed the 52 With a View list yet, but Chocorua was by far the most challenging for me. If you choose the Liberty and Brook Trail, I recommend hiking it clockwise. You’ll follow a stream for most of the way up, and I highly recommend doing this in the fall. The colors are breathtaking. Have I mentioned how amazing it is?
Rating:
🌄 View: 10+/10
⛰️ Difficulty: 8/10
Family & Dogs: I saw families with older kids, maybe middle school and up. This isn’t to say younger hikers couldn’t do it, but I’d only recommend it if your child has hiking experience. Definitely not a beginner hike. You know your kids best, but this is not one I would have brought my daughter on when she was younger.
Location: Albany, NH
Distance: 7 miles round trip
Elevation Gain: 2,582 ft

Mt Kearsarge on a cloudy day
4. Mt. Kearsarge
This wasn’t our first time hiking Kearsarge, but it was the first time we were disappointed by the views. No fault of the mountain—it was just one of those cloudy days.
We did the loop here (no getting lost this time—win-win!) and went up Winslow and down Barlow. It was definitely a relentless climb up, but overall, a beautiful hike. There are some big rocks to step up, but nothing too challenging. You can find out why we hiked the day we did and other details of the trail HERE on our podcast.
Rating:
🌄 View: 3/10 (blame the clouds!)
⛰️ Difficulty: 3/10
Family & Dogs: Popular hike for families, and dogs are welcome on a leash. A little more challenging than Willard, but if your kids are up for a fun adventure, this is a great mountain to tackle.
Location: Winslow State Park (fee required unless you have the NH State Park plate)
Distance: 5.7 miles round trip
Elevation Gain: 2,565 ft

One of the famous caves on Morgan & Percival
5. & 6. Morgan & Percival
I’ll admit—I was skeptical about this one. I mean, how many pre-hike Google searches include “Will I fit in the cave?” or “How sketchy are the ladders?” Or worse… “Has anyone died in the cave?”
Let me put your worries at ease—none of my crazy Google searches came true. The caves are avoidable if you pay attention, and the ladders felt totally safe… even if we went down instead of up. Yep, you guessed it—we went the wrong direction. It’s recommended to go clockwise, but we somehow went counterclockwise. You can listen to the podcast episode where we recount that adventure!
Fun fact: This double-peak hike counts as two spots on the 52 With a View list. And with a loop, you’re already committed—might as well do both!
Rating:
🌄 View: 7/10
⛰️ Difficulty: 7/10
Family & Dogs: Yes, families ready for adventure and dogs on a leash are welcome!
Location: Holderness, NH
Distance: 5.5 miles round trip
Elevation Gain: 1,522 ft

7. Middle and North Sugarloaf
Only Middle Sugarloaf makes the official 52 With a View list, but honestly, do both. The trail looks like a sloppy capital “T” if you were looking at it from above. We went right first to conquer North Sugarloaf and then headed to Middle Sugarloaf.
The views from both peaks were stunning, even on a cloudy morning. The trail starts pretty steep—no breaks until you get to the top of the “T.” You’ll also find some cool glacier boulders, a staircase, and even a cold plunge spot at the end. Honestly? It’s a pretty magical place. Listen to more details about this hike HERE on our podcast.
Rating:
🌄 View: 9/10
⛰️ Difficulty: 5/10
Family & Dogs: Great spot for the whole family, and leashed dogs are welcome.
Location: Bethlehem, NH
Distance: 3.5 miles round trip
Elevation Gain: 1,059 ft
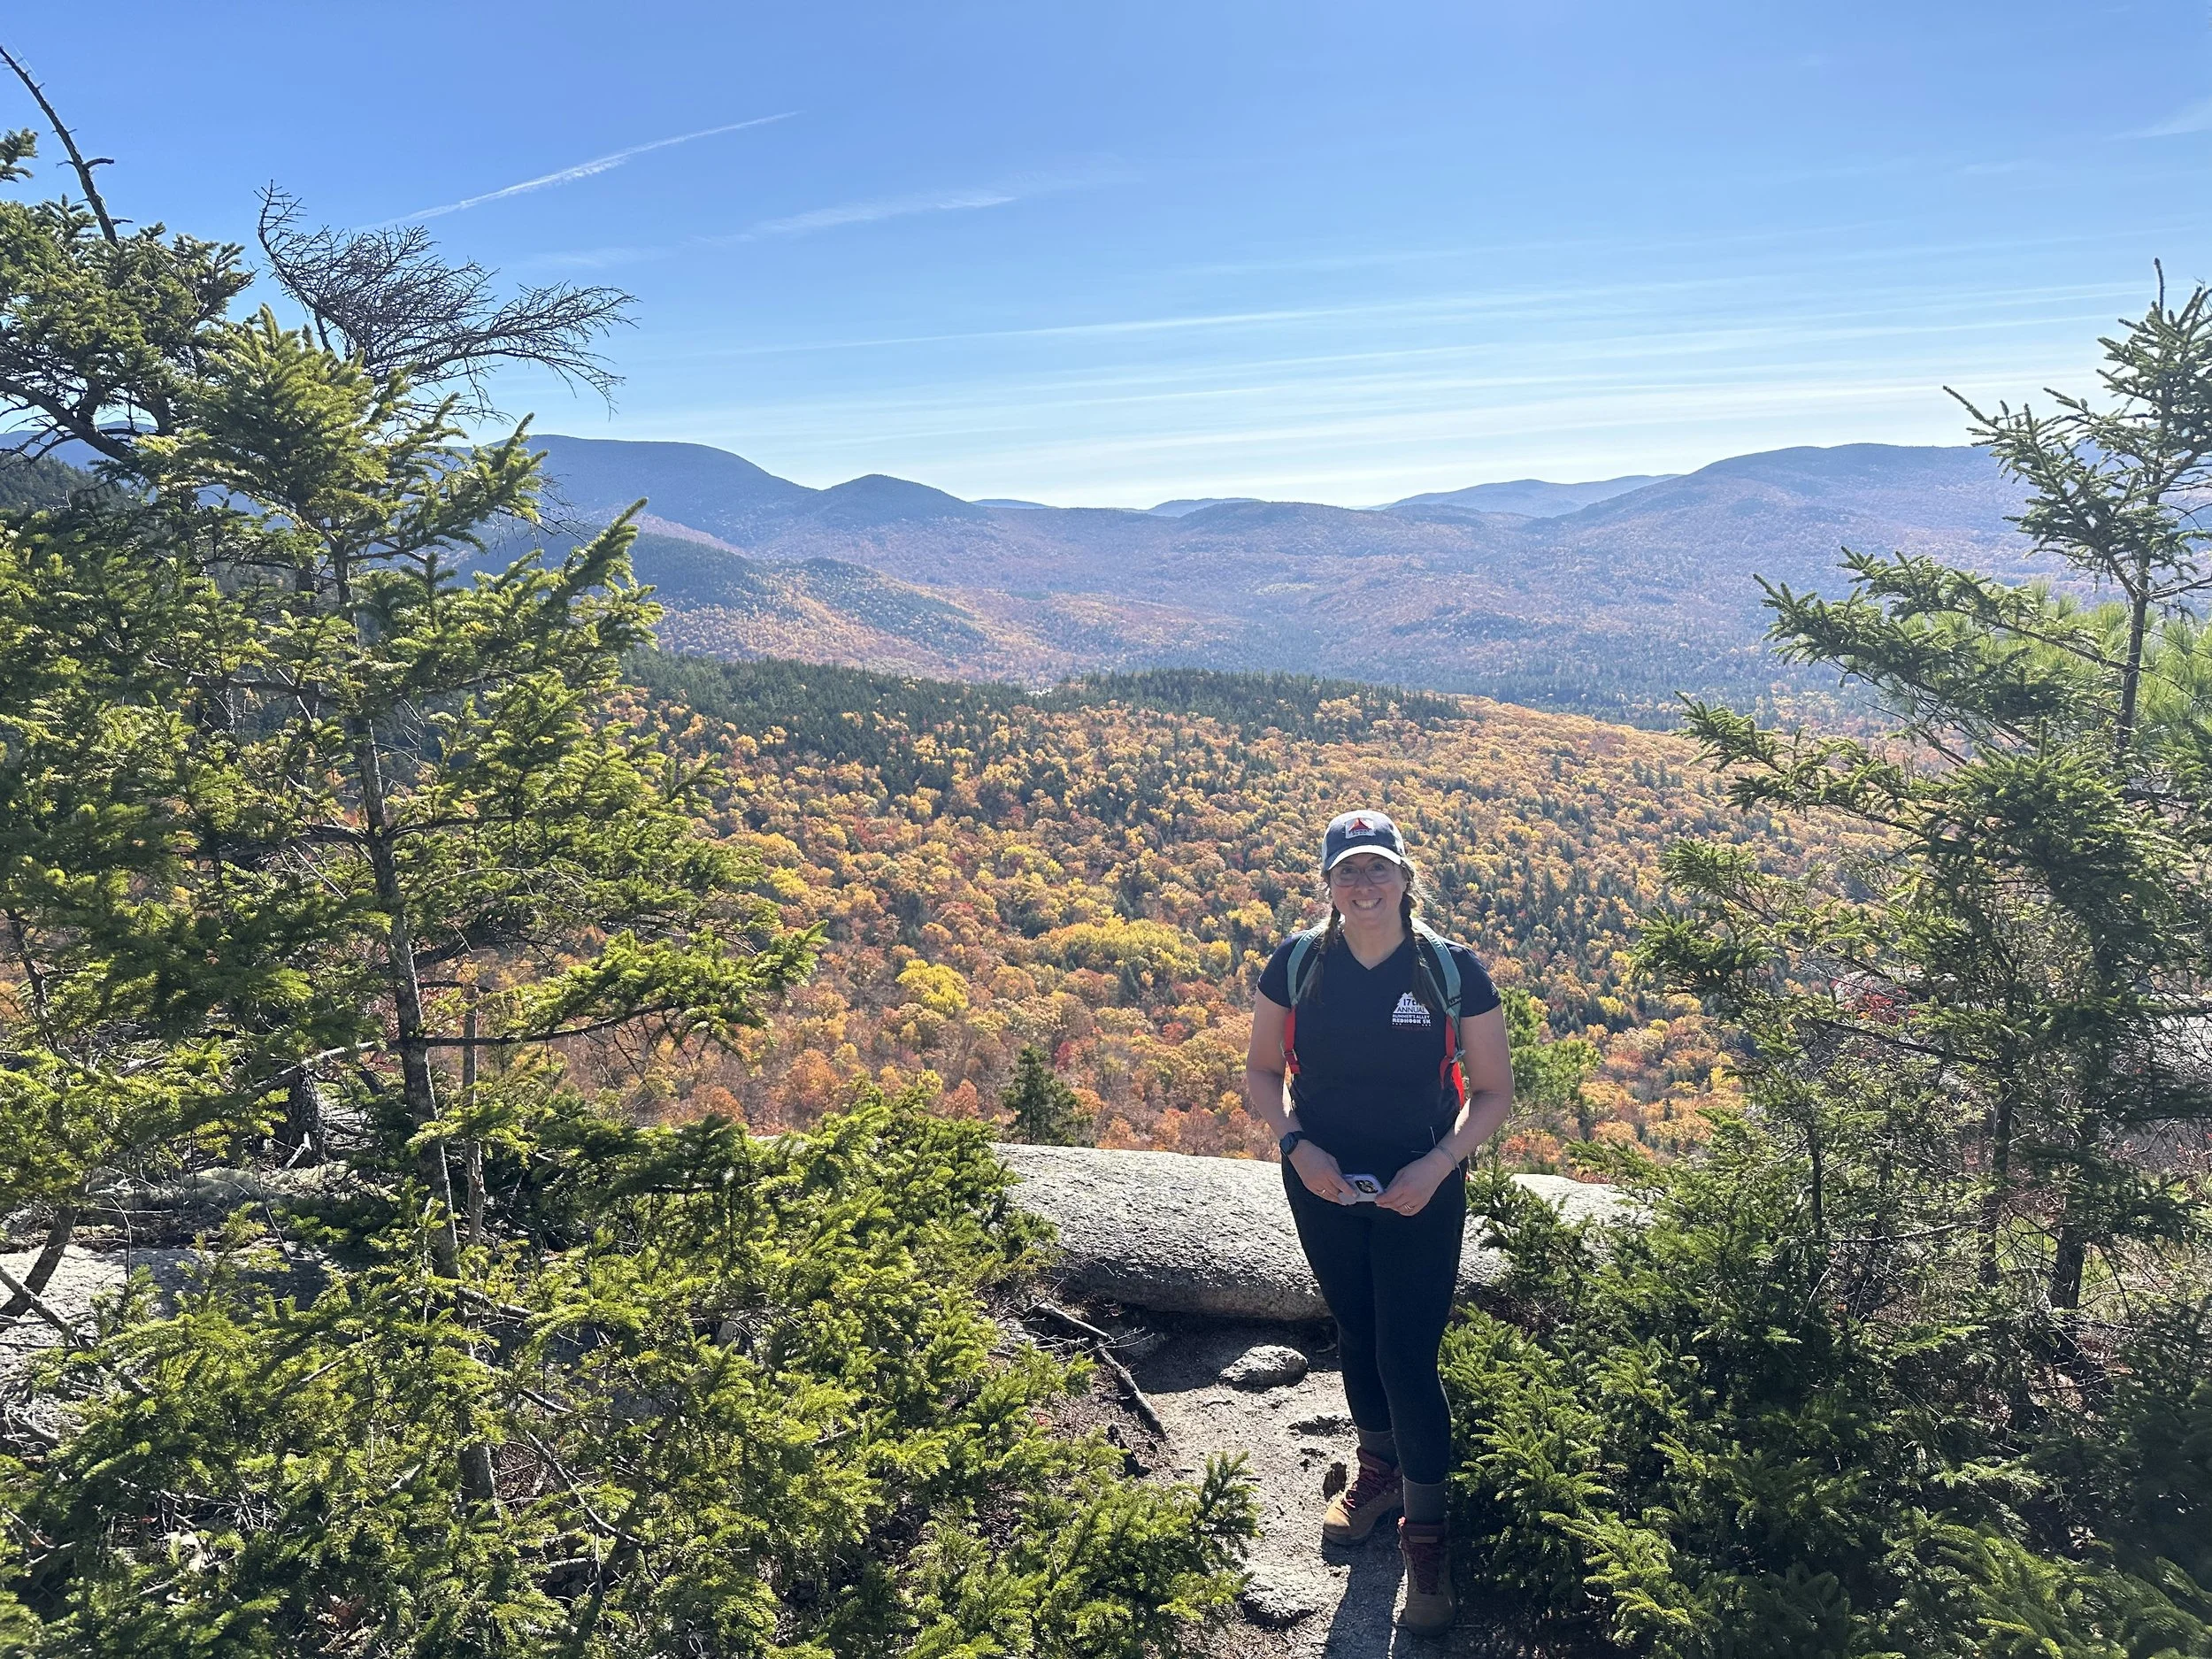
8. Welch & Dickey
Another two-for-one deal in a loop! We hit this one at the peak of fall foliage, and if you can time it as perfectly as we did—do it! The views and the trails here are pure magic.
We hiked counterclockwise (and actually followed directions this time—thanks, AllTrails!). The hike starts off with a gradual climb but eventually gives you a solid cardio workout. Once you hit Welch, you can see the peak of Dickey, and while it looks intimidating, it’s not as bad as it seems. You can listen to more details about this hike on our Welch & Dickey episode.
Rating:
🌄 View: 10/10
⛰️ Difficulty: 7/10
Family & Dogs: Yes to both, as long as your dog stays on a leash. It’s a bit more challenging due to the length, steepness & a little bit of rock climbing, so gauge what your kids are up for.
Location: Waterville Valley, NH
Distance: 4.4-mile loop
Elevation Gain: 1,781 ft

9.Mt. Pemigewasset
This was our first winter hike, and I fell in love with winter hiking. I mean, if we live in New England, we might as well embrace the never-ending winters, right?
It was the perfect hike for everything to go wrong too… not really, but when you start by locking yourself out of your car, it’s a tough beginning. You can listen to all that drama (and how well we handled it) on our podcast.
We parked at the Flume Gorge—if you’re visiting during the busy season, get there early or plan accordingly because it’s a very popular spot. The trail was gorgeous and not overly challenging. In winter, there was no rock scrambling, but there were some steep parts. I loved the vibe here and would definitely like to check it out during a different season.
Rating:
🌄 View: 9/10
⛰️ Difficulty: 5/10
Family & Dogs: Dogs are welcome as long as they stay on a leash.
Location: Franconia Notch State Park
Distance: 3.3 miles out and back
Elevation Gain: 1,259 ft
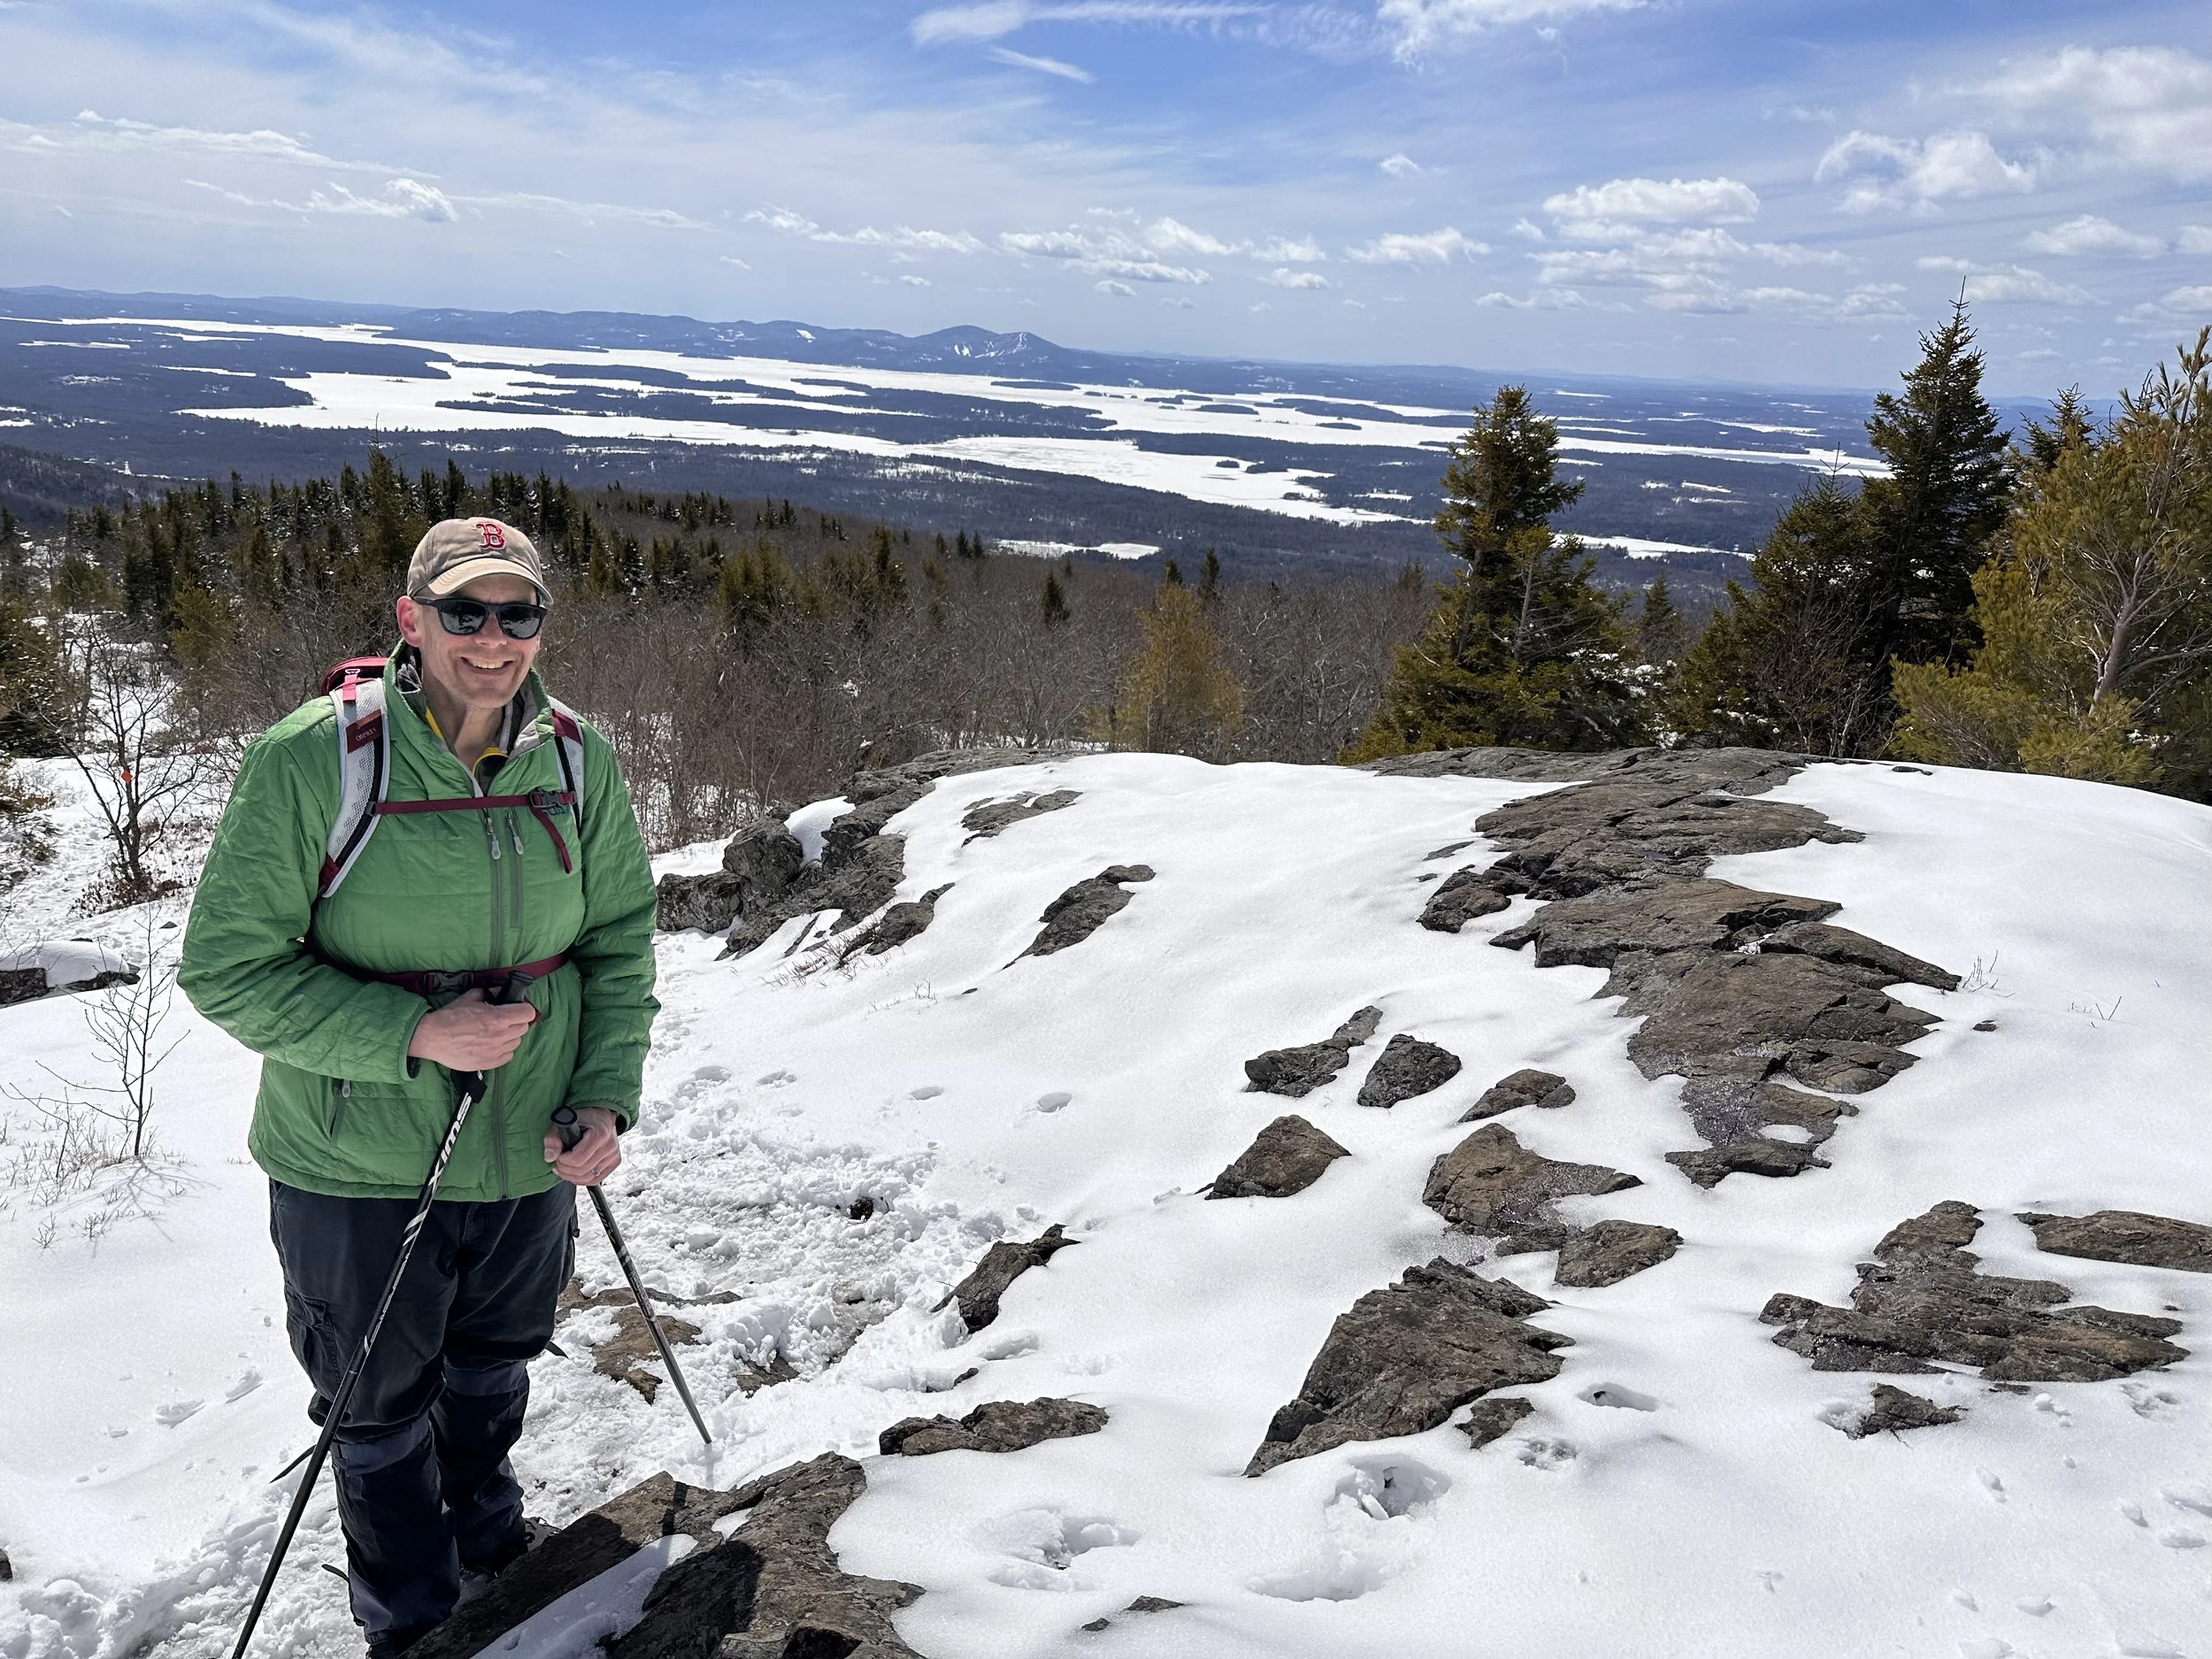
Mt. Roberts with views of Gunstock Mountain
10. Mt. Roberts
Hiked on March 26, 2025—just three days after a surprise spring snowstorm. There was no snow left at home, but we came prepared for whatever the trails had in store.
The adventure begins the moment you pull into the parking area for Mt. Roberts. You’re immediately greeted with views that make you question if you even need to hike. (But trust me, you do!) The trailhead is located near Castle in the Clouds, which, unfortunately, was closed for the season.
The Hike:
The trail itself was fairly easy, with a slow and steady incline that offered plenty of opportunities to pause and soak in the scenery. And the views? Pretty much nonstop—especially if you remember to look behind you! About halfway up, there’s a scenic lookout point that’s well worth a quick break.
Now, here’s where Mt. Roberts likes to play tricks on you. A few times, you’ll think you’ve reached the summit… but nope, not quite! The actual peak isn’t the most dramatic, but it rewards you with stunning views of the White Mountains.
The Descent:
On the way back down, we stopped for lunch on a rock slab with breathtaking views of Lake Winnipesaukee and Gunstock Mountain. It was one of those “this is why we hike” moments.
Location: Moultonborough, NH
Family & Dogs: Great for families and dogs on a leash
Distance: 5.2 miles (though my watch begged to differ and clocked a bit more)
Elevation Gain: 1,335 feet
View Rating: 🌄 10/10
Difficulty Rating:⛰️3.5/10

11. Mount Monadnock
Checked off in April on one of those rare, perfect spring days—bluebird skies, no ice, and surprisingly warm weather. Monadnock is one of the most climbed mountains in the U.S., and now we understand why. Mike did this one solo because G was away and she had done this one several times before.
The Hike: He took the White Dot Trail up and came down via White Cross—a great combo if you prefer scrambles on the way up and something gentler on the knees for the descent. White Dot gives your legs and lungs a good workout, and there are a few hands-and-feet scrambles near the top. Not technical, but enough to make you earn those summit views.
The summit delivered 360-degree views into Massachusetts, Vermont, and the Whites. It’s a rocky, scrambly, beautiful hike that’s more of a challenge than its popularity suggests. Bring plenty of water, good shoes, and a sense of humor for the scrambles. Pack sunscreen and bug spray, and swing by the cute trailhead store. Bonus: the bathrooms have real plumbing!
Rating:
🌄 View: 10/10
⛰️ Difficulty: 6.5/10
Family & Dogs: We saw plenty of families—some kids were crushing it, others not so thrilled about “too many rocks.” Dogs are welcome, but make sure they’re comfortable with rocky terrain.
Location: Monadnock State Park (reservation recommended; $15/car or free with NH State Park plate)
Distance: 3.9 miles loop (White Dot up, White Cross down)
Elevation Gain: 1,772 ft
12. Mt. Cube
We hiked Mt. Cube on a beautiful Friday in late June. This spring made it tough to plan hikes around the rain, but on this particular day, we got lucky. The weather was perfect—not too hot—which felt like a win considering it had been over 100°F just a few days earlier. (If you're more of a listener than a reader, you can catch all the details on our podcast!)
Mt. Cube is located in Orford, NH—a part of the state I hadn’t heard of before. To get there, we took Exit 26 off I-93 North in Plymouth. That section felt familiar, but once we left Plymouth, things quickly got more remote. Mt. Cube is about 25–40 minutes from Plymouth, depending on your pace.
Pro tip: Hit the Dunkin’ in Plymouth before you head out—it's your last public bathroom stop!
The parking area is a small lot, and the trailhead is just a short walk down a dirt road. We took the CRT (Cross Rivendell Trail).
The hike itself wasn’t super challenging, in my opinion. It had a steady incline with some breaks along the way. Near the summit, there’s a great spot to rest and take in the views. Mt. Cube actually has two peaks. The South Peak is about 4.2 miles round trip, and if you add on the North Peak, your total hike will be around 5 miles. Both are worth seeing! The South Peak is the one that counts for the 52 With a View list. The North Peak isn’t hard to reach, though we did get just a tiny bit turned around—as usual.
Rating:
🌄 View: 9/10
⛰️ Difficulty: 3.5/10
🐾 Family & Dogs: A great hike for families—and dogs on leashes! I found it to be easier than Mt. Cardigan and Mt. Willard.
Quick Info:
📍 Location: Orford, NH
🥾 Distance: 4.4 miles round trip
📈 Elevation Gain: 1,600 ft

Almost to the summit of MountChocorua
Whew, that’s a lot of views—and we’re just getting started! Stay tuned for more as we continue to check off the list! 🥾🌲

York Maine Vacation
A weekend in York Maine. Where to stay, eat and what to do!
Where to Stay, What to Do, and Most Importantly—Where to Eat
York, Maine—our old home. We miss living here so much. It really is the way life should be.
Located in Southern Maine, York might not be considered “real Maine” by some of the true Mainers we’ve met—but to us, and most visitors, it’s the perfect spot for a Maine vacation.
Where to Stay
York and the surrounding towns have some great hotel options. Since we lived in the area, our experience with hotels is somewhat limited, but we’ve managed to try a few!
York Surf Beach Club
We were lucky enough to stay here one year. It has a great vibe and is basically right on the beach, located at the rockier southern end of Long Sands.
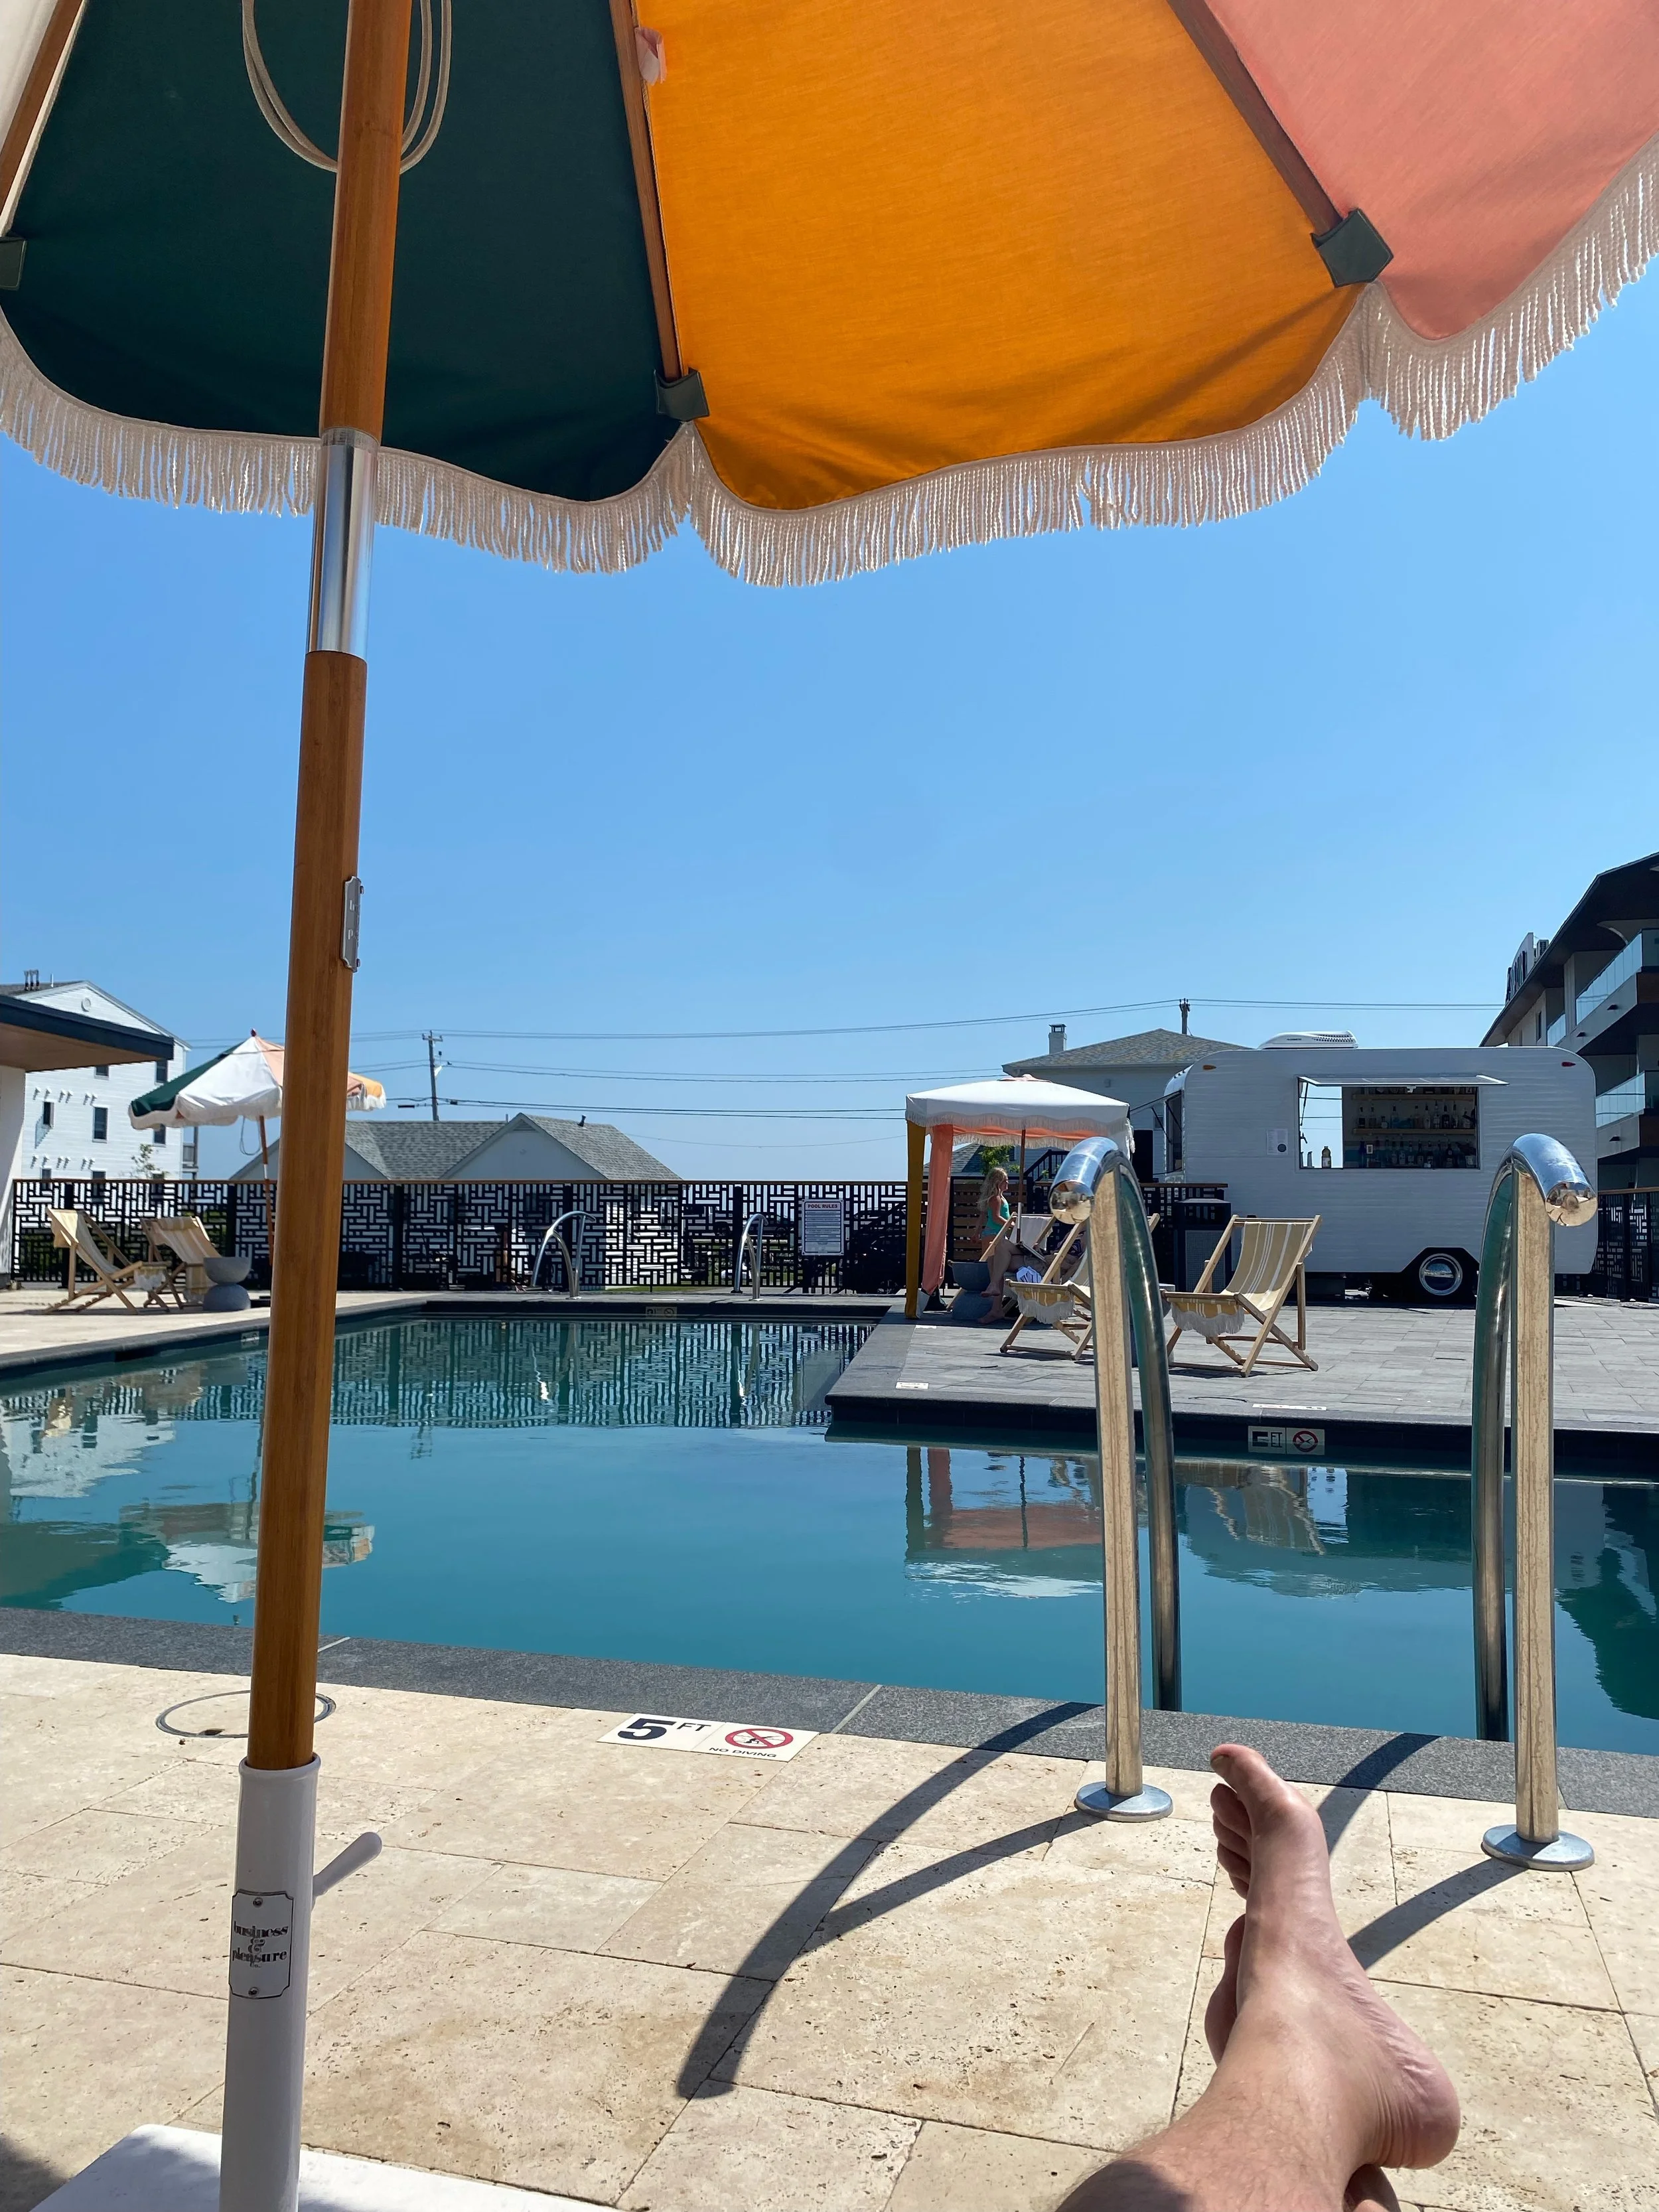
Pool area at the York Surf Club with views of the ocean and Nubble
Stage Neck Inn
This inn has a fantastic location on Harbor Beach, complete with a private beachside pool (private as in, guests only!). Harbor Beach has my heart—it's my personal favorite for families. The waves are generally calm, and the tidepooling is fantastic for little (or big) explorers.
The Union Bluff Hotel
Situated near Short Sands Beach—another great family-friendly beach.
Cliff House Maine
This is the place we really want to stay someday. If it’s in your budget, go for it—and please let us know how it is! Cliff House is technically in Cape Neddick, between York and Ogunquit. The resort sits on Bald Head Cliff and offers restaurants, multiple pools (including one with amazing ocean views), and total luxury. The only danger? You might never want to leave. Worth the risk, we say.
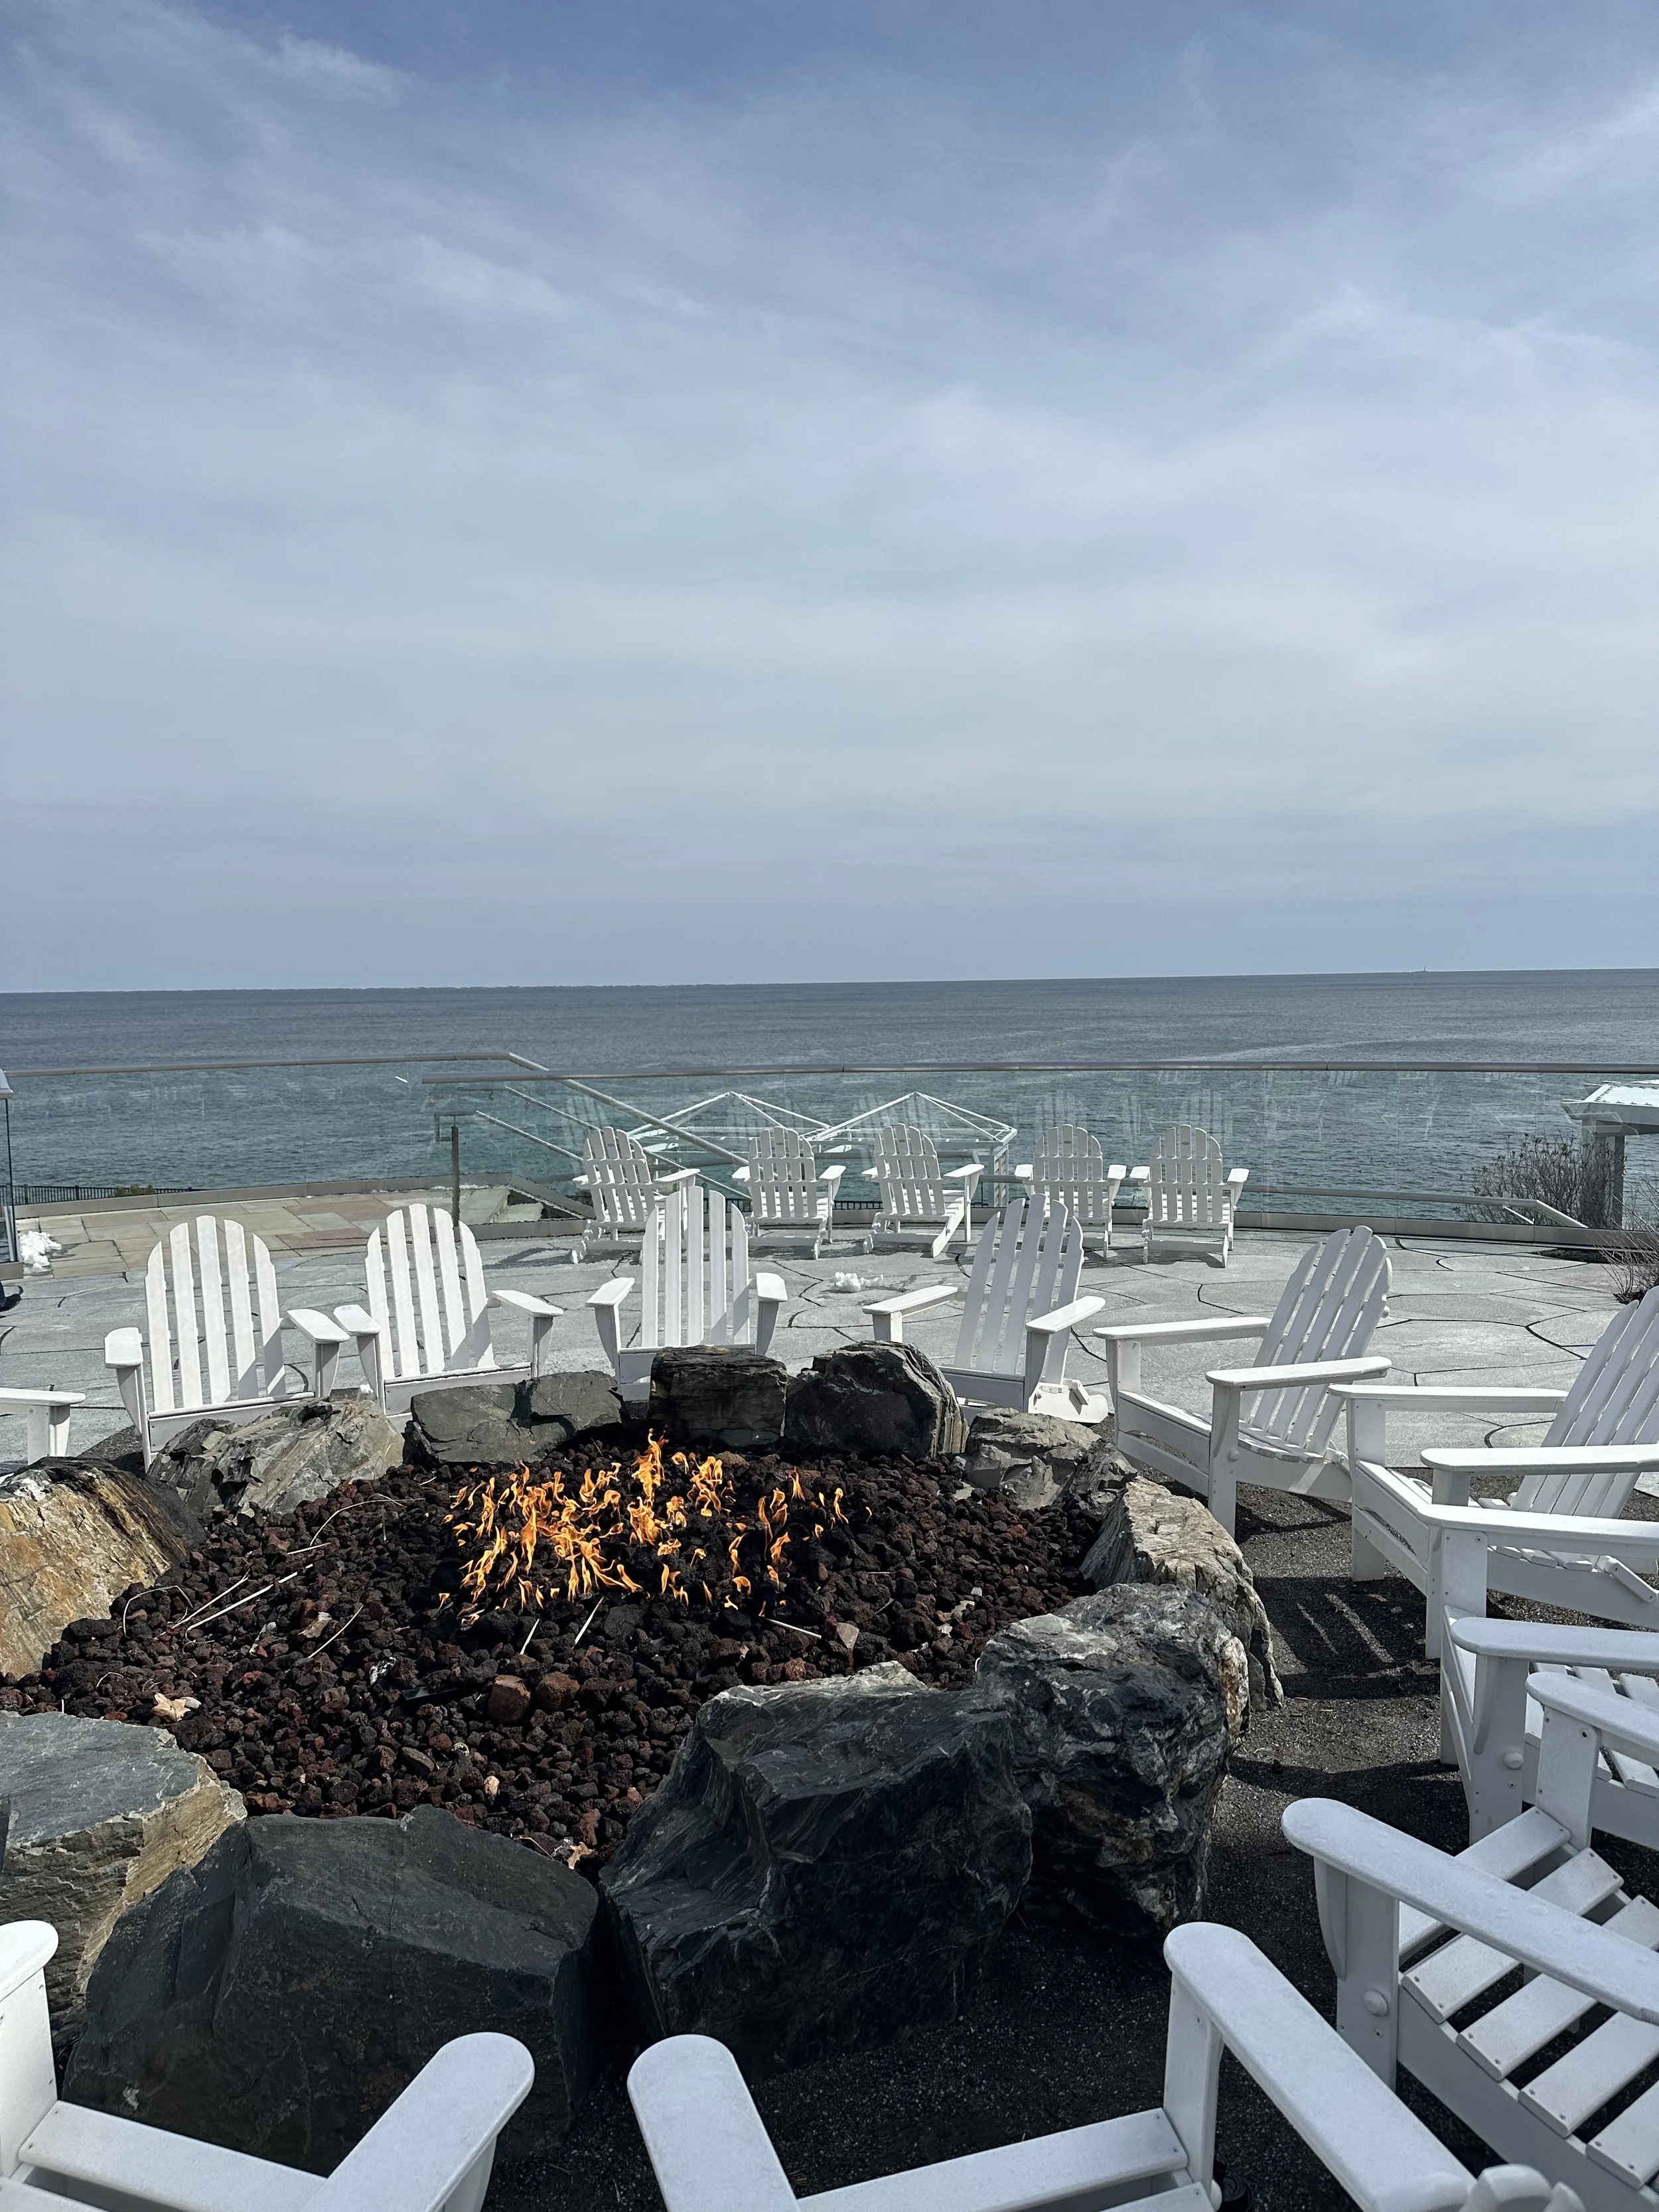
Winter time at the Cliff House the pools and fire pit are still open and magical
What to Do
Whether you're a go-go-go type or a take-it-slow family, York offers the perfect mix of action and relaxation.
Beaches
Harbor Beach
The one downside: there’s no public parking unless you're a resident (lucky you if you have that sticker!). If you're staying at Stage Neck Inn, you're just steps away from this peaceful little beach.

Harbor Beach my personal favorite
Long Sands Beach
Like the name suggests it is long and, it stretches about 1.5 miles from its rockier south side to its north end, near Nubble Light. Be mindful of the tides—at high tide, there’s not much beach left! But when the tide is low, the packed sand is perfect for beach games and long walks. It's also a popular spot for surfers, especially beginners. Surf conditions are usually gentle, and Liquid Dreams (a local surf shop) offers lessons, camps, and rentals. They're super helpful and knowledgeable.

Views of Nubble Lighthouse from Long Sands
Short Sands Beach
Smaller than Long Sands, but with softer sand and more beach at high tide. There’s a great playground for kids and the vintage Fun-O-Rama arcade—perfect for a sunny-day break. This beach is also home to the iconic Goldenrod, famous for its saltwater taffy. (Even if you’re not a candy person, trust me—this taffy is soft, fresh, and fun to watch being made!)
Where to Eat
Now for the good stuff—food!
Bagel Basket
Our go-to for breakfast or beach sandwiches. They also make an amazing iced chai. Grab a seat outside or take your bagel to go.
Anthony’s Food Shop
Located on Route 1. Don’t miss their sandwiches, pizza, and more—great for a quick, satisfying meal.
Fat Tomato
Right in York Village, this is one of our favorite sandwich spots.
York River Landing
A sit-down spot that’s great for the whole family, located on the southern side of Route 1 in York.
Worth the Short Drive: Kittery
When Pigs Fly – Amazing wood-fired pizza.
Bob’s Clam Hut – Classic seafood shack.
Lil’s Café – Go for the crullers, stay for everything else.
More Things to Do
Can’t go to the beach every day? No problem—there’s plenty more to explore.
Mount Agamenticus (Mt. A)
Check out our podcast episode on it! This is a great hike for all ages and abilities. The trails are well-marked, and you’ll find several routes to the top—or simply walk around the base. On a clear day, you can see Mt. Washington and the coastline up to Kennebunk. Dogs are welcome on-leash, and bathrooms (or port-o-potties) are typically available.
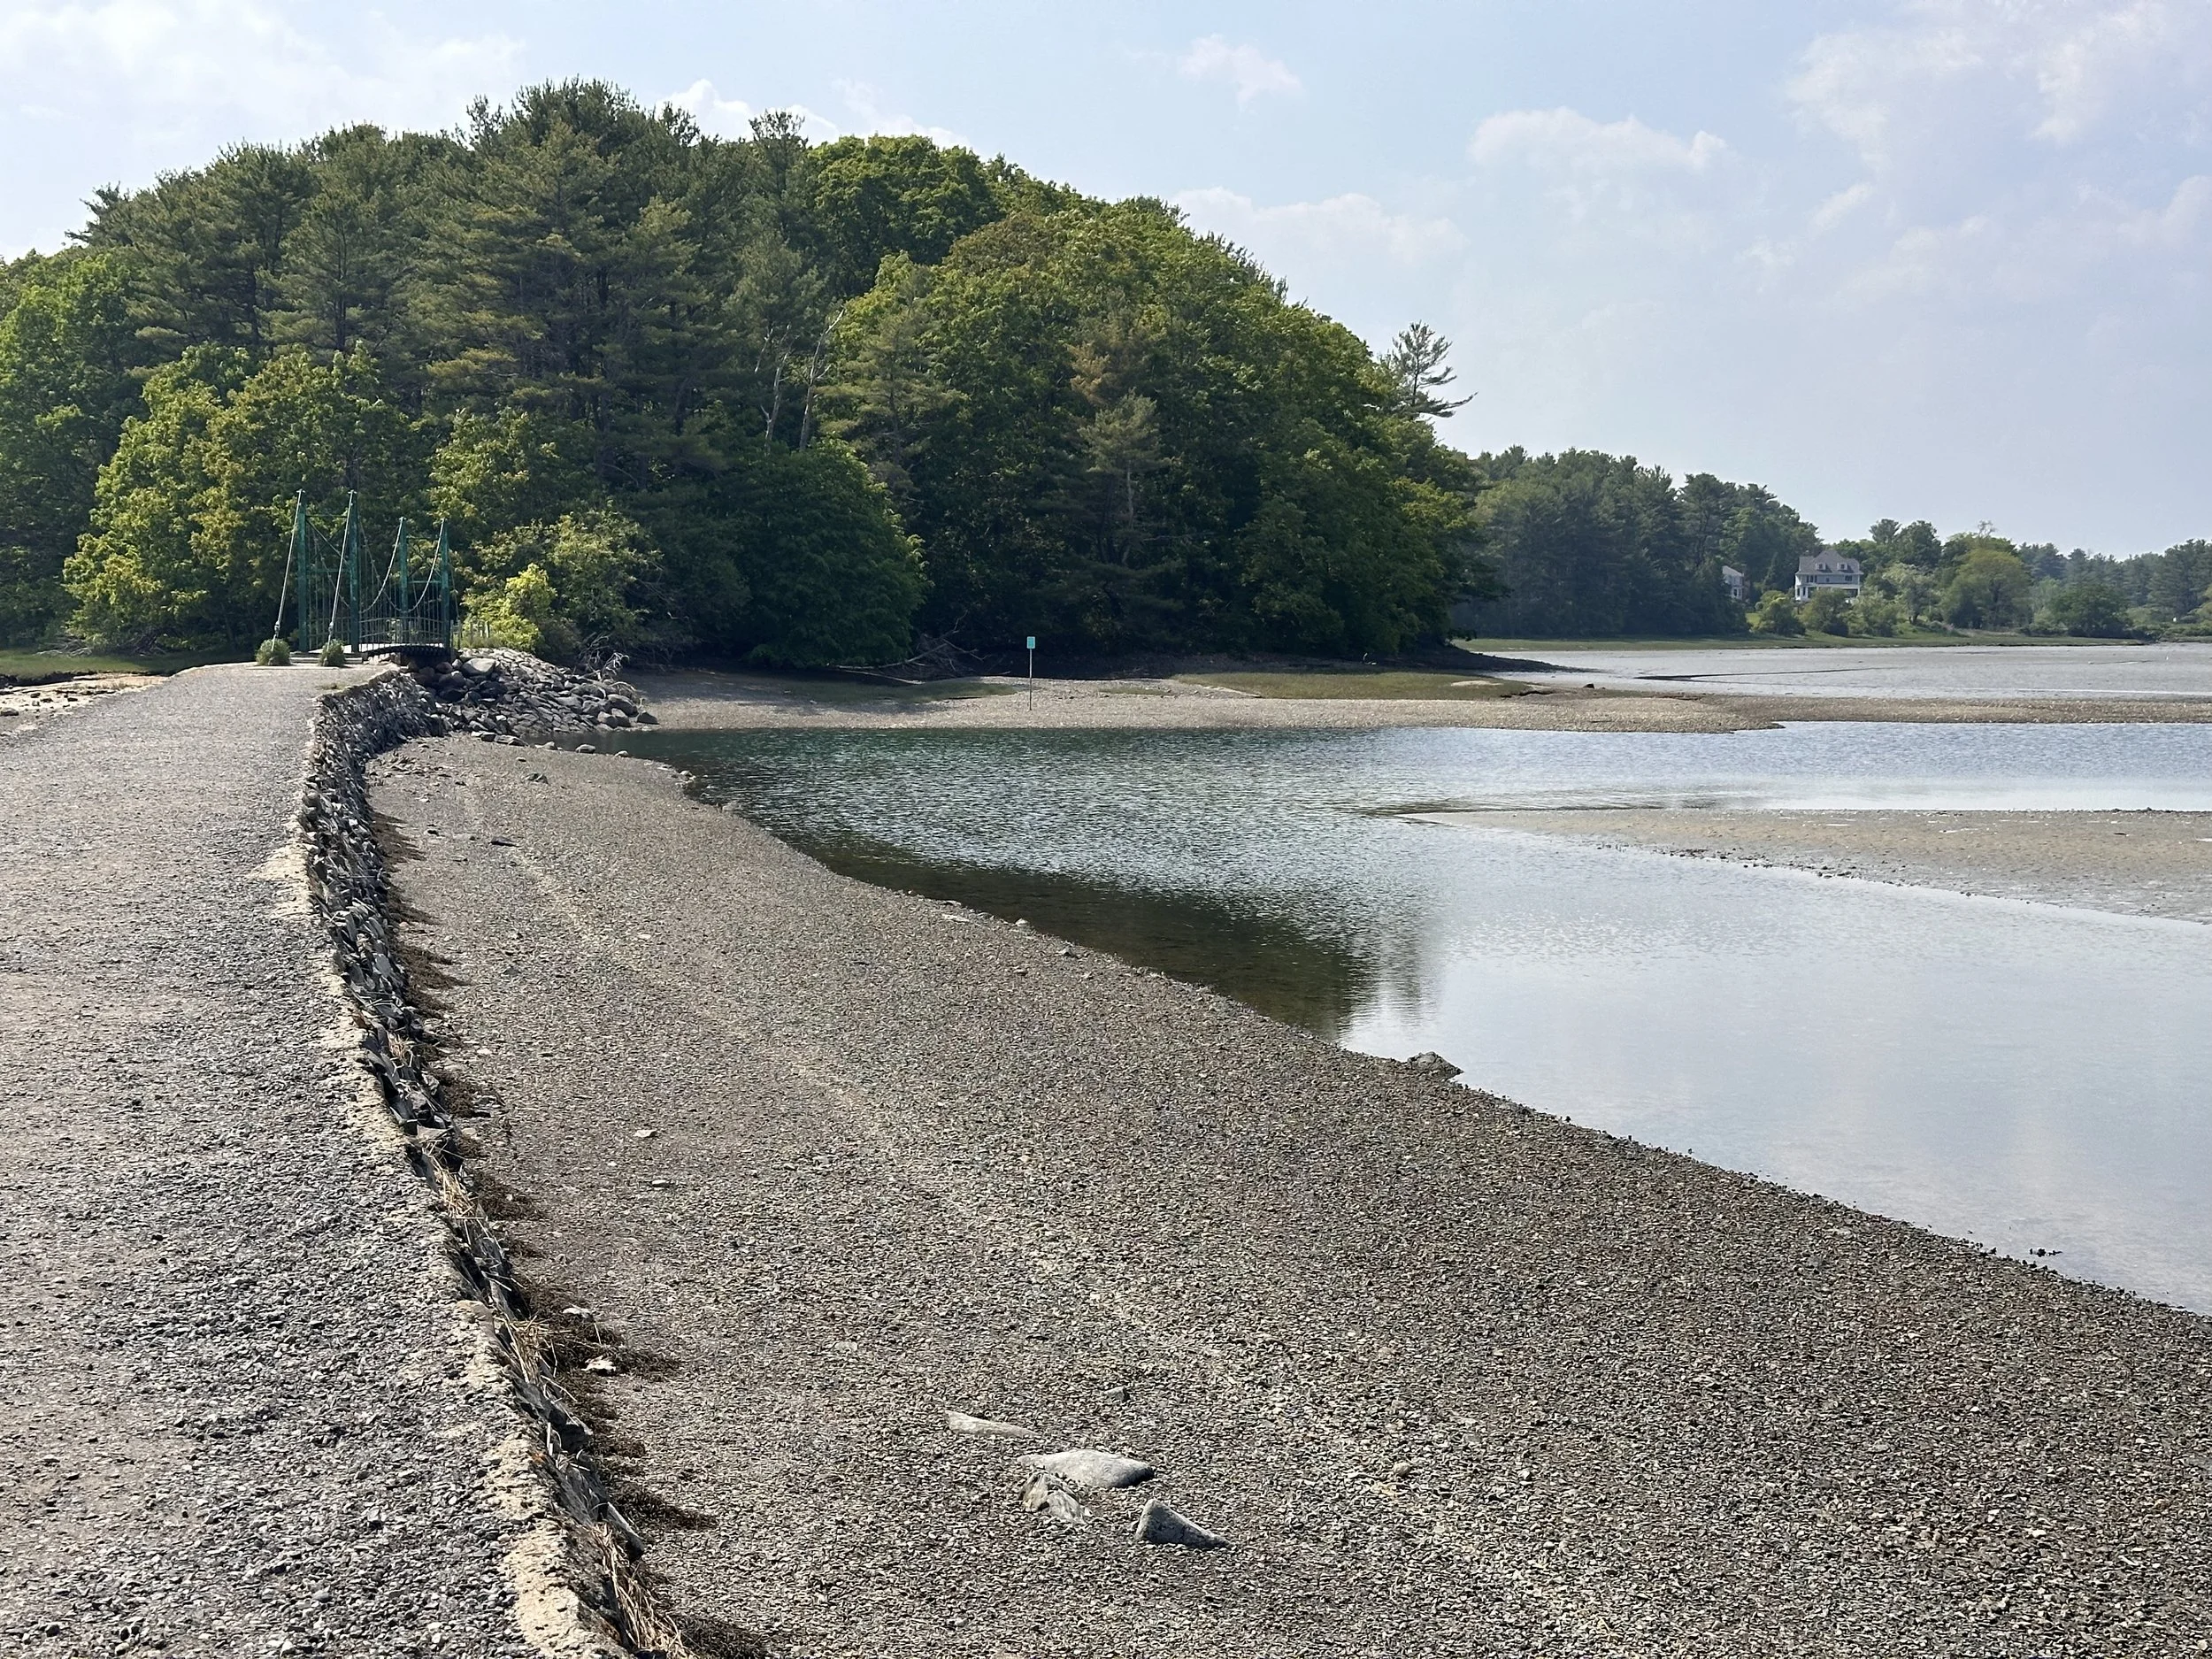
Wiggly Bridge & Steedman Woods
Parking is limited, mostly for residents, so plan ahead. This charming little hike takes you over the world’s smallest suspension bridge—and yes, it does wiggle! Once across, you can enjoy a peaceful walk through Steedman Woods with views of the York River. Be sure to stay on the trail—signs ask visitors to protect the delicate shoreline. No bathrooms here, and dogs must be leashed.
Fisherman’s Walk
If you're staying at Stage Neck Inn, this path runs along the York River and connects to Wiggly Bridge. It’s a gorgeous walk and very peaceful.

Golfing
We have a podcast episode where Mike shares his experience golfing in the area. (I don’t golf, so I’ll let him take that one!)
Final Thoughts
York, Maine is the ultimate summer destination, in my opinion. But it’s also a beautiful place to visit year-round. A peaceful winter walk on Long Sands or a cozy drink at the Ship’s Cellar Pub at York Harbor Inn—pure magic.
York is under an hour from Portland, just two towns away from Portsmouth, NH, and about an hour from Boston. Close to everything, but it feels a world away.
Time to start planning your Maine getaway!

New Hampshires 48 4,000-Footers: One Step at a Time
Hiking NH 48 4,000 footers one step at a time
Are we going to hike all 48 of New Hampshire’s 4,000-footers? I don’t know. But we’re going to try our best—one step & one snack break at a time.
This is an ongoing blog I’ll update as we check each NH 4,000-footer off the list. Take our advice or simply learn from our mildly chaotic journey as a couple of enthusiastic, slightly underprepared, outdoors-loving 40-somethings. We’re just trying to trade couch time for trail time—and hey, the views definitely beat doom scrolling the day away!

Mount Osceola peak
Mount Osceola
#1 of 48: You gotta start somewhere!
We only hiked one of the two peaks here—so does it count? Yes. Yes, it absolutely does. Let me explain.
What do I mean by “one of the two”? Well, Osceola has a buddy: East Osceola. They’re often hiked together as a dynamic duo. But since this was our first “big” hike, we decided to ease into it with just one summit. Baby steps, folks. You can read our thought process (and trail logic) in more detail [here]
And yes, we fully realize that if we want to earn that shiny “48” badge, we’ll have to come back and hike it again. But honestly? Worth it. This mountain was a total gem. In my non-expert, mildly sore opinion, it was the perfect introduction to the 4,000-footer club.
We hiked from Tripoli Road on a cool, rainy morning. The trail—though not marked well—was very easy to follow. It’s full of rocks to step over, but there were no scrambles or major climbs. Near the summit, there are some slanted rock slabs to navigate. Trust me when I say it’s best to walk on the awkward spot close to the ground. (You can listen to me explain why on our podcast episode [here].)
The views from the top were absolutely gorgeous. We could see the Waterville Valley ski area among the surrounding mountains.


This was a magical mountain for us to climb, and if you’re looking for a beginner-friendly 4,000-footer, this one should definitely be on your list!
Stats:
Elevation: 4,340 feet
Elevation gain: 2,040 feet
Distance: 6.4 miles round trip
Views: 10/10
Difficulty: 7/10

From the summit of Mount Pierce.
Mount Pierce
#2 of 48: One Step Closer!
We tackled this one toward the end of winter—aka that fun time of year in New Hampshire when it’s sunny in the parking lot but feels like Everest at the summit.
Microspikes were a must from start to finish, but snowshoes? Not even close. The snow on the trail was packed into a narrow monorail path, and stepping off it meant immediate regret (and post-holing up to your kneecaps). At one point, I casually sank my hiking pole all the way to the handle just a few inches off the trail. That was enough science for one day.
Mount Pierce was our first adventure into the Presidential Range, which felt pretty epic for our second 4,000-footer. We started at the AMC Highland Center, which has a big, easy-to-find parking lot. Just cross the street and boom—you’re at the trailhead for the Crawford Path.
This trail comes with serious historical street cred. It was first cut in 1819, making it the oldest continuously used mountain trail in the U.S. The Crawford family created it from their homestead (now Crawford Notch) to the summit of Mount Washington. Imagine deciding to cut a trail to the highest point in the Northeast—just because you could.


The hike starts climbing pretty quickly and doesn’t let up much. About 0.6 miles in, you get to see the very lovely Gibbs Falls, and the trail follows a river for a bit before breaking off. Roughly 0.7 miles from the summit, there’s a trail to the AMC Mizpah Spring Hut, which is closed in winter, so we stayed on Crawford Path. That side trail does loop around to the summit if you’re feeling extra ambitious in warmer months.
As you near the top, the trees start to thin, and suddenly—you’re in the Alpine Zone. There’s even a bench (yes, a bench!) where you can take in stunning views of Bretton Woods, the Mount Washington Hotel, and the looming beauty of Mount Eisenhower and Mount Washington right in front of you.
And then... in classic White Mountain fashion, the weather pulled a fast one. We felt a breeze entering the Alpine Zone, but by the time we reached the true summit just a few hundred feet later, the wind had cranked up and the cold rolled in like it had an appointment. So, instead of a scenic summit lunch, we hightailed it back to the tree line and picnicked there. Slightly less epic—but significantly warmer.
This hike was a blast. It was easier than we expected (thanks, packed trail!), and the views were absolutely top-tier. We’re officially hooked on the Presidential Range and can’t wait to check more off the list.
Stats:
Elevation: 4,310 feet
Elevation gain: 2,400 feet
Distance: 5.9 miles round trip
Views: 10/10
Difficulty: 6/10

Canadian Jay is eyeing our lunch with Mount Washington in the background.
Mount Jackson
#3 of 48: Jays, Ice, and Jaw-Dropping Views
This one had a little bit of everything: icy trails, sweeping views, and feathered trail companions that got very comfortable with us.
The hike starts out across from the Crawford Notch train station. We parked by the lake which is near the trailhead. We were very grateful to have our spikes as the trail was solid ice in places and packed snow in others. Snowshoes weren’t necessary (thankfully), but any step off the main path was instant regret. Classic monorail conditions. We were very glad we had our poles as well!
The trail itself wastes no time. It climbs steadily through the woods and throws in a few steeper sections just to keep things interesting. We didn’t hit anything technical, but the consistent ice made things a little more mentally taxing than usual. Near the top, the trail opens up to some rock slabs—this is the one area where we ditched the spikes for better grip. From there, it’s just a short, breezy push to the summit. And what a summit it is.
We were lucky enough to get a clear day, and the views of the Presidential Range were magical. Similar to Mount Pierce, this vantage point made Mount Washington look massive and snowy in the distance, and the surrounding peaks felt close enough to touch. Definitely one of those “whoa, this is why we hike” moments. As an added bonus, we even remembered to bring and use our binoculars!
The Canadian jays were something else! These bold little guys popped out just before the summit and were more than happy to hang out for a while. They were quite attentive and aggressive when we ate our peanut butter and jelly sandwiches!


If you want to hear us talk more about the trail conditions, our bird encounters, and our exciting ending to the hike, you can listen to the Mount Jackson episode.
All in all, Mount Jackson was a gem. In our completely non-expert, but slightly more confident opinion, this was one of the more rewarding hikes we’ve done so far. If you’re working on the 48, don’t sleep on this one. We’ll gladly come back for a summer version someday—but even with the ice, we’d do it all over again.
Stats:
Elevation: 4,052 feet
Elevation gain: ~2,150 feet
Distance: 5.2 miles round trip
Views: 10/10
Difficulty: 7/10

The Sandwich Range from The Boneyard ski trail at Waterville Valley on Mount Tecumseh
Mount Tecumseh
#4 of 48: Shortest 4,000 footer but a Straight Up Beast (SUB)
If you are looking for a 4,000 footer that won’t destroy your knees or your weekend plans, this hike is for you! The trailhead starts in the parking lot of the Waterville Valley ski area. Although this mountain is still listed as one of the 48 4,000 footers, it technically is a few feet lower than 4,000 feet when measured using more advanced LIDAR (Laser Imaging, Detection and Ranging) technology in 2019. The Mt Tecumseh Trail trailhead starts in the parking lot of the Waterville Valley ski area. There are no bathrooms available but the parking is free from the ski area. There is another trail that starts off Tripoli Road that is longer, and less steep, but we did the steeper Mt Tecumseh Trail.
The trail follows the edge of the ski area most of the way up to the summit. There are two spots on the trail that peek out to the ski trails. Take the moment to walk over and enjoy the views of Waterville Valley from the trail. The views at the true summit of Tecumseh aren’t great. The trees block any 360 degree views. There is an option to go over to the ski area summit via the .5 mile Sosman Trail. We didn’t venture off for that, but it is an option and the views are much better from the ski area. The views include the Osceola and East Osceola, and the Sandwich range.


Just because this mountain is short, doesn’t mean it’s easy, but it is certainly doable! The trail is mostly a steady incline - no huge scrambles or exposed ledges. You’ll gain elevation pretty consistently, there are a few rocky sections, but there are about a million stone stairs! The trail is very well maintained and even though its mostly tree covered, it was very peaceful. This is a good hike for your dogs too!
Mount Tecumseh might be the shortest of the 48, but it was not super easy. It’s a great confidence building hike. Whether you are are just starting your journey, or looking to squeeze in a hike before lunch, this “little” mountain delivers big satisfaction!
Stats:
Elevation: 4,003* feet
Elevation gain: ~2,150 feet
Distance: 5.0 miles round trip
Views: 6/10
Difficulty: 7/10

Exploring the Eastern Trail
Join us as we explore the Eastern Trail & Seacoast Greenway. Part of the East Coast Greenway!
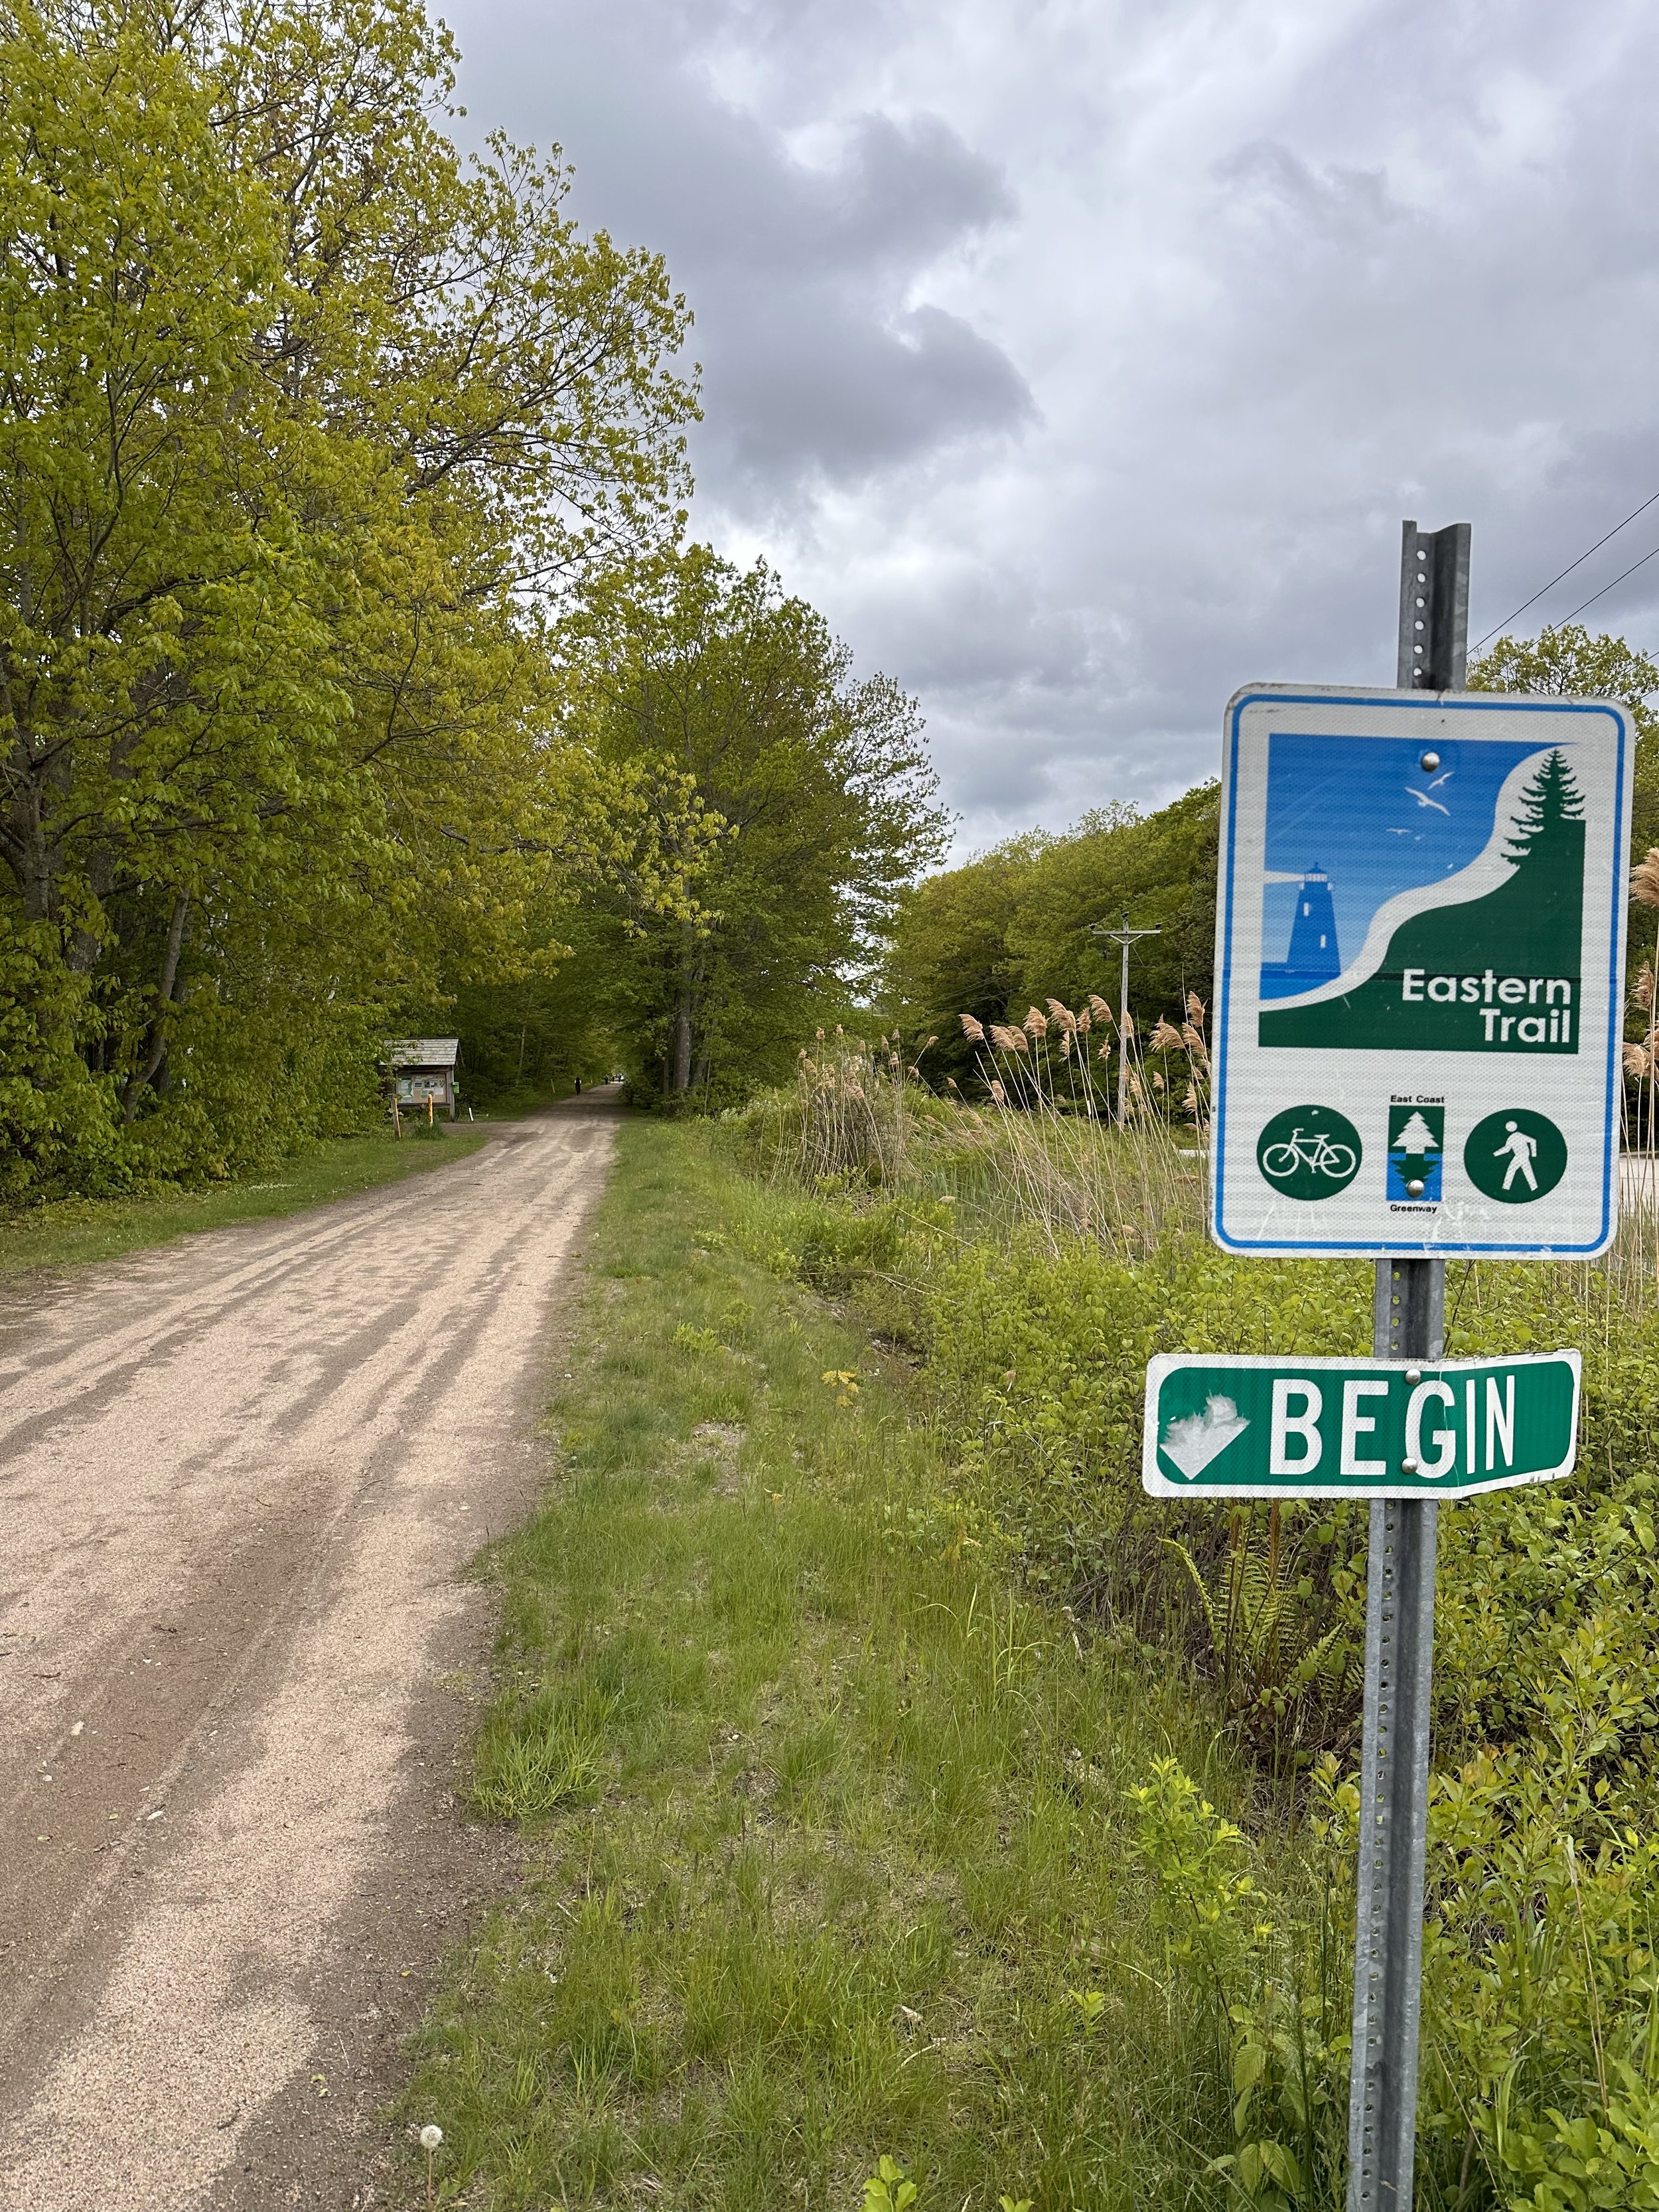
If you’re looking for a scenic, peaceful, and history-rich bike and walking path in New England, the Eastern Trail (ET) should be on your radar. This greenway-in-progress is part of the larger East Coast Greenway, a 3,000-mile trail network that eventually aims to connect Maine to Florida. But for now, we’re keeping things local—and we’re loving every mile of it.
So far, we’ve explored two stretches of the East Coast Greenway Trail: First, we checked out the serene 5.5-mile off-road section from Saco to Kennebunk, Maine on the Eastern Trail and the northern part of the Seacoast Greenway trail through Portsmouth, New Hampshire. Each one offered something unique and gave us a taste of the larger adventure that awaits as we continue working our way along the trail. This is a fun trail regardless if you are biking, running or walking. Leashed dogs are also allowed.

Kennebunk to Saco, Maine:
This 5.5-mile stretch between Kennebunk and Saco is one of the Eastern Trail’s longest off-road segments—and it feels like stepping into a peaceful tunnel of trees. The crushed-stone path is wide and well-maintained, making it great for both biking and walking. We started in Kennenbunk and headed north, enjoying the shade of the tree canopy and the quiet sounds of nature.


What stood out to us most was how removed from traffic and noise it felt even though you are still in civilization. You’ll pass through woodlands, wetlands, and even get glimpses of wildlife if you’re lucky. You even cross over 95 on a pedestrian bridge that is just North of the rest area on 95 in Kennebunk. There are several trailheads with parking, including one near Southern Maine Medical Center in Biddeford and another at Kennebunk Elementary School, which is where we parked, providing easy access. It’s a perfect stretch for families, casual riders, or anyone looking to unplug. It’s also a nice out-and-back if you want to make it a longer ride (11 miles round trip). The Eastern Trail website has more info including maps and more parking areas throughout the Maine section.

Market Square in Downtown Portsmouth is a fun destination from the Seacoast Greenway
Portsmouth, New Hampshire:
We also explored a short section of the Seacoast Greenway trail in Portsmouth, which is part of the current expansion of the larger East Coast Greenway project. This northern part opened in 2024. In 2025 & 2026 they plan to complete the trail between Seabrook and North Hampton and add several access points with parking.


The trail here technically follows sidewalks and bike lanes through parts of town, with future plans to extend and connect more seamlessly. We found it fun to pair a ride or walk here with a visit to downtown Portsmouth for coffee, food, or waterfront views. At the northern end of the dirt path, downtown is just a couple of easy miles up Islington Road.
With these two sections under our belt, we’re excited to keep going. The Eastern Trail still has several gaps—especially between towns—but progress is happening, and more off-road segments are in the works. We’ve got our eye on the Scarborough Marsh section and the stretch through South Portland next.
For anyone thinking about getting out there, we say: do it. Whether you’re a seasoned cyclist or a weekend walker, the East Coast Greenway is a rewarding way to see New England at a slower pace.
We’ll be sharing more trail updates as we explore new segments—so stay tuned!

Best Beaches in Rhode Island
Check out our list of our favorite beaches in Rhode Island!

Sunrise at Narragansett Town Beach
Rhode Island may be the tiniest state in the U.S., but it’s packing a serious punch when it comes to shoreline—over 400 miles of it! Some of our favorite beaches are tucked along the southern coast and Aquidneck Island. We’ve been itching to share this list so you can start planning the ultimate summer trip to the Ocean State.
This list runs roughly south to north. Most beaches are state-run by the D.E.M. (Department of Environmental Management), meaning they’re free to walk onto, but parking will cost you. In-state and out-of-state rates apply, and season passes are available through the D.E.M. website if you plan on becoming a regular (we wouldn’t blame you). A few beaches are town-owned, which might mean pricier access for non-residents. And hey—our first stop is actually a private beach. Fancy!


Watch Hill Beach – Watch Hill
Located in the picture-perfect seaside village of Watch Hill (yes, the one where Taylor Swift has a house), this private beach charges $15 for adults and $8 for kids ages 3–17. It’s only open from 10am–8pm, so plan accordingly. There’s a charming historic carousel for the kids—or nostalgic grownups—and some great boutique shops if you need a break from the sun or are suddenly inspired to buy linen pants.


Misquamicut State Beach – Westerly
Just down the coast from Watch Hill, Misquamicut is one of Rhode Island’s most popular beaches—and for good reason. It’s got soft sand, rolling (but gentle) waves, lifeguards, bathrooms, food stands, and even live music in the summer. It’s great for families, couples, and anyone looking for that classic “beach day” experience. Come early, bring snacks, and don’t forget your floaties.


East Beach – Charlestown
Heading north, we hit East Beach—a nature lover’s dream. This three-mile-long barrier beach is about as raw and unspoiled as it gets. It borders the Ninigret National Wildlife Refuge and even has a tiny campground with 20 primitive sites. It’s great for solitude, stargazing, and 4x4 vehicles if you’re feeling adventurous. Just note: amenities are basically limited to porta-potties. Bring your own everything.


Blue Shutters Beach – Charlestown
On your way to East Beach, you’ll pass Blue Shutters, a town beach with decent facilities and a little more parking. Both beaches fill up fast on sunny days, so aim to arrive early unless you enjoy the thrill of a parking lot showdown. Bonus: the views of Block Island across the water are top-notch.


East Matunuck State Beach – South Kingstown
Cruising north, just off Route 1 brings you to East Matunuck, a great beach for families with a full-service pavilion and soft sand. A short walk to the jetty offers a great view of the Block Island Ferry chugging out of nearby Galilee. You might even spot a few seagulls eyeing your sandwich choices. They can be aggressive there!


Salty Brine State Beach – Galilee
This cozy beach sits on the other side of the breakwater from East Matunuck and is one of the few spots in Rhode Island where you’ll find barely any waves—perfect for little ones or folks who just want to float. The views are gorgeous, the sand is soft, and you’re steps away from shops and restaurants. Grab a drink and some clamcakes at Champlin’s and watch the boats roll in.


Scarborough State Beach – Narragansett
Scarborough is the heavy hitter of Rhode Island beaches. It’s massive, with two large parking lots, plenty of space, and solid amenities. Wander down to the end of the beach and you’ll find the ruins of an old mansion near Black Point, which makes for a fun little side adventure. There’s even a walking trail along that goes out to Black Point—great for sunrise pics or pretending you’re in a moody beach movie.


Narragansett Town Beach – Narragansett
Arguably the most iconic beach in Rhode Island, this spot has it all: soft sand, crashing waves, sweeping views of the bay entrance, Jamestown, Newport, and the famous Narragansett Towers. It’s a favorite for surfers, sunbathers, and anyone who enjoys people-watching from behind a pair of oversized sunglasses. This one can get very busy—beach pros know to arrive early or bike in.


Mohegan Bluffs – Block Island
If you’re up for an adventure, hop on the ferry from Galilee to Block Island and make your way to Mohegan Bluffs. After descending 141 wooden steps (yes, we counted), you’ll land on one of the most stunning and secluded beaches in the Northeast. Towering clay cliffs and crashing surf make this feel like a tropical escape—minus the palm trees. Wear good shoes and don’t forget your camera.
Bonus tip: The ferry ride alone is worth the trip!


Second Beach (Sachuest Beach) – Middletown
Last but definitely not least, Sachuest Beach (known locally as “Second Beach”) offers dramatic views of the Atlantic and is backed by the gorgeous campus of St. George’s School. It’s a favorite among locals and visitors alike, and there’s great surfing on one end and calmer water on the other. At the far end of the road, the Sachuest Point National Wildlife Refuge offers easy trails and beautiful ocean views—perfect for walking off that beach snack haul.
Whether you’re looking for a bustling beach with bathrooms and snack shacks or a wild stretch of sand where your only company is a curious seagull, Rhode Island has you covered. Don’t forget to grab a Del’s Frozen Lemonade—it’s basically a law around here—and remember: the earlier you get to the beach, the better the parking (and the prime towel real estate).
Now get out there and make some sandy memories out there!

A Perfect NH Itinerary For Your Visit This Summer.
The must visit spots on your visit to New Hampshire.
*In our opinion
From its small coastline, to its gorgeous mountains, New Hampshire offers a variety of beautiful scenery. There are great spots to vacation, hike, eat, and explore. Here is what we would recommend for a long weekend getaway.

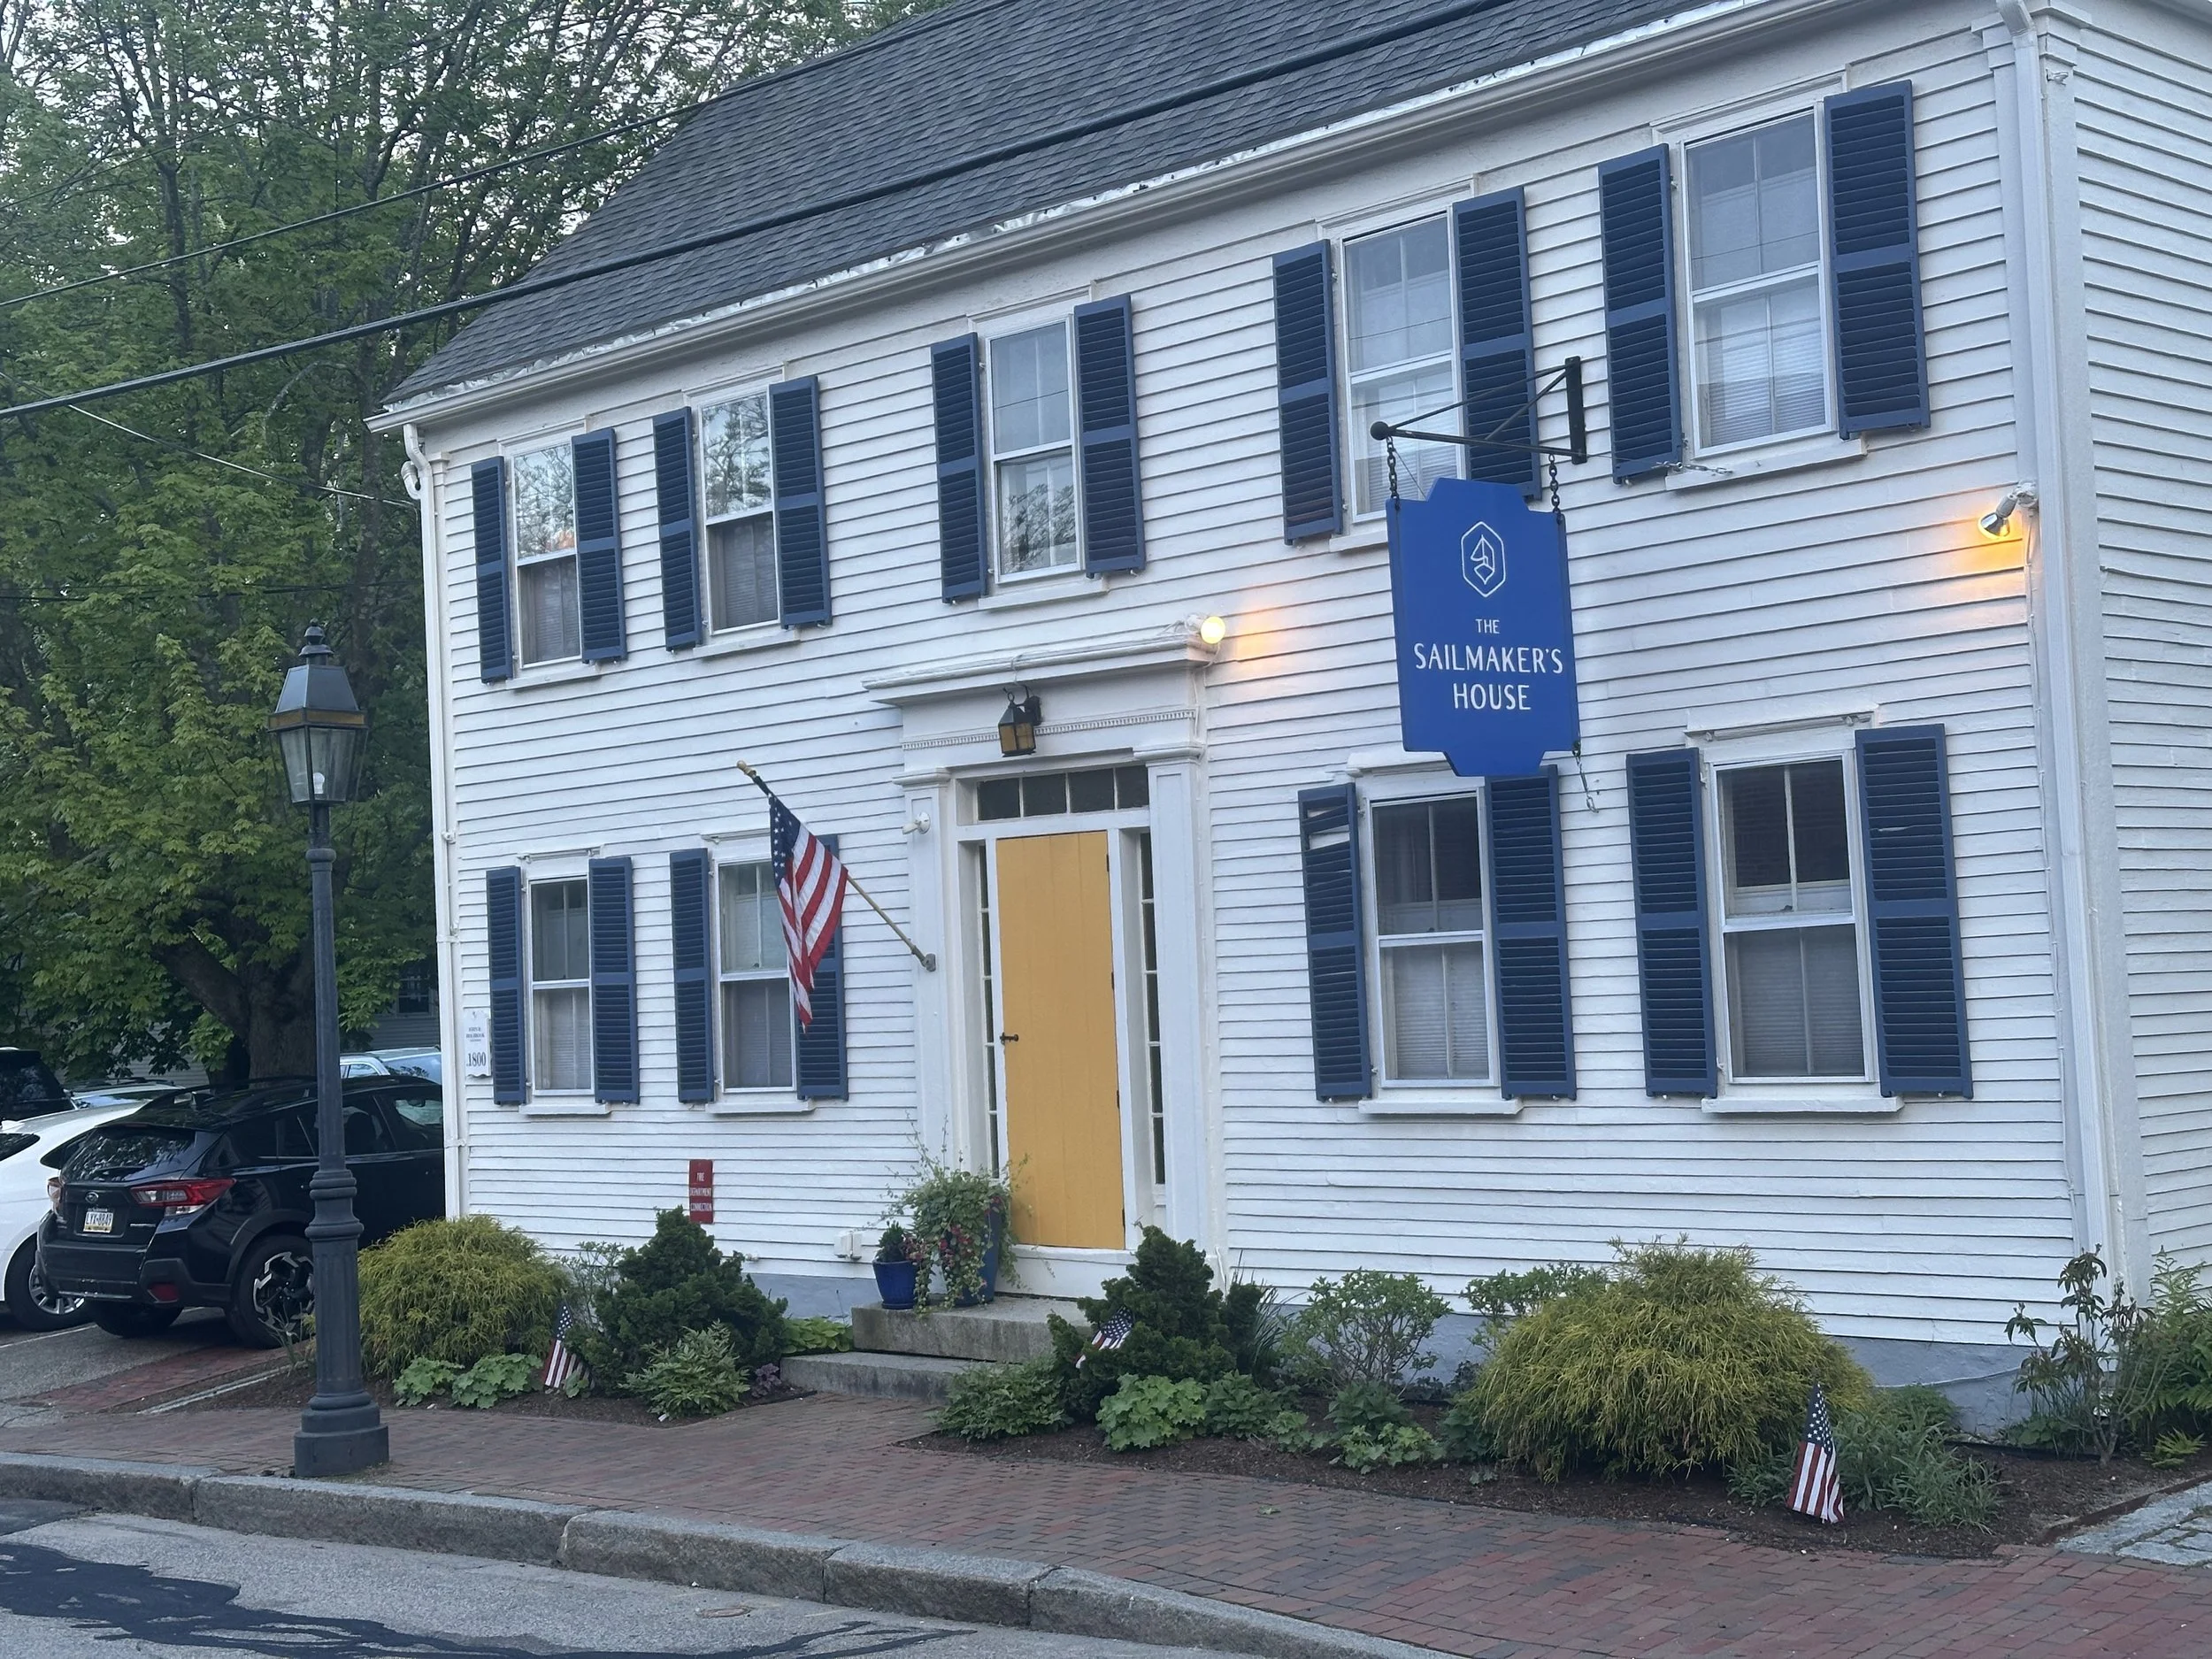
Day 1. Start in Portsmouth, NH, easily accessible from 95 and only an hour from Boston. This historic little city (yes NH has cities) has a lot of charm, history, and great places to eat and drink. We recommend that you check into the Sailmaker's House. They’re a small hotel that boasts an intimate experience with Portsmouth quaint downtown. This hotel recommends all kids be over the age of twelve and offers free parking which is a hot commodity in downtown Portsmouth.
Once checked in, walk over to Strawbery Banke. Strawbery Banke is New Hampshire's only Smithsonian Affiliate Museum. The museum itself offers a few historical homes all decorated from distinct time periods from pre-colonial to the 1940s. Strawbery Banke Museum is only open in the summer, however if you are planning to visit in the winter, they offer outdoor ice skating called Puddle Dock Pond. If you are planning to visit around Halloween or Christmas also check their calendar for special events such as Ghosts on the Banke or the Candlelight Stroll.


After enjoying some history, walk around downtown Portsmouth for some shopping. Some of our favorite spots include:


Off Piste- A unique shop with something for everyone, funny cards, books, games, socks, and some New Hampshire specific souvenirs. They deem themselves “the coolest gift shop to exist in the history of forever” and we could not agree more!
Evie- An upscale boutique clothing store with a unique selection of rotating stock that is always fun to shop at!
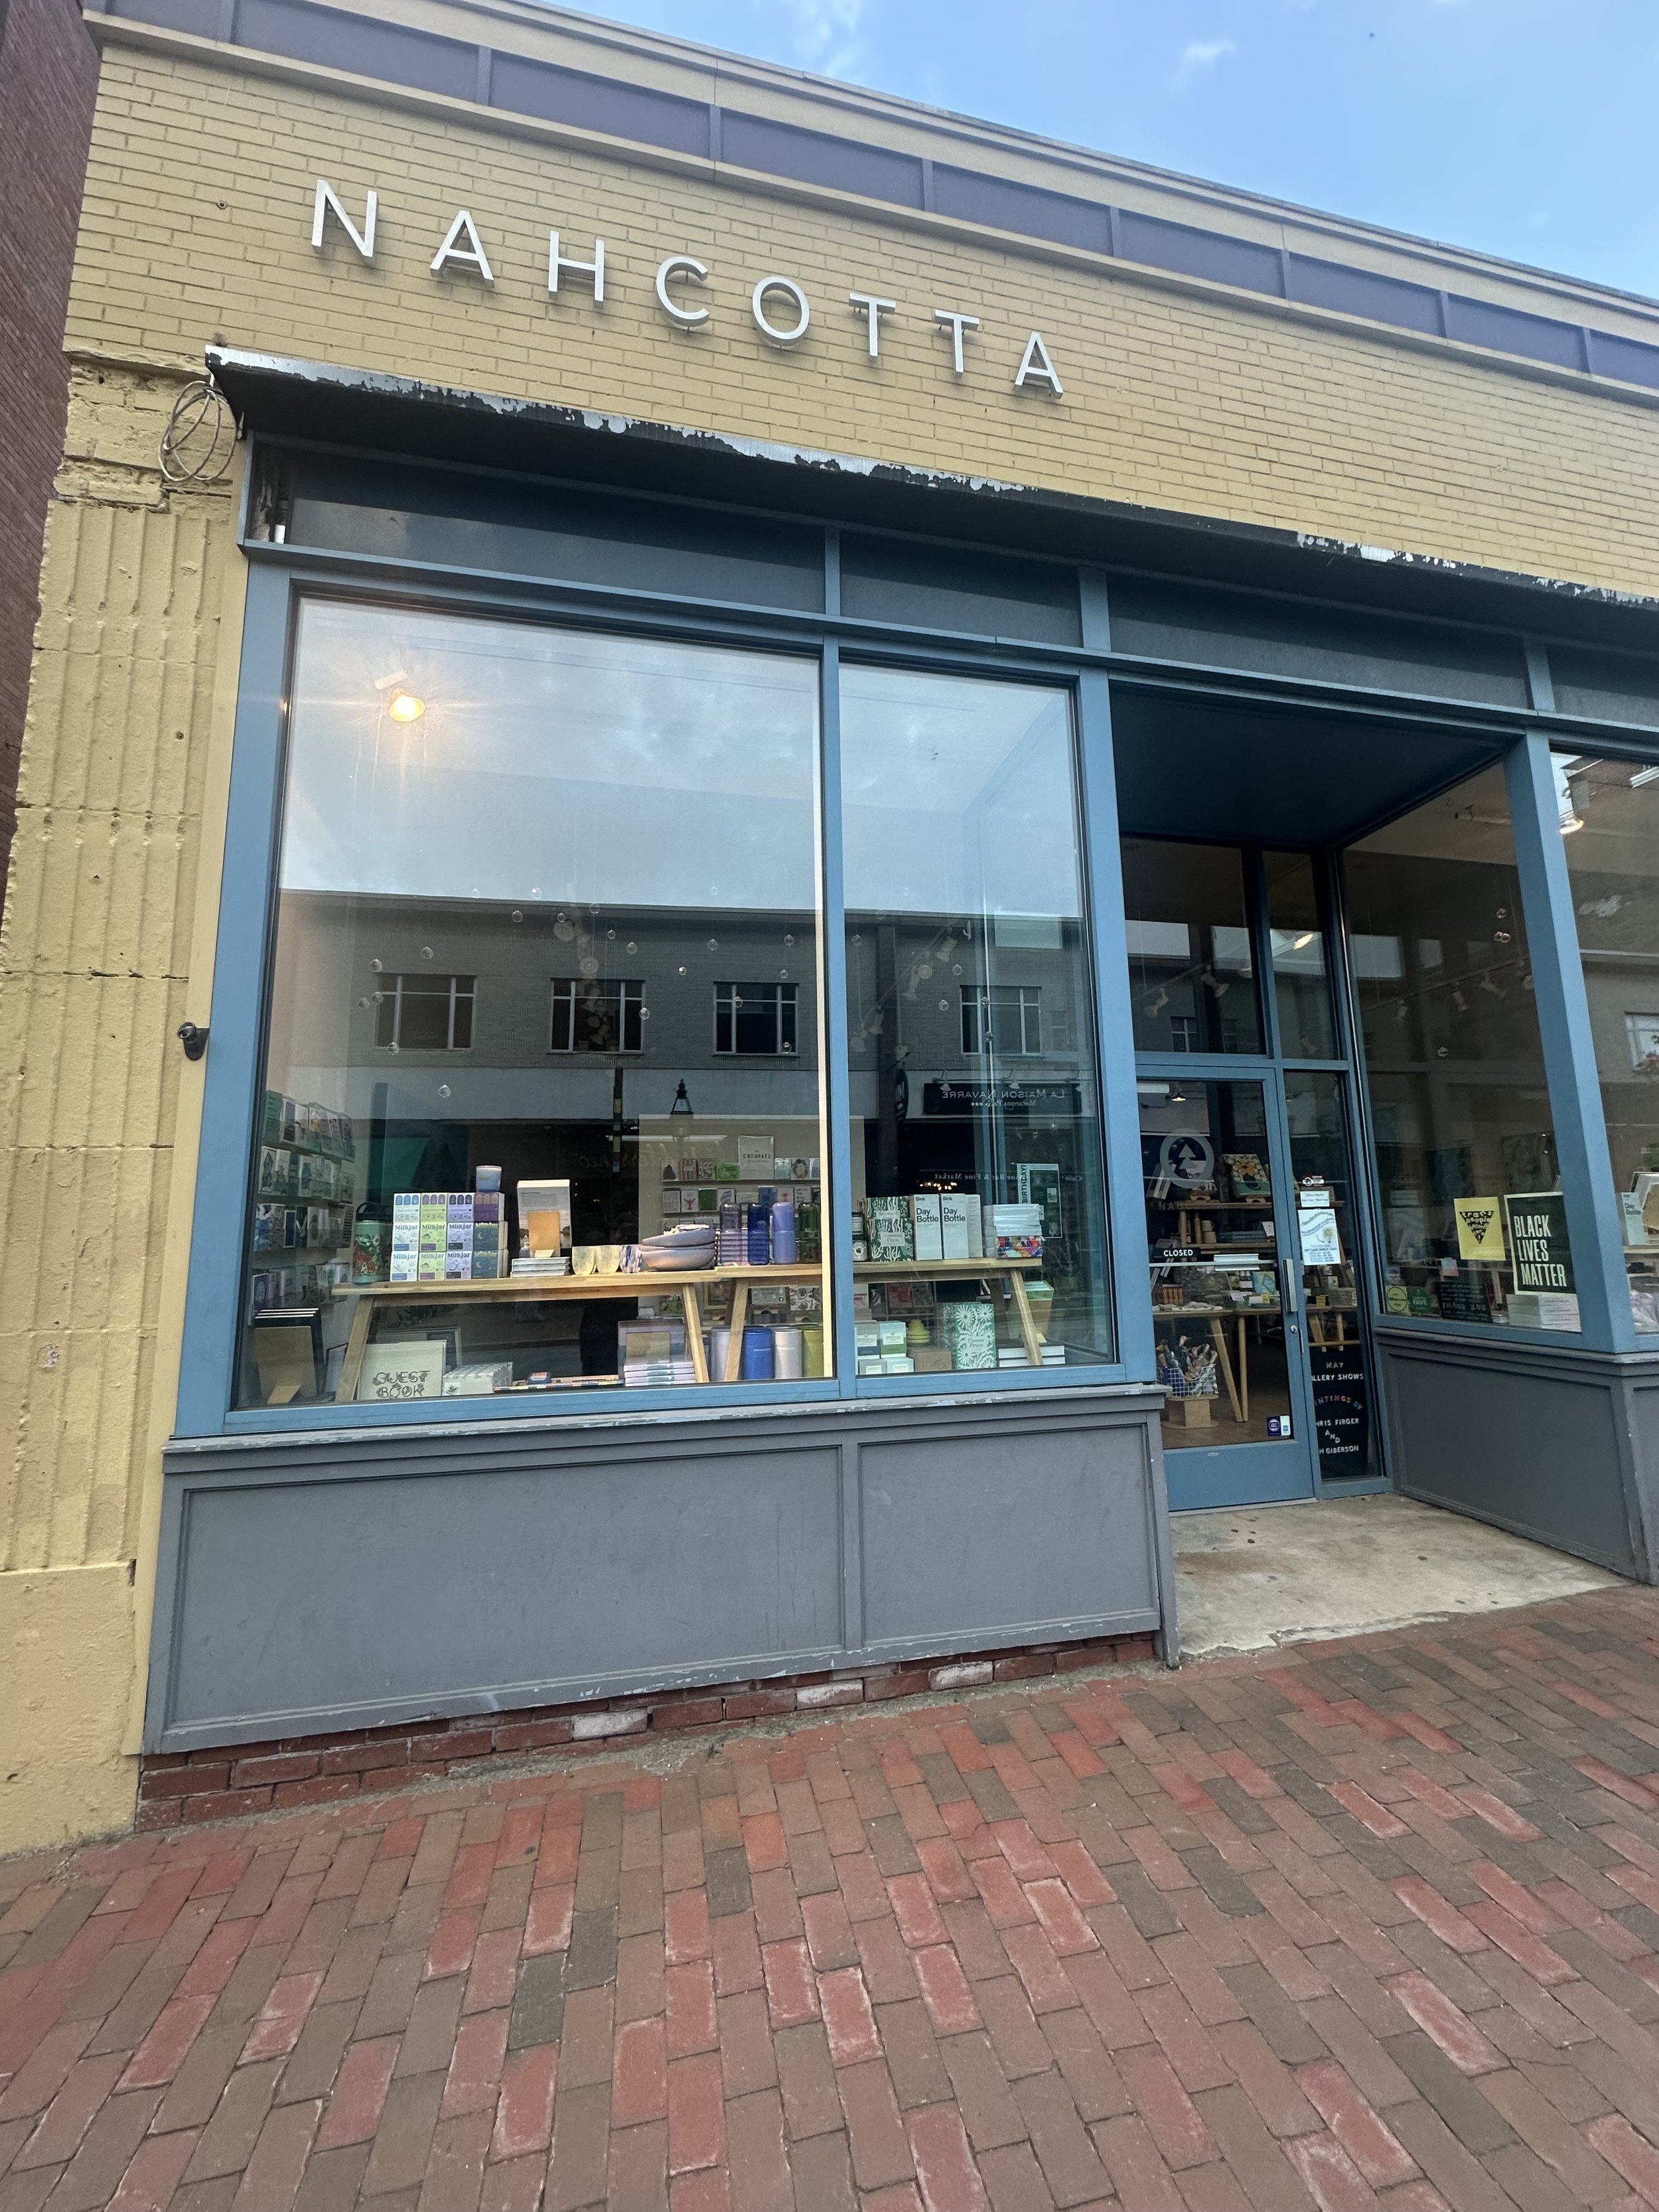
Nahcotta- A adorable art and stationary store that has a variety of options such as pens, prints, original paintings, and some pretty cute jewelry!
Cotillion Bureau- A curated up-cycled vintage clothing and accessory store that has some of the most unique pieces I have ever seen. My daughter has bought a variety of different items there from a 1940s jacket, to vintage silk scarves, they have something for everyone. One aspect that we would love to highlight is that they sometimes offer plus size options in the form of high quality vintage inspired outfits.
For lunch, there are so many amazing spots. You truly can not go wrong. We recommend:


The River House- Located on the Piscataqua, The River House has beautiful views and delicious food. We recommend the clam chowder.
Popovers- Located in the heart of downtown, Popovers has good coffee, tasty salads and their popovers with maple butter are a must try. Whether you want a quick coffee to go, or to sit down for a few minutes, Popovers has options for both.
Moe’s- Moe’s is a New Hampshire institution. Moe’s offers Italian sandwiches, it's a classic Portsmouth staple. We recommend an original Moe’s with oil and don’t forget those salt and vinegar chips.
Salud- Salud offers a lighter affair, including Acai bowls, smoothies, and as the name may suggest, salads. This is your spot for a healthy bite to eat.
For evening activities summer is the time to visit Portsmouth. Prescott Park Art Festival offers a play throughout the summer. That is their main stage production playing most Thursday- Sunday throughout the summer. Then they also offer concerts and weekly movies in the park. The stage is set on the Piscataqua River and truly has magical vibes. Get there early, set a blanket down and walk around the beautiful flowers. Prescott Park Arts Festival is free to attend but they do ask for donations.
Jimmy’s Jazz & Blues Club, the Music Hall and the Press Room are other venues that offer great shows. Check out their websites for schedules and to purchase tickets. Although all these venues have a different vibe, they all offer high quality entertainment.


Looking for dinner? Or maybe a cocktail before you head out to listen to some amazing live music? Check out one of our go-to spots that is within walking distance from the hotel:
The Wilder- A gastropub, with moody vibes, The Wilder has a collective menu with something for everyone. We recommend the espresso martini.
Jumpin’ Jay’s- A local seafood spot that boasts fresh fish that is delivered daily. We recommend the catch of the day, where you can pick your fish, sauce and sides.
Old Ferry Landing- A rustic seacoast treasure that is right on the water. It is a popular spot to grab a drink and enjoy watching the tugboats. For drinks we recommend trying a Jimmy Juice. For dinner this is your spot for fried seafood.
Barrio- Tacos, tequila, and whiskey! Need I say more?
Toscana- An upscale Italian chop house and bar. Their food and drinks are amazing. This is a great spot for a special occasion, we recommend their burrata starter.
There are many other amazing spots around town that we could not fit them all here!
Day 2. The next morning, grab a coffee and a pastry (or my personal favorite, the eggs cilbir) at Elephantine Bakery. In the summer the line can get long but it is well worth the wait. Not only is their food amazing, but the atmosphere, owners, and the staff are also wonderful! If you are visiting in the summer we also recommend checking to see if there is any availability for their Aperitivo dinner, it has been the highlight of my summer each time I have been. They run this event on select nights later in the summer.


After you have your coffee it's time to hit the road. Start heading up north to explore the beautiful White Mountains. Have your hiking gear ready. There are so many trails for ANY ability. Pack a lunch or stop along the way and grab a sandwich for your outdoor adventure. The Common Man Roadside is a great spot to grab a bite on the go. The most convenient locations are in Hooksett (on 93 N) or if you miss that in Plymouth, NH.
The first spot I recommend stopping at is the Flume Gorge. The current cost is: $18 in advance or $21 at the ticket window per adult. This hike is about 2 miles round trip. You will be treated to an absolutely beautiful waterfall. Although it is pricey for a hike, it is worth the visit here. The trail is well maintained and it has a boardwalk that provides you a close up view of the flume.
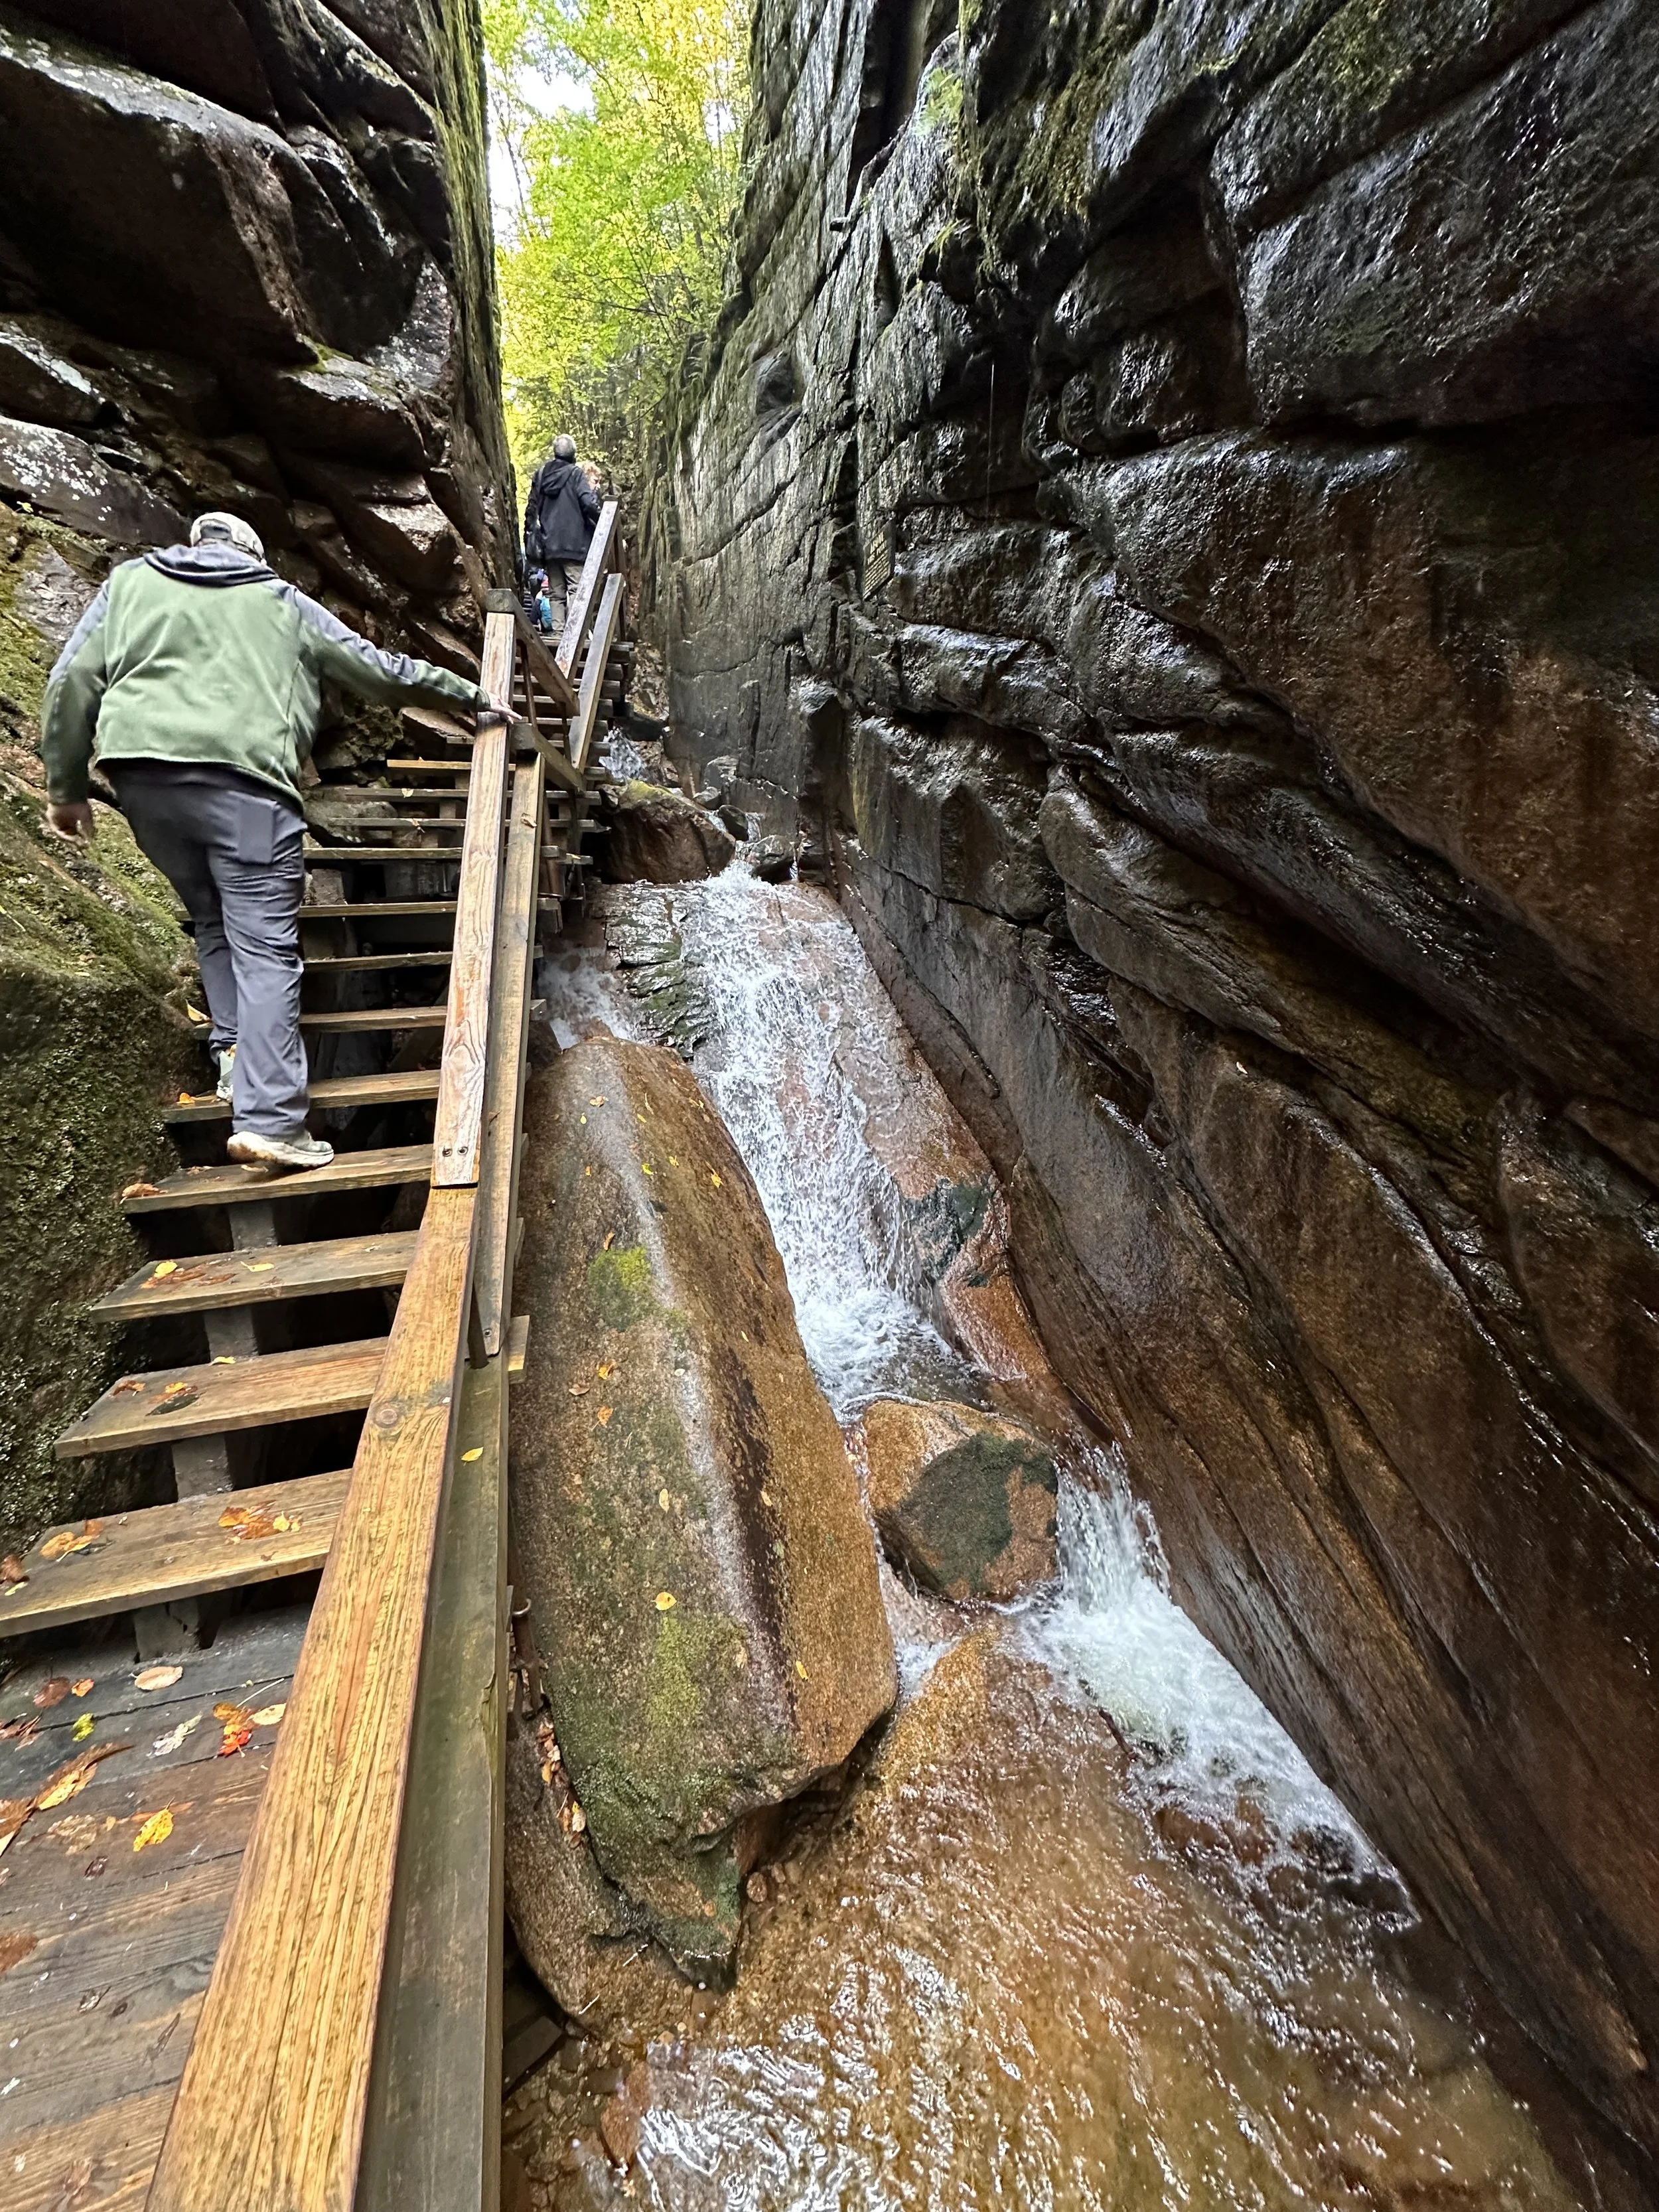
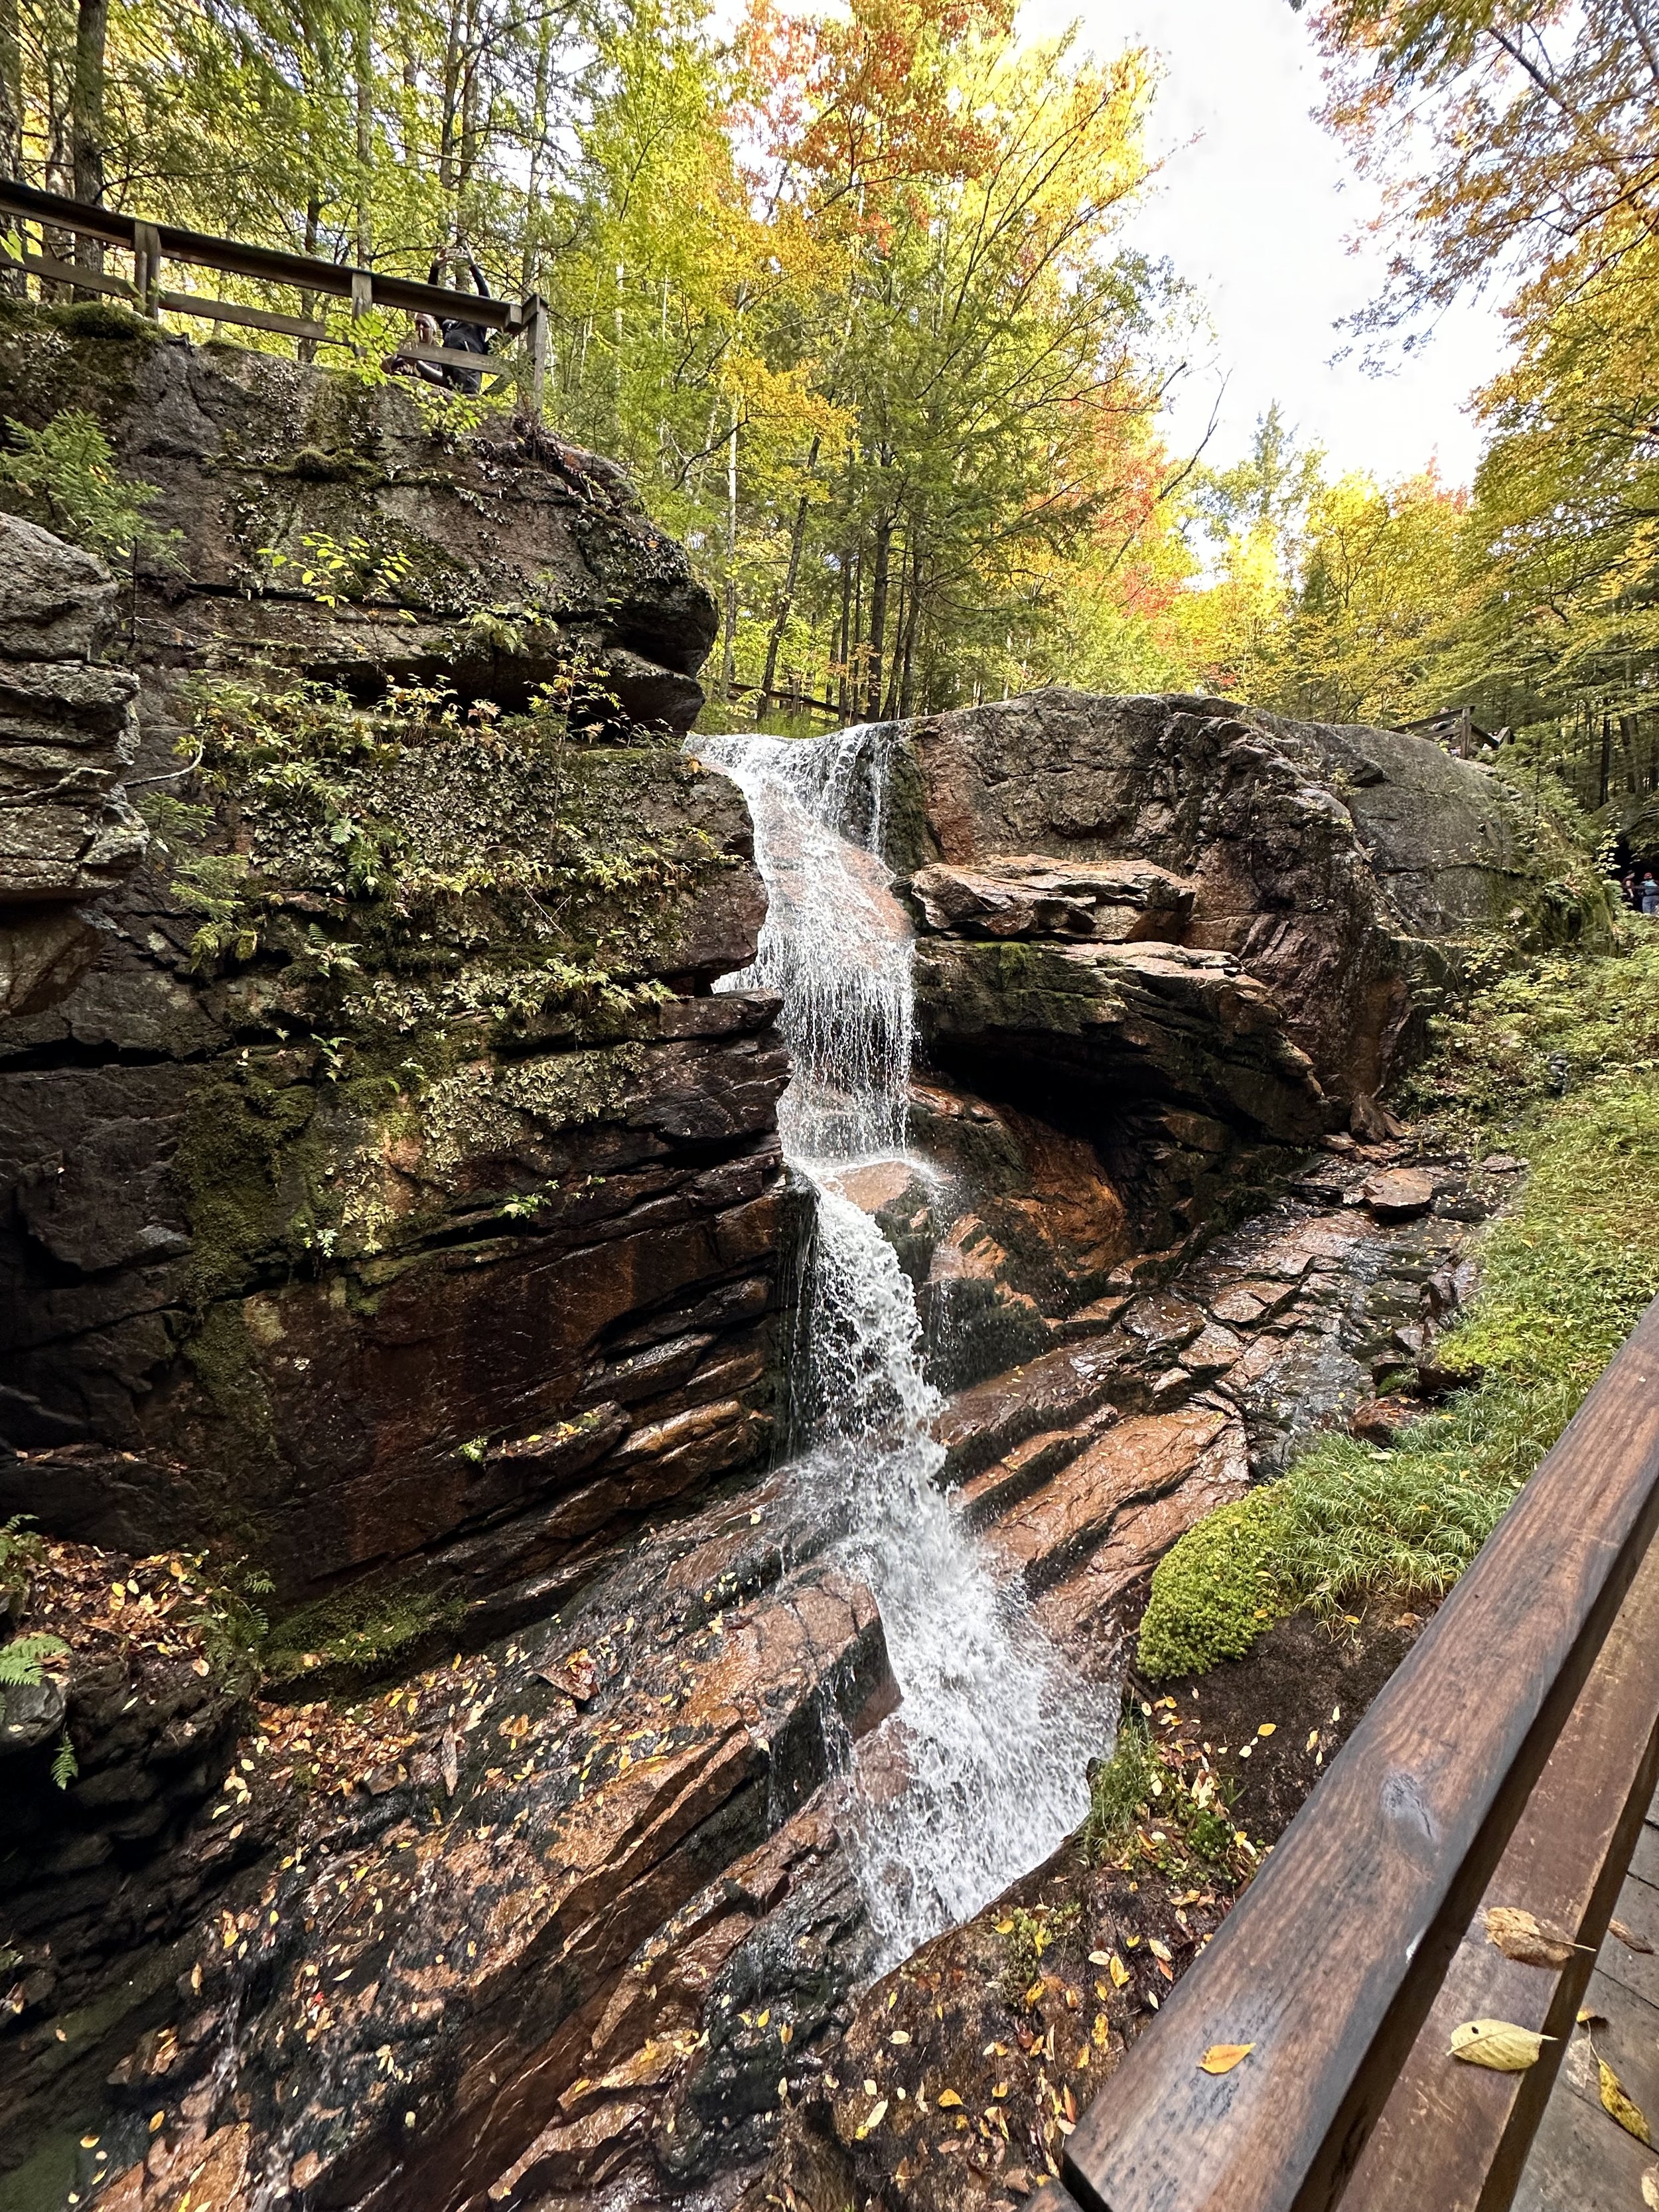


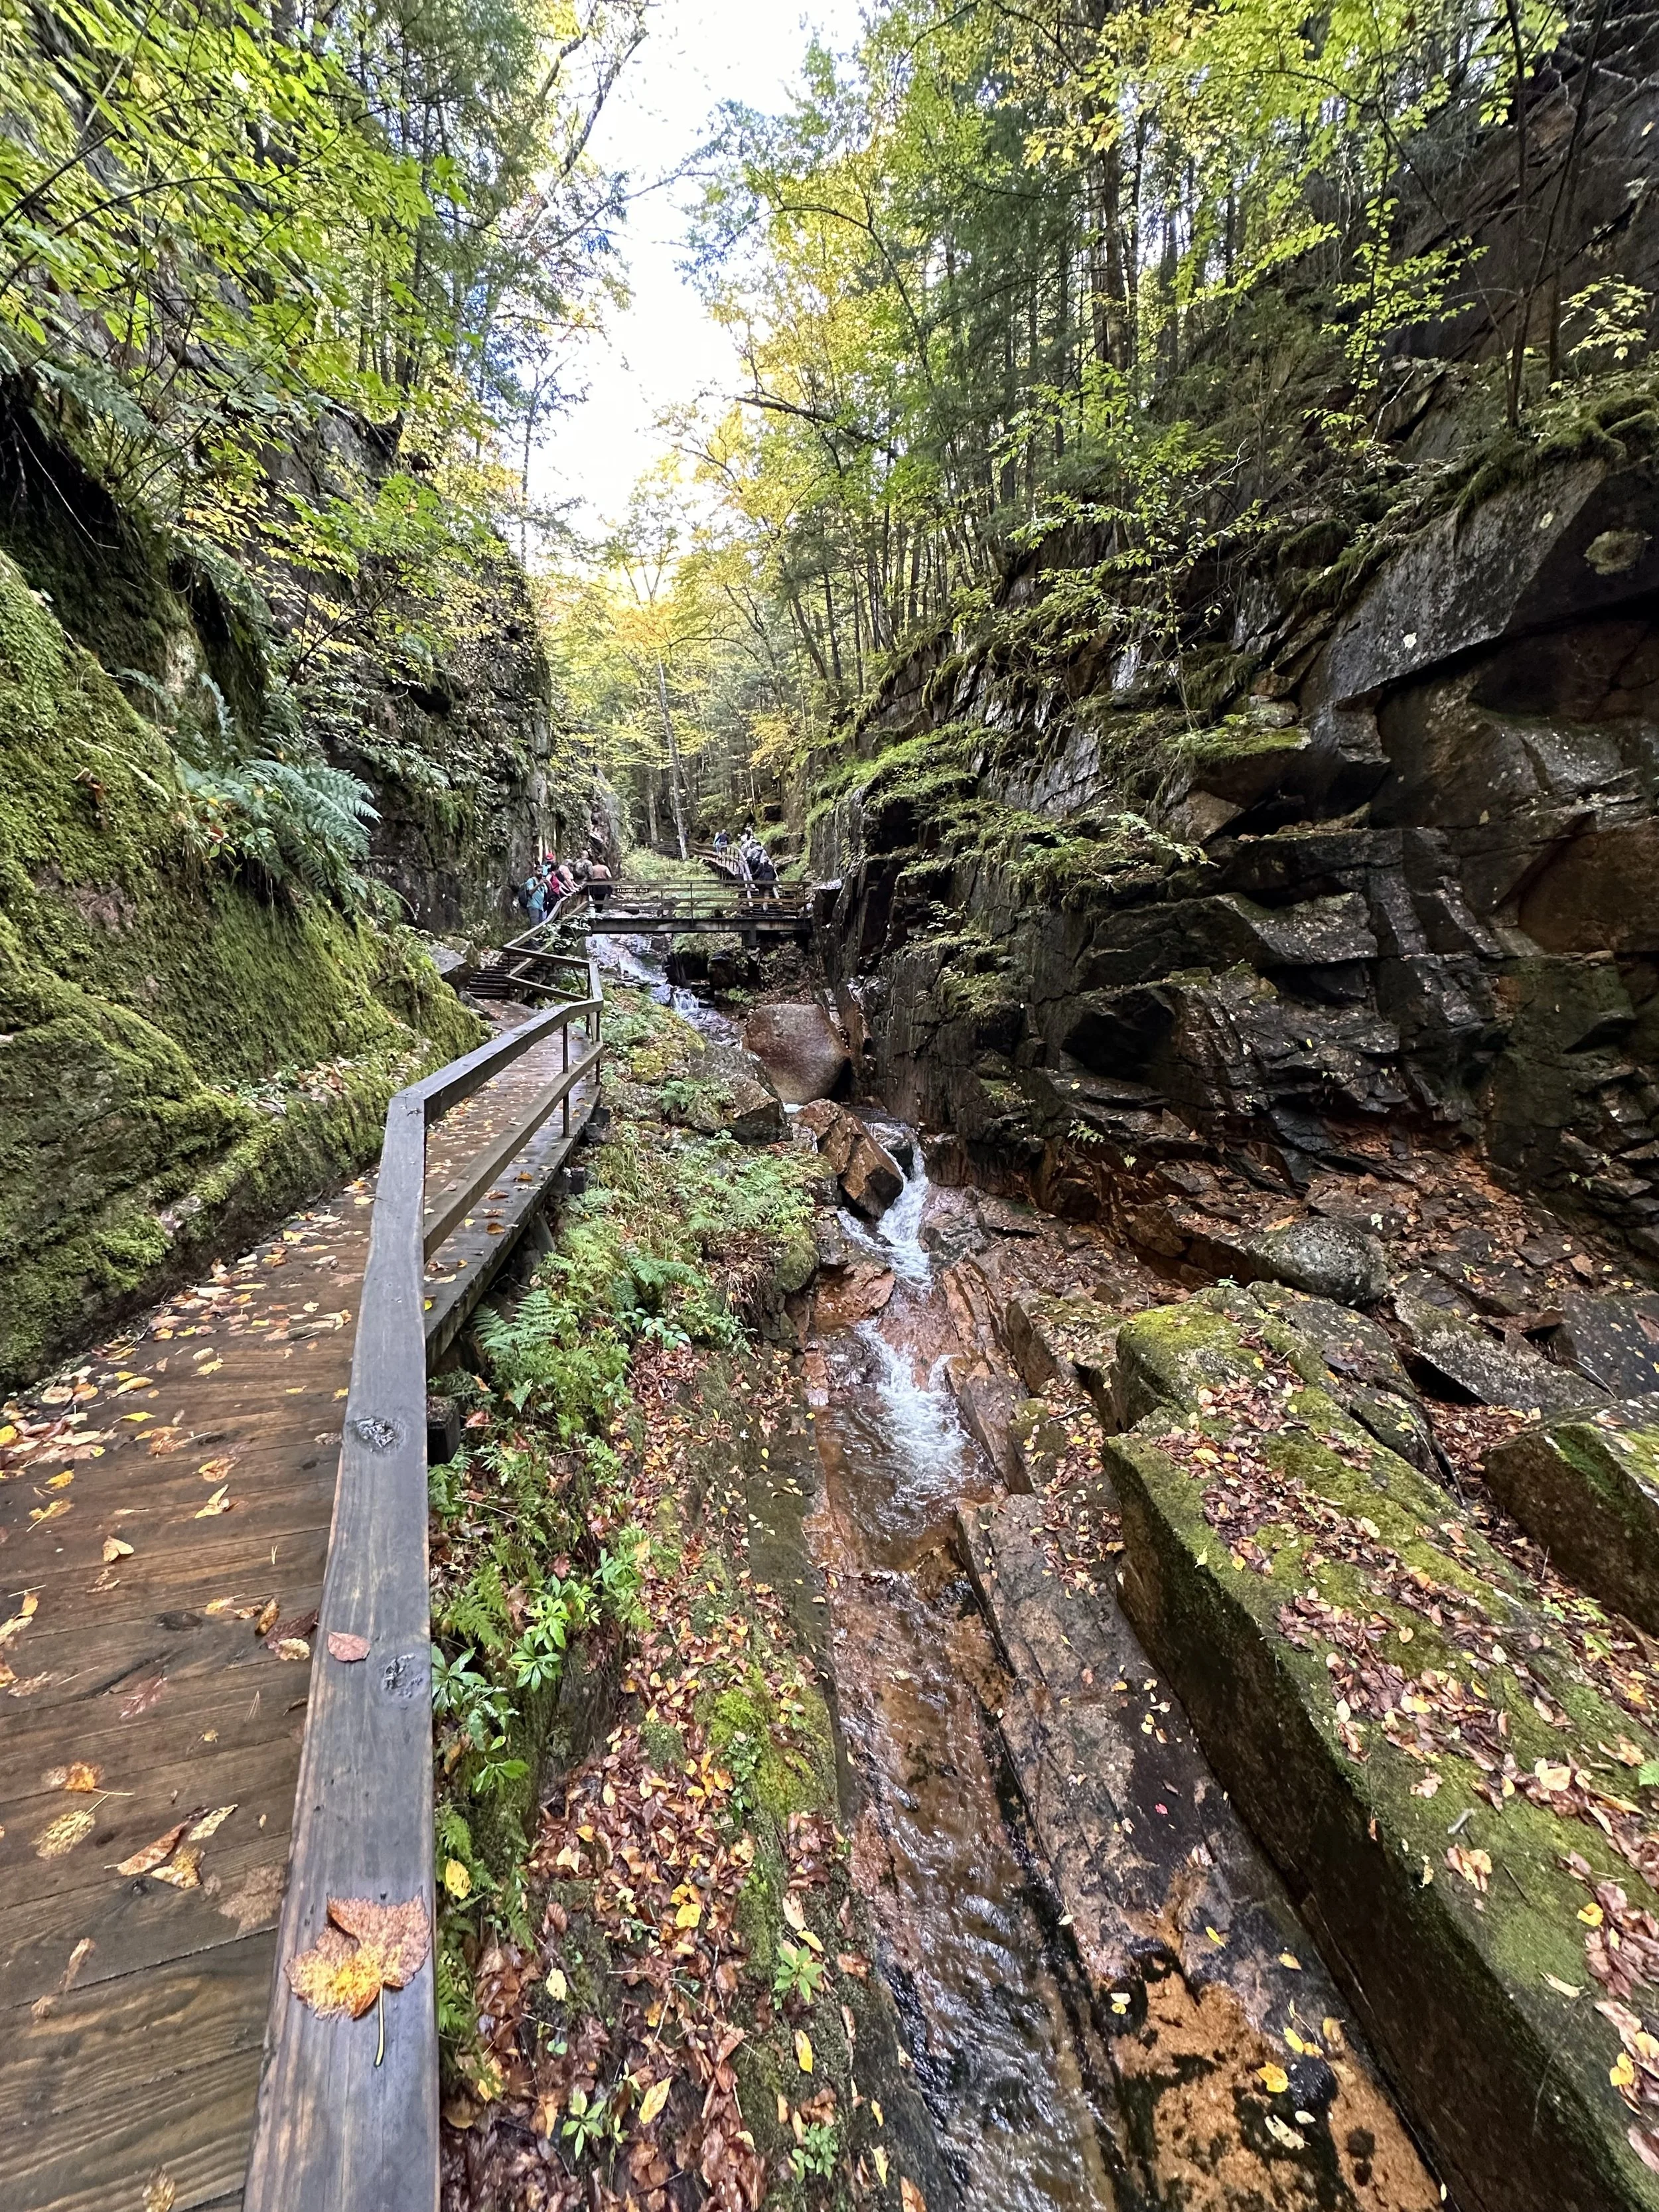
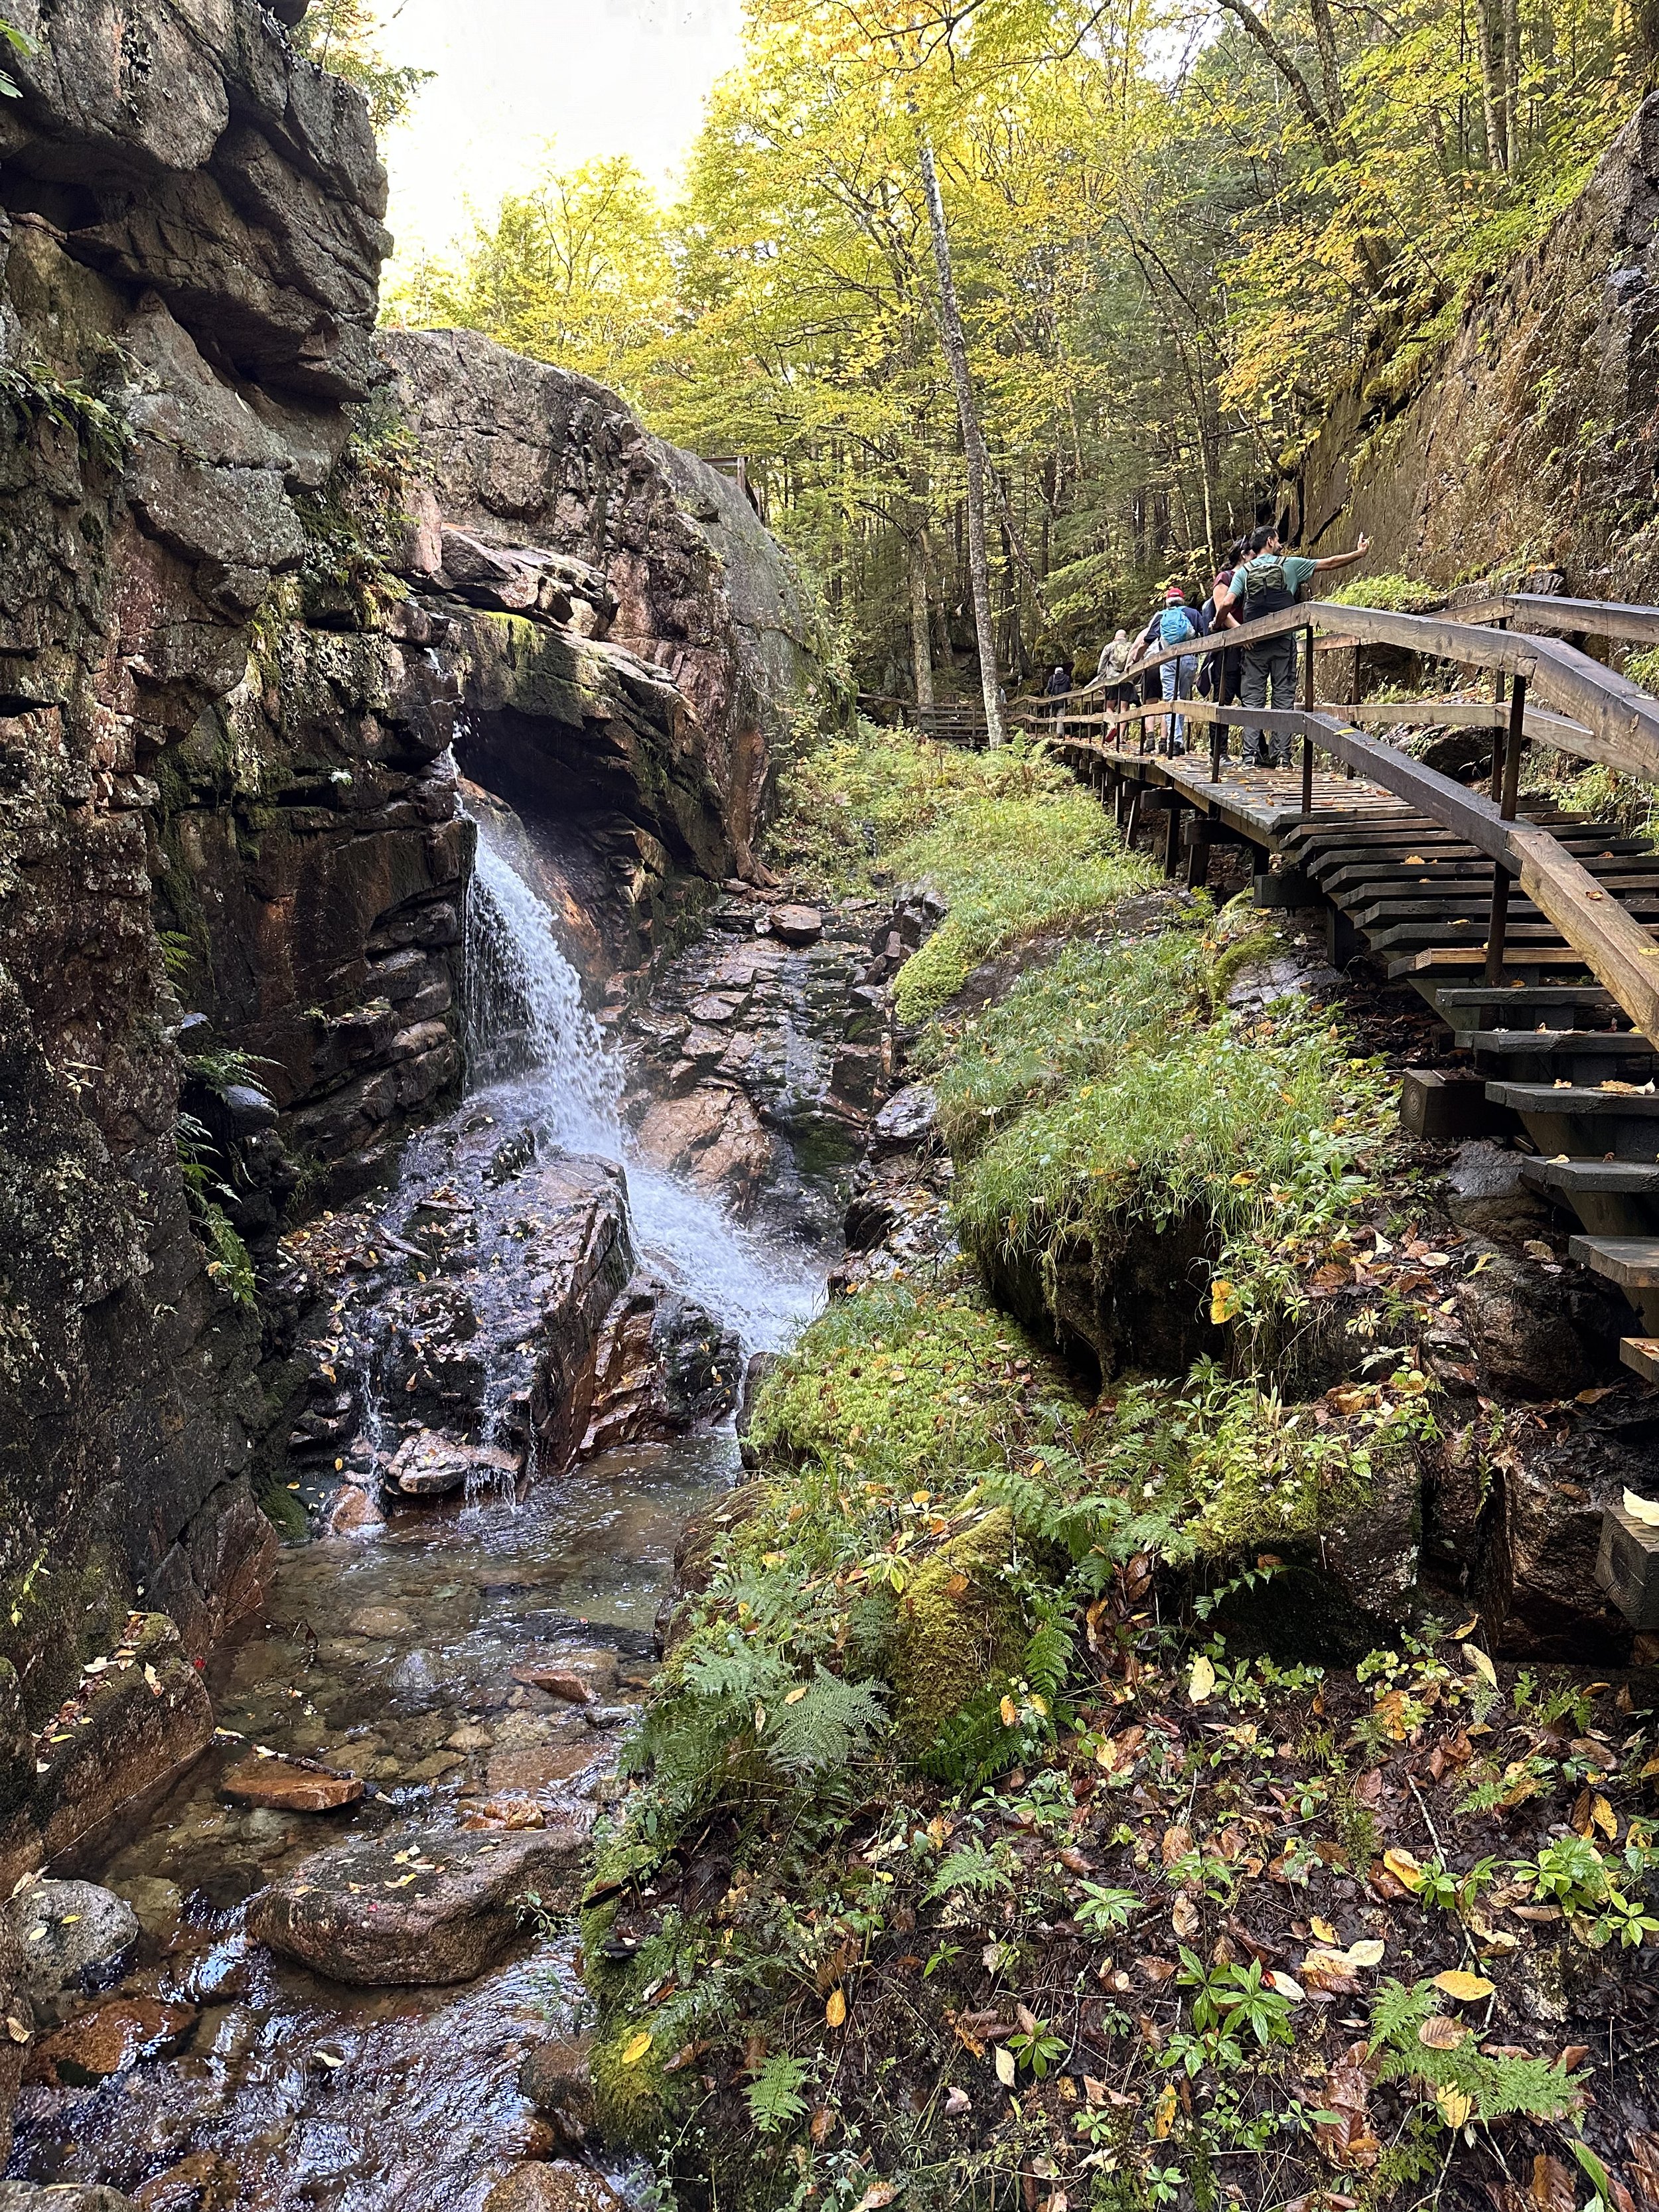

After your hike at the Flume Gorge, keep on driving up through Franconia Notch (also known as the Notch), and check out the Basin. This family friendly hike has a paved section which is (according to their website) is handicap accessible. The Basin itself is the star of the show and is towards the beginning of the hike, so if the full 2.5 mile hike is not for you you can cut it short.


Want to rest your legs but still see some amazing views? We recommend stopping by Cannon Mountain’s Aerial Tramway (off exit 34B). The tramway is an amazing option to get an aerial view of the White Mountains, Maine, Vermont, and if you are lucky, sometimes even Canada! Tickets need to be purchased in advance and prices vary depending on if it is peak season or not. Check out their website for pricing and availability. *Currently the Tram is closed and will re-open after the renovations!
Or are you ready for another hike? We recommend stopping by Cannon Mountain’s Artist Bluff (exit 34C). Artist Bluff is a great hike for most people. The trail is 1.4 miles and can get very busy on beautiful days and extremely busy in the fall. Accessible from Cannons parking lot, there is some slight elevation gain, but it is still an easy hike. The trail provides amazing views of the Notch, lake, and Cannon Mountain.

After your mountain adventures check into the Mountain View Grand Hotel. Personally, this is one of my all time favorite hotels. They offer many seasonal activities. They have a game room, movie theater, indoor and outdoor pool, and a spa. In an ideal world it would be nice to spend two nights here. The first day check in a little later, enjoy dinner and drinks at the hotel restaurant and bar, then unwind in their pool.


We love to stay here anytime! They even make winter wicked fun!
Day 3: The next day, be sure to get up early and head to Sugar Hill to get breakfast. No trip to NH would be complete without a stop at Polly’s Pancake Parlor. This historic pancake parlor is amazing. They used to only be open in the summer but after a large renovation years ago, they are now open year round. They are a very busy place, so if you’re hitting them at peak breakfast hours make sure to call ahead. Before you leave Polly's grab yourself some of their special pancake mix from their gift shop for when you’re home.

Ready for another hike? After you have filled up with delicious pancakes head on over to Crawford Notch to hike Mt Willard. This 3.1 mile round trip hike is absolutely stunning. It is an out and back hike and offers amazing views with no rock scrambles or climbing experience needed. You can hear about our experience hiking Mt Willard on our podcast Link here.

After your hike, head into Littleton, NH. This is one of the cutest towns in New Hampshire. They have some great spots to eat, shop, and explore. A couple of my favorites include
Little Town Brews -A great beer store with the opportunity to make your own 6 pack with beers from around New England. They also offer a variety of non-alcoholic beers. And if you’re lucky you can meet their dogs who are so well behaved and so cute! They have since closed (so sad!)

Chutters- A candy story which boasts the world's longest candy counter. Legit it is long! They have every type of candy we can imagine and then some.

Shaun Terhun Fine Art Photography Gallery- This one of a kind store is a must visit. His photography is absolutely stunning.

Looking for a good meal or a good beer or both? For dinner we recommend Schilling Beer Co for some of the best pizza and beer New England has to offer in a beautiful setting!


Day 4 After breakfast at the hotel and (being sad to leave the Mountain View Grand) head to the base of Mount Washington to ride the Cog Railway. You should pre purchase your tickets. They can be purchased onsite if availability allows.

This historic train has been taking people to the peak of the tallest mountain in the Northeast since 1869. It has a unique cog and rack system built specifically for the steep grades of Mt Washington. We learned on our adventure the technology that allows the train to ascent these steep peaks is similar to the chain on a bicycle. Once at the peak you will have plenty of time to enjoy the breathtaking views of the White Mountains including on a good day being able to see into Vermont, Maine, New York and even Canada! Make sure to pack some layers as Mt. Washington is famous for weather shifts and is known as the “world’s worst weather”.
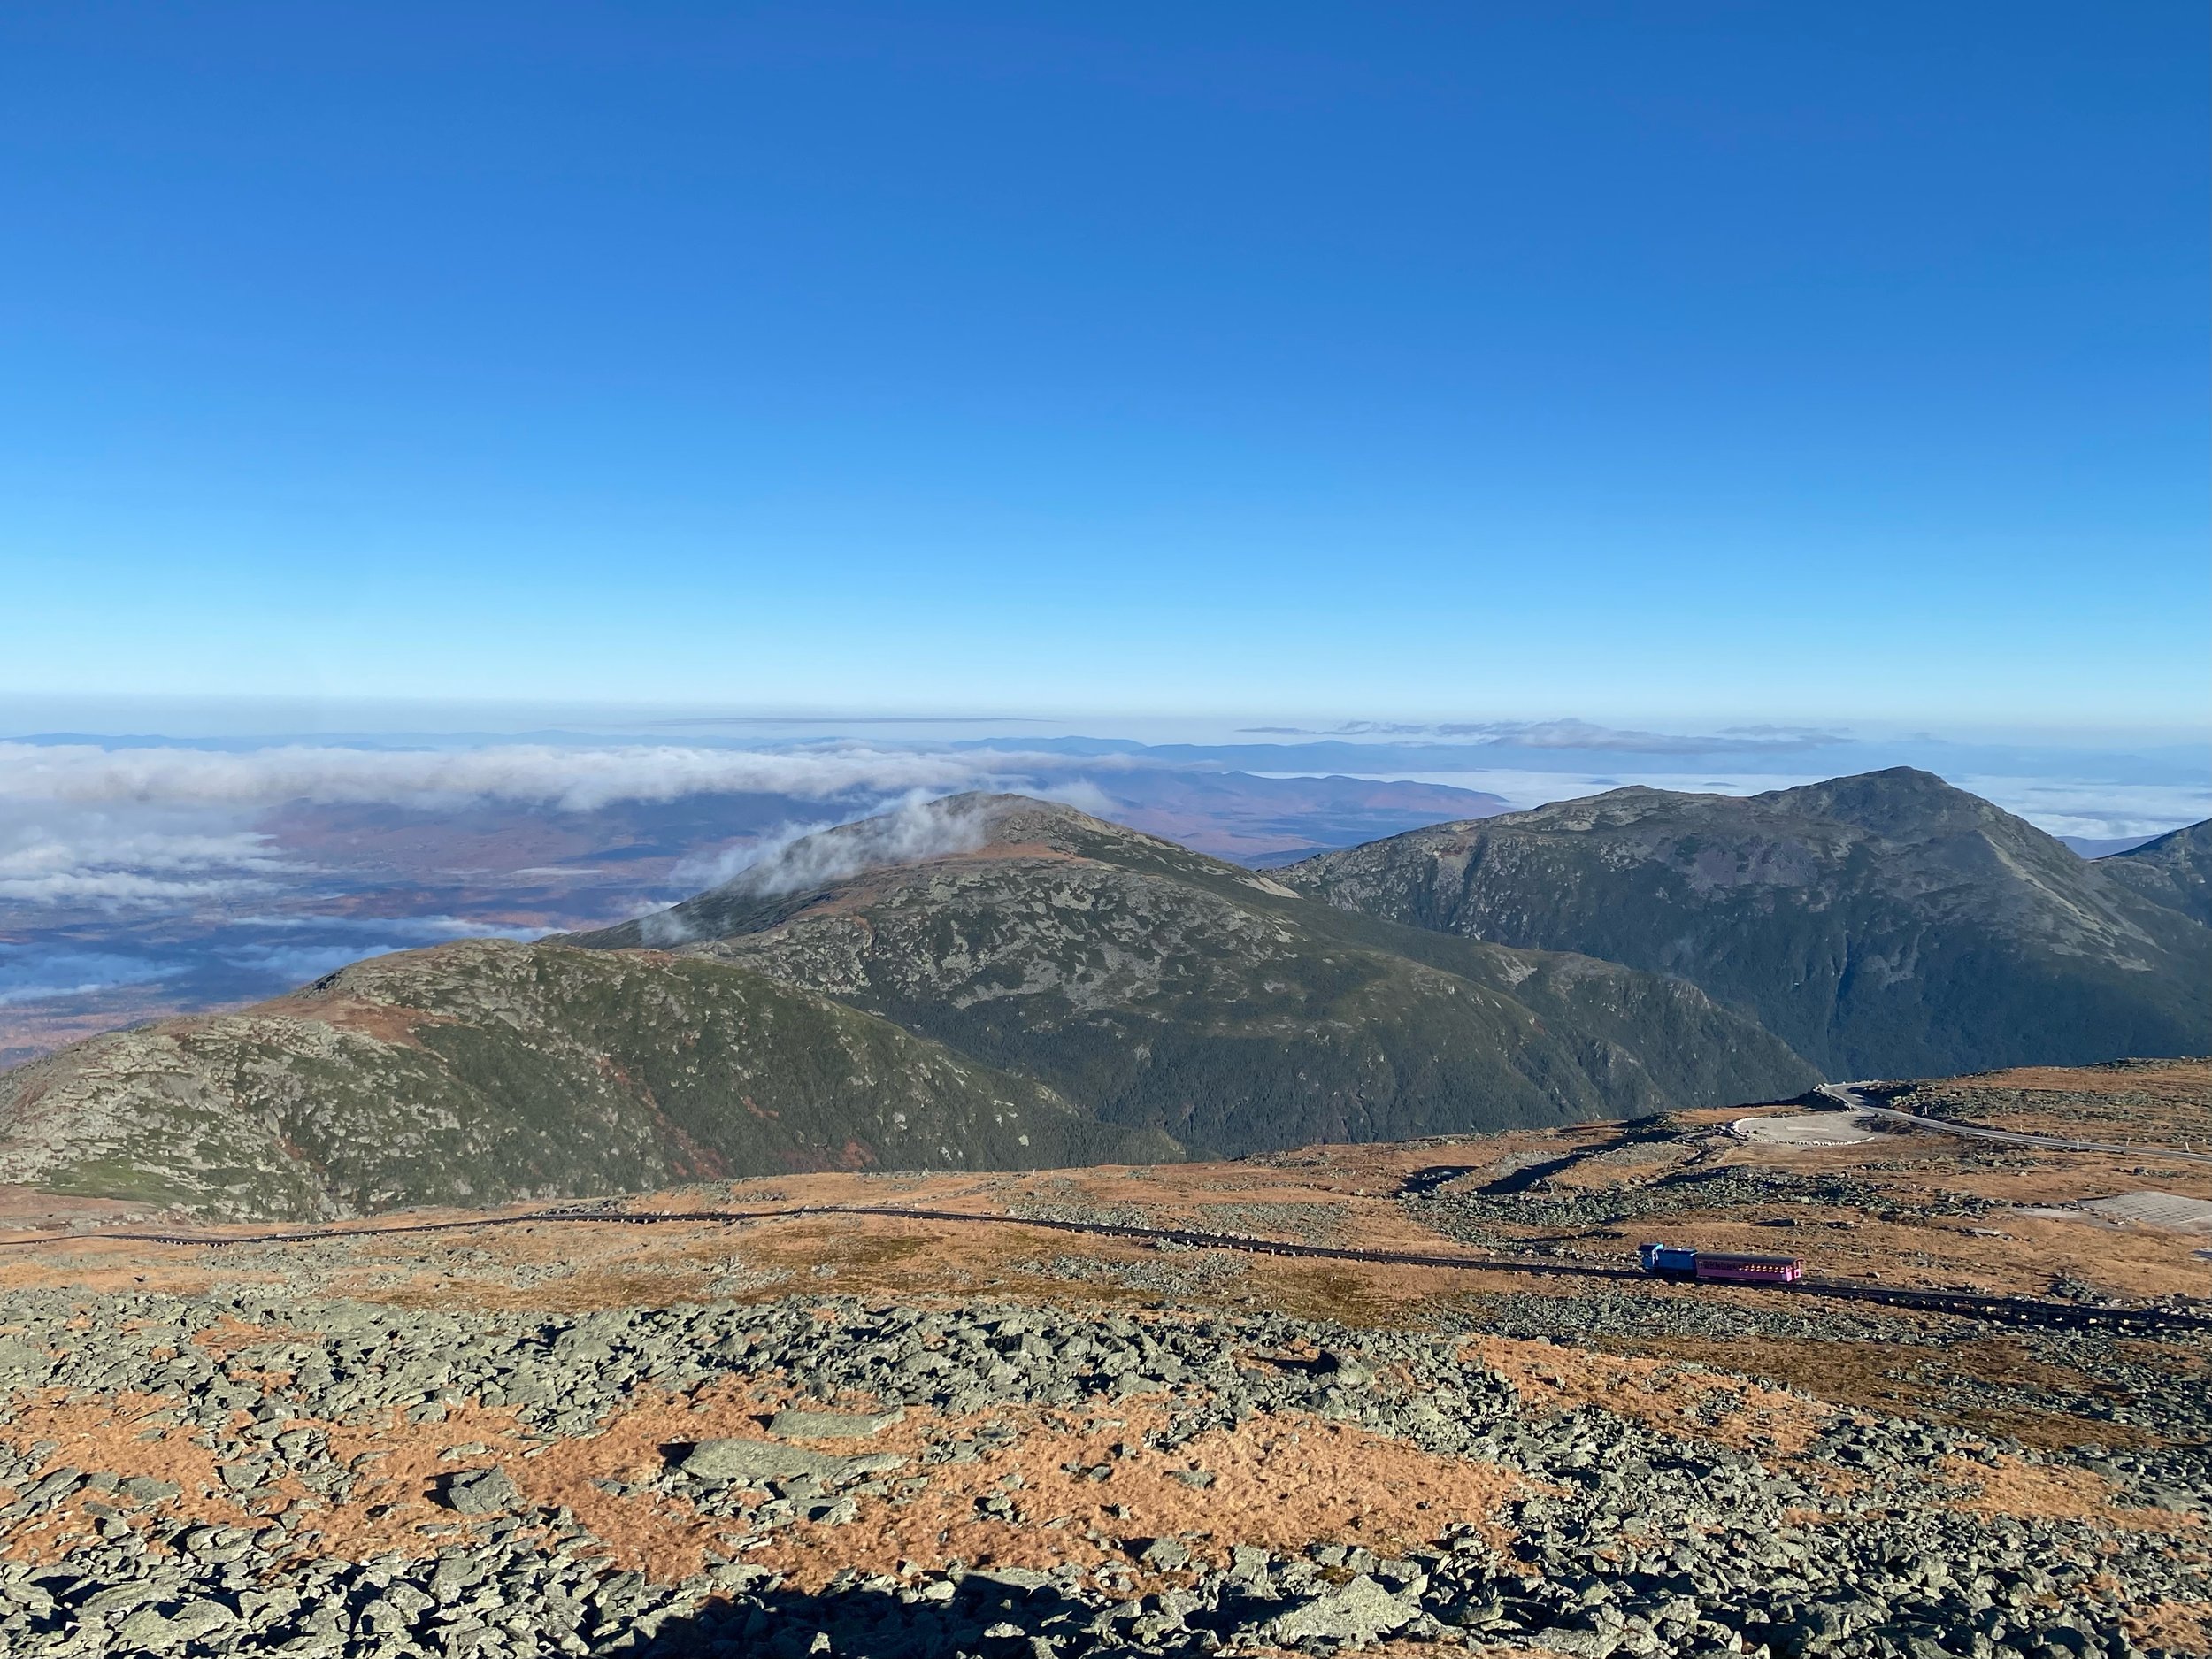


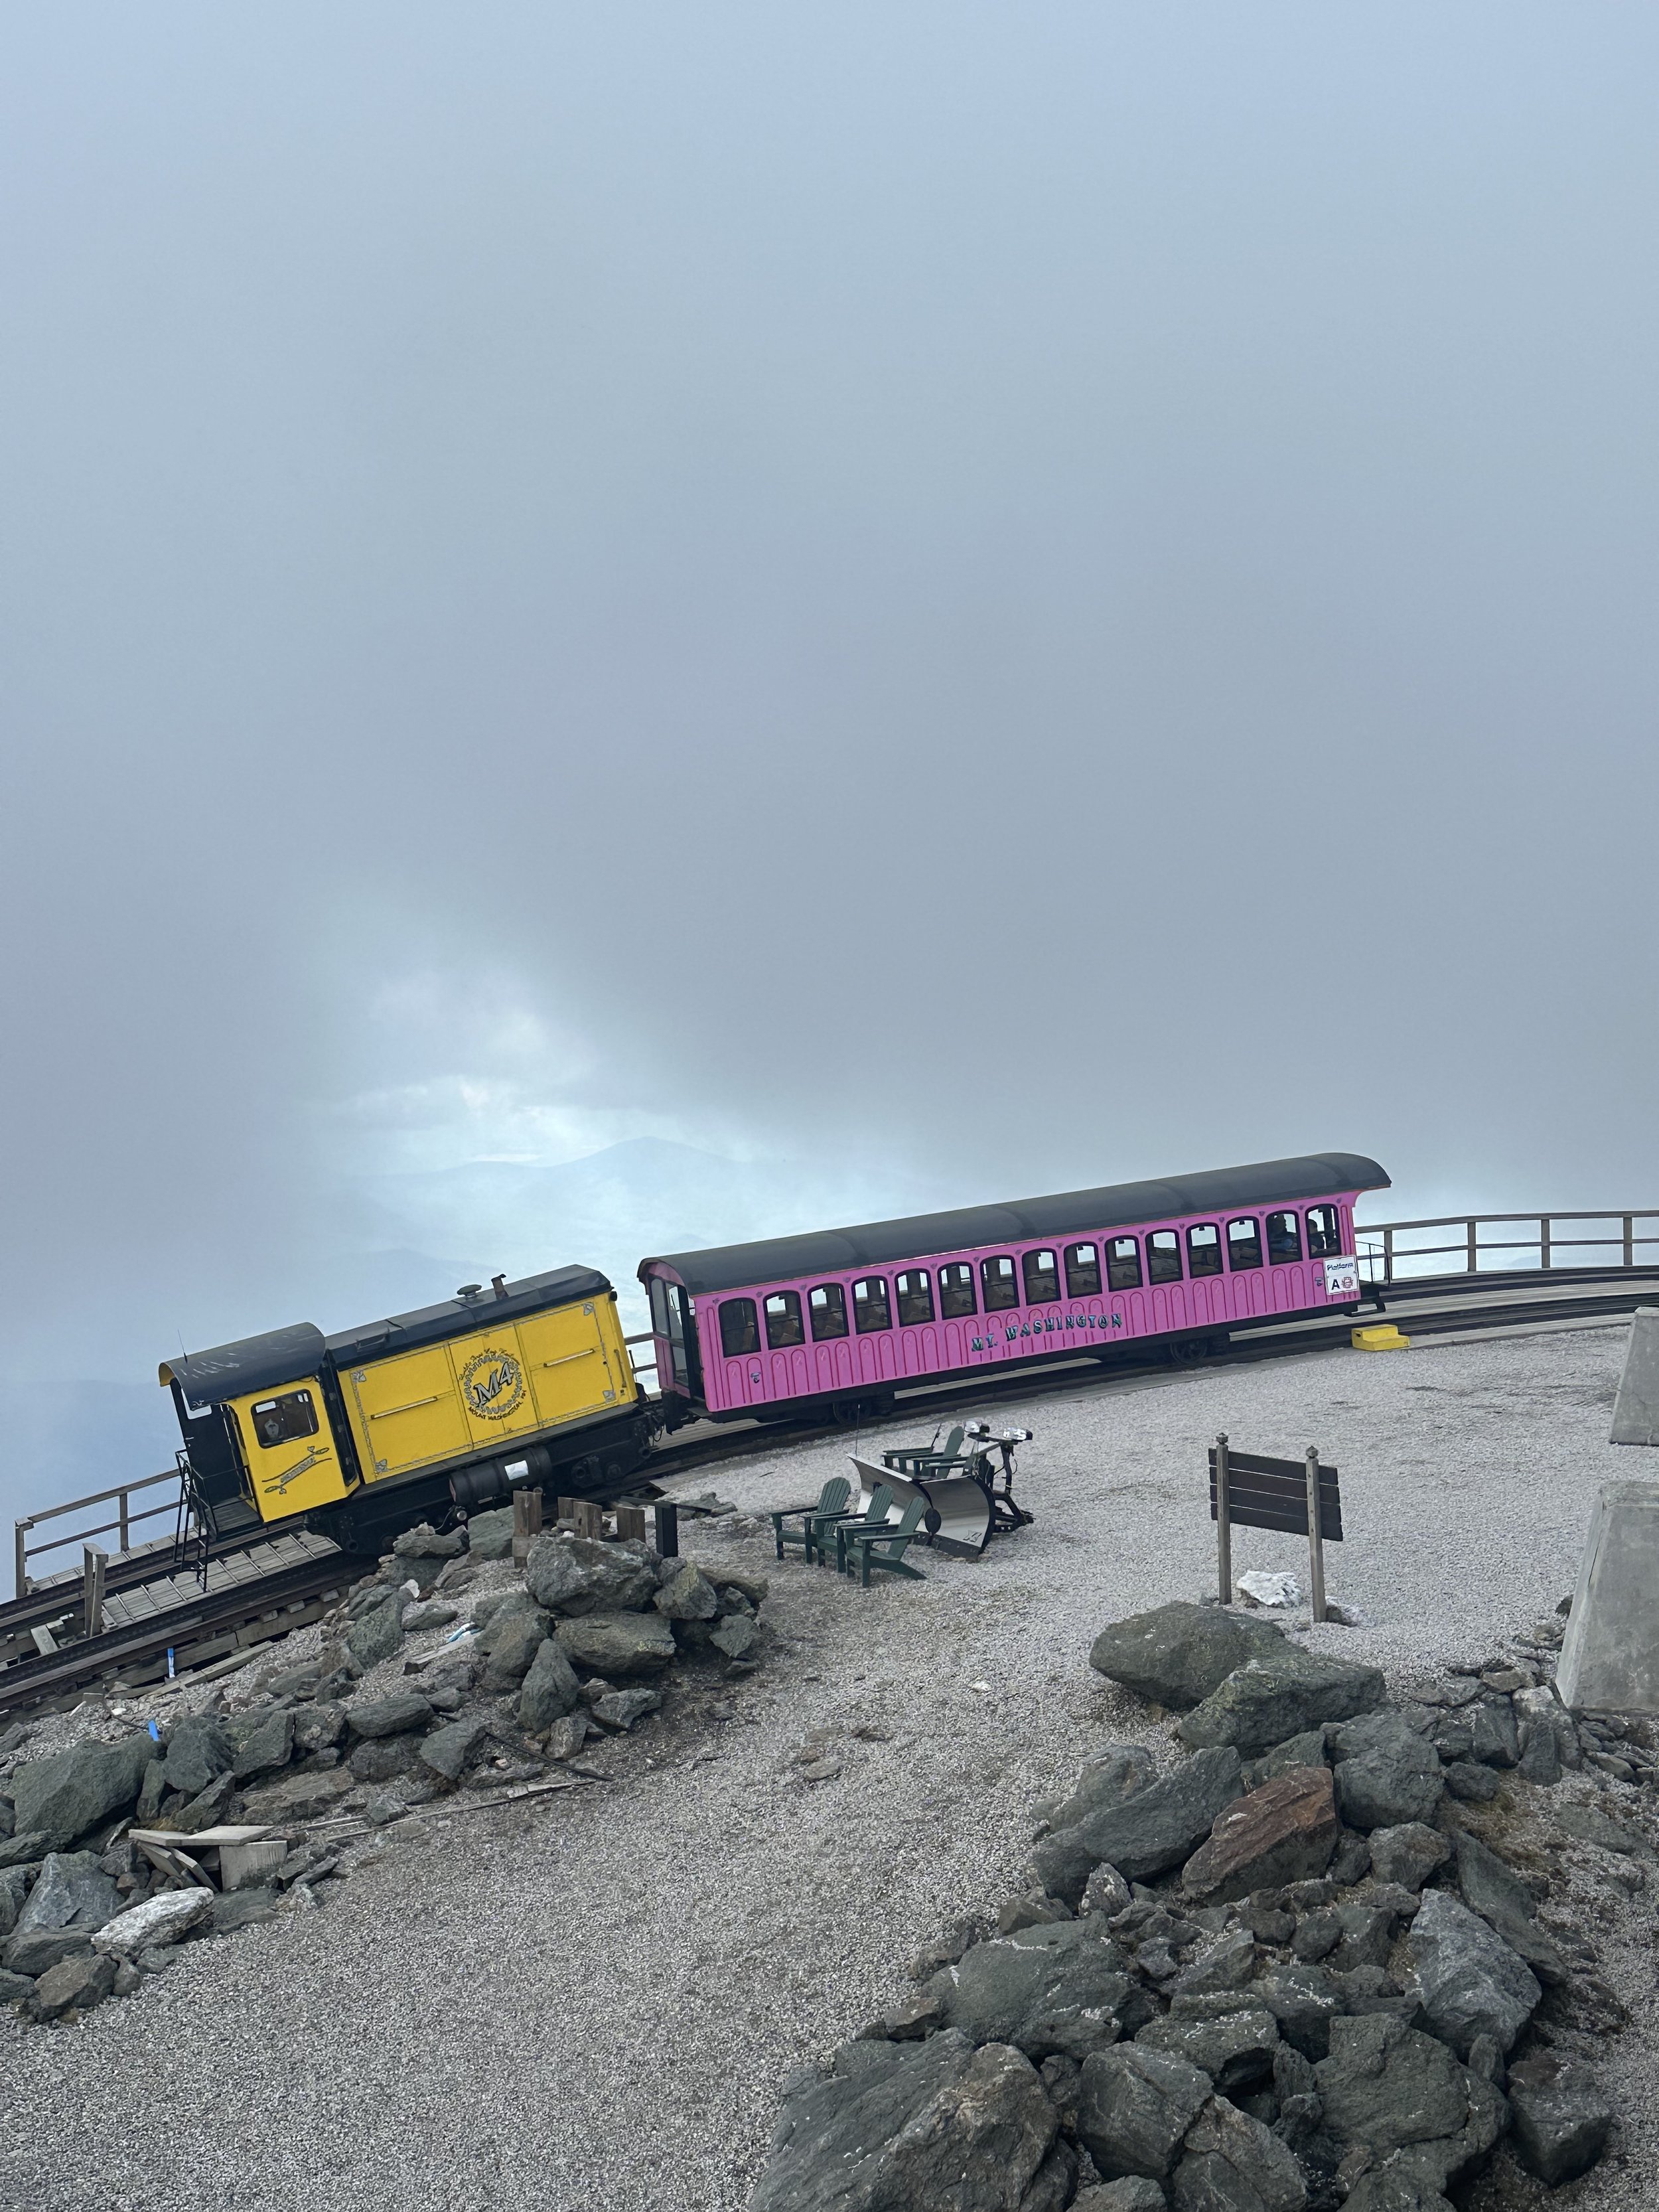


After you have soaked up the amazing views it will be time to head to North Conway. An idyllic town for you to visit. You can get here a couple of ways, the most direct would be to drive 302 east, which is pretty scenic and will take you about 45 minutes. But if you have more time and want to visit one of the more iconic roads in NH drive back down through the Notch on 93 South and take exit 32 in Lincoln. The start of the Kancamagus Highway (Rt 112), also called “The Kanc” is at the end of Main Street. This trip will take you double the time but the views will be worth it.
When you arrive in North Conway, check into your hotel. We have always liked the North Conway Grand located in the heart of the outlet shopping area. There are a variety of hotels to fit all budgets here.


Spend time shopping around the main street area. Check out the famous Zeb's General Store. You can find something for everyone here. They have such a nostalgic vibe to them you will have so much fun poking around picking your perfect NH souvenir.
Check out one of our other favorite shops The Penguin or any of the other small business establishments here.
For a mid day coffee pick me up we like Frontside Coffee Roasters.
For lunch we like: Delaney’s Hole in the wall, Wicked Fresh Craft Burger
For dinner The only spot I would recommend is Tuckerman Brewing Co. They are my personal favorite beer and the food, which is pizza, is top notch.
Ending your trip to our beautiful state might be sad there is so much to do and see and explore. Everything in the article listed above we have tried or experienced and loved. I tried to write & plan this like I was taking the trip. To have you drive in a way that made sense and hit the highlights. It got me thinking what would other people from NH recommend. I took to TikTok to see what I missed. Even though I grew up in NH and went to college here, as well as live here, I am not a NH expert nor do I pretend to be. There are so many wonderful spots in our state left for me to explore. My TikTok followers left me over 300 comments about where they would recommend you visit if you have never been to NH before. Listed below are some of the more popular TikTokers recommendations:
* Places we have been to that didn’t fit into the itinerary above but we love.
Family Spots:
*Castle in the Clouds Moultonborough
*Storyland, Glen
*Santa’s Village, Jefferson
Clarks Trading Post, Lincoln
Fun Spot, Laconia
Polar Caves, Rumney
*Squam Lake Science Center, Holderness
Restaurants
Pickity Place, Mason
*Woodstock Brewery, North Woodstock
Vino, Exeter
*Cure, Portsmouth
*Petey’s, Rye
Tuckaway Tavern, Raymond
Rye Lobster Pound, Rye
Flying Goose Pub, New London
Walter’ Basin, Holderness
*Mad River Coffee, Campton
*Kaffee Vonsolln, Portsmouth
*A Place Above the Notch, Bethlehem
Maryann’s, Derry & other locations
Tilton Diner, Tilton
*Biederman’s, Plymouth
*BRGR-BAR, Portsmouth
Outdoor adventures
Tubing on of our beautiful rivers
*Hike Mt Major, Alton
*Hike Mt Monadnock, Jaffery
*Glen Ellis Falls, Gorham
*Diana’s Bath, Bartlett
*Gunstock Mountain , Gilford
Hike West Rattlesnake, Sandwich
*Hike Welch & Dickey, Thorton
Lost River Gorge, Woodstock
Hike to Lonesome Lake, Franconia Notch
*Suncook River Campground- Glamping Domes
Historic Sites and Other Cool Things to Check Out
The Woodman Museum, Dover
Ben’s Sugar Shack, Temple
Parker's Maple Barn Mason
Alpine Adventures, Lincoln
Granite Oak Farm, Harrisville
Tupelo Music Hall, Derry
Hotels
RiverWalk Resort at Loon Mountain, Lincoln
Patio Cabins, Twin Mountain
Wentworth by the Sea, New Castle
Church Landing, Meredith
Omni Mt Washington, Bretton Woods
The Wentworth, Jackson
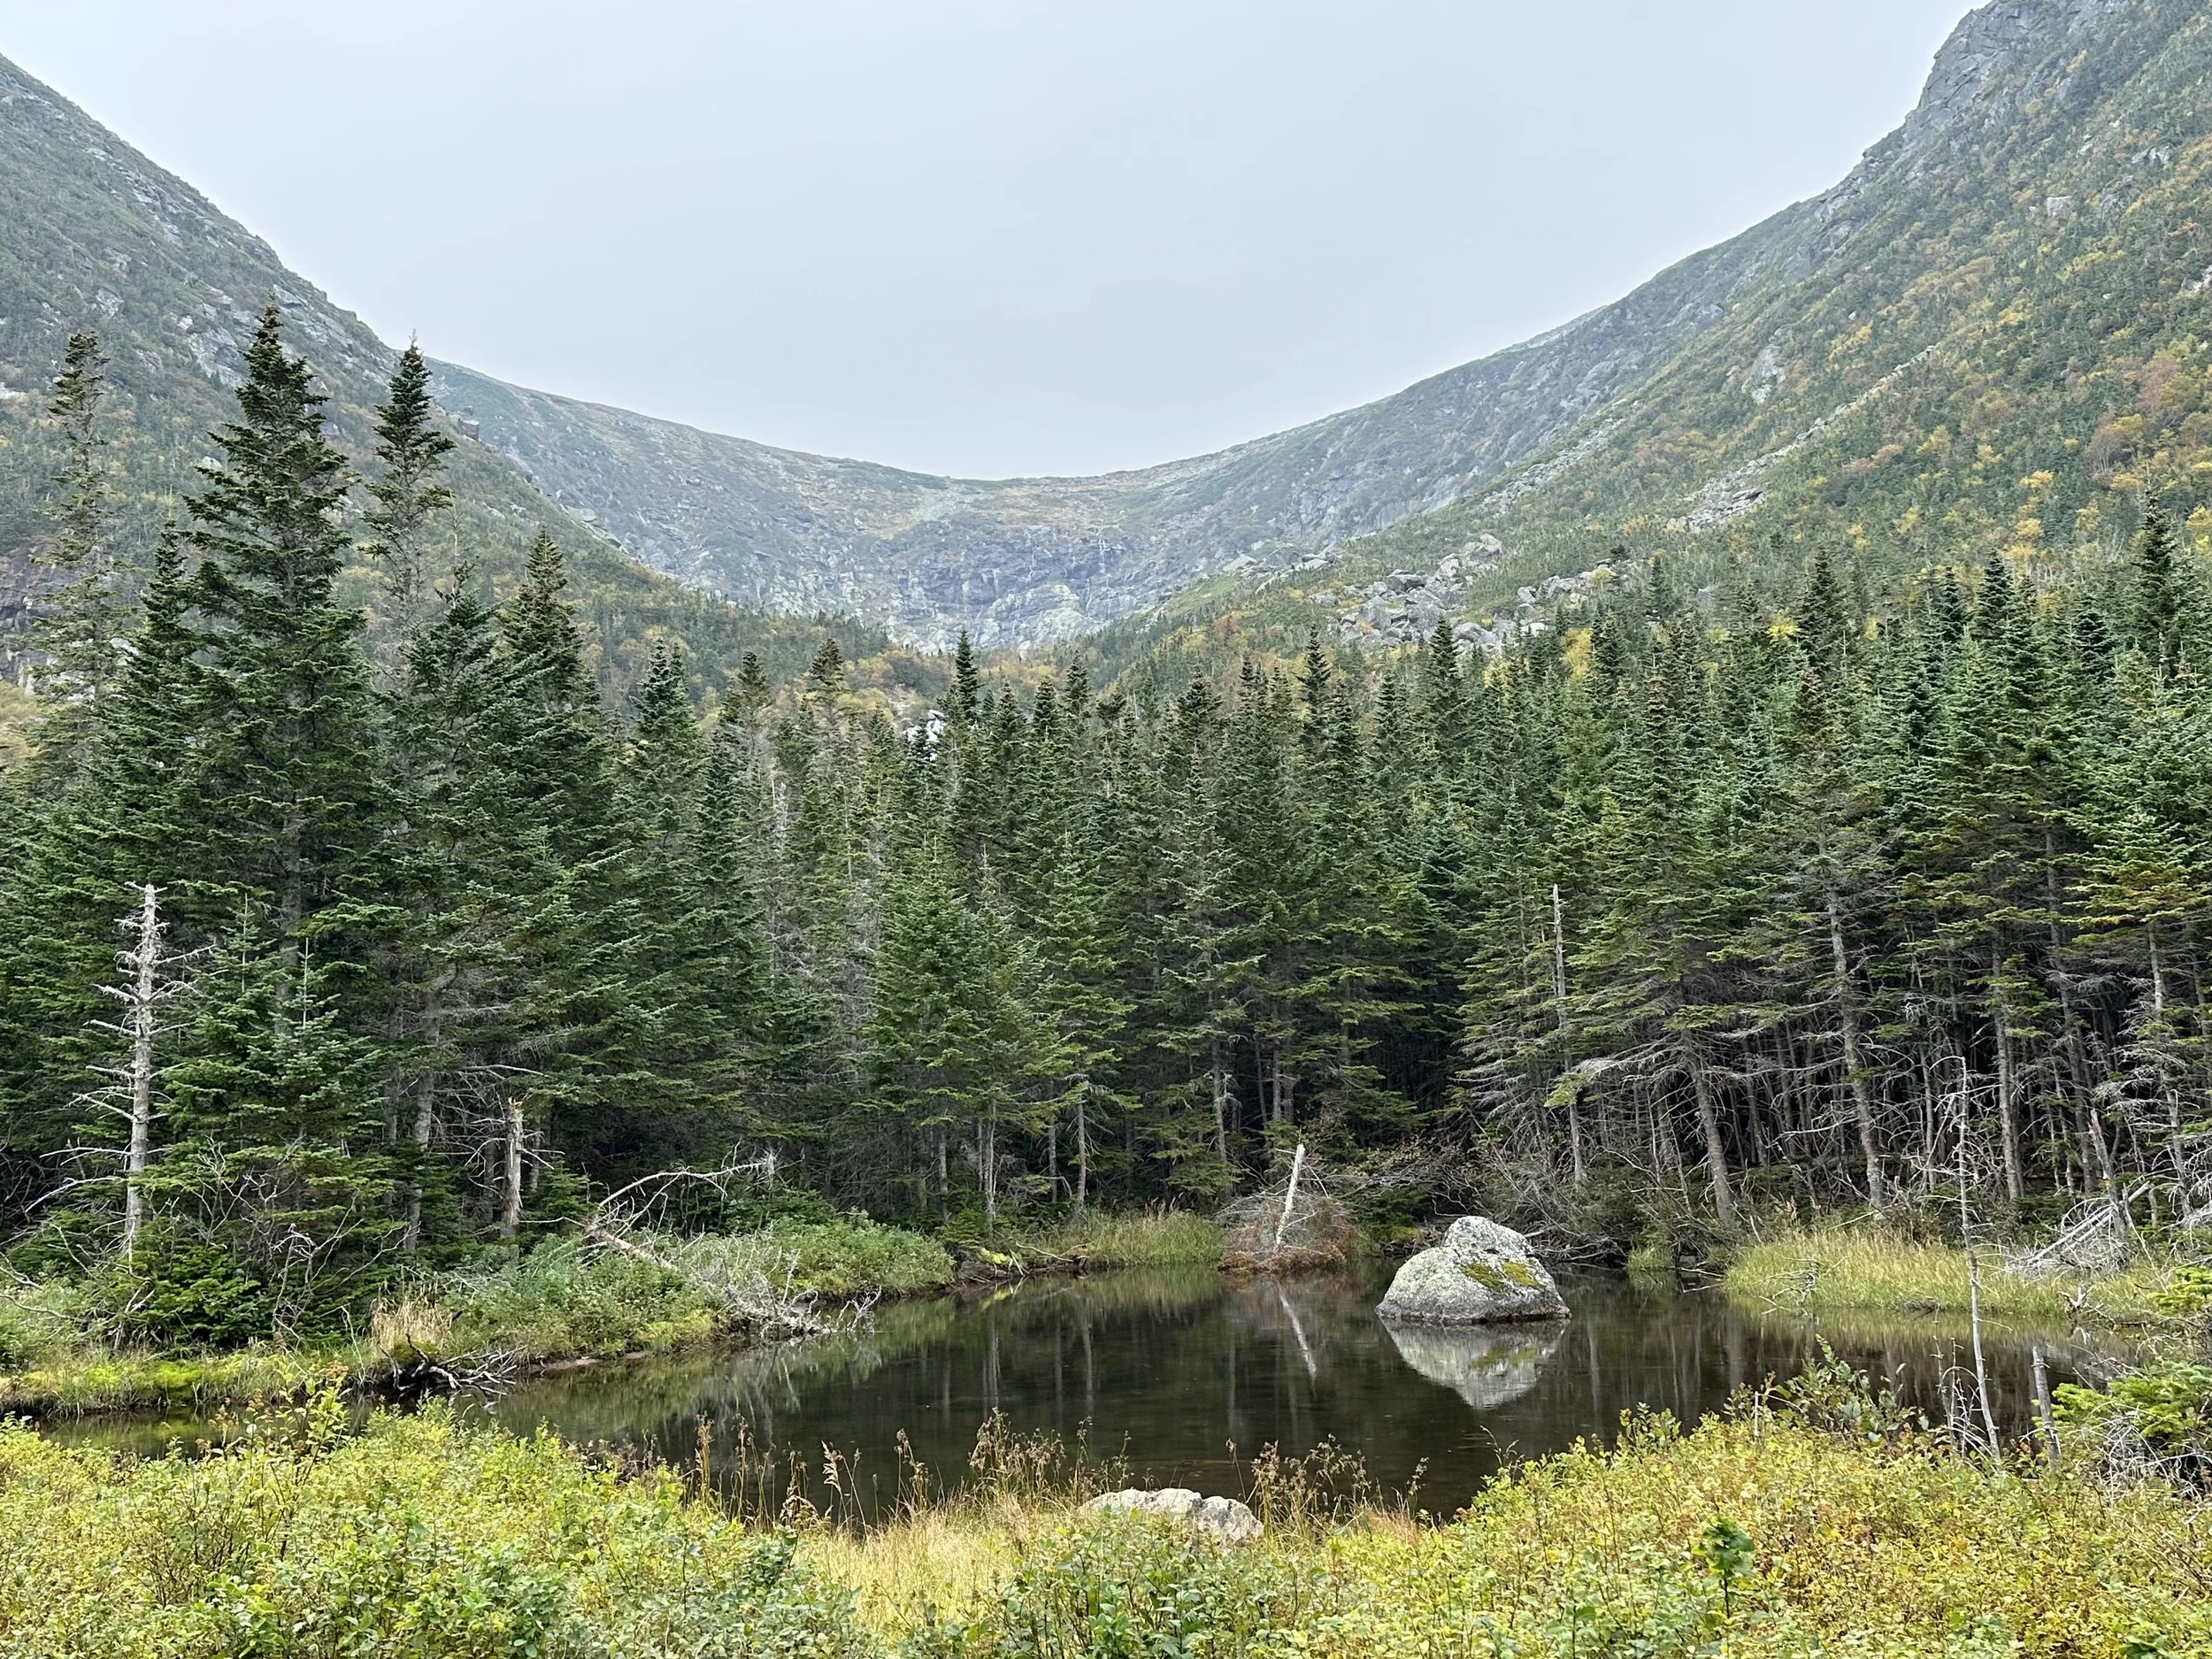
The 10 Essentials of Hiking
Every hike we learn a new lesson, and inevitably we discuss how we should properly load up our bags with some items that “would have been nice to have”. Sometimes the only way we learn these difficult lessons is the hard way. Eventually we stumbled upon “The 10 Essentials,” which is a must-know for beginners and a good reminder for seasoned hikers. Here’s a breakdown of what to bring—and why it matters—especially here in unpredictable New England.

1. Navigation (Map, Compass, GPS)
Trails can get confusing, especially in snow, fog, or low light. Always carry:
A paper map of the area (laminated or in a ziplock bag)
A compass—and know how to use it. Ours has a whistle and a thermometer on it too!
A GPS app like AllTrails, Gaia GPS, or Caltopo (but don’t rely on your phone alone—batteries die quickly in the cold)
New England Tip: Trail blazes can disappear in snowy or foggy conditions—always double-check your route before you go
2. Headlamp (Plus Extra Batteries)
Daylight fades fast—especially in fall and winter. A reliable LED headlamp is essential in case your hike takes longer than expected. We realized how important this one was when there was an injury in our party while descending Mount Jackson. Although we made it to the trailhead before sunset the light was getting limited with the tree-cover and heavy clouds.
Pro tip: Don’t rely on your phone flashlight!
3. Sun Protection (Sunglasses, Sunscreen, Lip Balm)
Even in winter, UV rays can be intense—especially when bouncing off snow or water. Pack:
Polarized sunglasses
Sunscreen (SPF 30 or higher)
Lip balm with SPF
There are also lots of lightweight hiking apparel with UV protection.
4. First Aid Kit
You don’t need a full trauma kit, but a basic first aid kit should include:
Bandages, antiseptic wipes, blister pads
Tweezers (for ticks or splinters)
Pain relievers (like ibuprofen)
Any personal meds (EpiPens, inhalers, etc.)
Consider taking a basic wilderness first aid course—it’s something we have considered doing but haven’t yet!
5. Knife or Multi-tool
From cutting the extra tag from a ziptie, to fixing a busted hiking pole, a multi-tool or small knife can be a lifesaver. There are many times a knife comes in handy in the wilderness.
6. Fire (Matches, Lighter, Firestarter)
If you ever need to spend the night outdoors, being able to start a fire is key. Bring:
Waterproof matches and/or a mini Bic lighter
If you plan on a fire, you might want to bring something to get it started like some dry paper.
7. Shelter (Emergency Blanket)
Always carry an emergency space blanket or lightweight bivy sack, even on short hikes. It could save your life if you’re injured or lost. This is more affordable and takes up way less space than you would think.
You can find options that weigh under 4 oz—no excuse not to pack one.
8. Extra Food
Bring more than just enough snacks for your planned hike. Add:
An extra protein bar or two
Trail mix or dried fruit
A meal (like a freeze-dried pack) for longer hikes
New England Bonus: Pack something that won’t freeze solid in winter.
9. Extra Water (and Purification)
Carry at least 2 liters of water, and ideally bring a way to purify more:
Water filter, tablets, or a LifeStraw are options for purification
In winter, keep bottles insulated to prevent freezing
Hydration is just as important in the cold—even if you’re not sweating.
10. Extra Clothes
Weather can change fast in the mountains any time of year. Always pack:
A warm layer; avoid cotton, think fleece or lightweight down.
Rain shell or windbreaker is always handy!
Hat and gloves, even in summer for higher elevation hikes (hypothermia is real)
Layering is key—ditch the cotton and go with synthetic or wool.
The 10 Essentials aren’t about fear—they’re about confidence. When you’re prepared, you can explore more boldly, whether you’re tackling a rugged ridge in the Whites or cruising through a forest trail in Rhode Island. Even if you don’t use all these items every time, you’ll be grateful you packed them when the unexpected hits.

Mount Monadnock
I finally hiked the popular Mount Monadnock and it did not disappoint!

If you’ve spent any time hiking in New England, chances are someone’s told you to check out Mount Monadnock. Maybe they even said it’s one of the most climbed mountain in the U.S. Regardless, I finally checked it off my list on an unseasonably warm Thursday in April—and wow, what a day for it.

Bluebird skies. No ice. No spikes. And most importantly, no regrets.
I opted for the classic route up the White Dot Trail and came down via the White Cross Trail, which I’d recommend if you’re not into testing your ankle stability on the descent.
Here are some stats:
The loop that I did was 3.9 miles with 1772 feet of elevation gain. The mountain’s elevation is 3245’ with 360 degree views.

White Dot is a bit of a cardio challenge, with some solid scrambles toward the top. Let’s just say there were a few spots that required more than just my dignity—I needed my hands too. I have yet to figure out a good way to attach the poles I use to my day pack so they were kind of in the way for a lot of the steep scrambles on the ascent. My knees thanked me for having them on the trip down!
That said, it’s absolutely doable for most people with determination (and snacks). I saw several kids under 8 hiking with their parents—some of them crushing it, others loudly voicing their discontent about “too many rocks.” I chuckle whenever I hear a child voicing what my inner mind wants to say out loud on the trail.


The summit views were spectacular—clear skies all the way into Massachusetts, Vermont and the White Mountains of New Hampshire. It’s one of those rare days in April where you feel like you’ve cheated the system. No snow, no ice or clouds and just enough of a breeze to cool you down at the summit.
A few things to note:
There is an entrance fee of $15 per car (6 passenger max) but the New Hampshire State Parks license plate gets you in for free. There are nice facilities here so it’s worth the money.
Reservations are strongly recommended as this trailhead gets busy. I’m glad I had a reservation.
It was surprisingly busy for a Thursday. That could have been because it was school vacation week in Massachusetts, and Monadnock is close enough to the border to draw a crowd.
If you’re choosing between White Dot and White Cross for your descent, go with White Cross. It’s more of a rock-hop than a scramble, and your knees will thank you later.
Bring plenty of water, wear decent shoes, and mentally prepare for the fact that this “easy mountain” is actually kind of a beast. In a good way.
Bring bug spray & sunscreen, especially as these warm spring days become more frequent.
There is a cute store at the trailhead that sells Monadnock State Park merchandise, drinks, stickers, and snacks!
The bathrooms are very nice with real plumbing!

Mount Monadnock lives up to the hype—but don’t let its popularity fool you into thinking it’s a walk in the park. It’s a rocky, scrambly, gorgeous New England classic, and you’ll earn every step of those views.

North & South Mountain Loop - Pawtuckaway State Park
North and South Mountain Loop - Pawtuckaway State Park, Nottingham, NH.
I woke up to a beautiful sunny spring day. My first thought was I need to get out for a hike today! Then reality of responsibilities set in, my limited time narrowed down my options considerably. I decided to check out a loop that’s been on our radar for a while—the North and South Mountain Loop at Pawtuckaway State Park in New Hampshire. Tucked away in the small town of Nottingham, this park is better known for its boulder field (a favorite among rock climbers), but the double summit loop turned out to be a surprisingly solid hike—more elevation than expected and some fun features that made it worth the effort.

Conditions in Late March
I lucked out with weather—temps in the upper 40s and no snow or ice on the trail, which meant no need for microspikes. Just dry leaves, the occasional mud patch, and that early-spring forest smell that hints at what’s coming.
If you’re itching to get outside before the higher peaks are fully melted out, this one’s a great shoulder-season option. It was about 15 minutes off route 101 in Nottingham, so it is pretty easy to get to from either 95 or 93.

The Hike
I did the full North and South Mountain Loop, a 6.9 mile loop with over 1300 feet of elevation gain. I started from the main trailhead and headed toward North Mountain first. That’s where I realized—this hike packs a little more vertical than it lets on. Going clockwise from the parking lot on Reservation Road, your incline starts rather quickly. The views are great from up there, and you can see two ponds in the distance. About halfway from North mountain to South Mountain, you walk between the ponds, pass the boulder field, and there are a few easy water crossings that connect the two ponds. I saw a Blue Heron and a few ducks in the pond. I felt like if I waited long enough, I would see a deer or moose come to the edge of the water for a drink but I just kept hiking.
The South Mountain summit features a fire tower, which technically offers 360-degree views. I have to take the internet’s word for it. By now it’s no secret I don’t do well with fire towers. I only made it up one flight of stairs—those things always feel sketchier than they look—but even from there, the view out across the bare trees was worth a stop. Definitely a good snack break spot if the summit is windy.
Not hard, but enough to make you feel like you’re in the mountains.

Lunch With a View
I had a quick lunch at the cairn on North Mountain, which looks like a stone throne—and yes, I absolutely sat in it like the King of Pawtuckaway. It’s a quirky little spot and a great place to soak in the moment before heading back down. Honestly, I was pretty tired by now and sitting in the sun for a few minutes felt great!
The descent was mellow, and I looped back toward the trailhead. The last mile or so is simply a walk in the woods. By now I had ran into another set of hikers and several mountain bikers. I also saw horse shoe tracks, so be aware for equestrians too.

Final Thoughts
Surprise Factor: More elevation gain than expected, but nothing too intense. All Trails says 1300 feet of elevation gain, but my watch said 1700 feet.
Trail Conditions: March was perfect—dry, no bugs, no snow. A few muddy and icy spots but easily avoidable.
Highlight: The throne-shaped cairn on North Mountain. Weird, cool, and surprisingly comfy.
Would I Do It Again? For sure. It’s a great loop when you’re craving some terrain but not looking to deal with above-treeline weather. It’s an easy drive from the Seacoast of NH.

Tips for Hikers:
The fire tower is not for the faint of heart, but if you’re into views and aren’t afraid of heights (like me), give it a try.
Parking: The main lot is closed in the off-season, so you may need to park at the winter lot and add a bit to your mileage. I was able to park on Reservation Road at the trailhead in late March.
Bring a map or GPS—trail intersections aren’t always marked clearly. All Trails helped me get back on trail more than once! The white blazes are plentiful in spots, and scarce in other spots.
If you’re feeling ambitious, take some time to check out the boulder field. Even if you’re not climbing, it’s fun to wander through. On this loop, you walk right by it.
This one’s going on the list of go-to shoulder season hikes. Not too far from home, no gear drama, and a good reminder that spring hiking has its own rewards.

Fenway Park
Fenway Park is a classic New England landmark that can’t be missed when visiting Boston!

Where are we headed today?
Fenway Park—the oldest ballpark in Major League Baseball and a true Boston icon!

Quick Fenway Facts:
Opened: 1912
Neighborhood: Fenway, Boston
Oldest MLB Park
Almost torn down in 1999, but saved and renovated
Home of the Red Sox and a top concert venue


Must-Know Fenway Features:
Green Monster: Iconic left field wall, hand-operated scoreboard, seats added in 2003
Pesky’s Pole: Right field foul pole, just 302 ft from home plate
The Red Seat: Section 42, Row 37, Seat 21—Ted Williams’ 502 ft homer in 1946
Sweet Caroline: Played in the 8th inning since 1997


Concerts
Hosted legends like Springsteen, Gaga, Foo Fighters, and Pink (who broke the attendance record in 2023)
Retired Numbers:
Includes greats like Ted Williams (9), David Ortiz (34), and Pedro Martinez (45)
Jackie Robinson’s 42 is retired across all MLB
The Curse of the Bambino:
Babe Ruth sold to Yankees in 1919
Red Sox didn’t win a World Series again until 2004


Fenway Park Tours:
Offered year-round, even on game days
See the press box, dugouts, Green Monster, and more


Where to Eat:
Fenway area: Blaze Pizza, Time Out Market, Trillium, Sweet Cheeks Q, El Jefe's Taqueria, Sweet Green, Cava, Yard House, & Tasty Burger.
North End: Mike’s Pastry, Bova’s, Galleria Umberto (easy Green Line ride)
Tip: Even if there’s no game, take the Fenway tour—it’s worth it!
Catch the full story on our podcast!

Tuckerman Ravine: It’s not just for extreme skiing!
Tuckerman Ravine on Mount Washington in New Hampshire. It’s fun for all!

Tuckerman Ravine is beautiful all year long.
I have always been fascinated by the incredible site of Tuckerman Ravine on Mount Washington since I was a kid. It isn’t just a hike—it’s pretty much a rite of passage for New England adventurers. It’s a place where hikers, skiers, and the occasional ill-prepared rookie (like I was) all come together to suffer… I mean, enjoy the challenge.
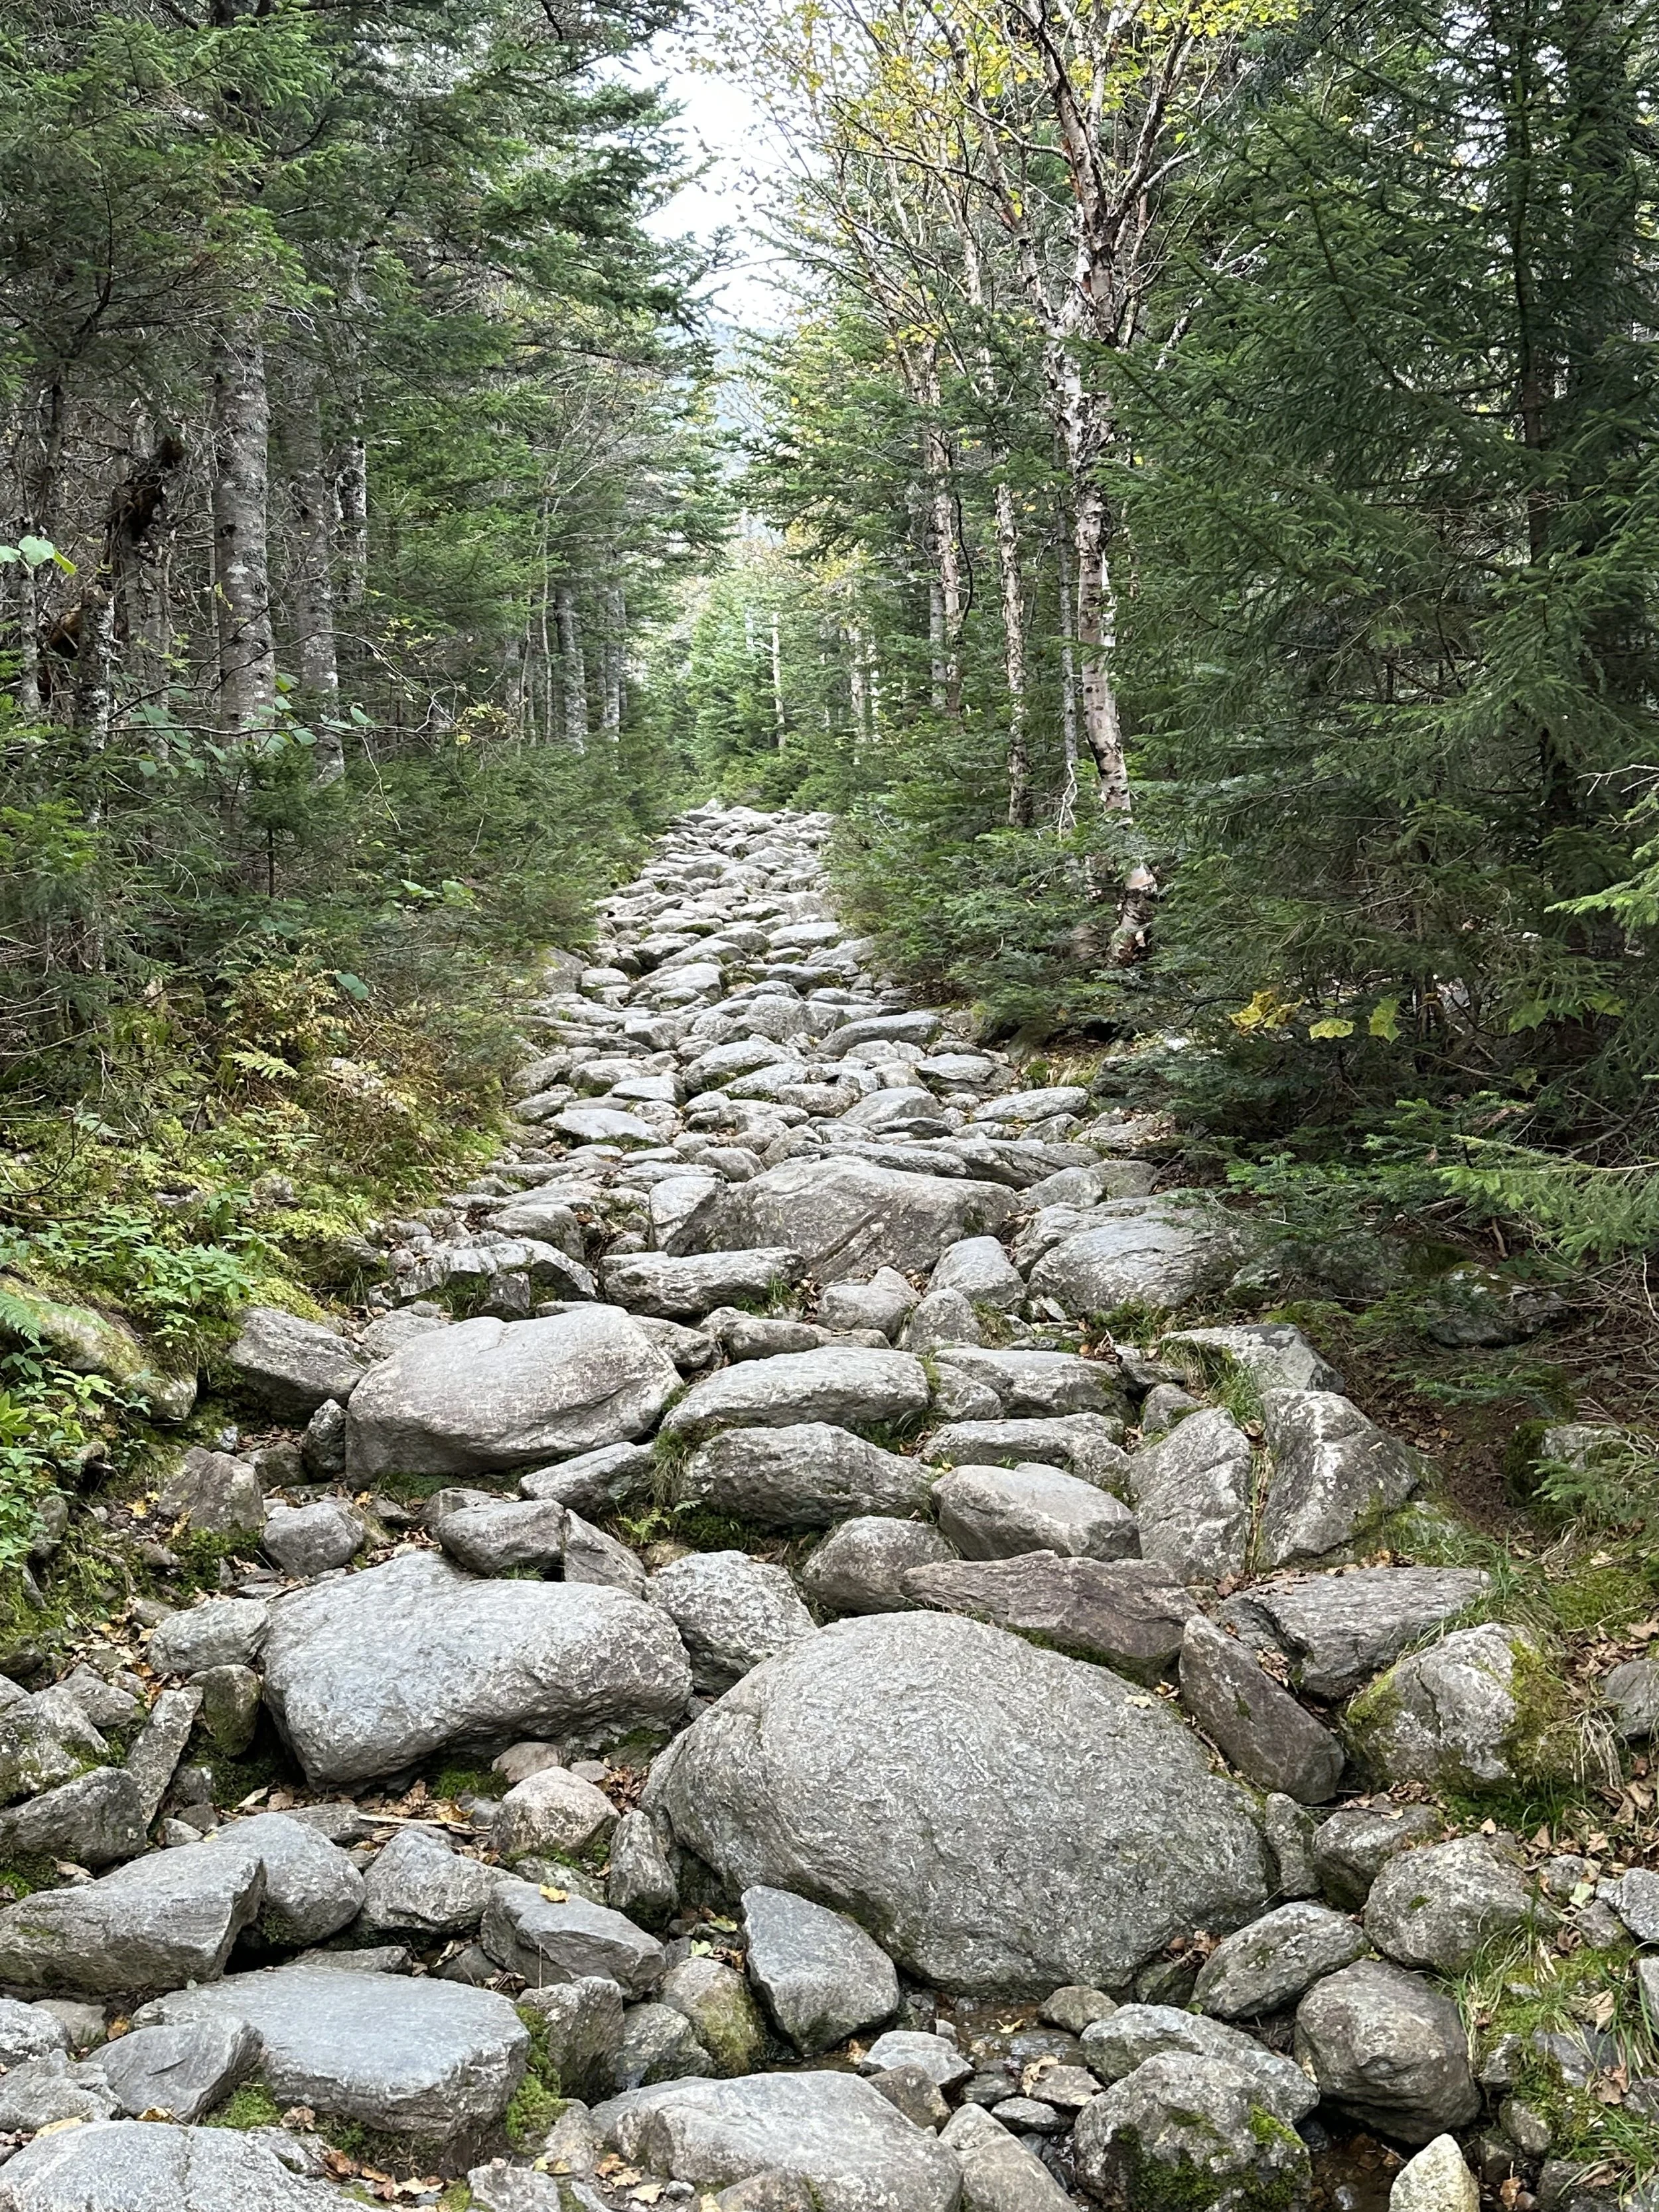

The Climb: Sweating and Regretting
The trail starts off nice and easy, luring you into a false sense of security. You’re thinking, Hey, this isn’t so bad! In the winter, the rock and root filled trails are smooth and packed down. Fast forward an hour, and you’re sucking wind, peeling off layers, and questioning why you ever left the car. If you’re carrying skis, add an extra dose of regret. Keep in mind that just past the Hermit Lake hut, there is a water pump that allows you to refill your water bottle with the coolest and freshest water you can get!
Somehow, the excitement of what’s ahead keeps you moving—whether it’s the promise of an epic ski descent, the thrill of conquering the bowl, or just the chance to collapse at the shelter and pretend you’re an experienced mountaineer. I’ve done all of these and every adventure was a blast on Mount Washington!

First time in Tuckerman Ravine. Bald sneakers were a poor choice.
The Bowl: Nature’s Ski Playground
As I posed for this photo, a descending hiker said that this huge ice chuck just fell off the face of the ravine within the last couple of hours, as it was definitely not there when he was going up! That was a sobering reminder that Mount Washington is no joke. There I was, a total rookie, sneakers slipping all over the place, while seasoned hikers with crampons and trekking poles looked at me like I had wandered in from a nearby mall. Lesson learned.
The first time I hiked up, I did it with skis. It was early April and the conditions were good. There was a lot of snow still in the bowl. My friend and I decided the Right Gully looked good to ski. I hiked several hundred feet up before I panicked and put my skis on. It was a short little run, but I was psyched that I could honestly could say I skied at Tuckerman Ravine! Although I wanted to go higher up like my friend did, my fear and my lack of confidence got the better of me. Now all I have is regret!
After my short run, I really enjoyed hanging out around lunch rocks and watching the other (more experienced, less fearful) skiers tackle Tucks! The best part of the day was skiing down from the bowl. The first challenge is the Little Headwall, which is a waterfall in the warmer months, but is a very steep ski obstacle in the winter. Once you get past that, you are now out of the bowl. Now you are on the Sherburne Trail. “The Sherbie” was a ton of fun! This is a winding ski-only trail that brings you right to the parking lot of the Pinkham Notch parking lot.
The following spring, I never even made it past the hut because I got sick when I arrived there. In hindsight, it was probably just my nerves, but I accepted that the hut was my limit that day. My friend hiked and skied Hillman’s Highway, so I was able to watch him and regret not feeling well enough to go up with him.


Weather Roulette
If you want a real adventure, stay overnight in the Hermit Lake shelter hut. We did this in late March. It’s hard to believe these two photos are the same hut, just in different seasons! Mount Washington’s reputation for unexpected weather is 100% true. The day we hiked up, it was beautiful out. In the middle of the night, we could see a million stars from where we camped. Seriously, it was the best view of the sky I have ever seen! Having practically zero light pollution was a unique experience. When we woke up, it was raining and foggy. We couldn’t see 30 feet in front of us! We hiked up to the bowl but it was not safe at all due to the low visibility so we simply hiked down in the rain like two disappointed very wet puppies.
That’s the magic of Mount Washington—it keeps you humble and reminds you that the weather forecast is just a suggestion. Mount Washington’s reputation for unexpected weather is true and demands respect. I recommend checking out the Mount Washington Observatory webpage for weather reports when planning your trip!

We are excited to hike Tuckerman Ravine to the summit this year!
Despite the sweat, the weather mood swings, and my past footwear fiascos, I’ve never had a bad time at Tuckerman Ravine. Whether you’re hiking, skiing, or just spectating, it’s a New England classic. G and I are already planning to tackle the whole Tuckerman Ravine Trail to the summit this summer or fall, and if history is any indication, there will be at least one ridiculous moment along the way.
So, if you haven’t done it yet, get out there and experience it—just maybe leave the bald sneakers at home!

Trail Etiquette 101: How to Avoid Being “That Person” While Skiing, Hiking, or Strolling the Beach
A little etiquette goes a long way when hiking, skiing, or even walking the beach! Read our blog on how not to be “that person”.
Whether I’m flying down a ski slope, trekking up a mountain, or simply walking on a sidewalk along the beach, I’ve seen my fair share of questionable trail behavior. And let’s face it — we’ve all had those moments where we accidentally break a rule or two. We’re all guilty of it but being aware of these unwritten rules might help you avoid doing it again.

On the Slopes: Skiing and Snowboarding Etiquette
Ah, the mountain — my happy place. But just because we’re all bundled up doesn’t mean we can forget our manners. Here’s how to keep things smooth on the slopes
1. Lift Line Diplomacy: You’re not merging onto the highway, so no aggressive line-cutting. Keep your crew together, fill the singles line if needed, and if you accidentally step on someone’s skis, offer a quick “oops, my bad!” instead of pretending you didn’t feel it.
2. Downhill Has the Right of Way: Picture it: You’re gracefully carving turns (okay, maybe not gracefully), and suddenly someone barrels in like. Don’t be that moose. If someone’s ahead of you, give them space — no one likes a surprise tackle.
3. Park it Responsibly: Need a breather? Pull over to the side of the trail. Stopping in the middle of a run is like parking your car in the middle of a rotary — legal in exactly zero states.
4. Know Your Limits: If the sign says “Double Black Diamond,” it’s not a dare. It’s a warning. And trust me, your knees will thank you later.
5. Lodge Etiquette: The lodge is for warming up, not for airing out your socks like you’re drying fish. Be kind, share the table space, and store your bags appropriately.

Tuckerman Ravine Trail, Mount Washington
On the Trails: Hiking Etiquette
Hiking is my version of therapy — fresh air, good views, and just enough challenge to convince myself I deserve a post-hike burger. But even out in the wild, some rules apply
1. Yield to the Uphill Warriors: Hiking uphill is basically nature’s version of a StairMaster. If someone is climbing while you’re cruising downhill, step aside and give them a break. Bonus points if you offer a breathless “you’re almost there!” even if they’re obviously not.
2. Keep It Single File: I love a good trail chat, but blocking the entire path with your hiking buddies is a rookie move. Walk like a polite conga line, not a wall of defensive linemen.
3. Leave No Trace: I get it — tossing a banana peel “for the animals” feels like a good deed. But unless squirrels have developed compost bins, it’s best to pack it out.
4. Leash Your Adventure Pup: I’m all for bringing dogs along, but not everyone wants a surprise greeting from your muddy four-legged friend. And if your pup is the type who thinks squirrels are sworn enemies, maybe keep that leash tight. Also be sure to take your bag of waste with you. No “I’ll grab it on the way back”!
5. Music Manners: Singing to yourself on the trail? Totally fine. Blasting your playlist like it’s an impromptu forest rave? Not so much. Let’s let the birds sing the songs, ok?
6. Don’t be a view hog: Everyone hikes the mountain for the view. Once you soak it in, maybe take a photo or seven, then step aside so any other hikers can also enjoy the views.

Charlestown Town Beach, RI
On the Sidewalk: Beach and Boardwalk Etiquette
Not every adventure is on a mountain. Sometimes it’s just a walk along the beach — enjoying the salt air, avoiding sunburn (in theory), and dodging rogue seagulls. But even on the boardwalk, there are a few unspoken rules
1. Stick to Your Lane: Sidewalks work just like roads. Walk on the right, pass on the left. And no sudden stops! That scenic ocean view will still be there in three steps.
2. Space Management: Walking four abreast on a sidewalk is a pet peeve of mine. Break it up. Other people would like to avoid doing an awkward sideways shuffle just to pass you.
3. Dog Etiquette (Yes, Again): I adore dogs, but the beach is not a choose-your-own-adventure zone. Keep your pup on a leash if required, and for the love of sandy feet, clean up after them. Be sure to take it away too!
4. Sunset Serenity: Watching the sunset is practically a sport in New England. If you’re lucky enough to catch one, savor it. And if you must narrate your every thought, maybe wait until the sun dips below the horizon.
Mount Osceola Summit
Whether I’m skiing down a powdery slope, conquering a new hiking trail, or even wandering along the beach with sand somehow already in my shoes, I try to remember one thing: good trail etiquette makes everything better.
A little courtesy goes a long way — and who knows? Maybe your kindness will inspire others to do the same. Plus, fewer angry glares from fellow adventurers? That’s always a win.
Now get out there, follow the rules, and may your trails be clear, your slopes be powdery, and your beach days be seagull-free!

Mud Season Madness: More Alternative Outdoor Activities in New England
Winter is over. Spring hasn’t fully sprung. What can we do besides hiking? Here are some ideas that won’t get you stuck this mud season!

Spring = Muddy Trails Everywhere
When your passions are hiking and skiing, this time of year is tough. Melting snow, rain showers, and bare ski trails. Winter is over. Spring hasn’t fully sprung yet though. Most hiking trails are either closed or full of mud.
You can call it mud season, stick season, or simply spring in New England. Regardless of what you call it, it’s a rough time for us outdoor enthusiasts so I want to expand upon what to do when the weather is less than ideal for our go-to outdoor activities. Here are some more ideas that won’t get you stuck this mud season!

Baird Farm in Chittenden, VT
Maple Syrup Tasting: Nature’s Liquid Gold
March and April mean one thing — maple syrup season! Many sugarhouses offer tastings and tours, and nothing fuels a New Englander’s spirit like a sugar rush. Vermont is a fantastic place to find maple farms that host tours and sell their products directly! We went to Vermont’s Maple Weekend in March and we had a blast learning all about the maple syrup manufacturing process and of course tasting all things maple! We always love to support small businesses and this is an absolute blast! After all, “supporting local agriculture” sounds way better than “ate four waffles for research.” Go support your local sugarbush. Take the tour, try a sample, and buy all the fresh maple products! You will be glad you did!

Beavertail Lighthouse in Jamestown, RI
Lighthouse Hunting (No Actual Hunting Required)
New England has more lighthouses than Dunkin’ locations — well, almost. Hit the coast for some scenic views and the perfect Instagram backdrop. Fact: There’s zero chance of sinking in mud when you’re on a rocky shoreline! Every New England state has lighthouses worth the drive for. You can use google maps to locate one nearest you. Even Vermont has lighthouses on Lake Champlain! Many have tours or at least plaques that have historical information to read. The one pictured above has a trail along the ocean with amazing views that is an easy walk from the parking lot.

Tuckerman Brewing in Conway, NH
By now you know we love a good meal at a brewery after a hike, but here is a little known secret; we like to eat at breweries regardless of what we do. Some New England breweries have outdoor patios perfect for soaking up the sun (or huddling under a heat lamp — it’s still New England, after all). Others realize that it’s best to wait for the warm weather to have outdoor seating considering we have “fake spring” a few times every year. Many breweries are now brewing their own non-alcoholic beers along with their typical micro brews. Don’t underestimate their food. We have discovered that some of the best pretzels, pizzas, and burgers are from breweries!

Longley Covered Bridge in Montgomery, VT
Explore Covered Bridges
One of the things I have been known to do when I travel alone is to stop and admire one of New England’s many covered bridges. Each one has a story — or at least a great spot to dramatically stare into the distance while contemplating the meaning of life. Seriously, the history and the engineering of these covered bridges can be really interesting. Quite often they are located in picturesque settings as an added bonus. Google is a great tool to research where to find iconic covered bridges along your travel plans.

Sunrise at the Beach in Rye, NH
Scenic Drives: Let the Car Do the Hiking
One of my favorite things to do is to get in the car and take a long drive. New England’s backroads and coastlines are springtime delights. Waves, wildflowers, babbling brooks, and the occasional rogue turkey — it’s like a live-action screensaver. Roll down the windows, blast some tunes, and take in that fresh air that no longer stings the face. Go ahead and take that road that you have never been on before! You never know what you’ll find on this type of adventure. Don’t be afraid to stop the car, get out and get that amazing shot for Instagram. The seacoast is always a great destination with views!
Mud season may put a damper on your hiking plans, but it’s also a reminder that New England’s charm goes way beyond the trails. So embrace the chaos, laugh at your mud-covered car, and sip that well-earned maple latte.
And remember — the mountains will still be there when the ground stops trying to steal your boots in the mud.
Happy adventuring!