Family Friendly Hikes Around New England
view from the top of Table Rock in Grafton Notch State Park in the summer
Looking for a mountain to get your family into hiking? This is our working list of hikes we’ve experienced, separated into five of the six New England states. (Sorry, Rhode Island, we haven’t found a mountain there yet!)
These hikes are perfect for getting the entire family outdoors. They all have pretty views, nothing on this list is too challenging, and each one will leave you feeling accomplished and happy because you just spent time in nature.
Our Family-Friendly Rating Scale-
We rate hikes on a 1–5 scale, with 1 being the easiest and 5 being the most challenging. No two families, mountains, or hikes are the same, so think of this as a guide rather than a rulebook. Each listing includes our 1–5 rating, mileage, elevation gain, and whether it’s a good spot for your four-legged family member.
5 – Advanced Family-Friendly
These hikes can be around 5 miles (sometimes less). They’re not for first-timers. They’re for families ready to tackle a bit more length, elevation, and challenge. You might be a little out of breath and sore the next day, but you’ll earn both the view and the workout. Some of these could have a bit of basic rock scrambles, but nothing you can’t handle if you’ve hit the trails before.
4 – Upper Moderate
Not quite advanced, but definitely a step up from a moderate hike. These trails have views, elevation, and miles (usually under 5). Consider these when you’re ready to move up from moderate hikes but not quite ready for the advanced challenge.
3 – Moderate
These hikes are around 3 miles or less with enough elevation to give you a workout and views to match. Perfect for when you want an adventure but still have plans later in the day. You’ll get your nature fix without being gone for hours.
2 – Easy
Great for starting your family hiking adventures! Ready to break in those hiking boots or get your younger kids some trail experience? These are perfect starter trails, maybe a bit longer or steeper than a “walk in the park,” but still very approachable.
1 – Super Easy
Kind of like a walk in the park (literally). Not sure how your kids will do on a mountain? Start here.
You know your family best! Always bring water (and maybe a snack or two). Nobody wants a hangry hiker! Stay safe and have fun!

Vermont Hikes
Mt. Philo
Rating: 2 Location: Charlotte, VT Miles: 2 Elevation Gain: 652 ft Bathrooms at trailhead Dog-Friendly
A beautiful hike with some stairs and great views from the top! Plus Adirondack chairs where you can relax and take in the Adirondack Mountains.

Gile Mountain
Rating: 2 Location: Norwich, VT Miles: 1.5 Elevation Gain: 387 ft No Bathrooms Dog-Friendly
A fairly short hike with lots of stairs and a cool fire tower at the summit. On a clear day, you can even spot the ski trails of Killington Mountain.
Mt. Pisgah
Rating: 5 Location: Orleans, VT Miles: 4.5 Elevation Gain: 1,660 ft No Bathrooms Dog-Friendly The most challenging on our Vermont list due to length and elevation. The viewpoints are stunning! Watch out for cliffs!

Rating: 3 (longer than our typical 3) Location: Manchester, VT Miles: 4.8 Elevation Gain: 954 feet Dog Friendly / No Bathrooms
If you’re looking for a family-friendly hike with a beautiful payoff, this is it. I rated this hike a 3, although longer than our typical 3 hikes, this trail was fairly easy. There is no scrambling or climbing required, just a peaceful walk through the woods leading to one of Vermont’s tallest waterfalls. And let’s be honest, when you’re hiking with kids, a big, impressive destination at the end is basically your secret weapon to keep them moving.
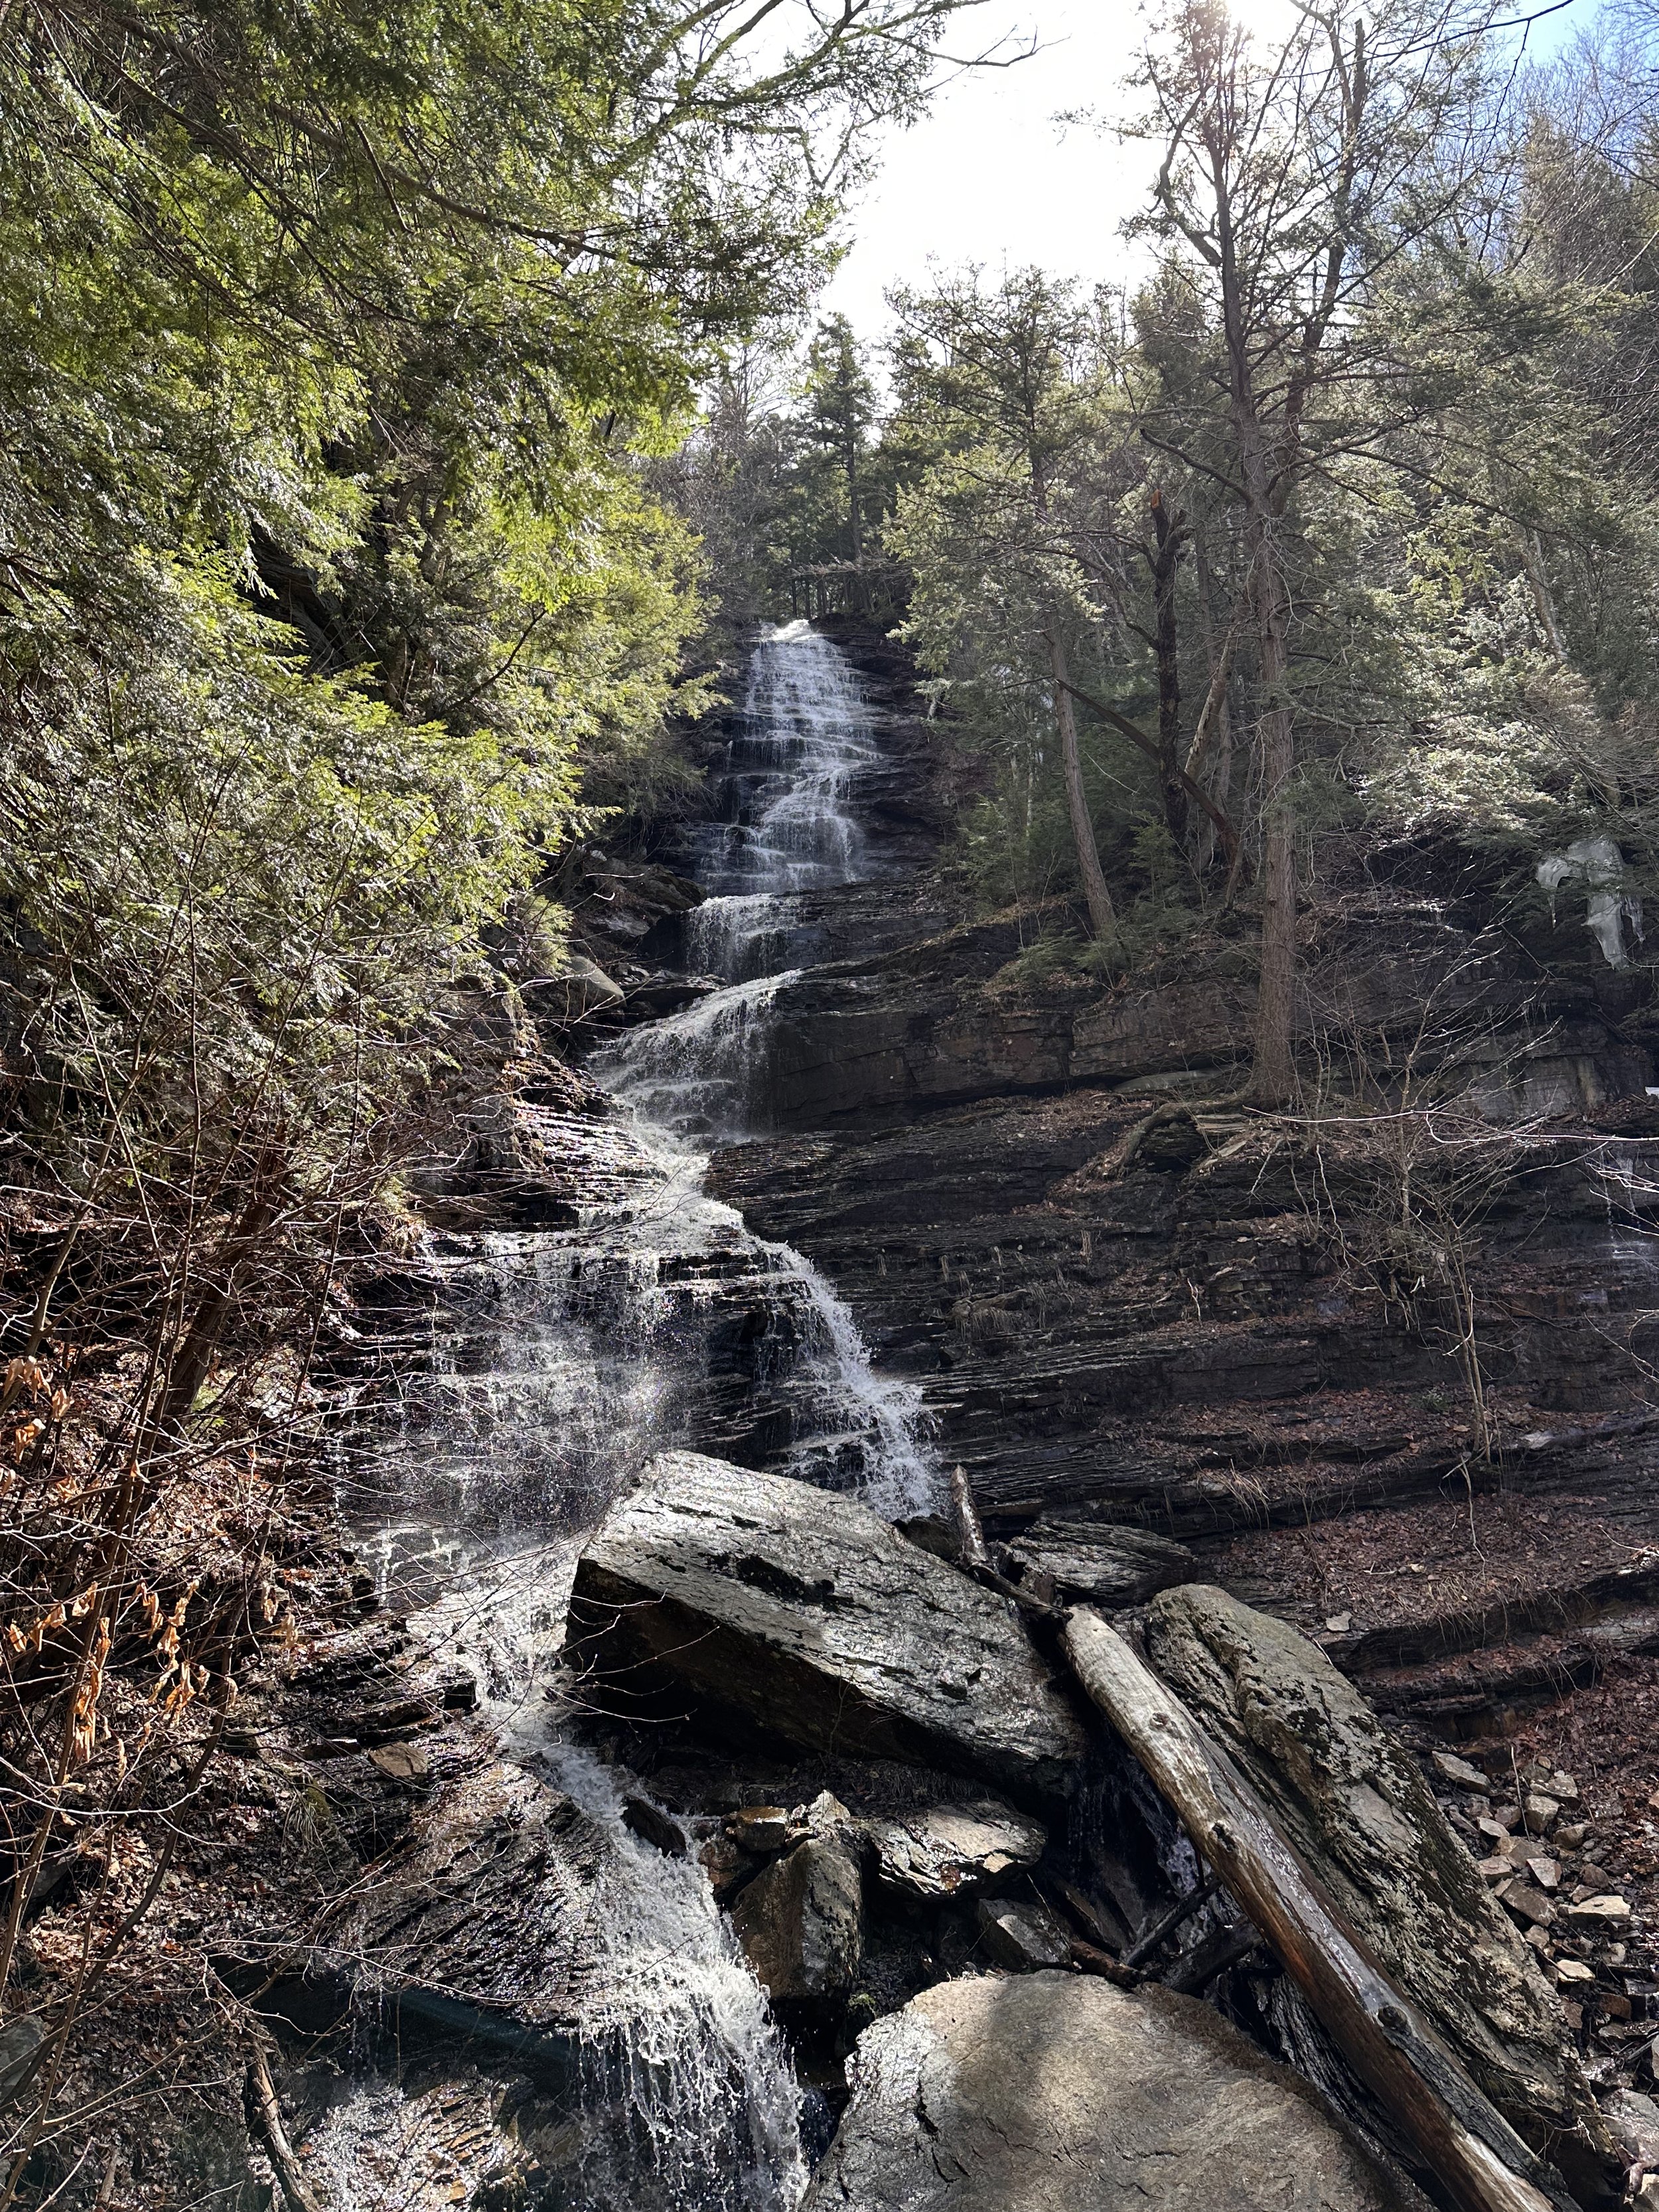
Lye Brook Falls the 125 foot waterfall in Manchester, VT
Maine Hikes
Mount Agamenticus
Rating: 2 Location: York, ME Miles: 1.5–2+ Elevation Gain: 350+ ft Dog-Friendly on a leash / Bathrooms at the trailhead and peak
A perfect first mountain for little hikers. There are a variety of trails here, choose your own adventure! You can make it short and sweet or extend your outing as you wish. On a clear day you can see Mt Washington and the Atlantic Ocean!

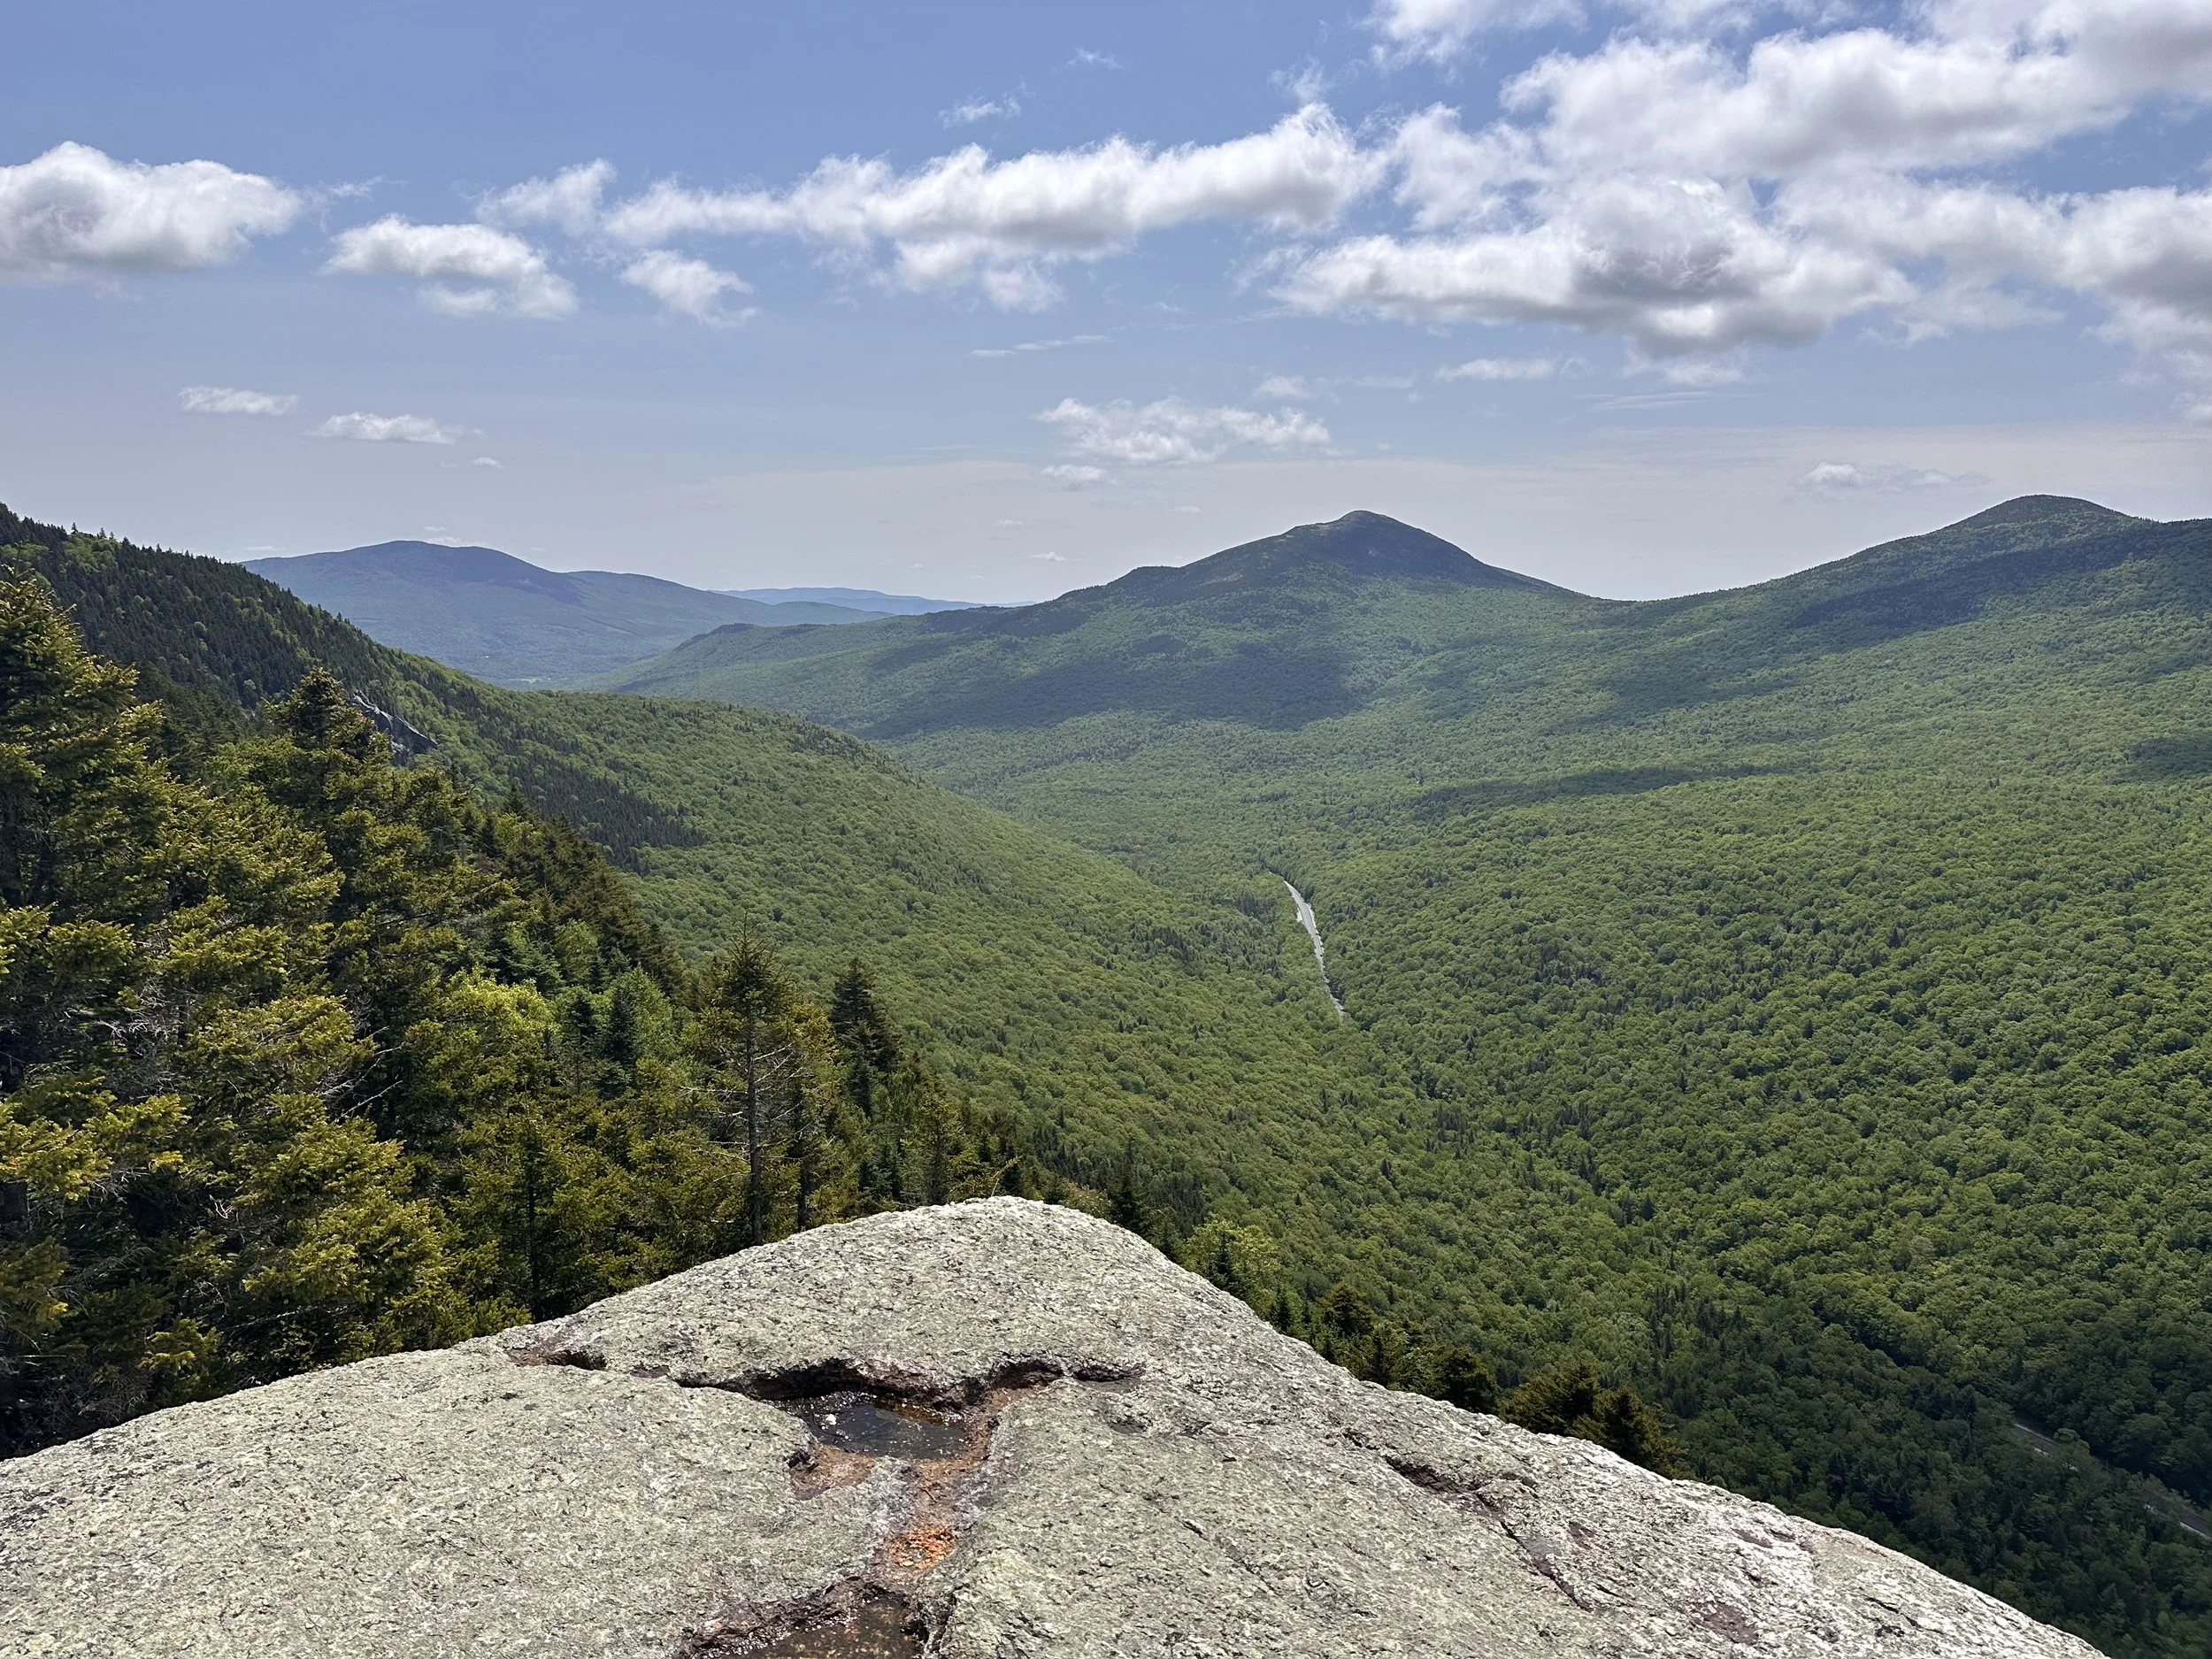
Table Rock
Rating: 3 Location: Gilead, ME Miles: 2.3 Elevation Gain: 902 ft Dog-Friendly/ Bathrooms at the trailhead
You can take the loop counterclockwise for the steep section first, or clockwise to avoid it and do an out-and-back. Either way, you’ll earn those views. The steep rocky part has serious fairytale vibes, beautiful and a bit breath-stealing (in both senses!).
Views from the peak of Table Rock in Grafton Notch State Park
Mt. Philip
Rating: 1 Location: Rome, ME Miles: 1.4 Elevation Gain: 338 ft No Bathroom / Dog-Friendly
A short and lovely hike. No sweeping views, but a wonderful family trail for kids and dogs alike.

When the leaves are off the trees you get pretty views at Mt Philip
Mt. Megunticook
Rating: 3 Location: Camden, ME Miles: up to 4.5 (can be under 3) Elevation Gain: 1,214 ft (varies depending on the trails you take) Dog-Friendly / Bathroom at the trailhead
Choose your adventure! Some solid elevation may leave you catching your breath, but on a clear day, the views of Camden Harbor are worth every step. You can even extend your trek over to Mt. Battie. (Sure, there’s a road to the peak, but hiking it is way more fun and that’s what this list is all about!)

Mt Megunticook on a cloudy day
Rating: 2 Location: Bridgton, ME Miles: 3.7 (can be less) Elevation Gain: 833 feet Dog friendly / NO bathrooms
A very fun family friendly hike with some sneaky steep parts, they can be avoided. This is a choose your own adventure type of hike! Pro tip: hike in the fall (but make sure you have your orange).
New Hampshire Hikes
Mt. Major
Rating: 4 Location: Alton Bay, NH Miles: up to 4.5 Elevation Gain: 1,165 ft Dog-Friendly / Bathrooms at trailhead
A very popular hike, and for good reason. Depending on the trail you choose, you might find yourself scrambling over rocks or taking a longer but gentler route. Either way, the views of Alton Bay are stunning.
Hazy views from our end of summer hike of Mt Major
Mt. Monadnock
Rating: 5 Location: Jaffrey, NH Miles: 3.9 Elevation Gain: 1,772 ft Dog-Friendly / Bathrooms at trailhead
One of the most hiked mountains in the U.S., and for good reason. It’s a true New England classic. But don’t underestimate it just because it’s popular! Bring plenty of water and snacks; this one is a workout.

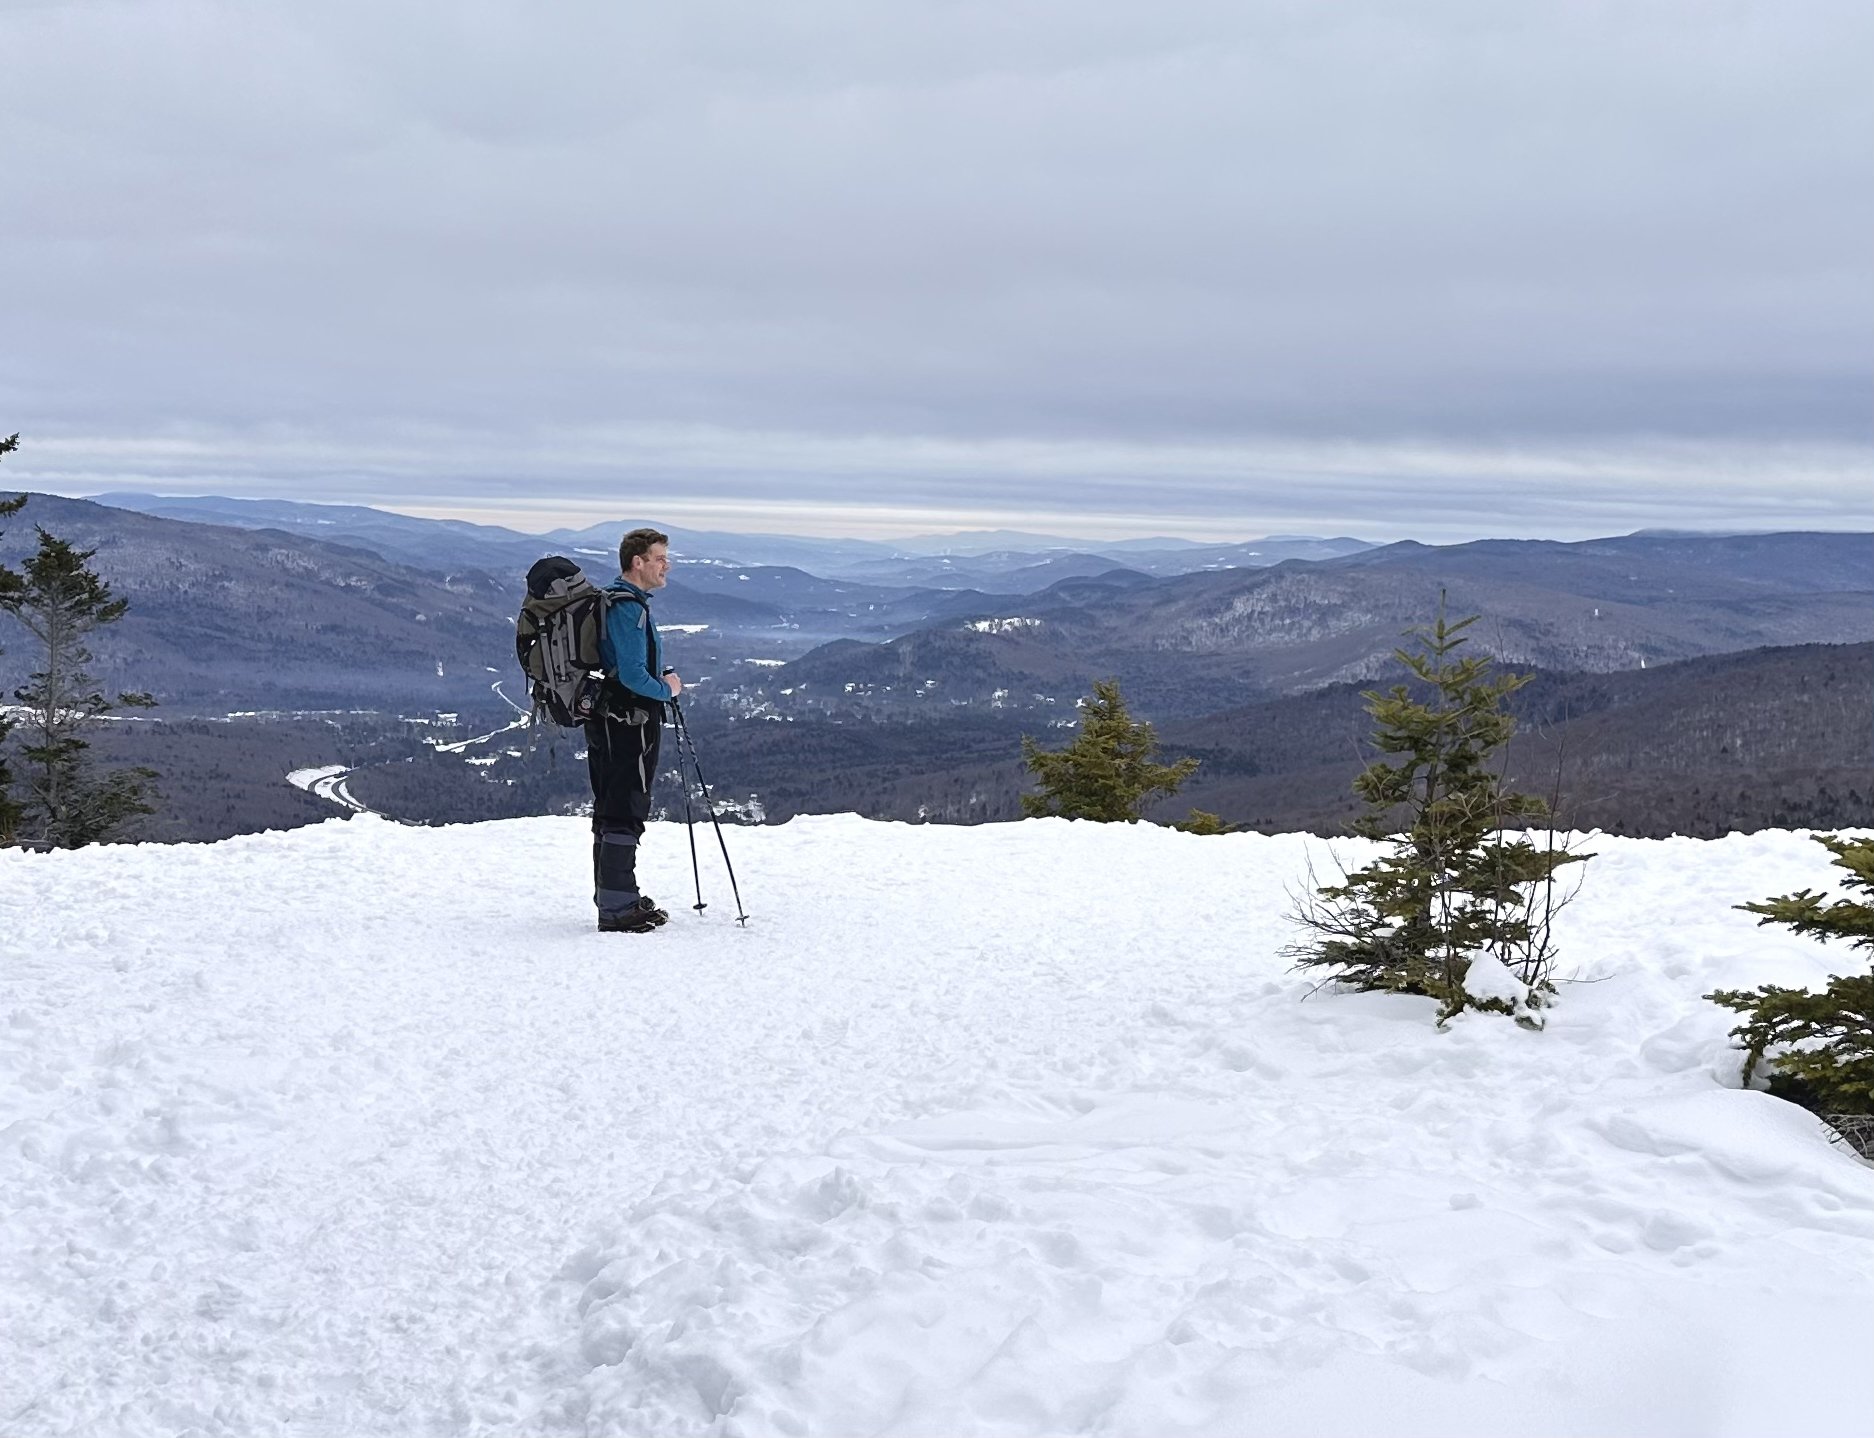
Mt. Pemigewasset
Rating: 5 Location: Franconia Notch State Park, NH Miles: 3.5 Elevation Gain: 1,260 ft Dog-Friendly / Bathrooms at Flume Gorge on season only
A fun family challenge with rewarding views at the top. We even tackled this one as a winter hike, it was a great way to test our gear!

Mt Pemi is even a fun winter hike!
Mt. Willard
Rating: 3 Location: Twin Mountain, NH Miles: 3.2 Elevation Gain: 912 ft Dog-Friendly / Bathrooms at trailhead and AMC Hut
A personal Around New England favorite. It’s a steady climb to the summit, with stunning views of Crawford Notch. Pack snacks and water, there’s no better spot for a mountaintop picnic.

Mount Kearsarge
Rating: 4 Location: Winslow State Park, Wilmot, NH Miles: 2.5 Elevation Gain: 1,115 ft Dog-Friendly (on leash) / Bathrooms at trailhead
Bathrooms at the trailhead (always a plus). There’s a small fee unless you have the NH State Park plate. The loop trail can be hiked either way. Go counterclockwise to tackle the steep part first and save your knees on the way down. There’s even a tower at the top you can spend the night in (first come, first serve)! A great family hike with a little challenge and a big payoff.
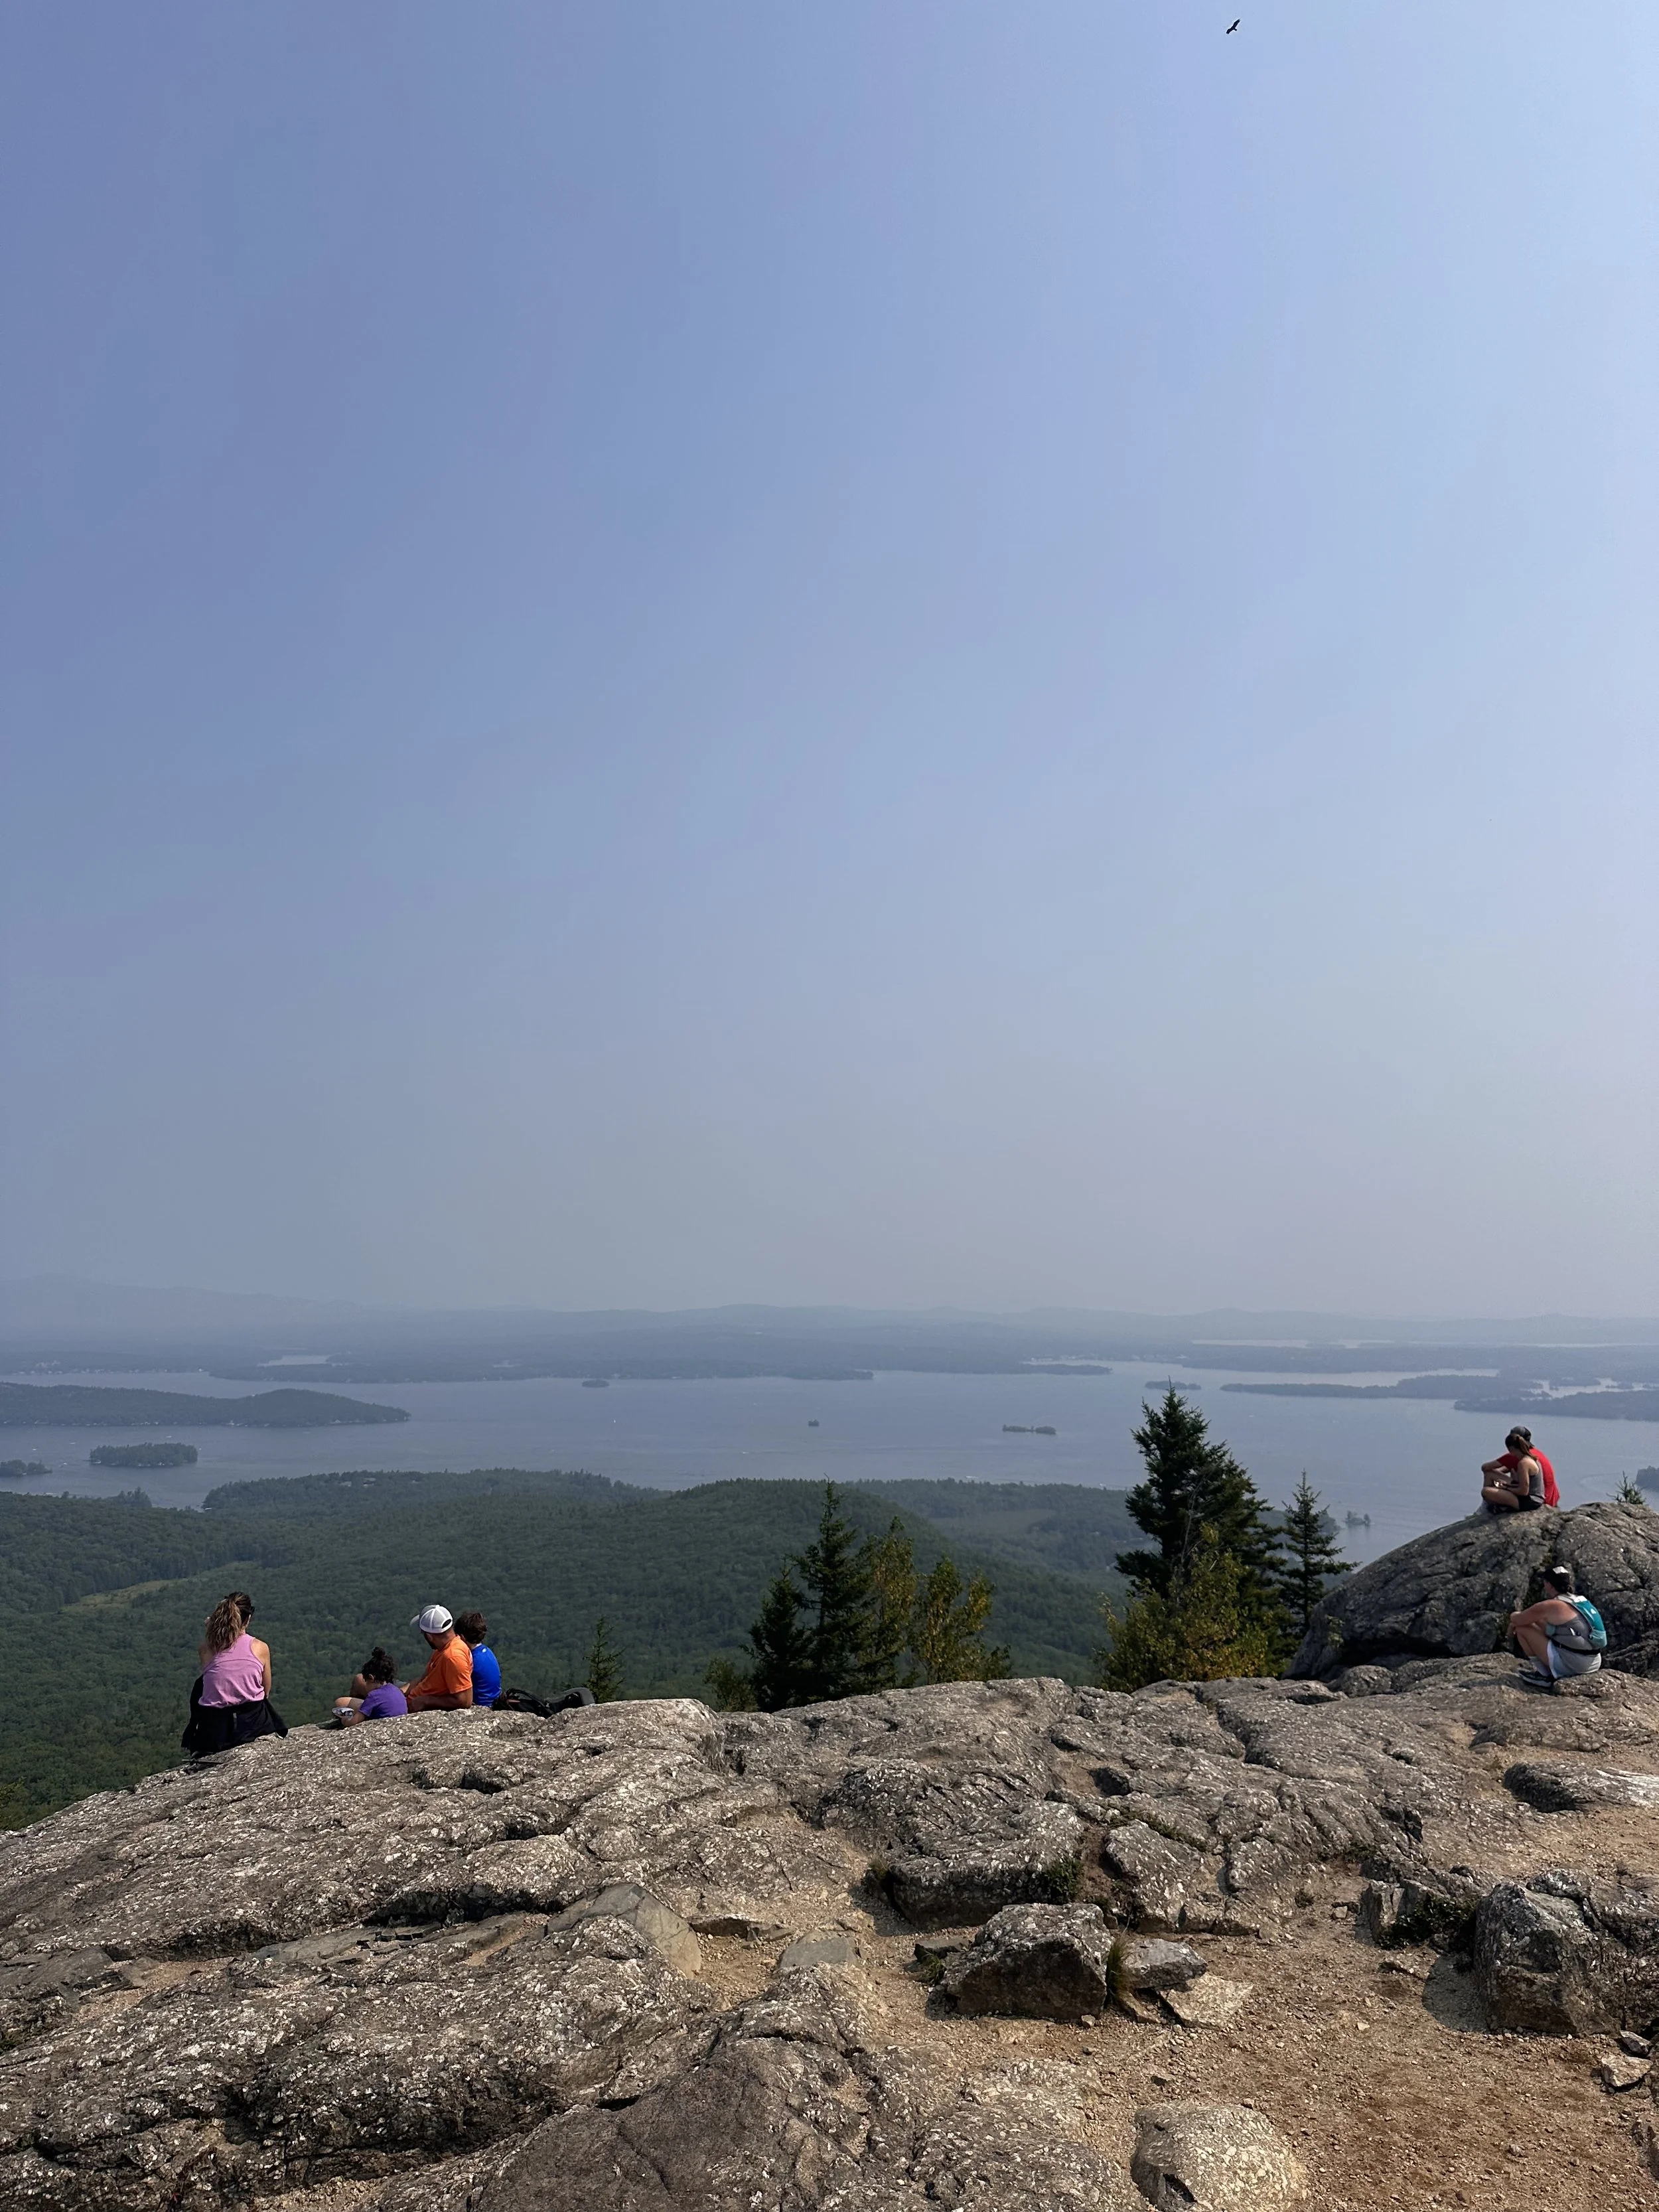
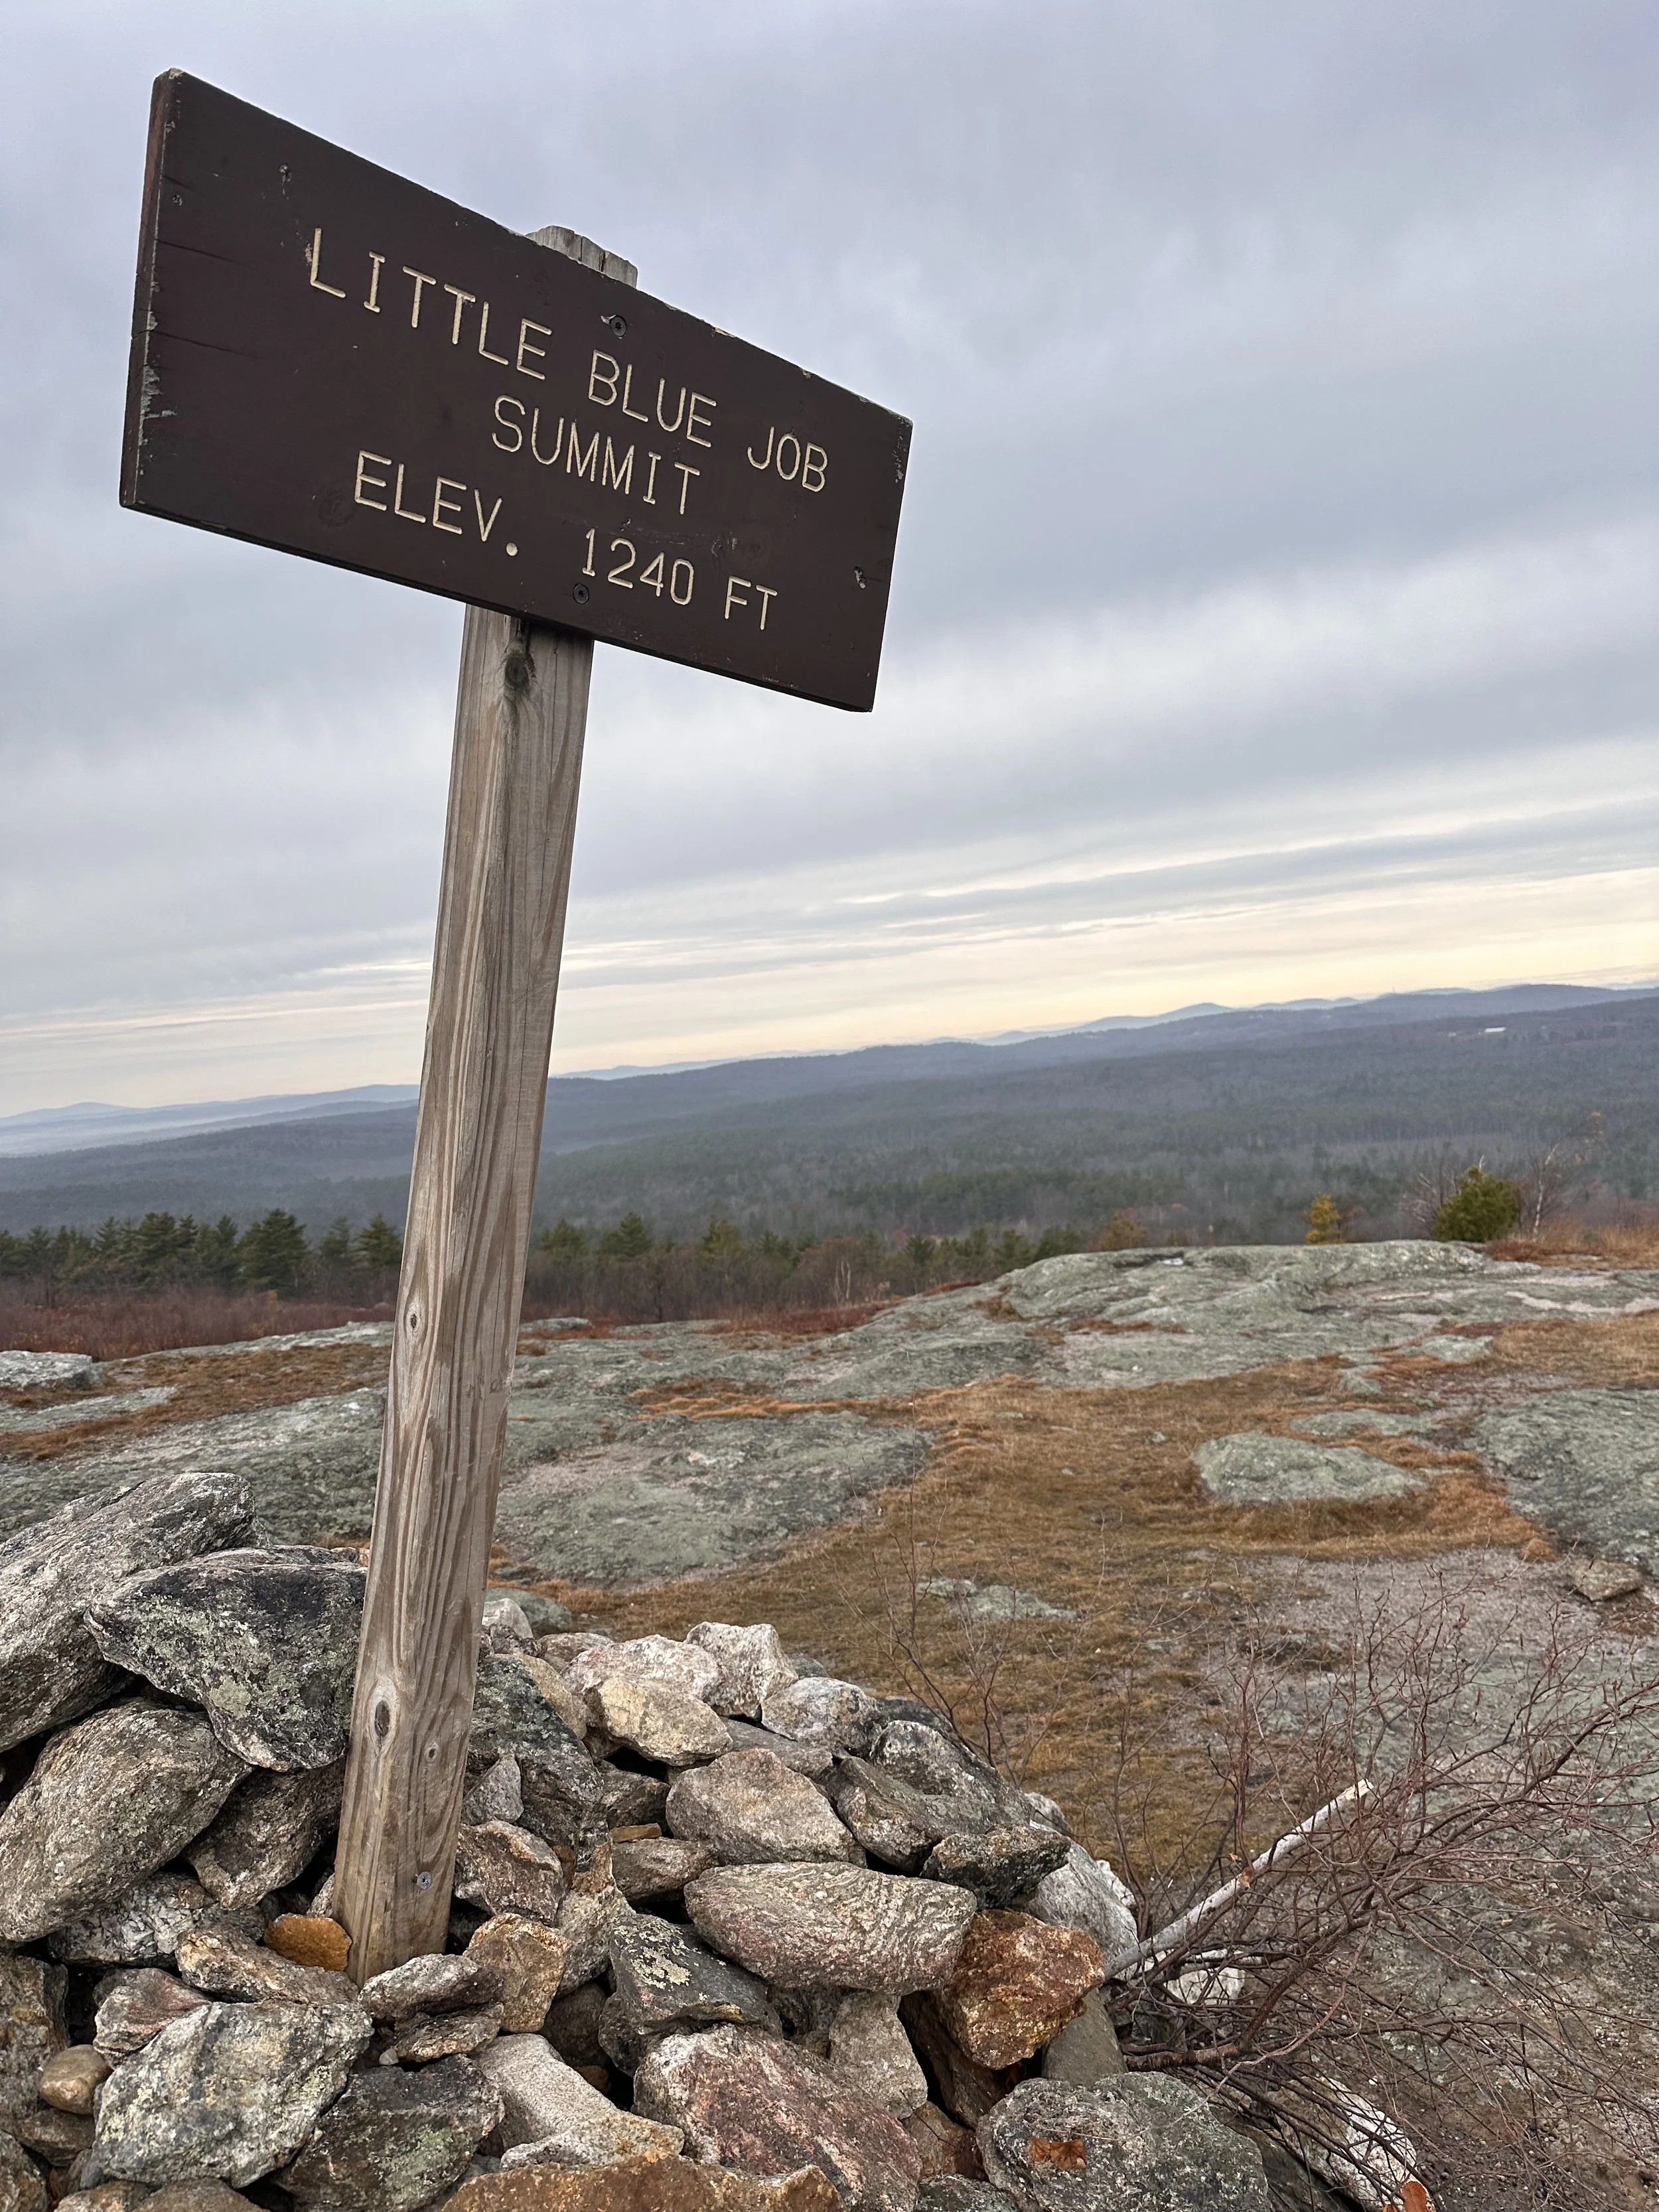
Rating: 1 Location: Strafford, NH Miles: 2 Elevation Gain: 430 feet Dog Friendly / No Bathrooms
Want to get your kids into hiking? This is a great spot to start. At only 2 miles Blue Job & Little Blue Job offers beautiful views on a clear day, or even cloudy we appreciated the views and a fire tower! Fun for the entire family.
Pro Tip: Be careful of the slippery leaves in the fall!
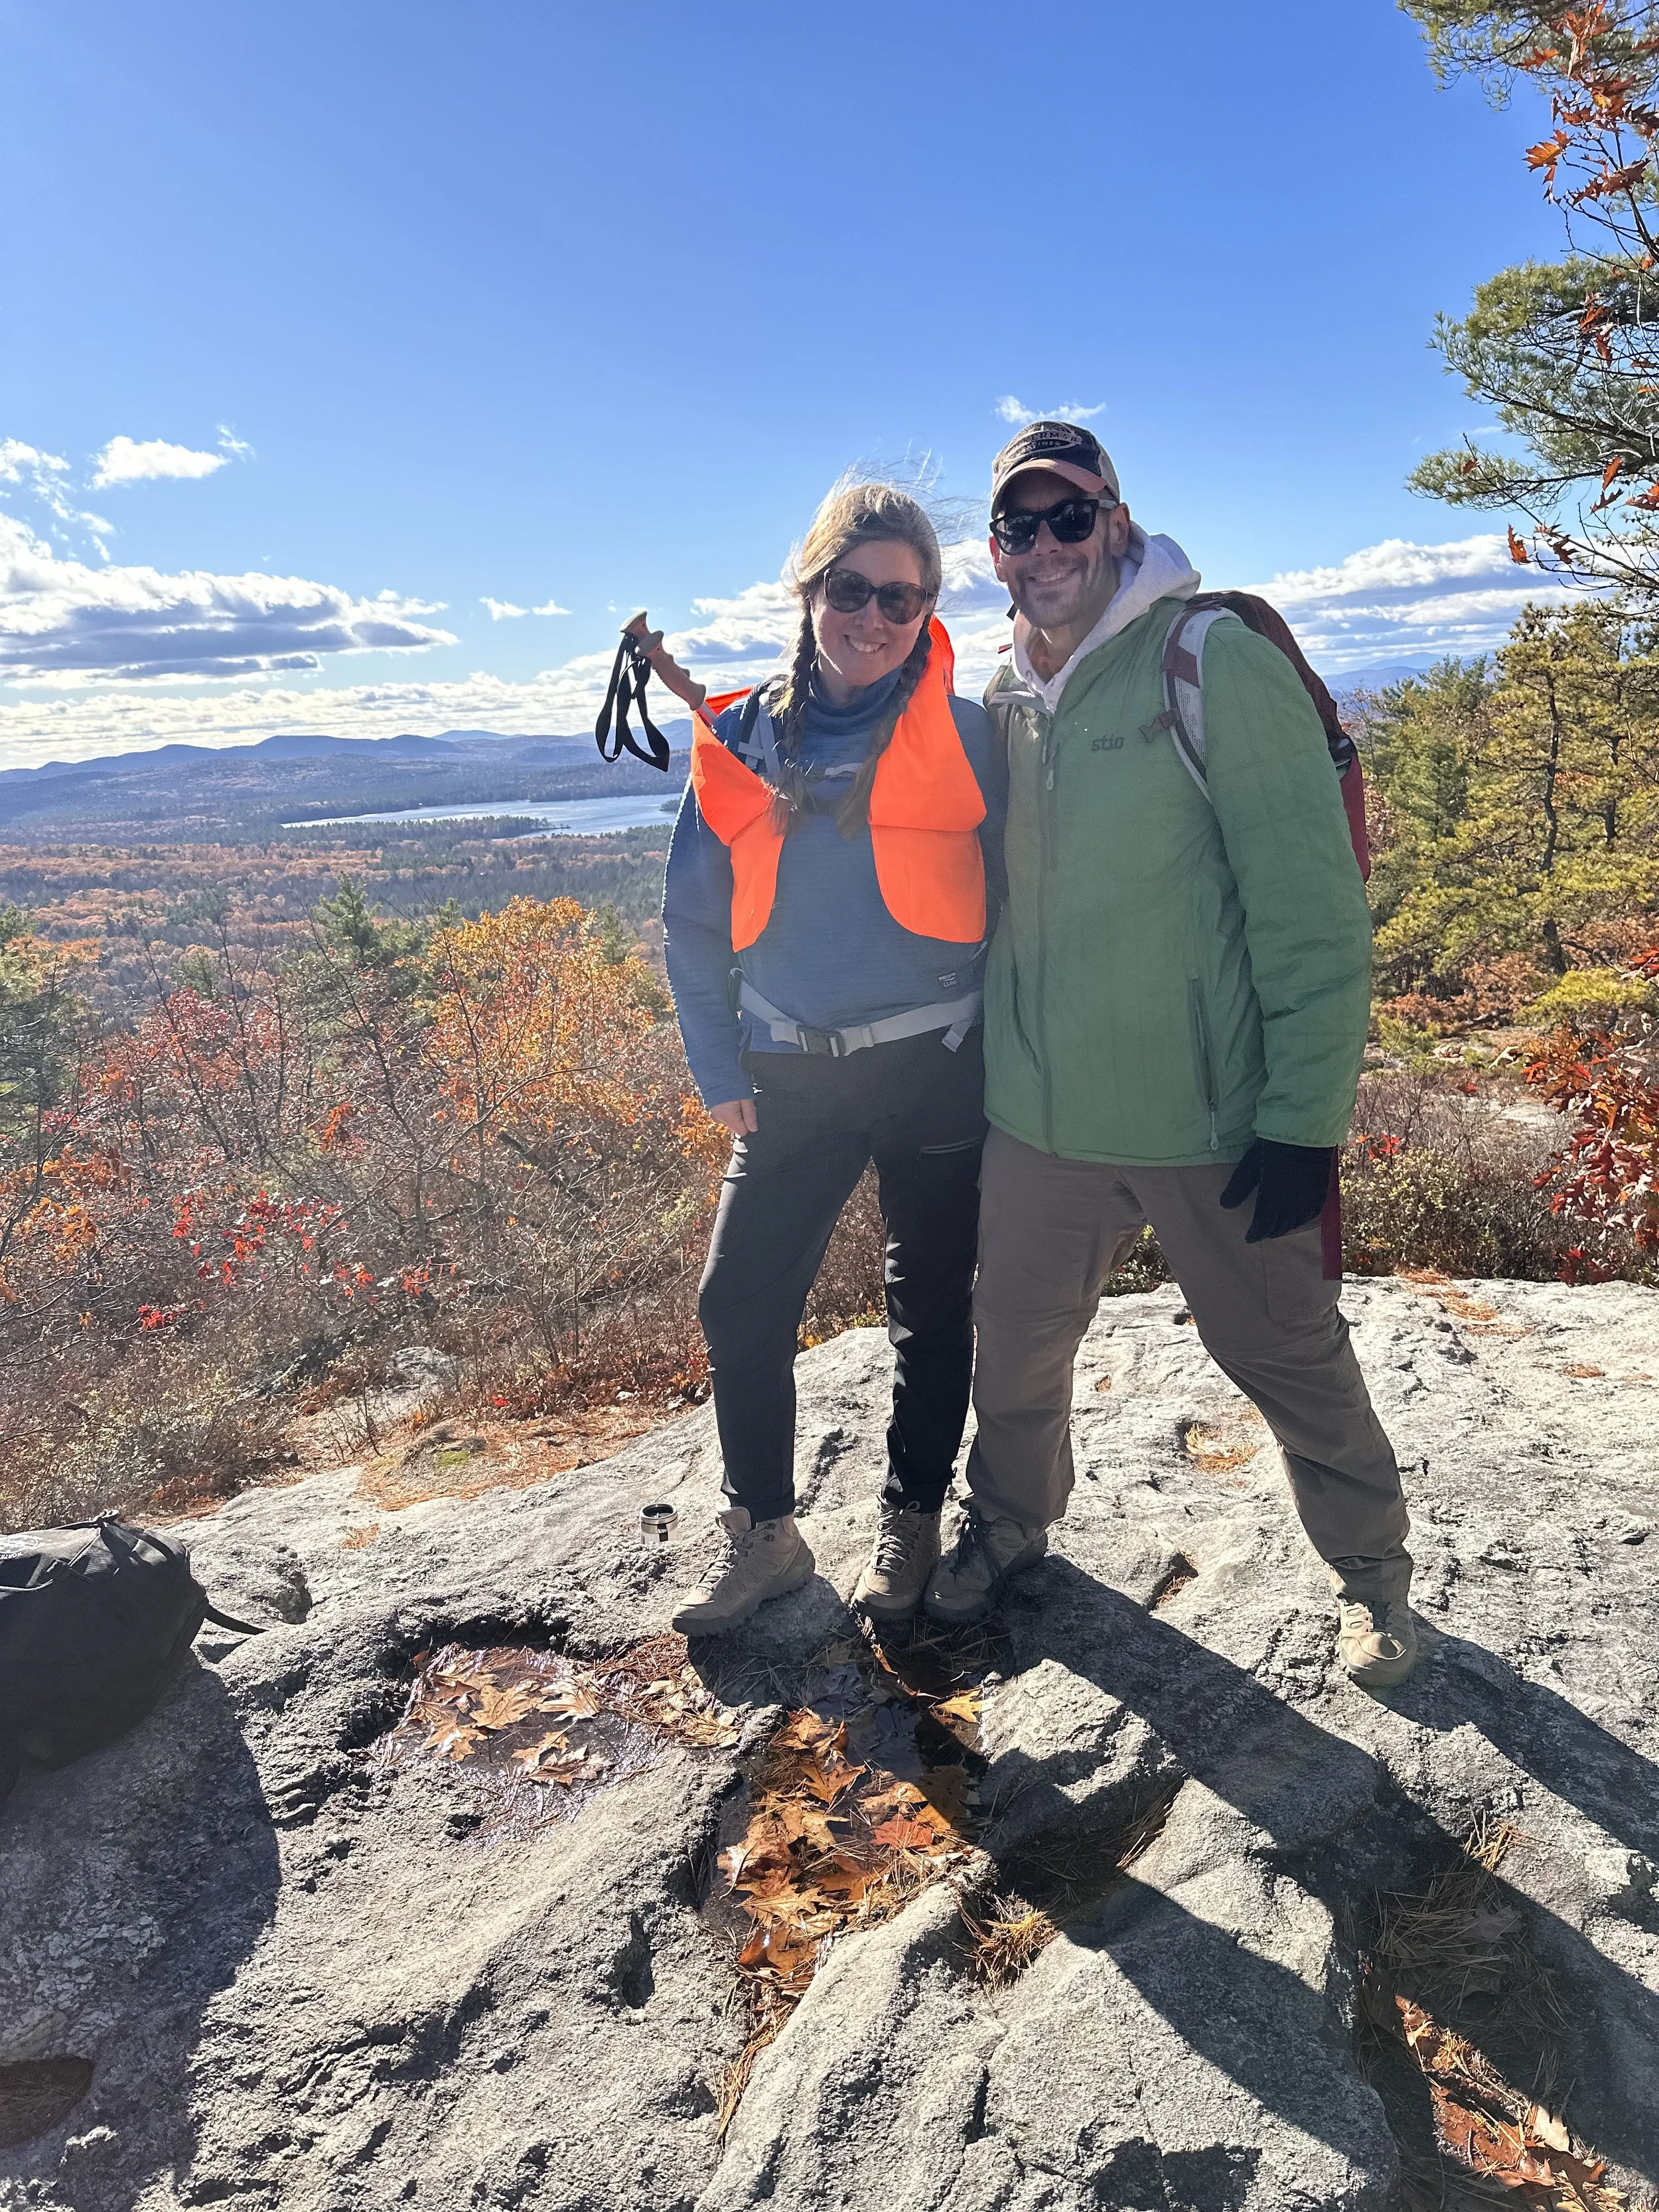
Rating: 2 Location: Franconia, NH Miles: 1.5 Elevation Gain: 367 Bathrooms available (seasonally) Dogs allowed
This is the hike you read about and see in the news. It is very popular and for good reason. It’s a fairly easy hike for the entire family to enjoy & you get great views of the notch and Cannon MT. You can do this out and back, but I suggest hiking the entire loop, especially on a busy day! Pro tip: hike on a weekday. The Fall will be the busiest time (for good reason see picture below). This is a great hike any time of the year!
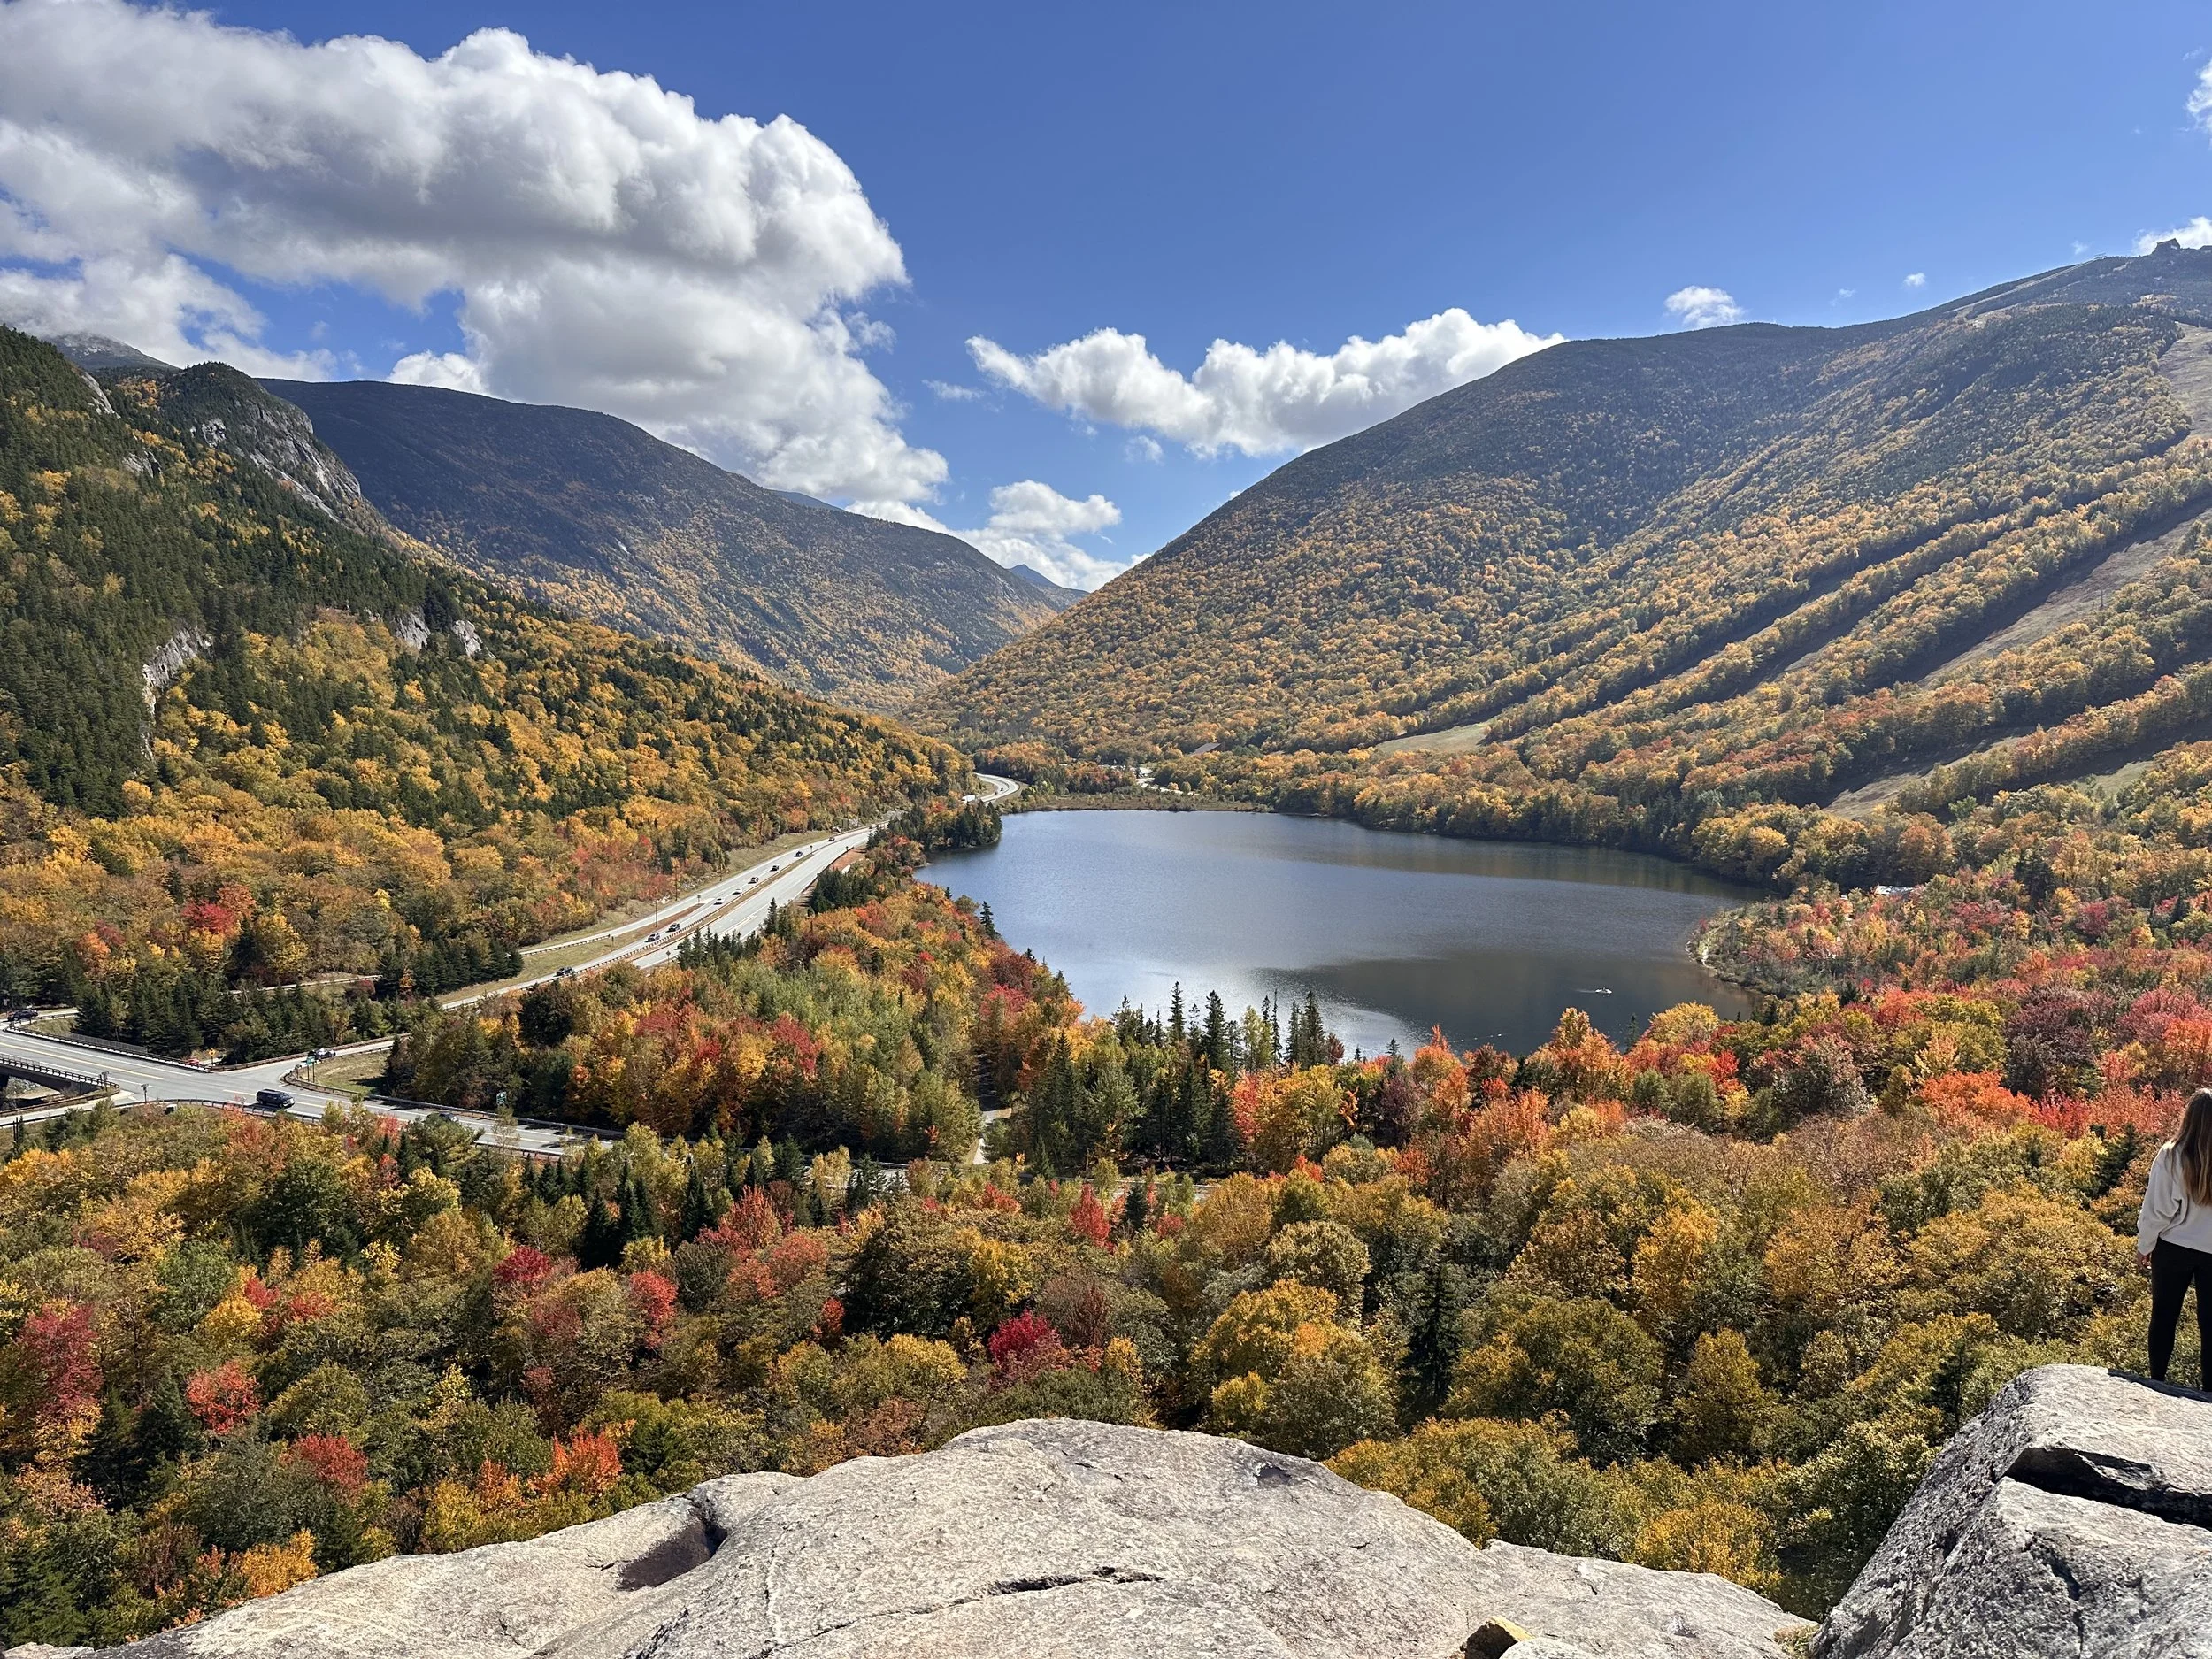
Beautiful views from Artist Bluff. You see Franconia Notch & Cannon MT on a clear day.
Massachusetts Hikes
Mt. Tom
Rating: 2 Location: Holyoke, MA Miles: 1.5+ Elevation Gain: 627 ft Dog-Friendly / No Bathrooms
A fun, fairly short hike with a few steep sections and some loose rocks. There are multiple trail options, so you can make it longer if you’d like. A great family spot if you’re in the area.

Wachusett Mountain
Rating: 3 Location: Princeton, MA Miles: 3.5 Elevation Gain: 974ft Yes Dog Friendly/Yes Bathrooms at trailhead
There are a variety of hiking trails for Wachusett. We picked one of the more popular ones, also not the longest one. It starts in the skiing parking lot. There are bathrooms and signs at the beginning of trail. You follow the trail to Balance Rock and then the trail turns into Old Indian Trail. No rock scrambles, one steep section otherwise a pretty steady incline with some short flat breaks. Cool views of Mt Monadnock, into Vermont, and you can see Boston in the distance. Great for families of all ages. You can also drive to the top if you would like, or ride your bike on the road.
Connecticut Hikes
Ragged Mountain Preserve
Rating: 2 Location: Berlin, CT Miles: up to 4.5 Elevation Gain: 620 ft Dog-Friendly / No Bathrooms
A peaceful and beautiful hike with more trail than parking — the lot is small! You can take a shorter route, but if you want those great views, be prepared for a bit of a longer trek. Some steep sections at the start, but totally worth it once you reach the top.

Always stop and enjoy the views! Ragged Mt Preserve has some beautiful spots!
Rating: 3 Location: Hamden, CT Milage: 3.2 (can be more) Elevation Gain: 597ft Dog Friendly/ Bathrooms available in season porta-potty in off season
This not so hidden gem is a great spot for your entire family. There are a variety of trails here, the most popular one is about 1.6 miles to the castle aka the tower. This steady incline on crushed stone is wide open and has spots to catch your breath while you enjoy a view. Hike this anytime of the year, but fall would be my pick. There is a fee to enter on season $15 for non CT resident on weekends (based on car registration) and $6 for out of state residents on weekdays. If you have CT plates you will be able to enter for free!
You can climb the tower and enjoy the views of Long Island Sound
We will keep adding hikes as we experience them and think they would be good for the entire family! If you have any we should check out please let us know! Happy Hiking!

Be Prepared for Winter Hiking — Even in the Fall🍂
How to be ready for hiking in the white mountains this fall and winter
I know it might sound silly, it’s 50° at home, maybe even at the trailhead, the fall leaves are popping, and you’re ready to hit the trails. But here’s the thing: those gorgeous higher-elevation mountains? They don’t care what the weather is like at your house.
After a few recent rescues of hikers who were not prepared (clearly they haven’t listened to our podcast or read this blog 😉), it’s time to say it again: don’t underestimate the mountains, especially in Vermont, New Hampshire, and Maine.
If you haven’t already, check out Mike’s full blog on the Ten Essentials. I’m adding a few cold-weather and winter hiking must-haves to that list. But first, a quick refresher:
Map
Headlamp
Sun protection
First aid kit
Multi-tool or knife
Matches or lighter
Emergency blanket
Extra food
Extra water & purification method
Extra clothes
Now let’s talk about a few extra essentials for New England hikers heading out in fall or winter.

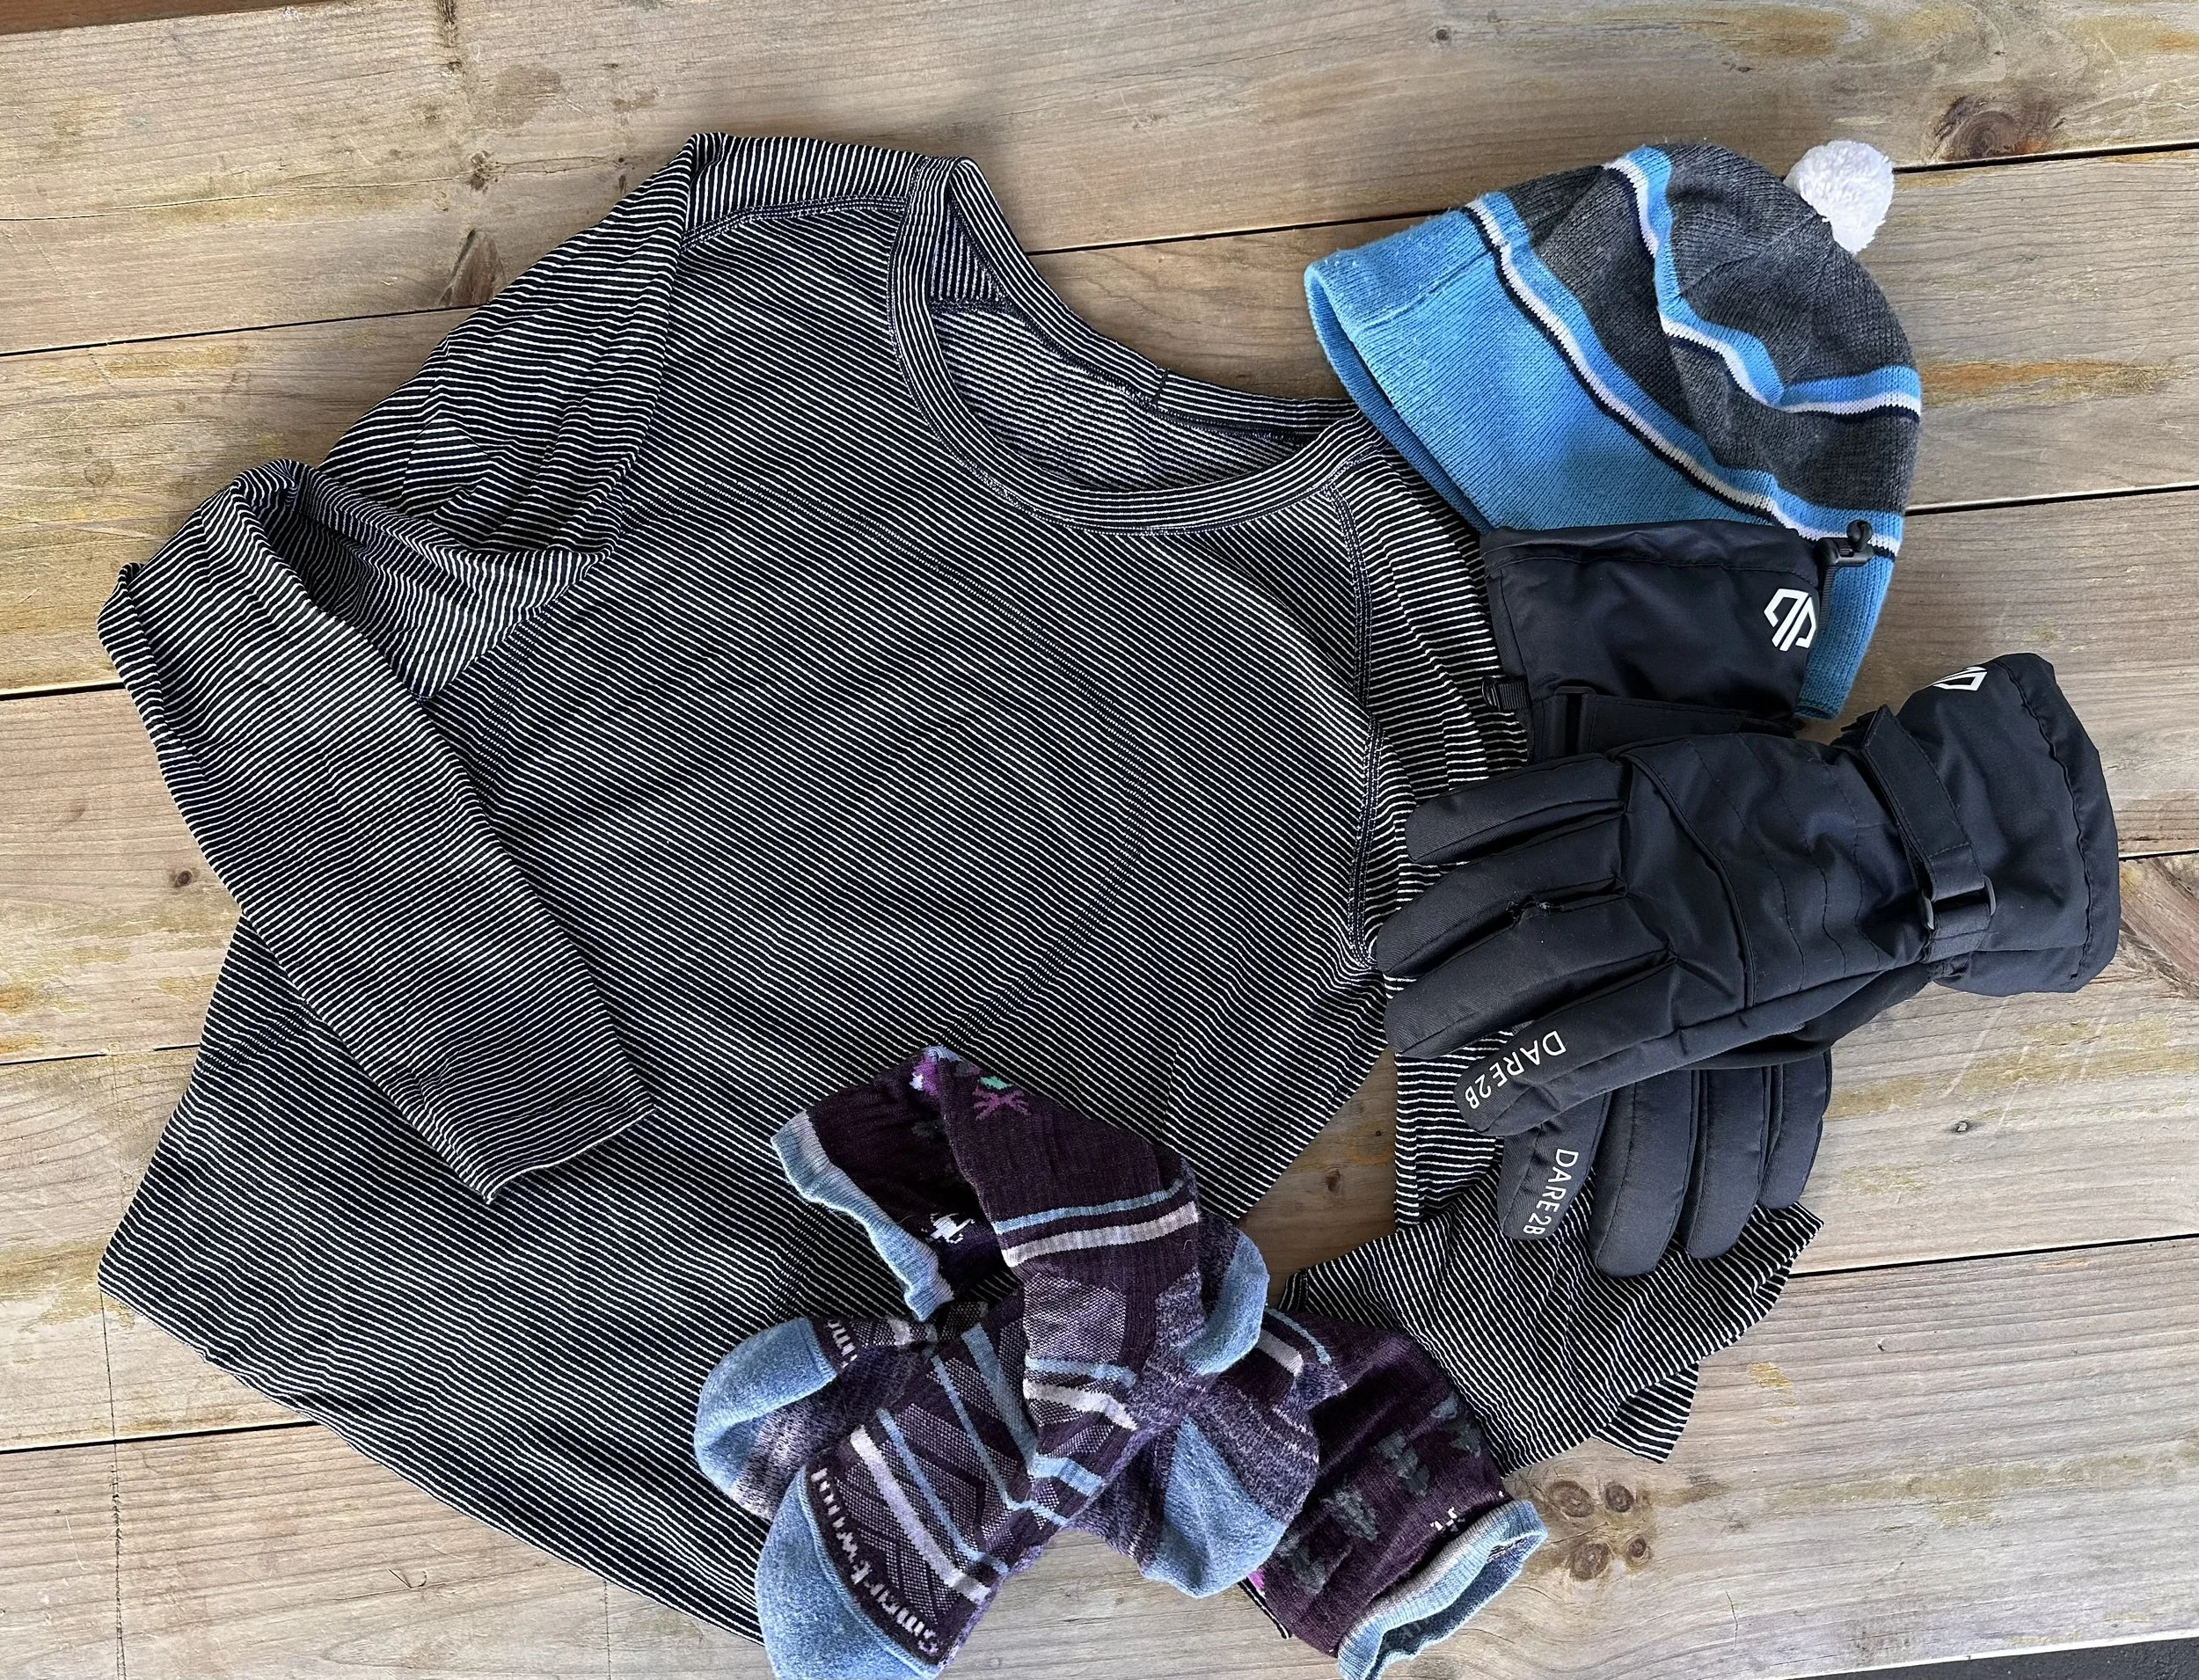
Layer Like a Pro (a Warm, Dry, Cozy Pro)
The right layers can make or break your hike. Here’s the golden rule: no cotton. Go for synthetic materials like polyester, or even better, merino wool, it’s my favorite when it’s really cold. Mike has a saying and I am adopting it: there is no bad weather only bad clothing, listen to him he is correct, this time. We have a rule. Start the hike slightly cool, you warm up as you hike. But always have layers ready to go. No one wants to be shivering! Here’s my layering strategy:
Base Layer: Something moisture-wicking.
My favorites are the Lululemon Swiftly Long Sleeve 2.0 Tech Shirt and the LLBean Women’s Cresta Midweight 250 Crew Top.Mid Layer: Something warm and breathable.
I rotate between old race long sleeve tech shirts and my favorite, the Patagonia R1 Air Fleece Hoodie. LLBean also makes some solid fleece options.Pants: I live in my Athleta Fleece-Lined High-Waisted Stash Leggings — warm, stretchy, I love these leggings so much!
Outer Layer: Something weather-resistant. My go-to is an LLBean Classic Puffer Jacket. Mine was an outlet find (of course), but this one is very similar to what I wear all winter.
Socks: Smartwool Hike Targeted Cushion Mid Crew Socks. Warm, comfy, and they last forever. I wear mine year round. It is also not a bad idea to have an extra pair in your bag.
“It’s Just Fall… Do I Really Need All That?”
Short answer: yes.
Even if it feels mild when you start, temperatures can drop fast as you climb. It might be a crisp fall morning at the trailhead and a snowy, icy wonderland at the summit. As I’m writing this, Mt. Washington already has snow!
So along with the ten essentials, toss some extra layers & winter extras in your bag just in case:
Microspikes: These should really be the 11th essential. If you listened to our Mt. Pemi episode, you know the rule — always carry a backup pair! If one breaks mid-hike, you’ll be glad you did.
Check out Kahtoola Microspikes from LLBean. We have scored deals at EMS or Amazon.It is the time of year to add your favorite hat and gloves to your bag. No one wants cold fingers!

Watch the Weather
Don’t just rely on your iPhone app. If you’re hiking in the White Mountains, check the Mount Washington Observatory Higher Summit Forecast — they’re the experts for a reason.
And if the weather looks questionable, turn around. Seriously. The goal is to get back to your car safely, not to make the evening news. The mountain will still be there next weekend!
Also, it gets dark fast this time of year. Bring a headlamp (and extra batteries) because “stumbling through the woods in the dark” is not the kind of adventure you want.
Final Thoughts
Always tell someone your hiking plans before heading out. Be smart, be prepared, and don’t be a statistic. Check out the NH safe card. This is only vaild in NH, Maine & Vermont do not offer this type of card.
The mountains are magical, but they can also be merciless. So pack your layers, check the forecast, grab your spikes, and get out there safely. Winter and fall hiking can be incredible, as long as you respect it.

Hiking the top rated hike in NH
Hiking Lincoln and Lafayette the top rated hike in New Hampshire!
Lincoln & Lafayette – Franconia Ridge Adventure
Lincoln & Lafayette mountains. The view of what you’ve hiked as you start to go down.
New Hampshire’s top-rated hike - Lincoln & Lafayette on the Franconia Ridge!
This was our biggest hike of the year, they’re two of New Hampshire’s tallest mountains, the 6th and 7th highest peaks in the state. These were also numbers 6 and 7 for us out of the 48 4,000-footers. We started this 4,000-footer journey about a year ago, saying we’d just “dip our toes in” and see how it went. We weren’t sure if we’d actually work on finishing the list… but here we are, checking them off one by one. Will we complete it? Only time will tell.
Let’s get into this incredible hike… and yes, it really is incredible!

We always take a picture of the trail head start sign, when we begin. Helps to know how long it takes us
Early Start
We started early. Because this hike is super popular. Like, “parking-lot-fills-before-sunrise” popular. We hit the trail around 5:45 a.m. with our headlamps on. Total hiking time: about 8½ hours (not counting breaks). I’m a slow hiker, so we planned for roughly a mile per hour, and for once, our timing was spot on.
Starting in the dark is always a little eerie, especially in northern New Hampshire. There are a few water crossings early on, and as the sun started peeking through the trees, we could see some pretty waterfalls. It’s been a dry year, so nothing too tricky, but the last waterfall (about 1.3 miles in) is the showstopper. That’s also your final water crossing. The rocks there are steep and could be slippery if wet, so I was very thankful for the dry day!


Climbing Toward the Ridge
At about 3 miles, you hit the alpine zone! Almost to your first peak (though not one of the official 48). You’ll reach Little Haystack around 3.2 miles in.
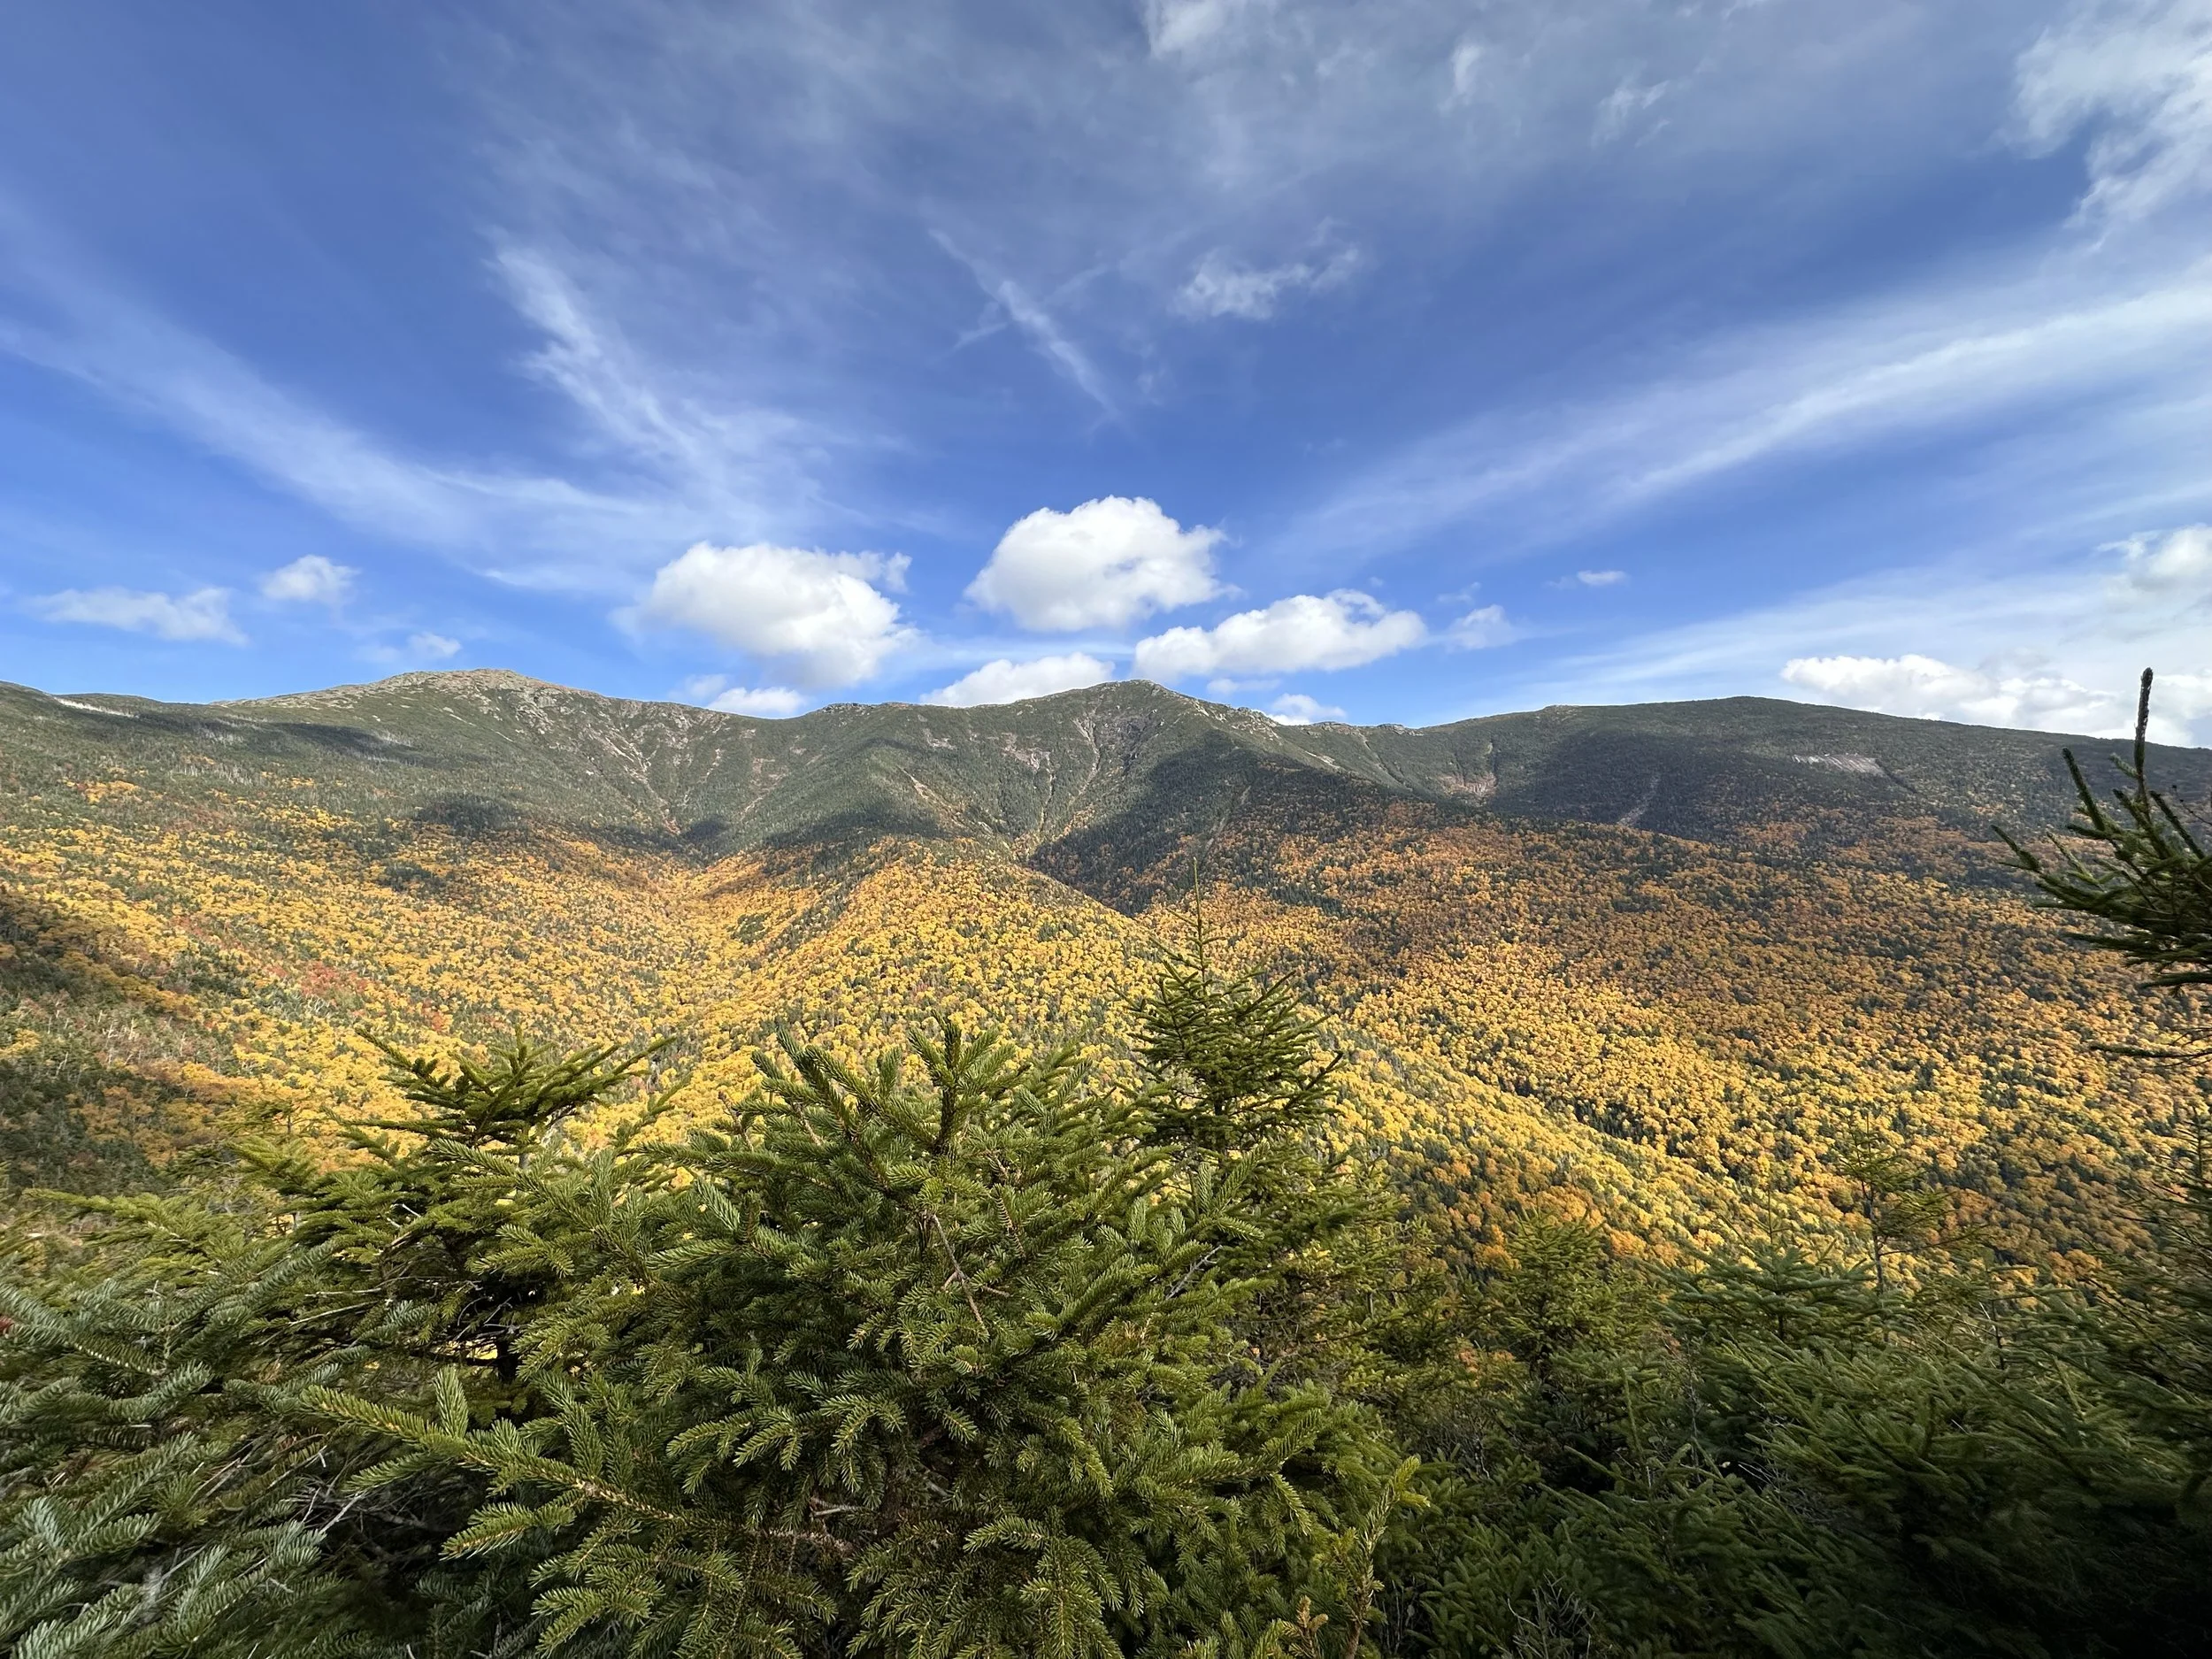
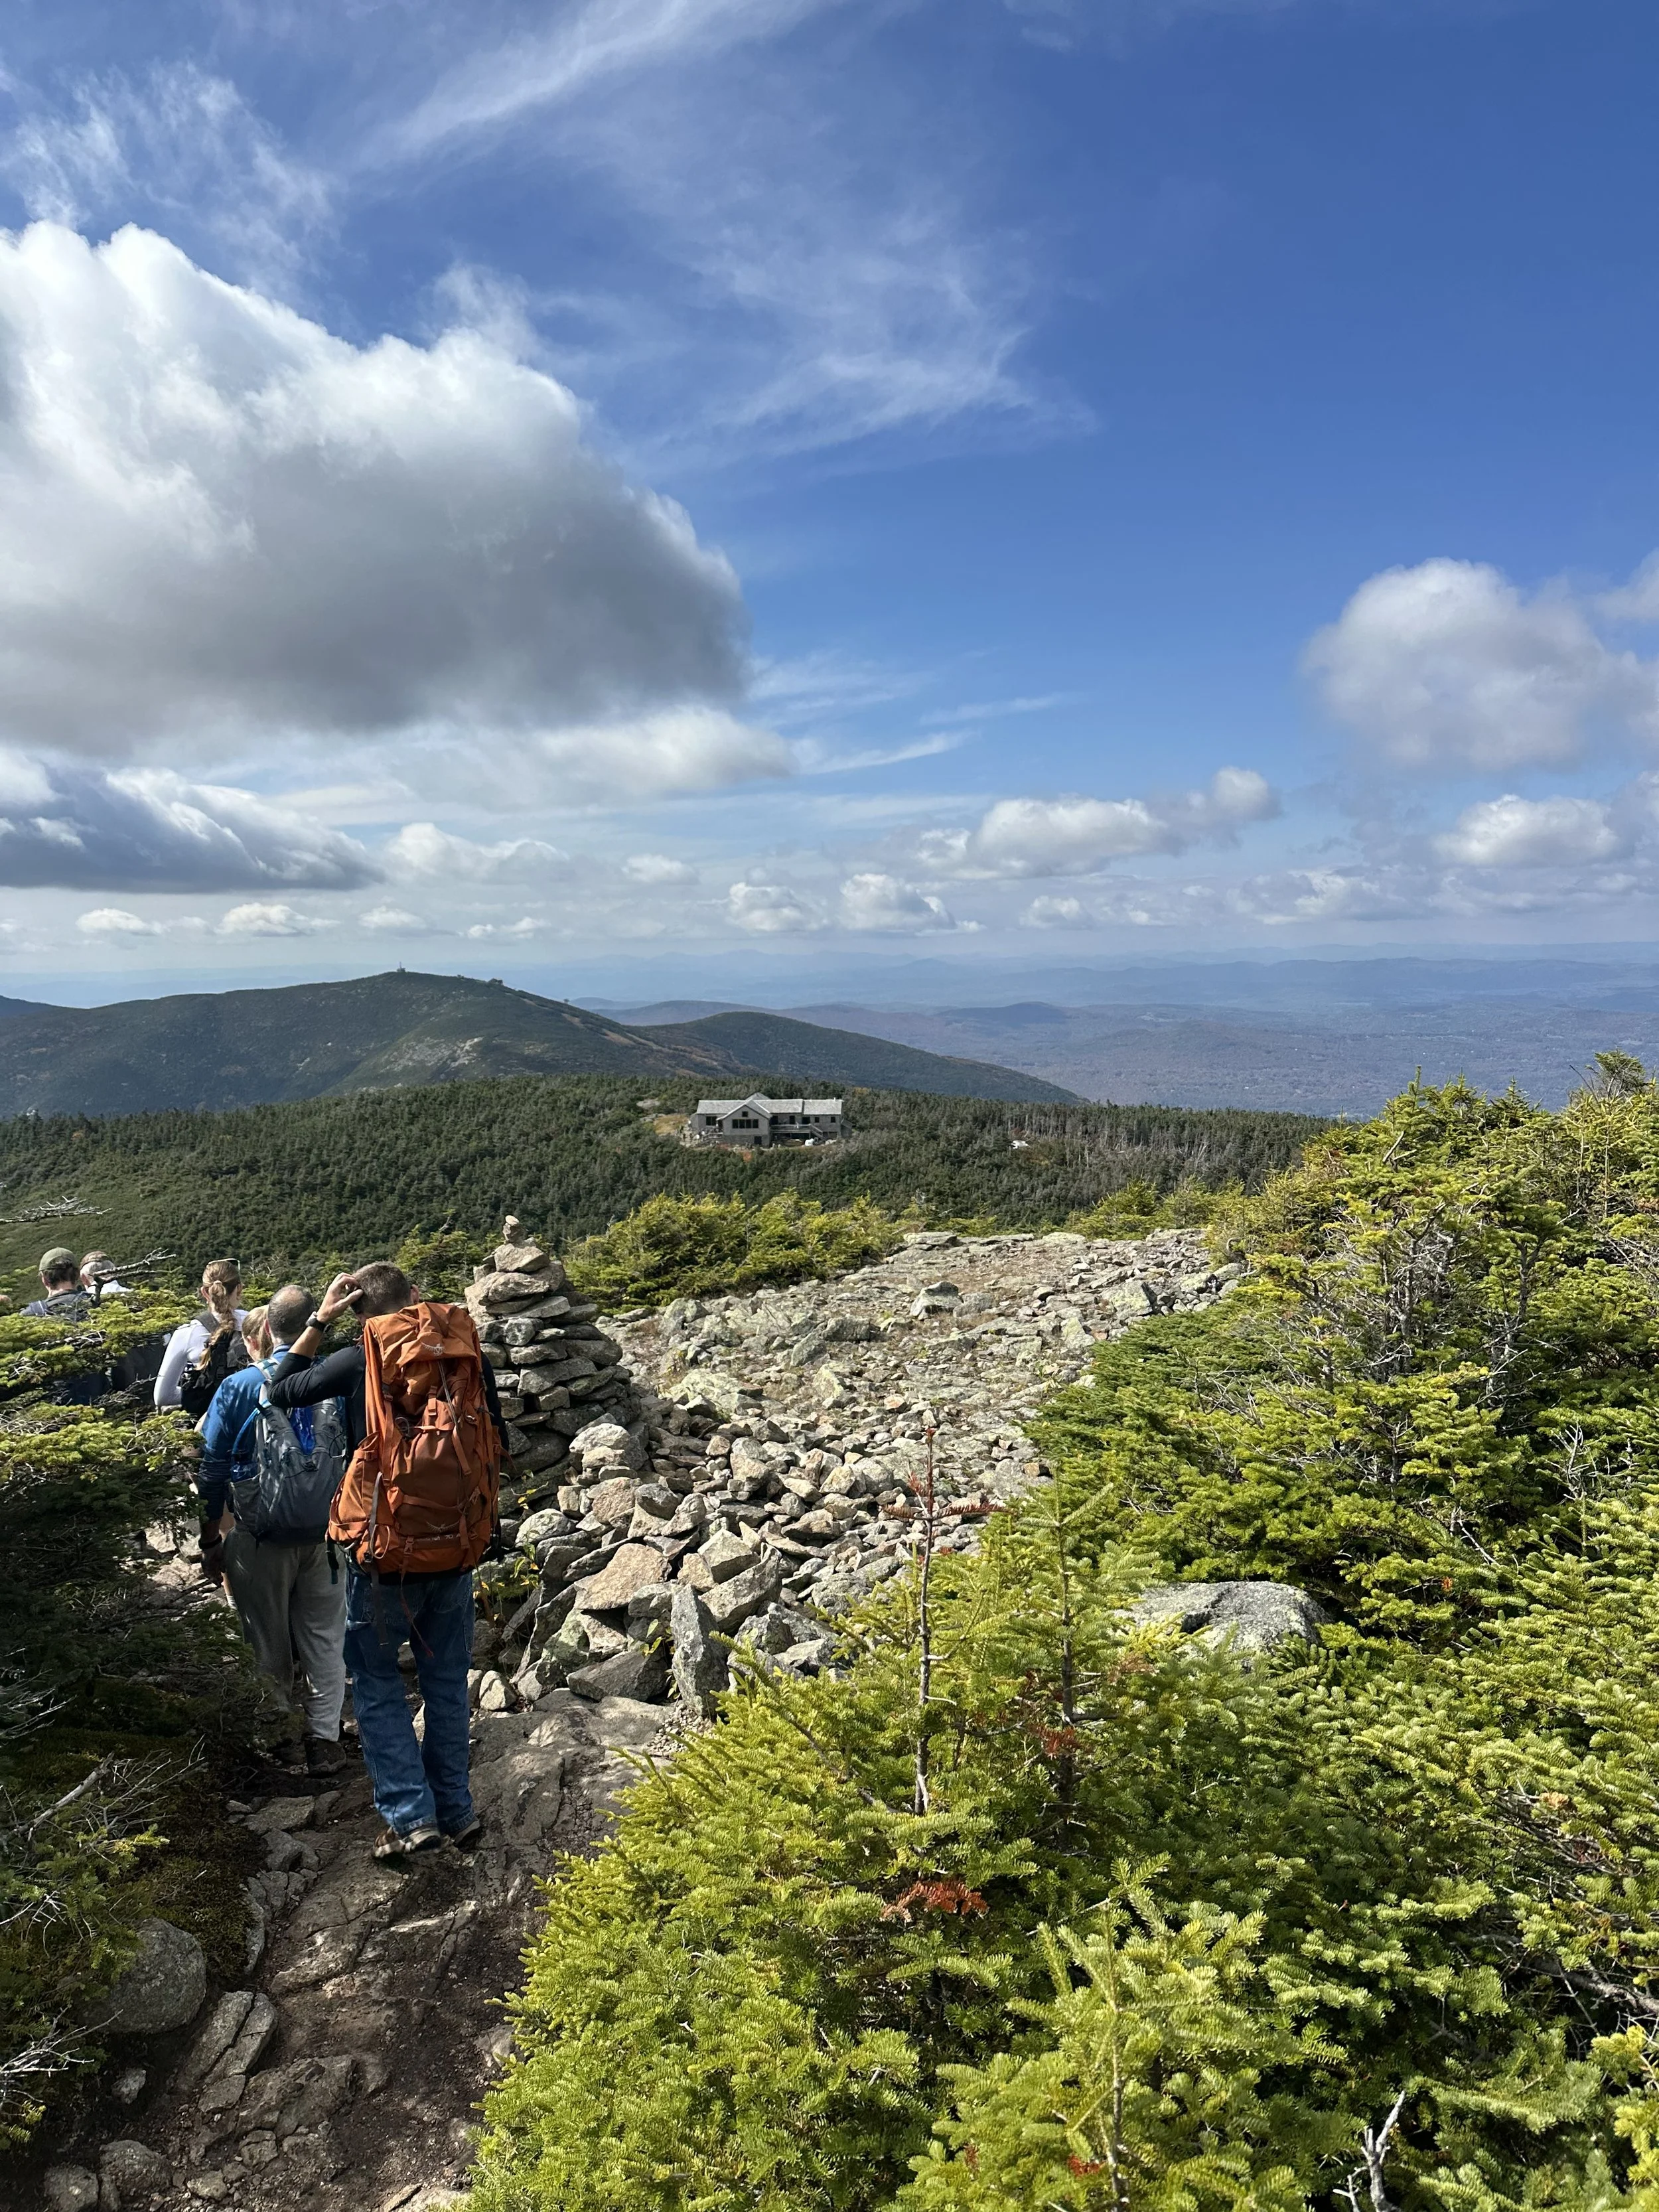
By this point, the faster hikers were catching up, and the trail started getting busier. Don’t forget to look behind you occasionally (one of my hiking tips) Cannon Mountain starts peeking through the trees here. Starting now, the views basically don’t stop for over 2 miles. It’s unreal.
Little Haystack doesn’t count as a 4,000-footer because it lacks 200 feet of prominence. From here, you leave the Falling Waters Trail and join the Franconia Ridge Trail, which is part of the Appalachian Trail, so you might spot a few thru-hikers!
This ridge is where my camera roll exploded. Mt. Lafayette was covered in a moving cloud for a while, and it was pure magic.


Mt. Lincoln
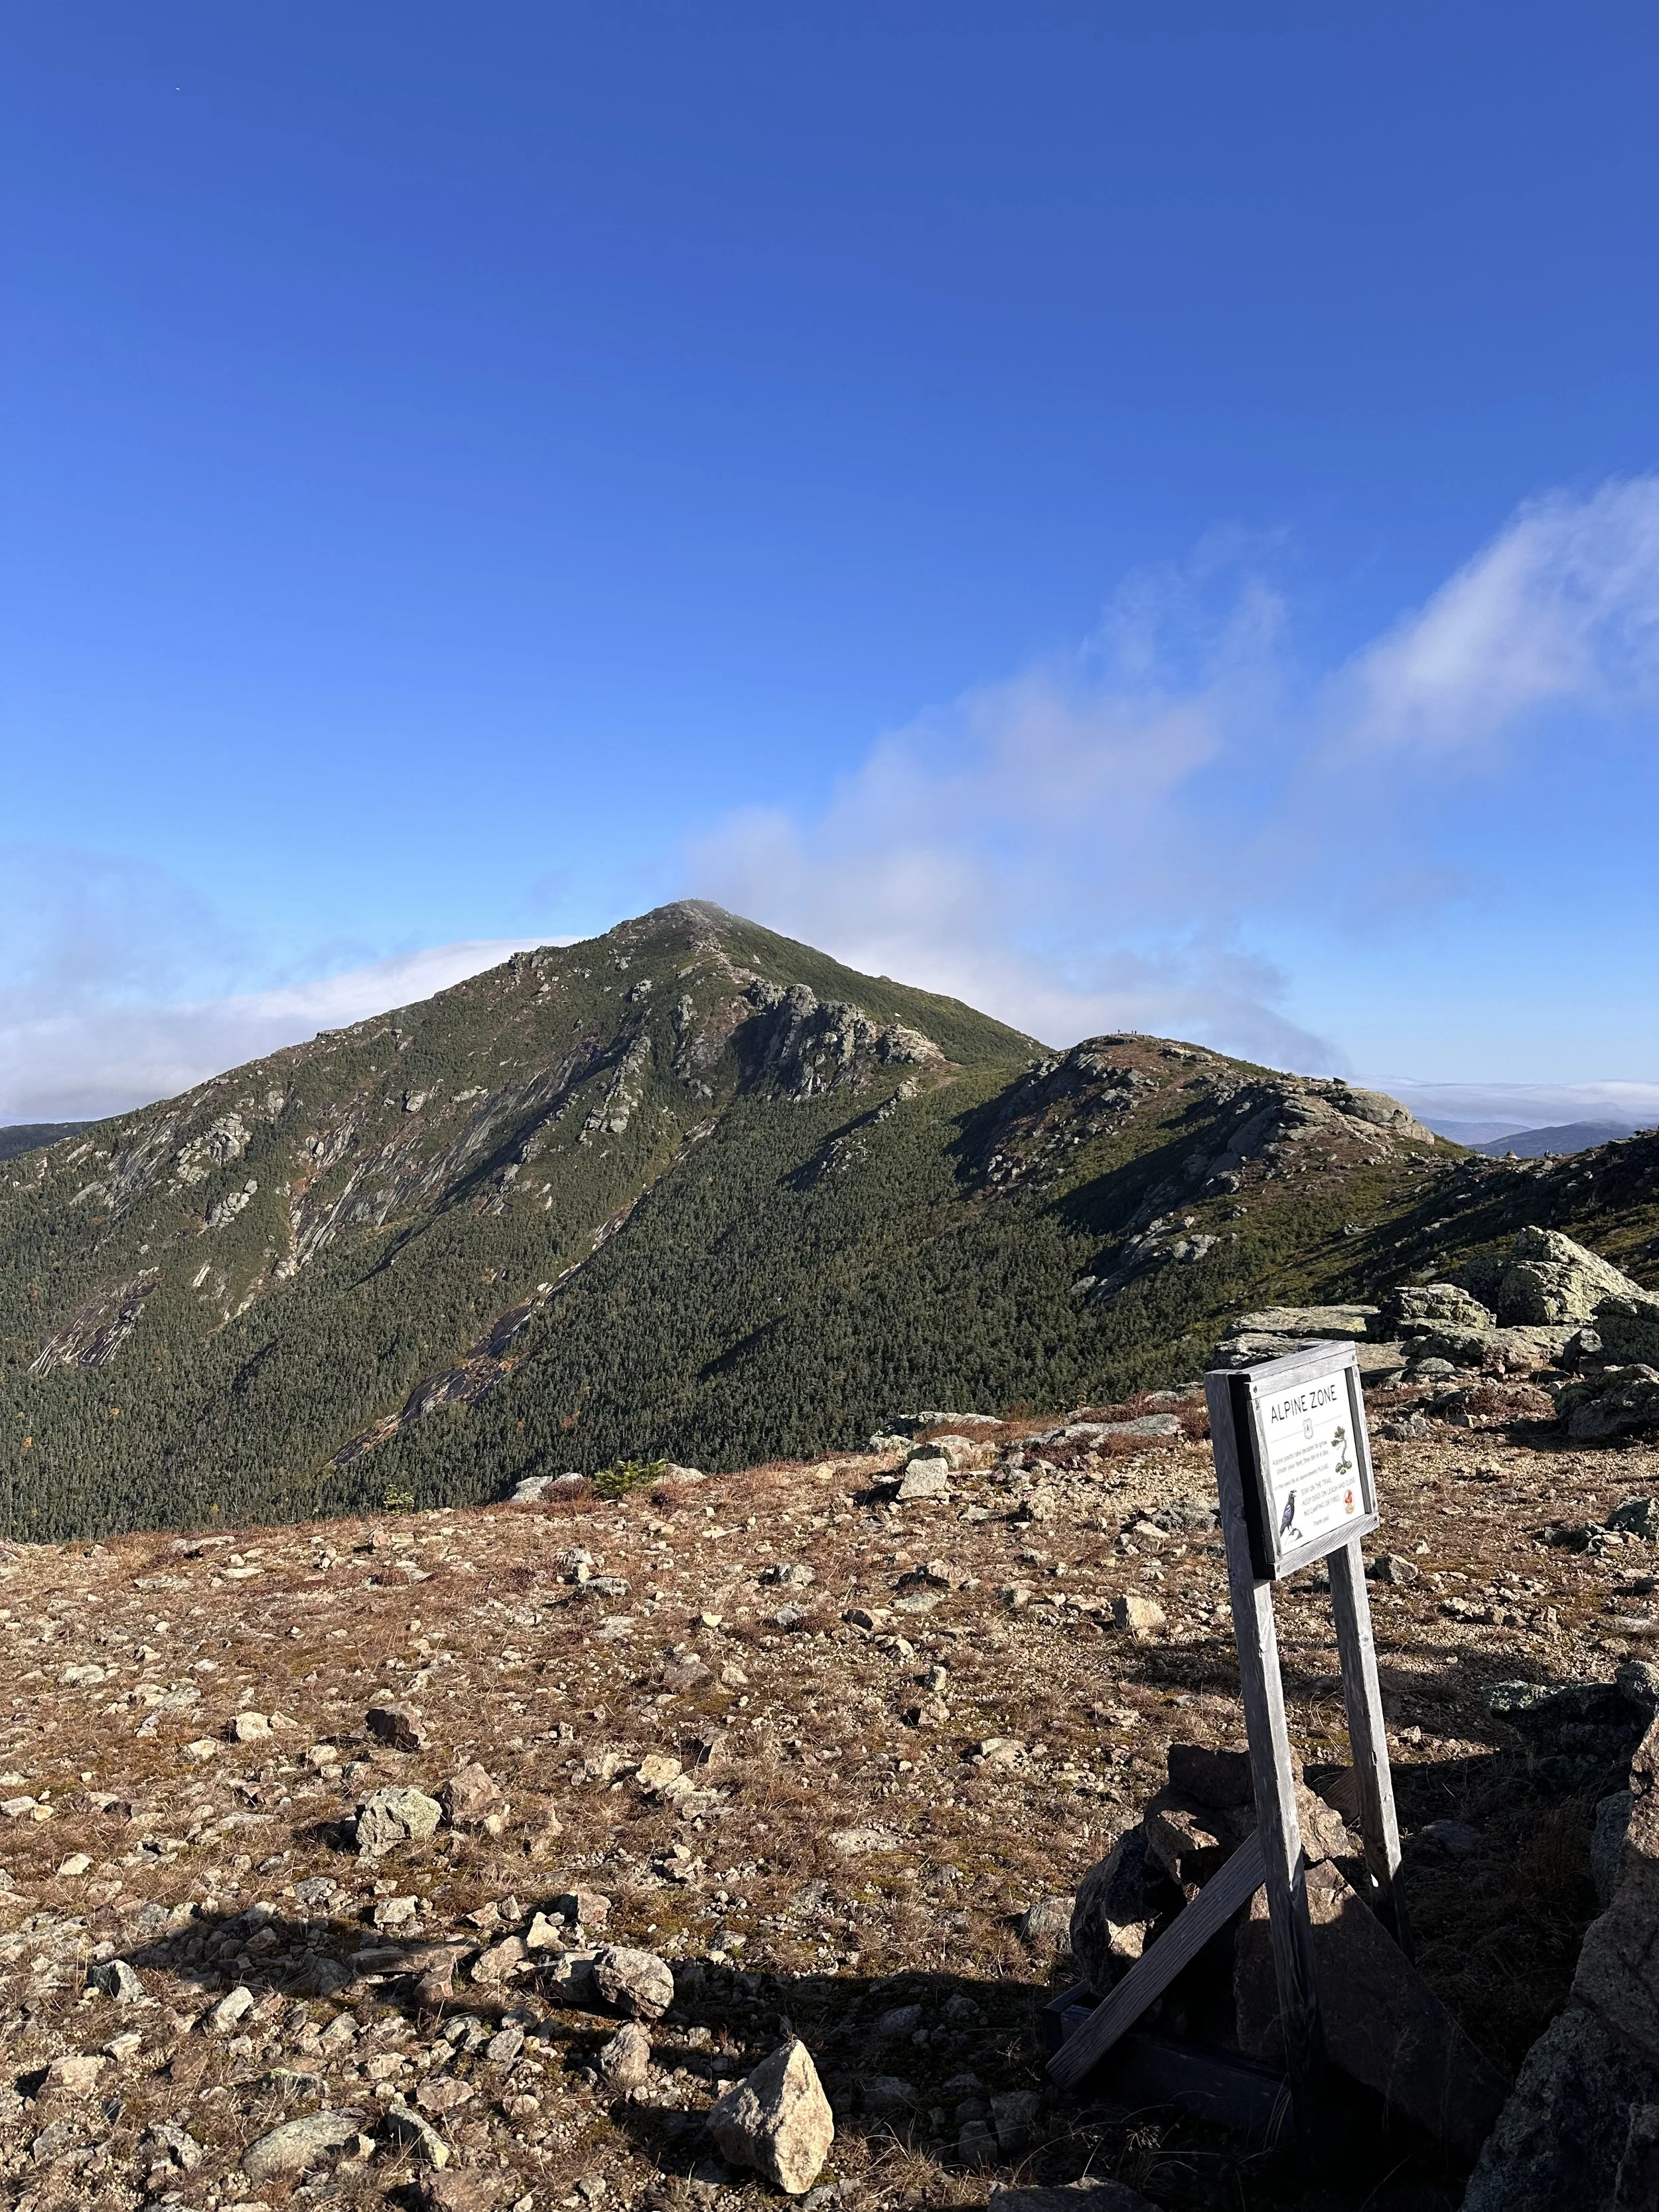
We didn’t linger long at Little Haystack (it was crowded), so we pushed on. The first official 4,000-footer of the day, Mt. Lincoln (5,089 ft), is about 4 miles in, the perfect PB&J break spot.
From here, we could see what looked like the next peak…but surprise! It was a false summit (North Lincoln), another 4,000-footer that doesn’t count. It’s okay though, the ridge is stunning, and sometimes a little scary with those sharp drop-offs toward Cannon. I was very happy for clear weather.


Peak of Mt Lincoln in NH
Mt. Lafayette
The climb to Lafayette gets steep, we even had to use our hands a few times. The summit, at 5,250 ft, comes around 5 miles in. We stopped for another quick snack but didn’t stay long; the crowds were really catching up by now.
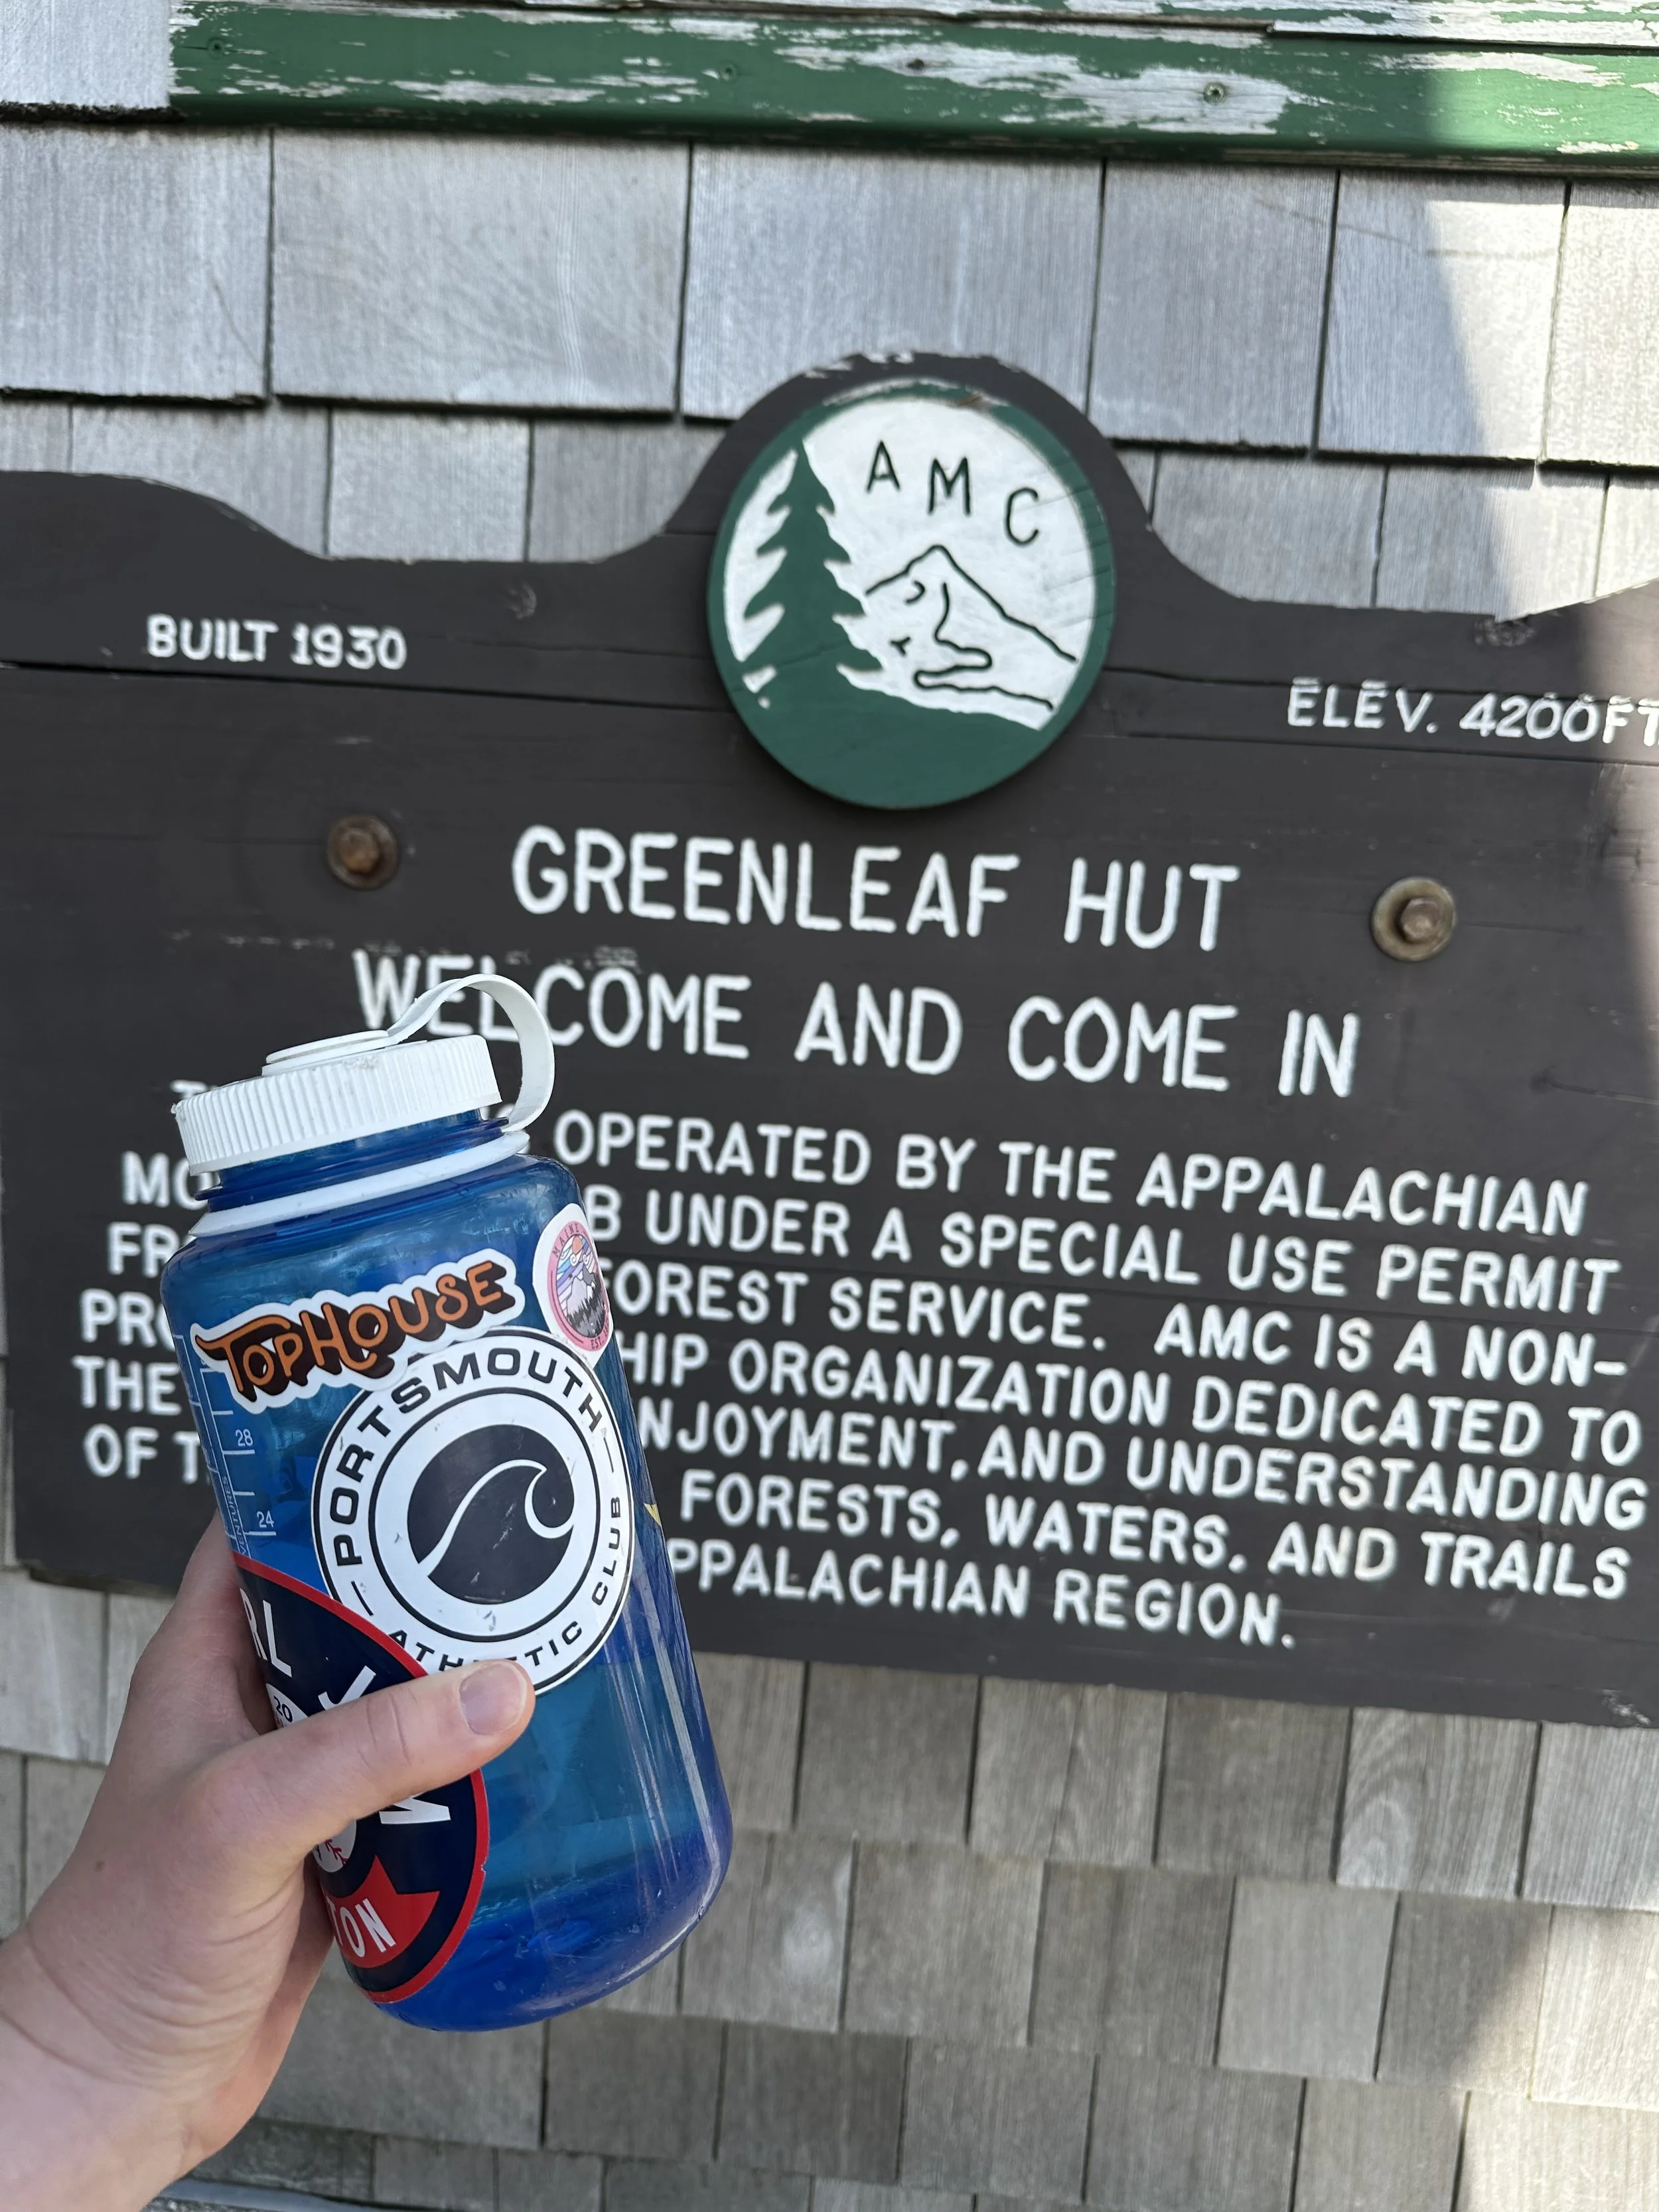
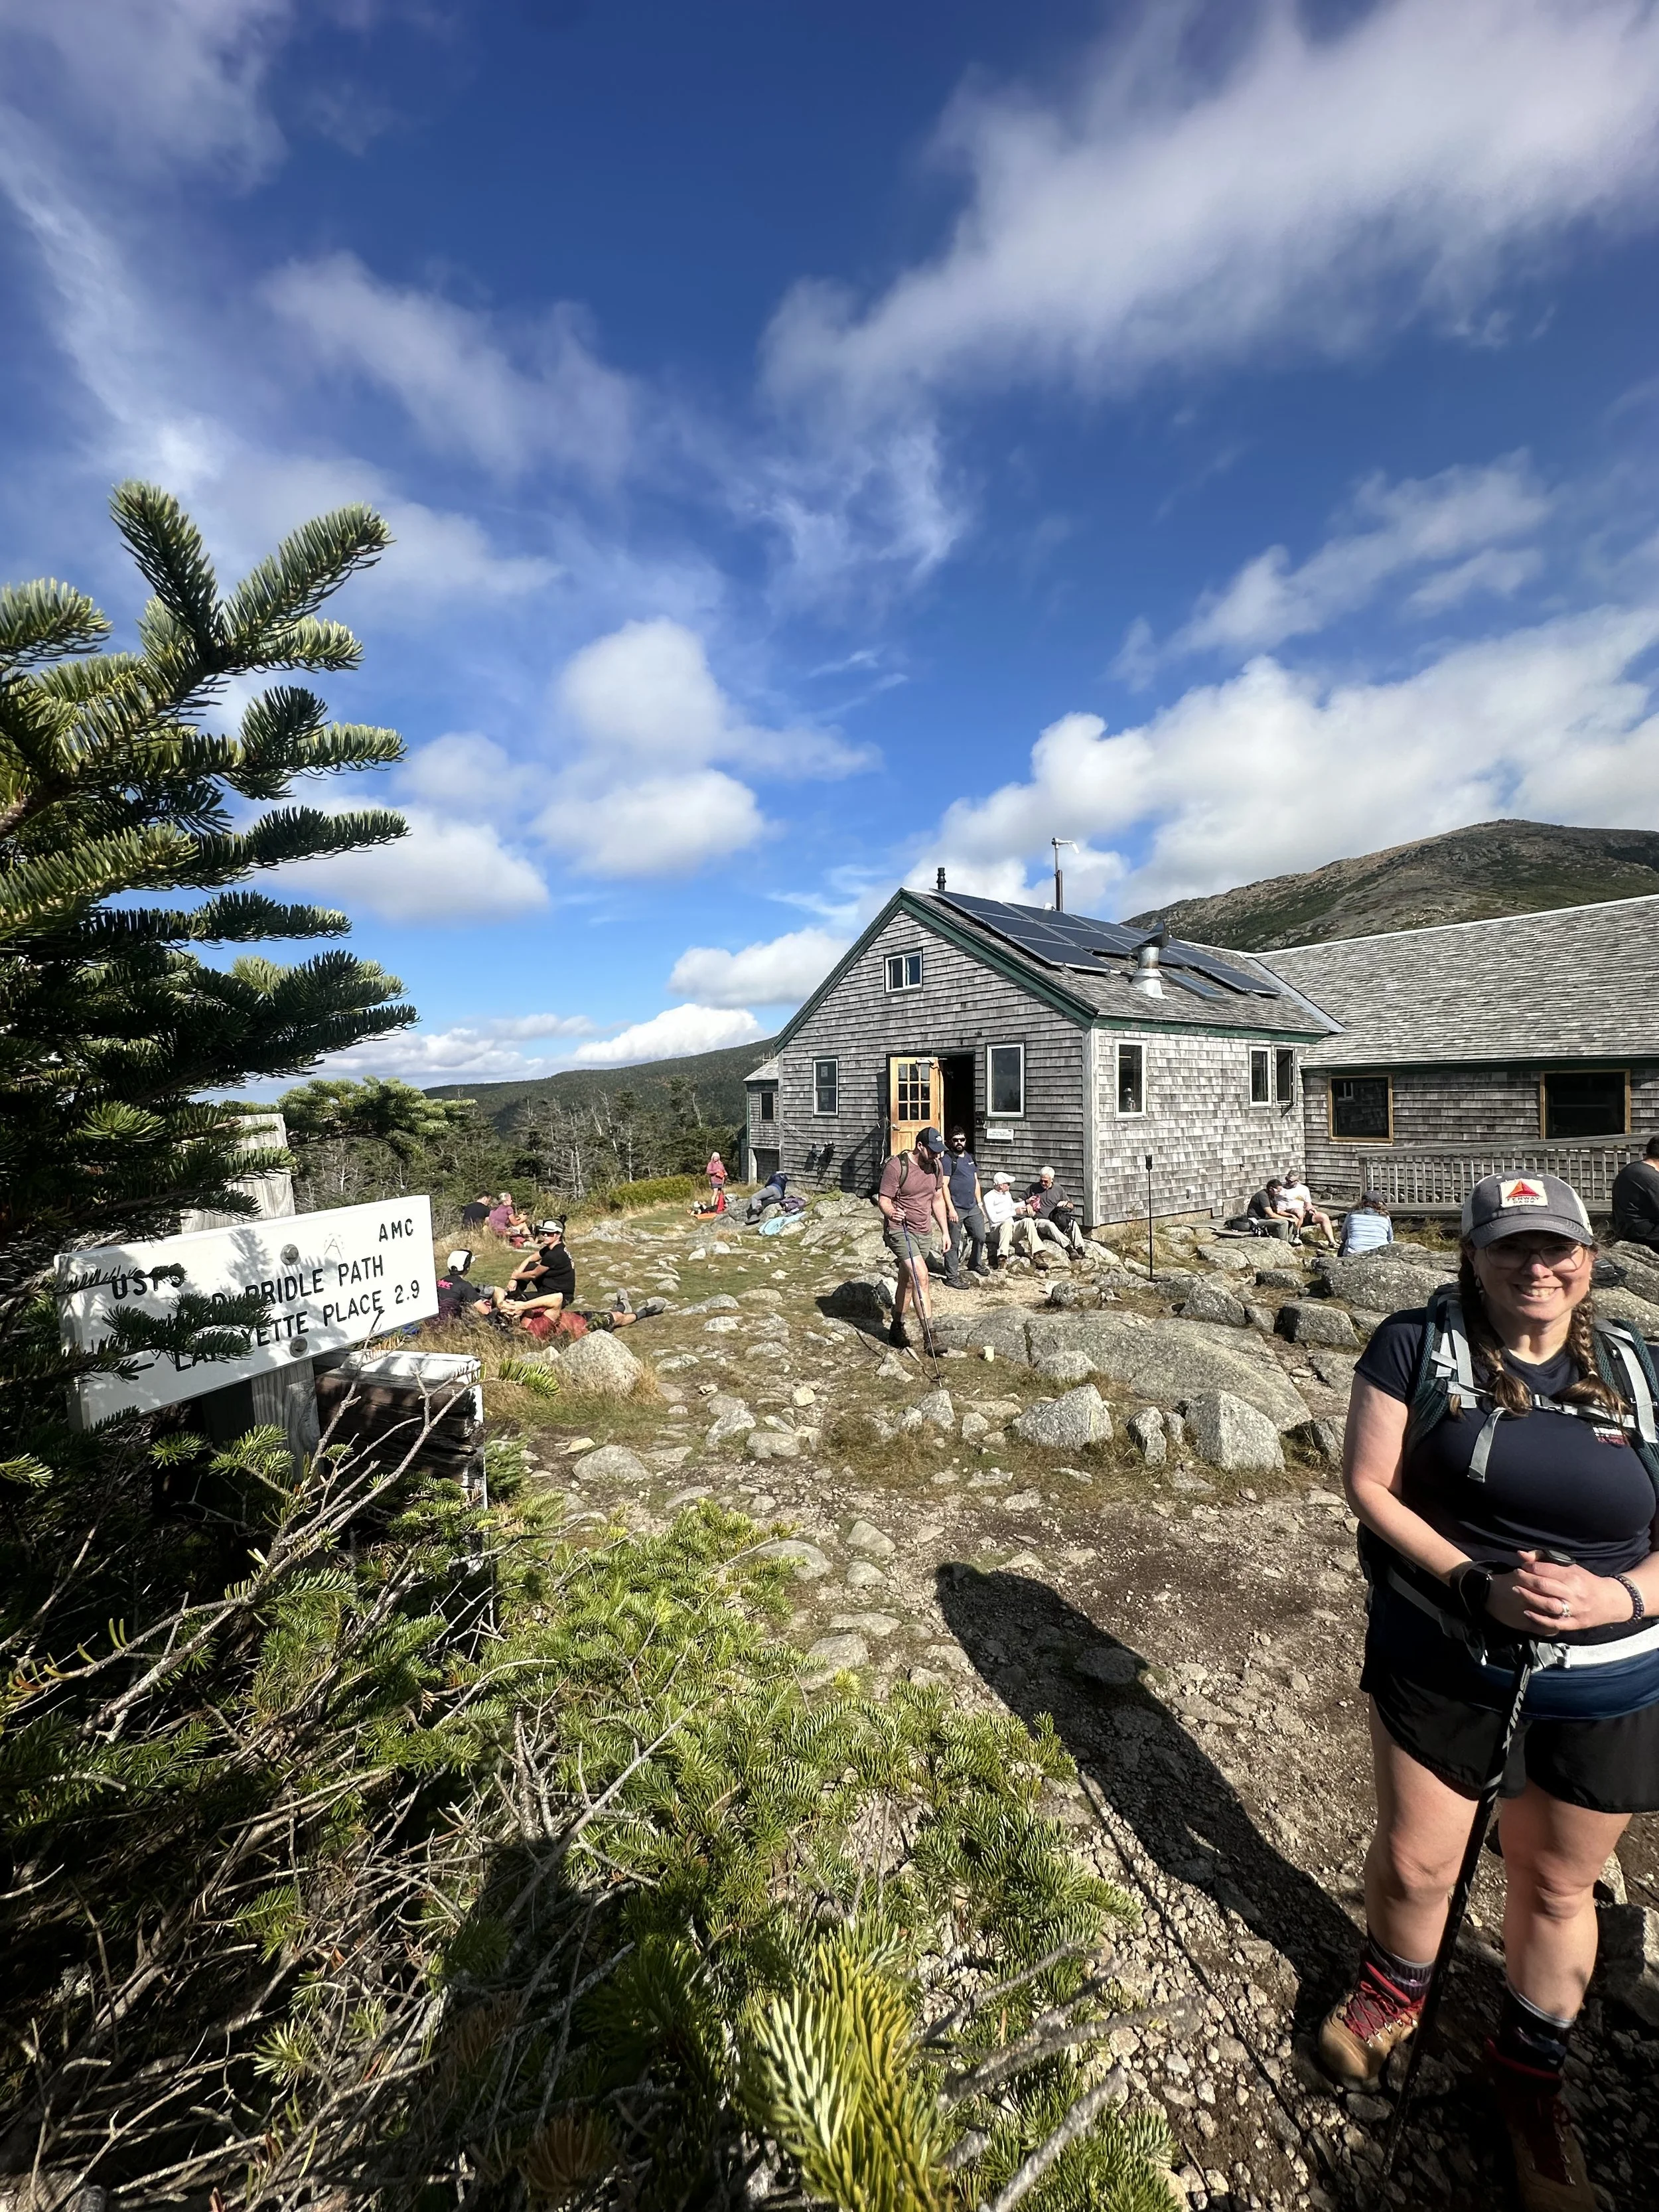
Then came the descent to Greenleaf Hut, about 1.1 miles away, though it looks closer (classic trail illusion). You go down, then up again (of course), before reaching the hut around 6 miles into your day.
This seasonal hut is a gem, a great place for a bathroom break, water refill, or even a snack if they’ve got any left. The day we went, the baked goods were gone (tragic), but they were offering soup and cornbread for a small cash fee. Lesson learned: keep cash in you pack you never know when you can get trail treats!
They also have cold water refills. So refreshing after a hot climb.


The Descent
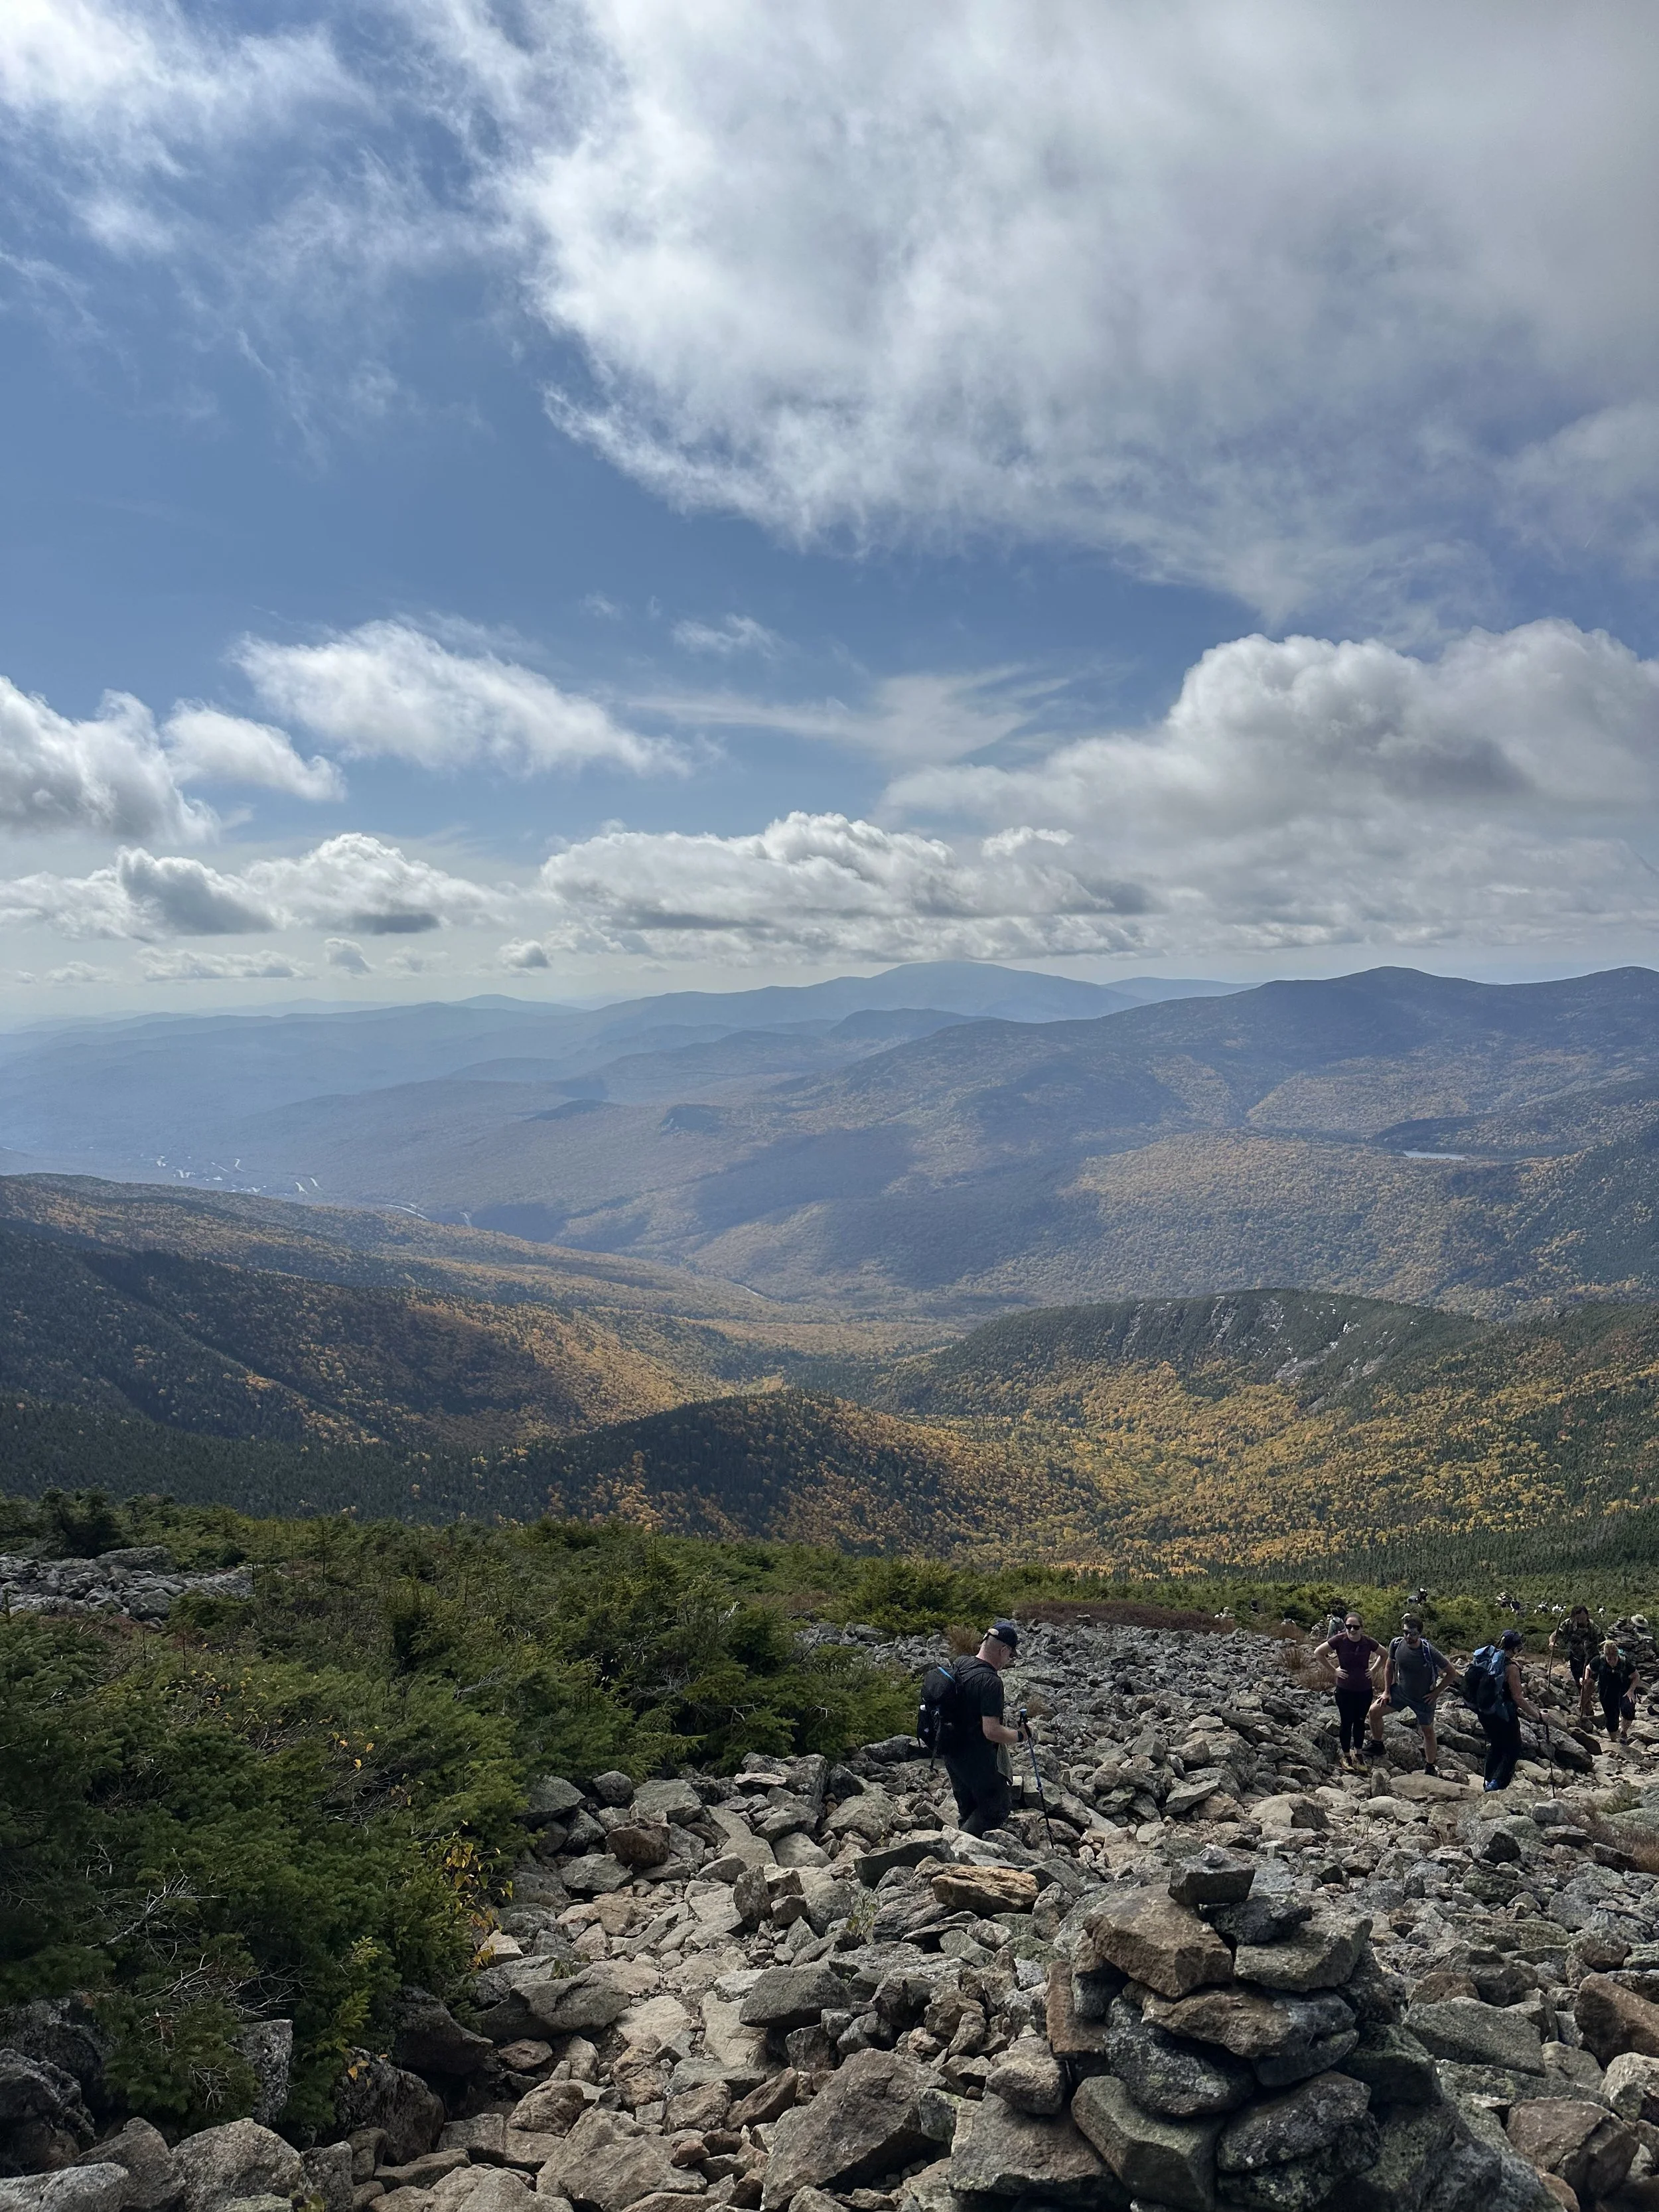
From Greenleaf, make sure you follow the Old Bridle Path down. Go the wrong way, and you’ll have a much longer day than planned. At this point, it felt like a hiker conga line, so I definitely wished we’d gone on a weekday.
You’re still at about 4,200 ft at the hut, which means there’s plenty of downhill left. This stretch follows Agony Ridge (aptly named), with slick, uneven rocks. I had a few “scoot down on my butt” moments here.
Being a slower hiker can be stressful when people are right behind you, especially when there’s no safe spot to step aside. One guy in particular had zero patience, basically flying past everyone. The next day I saw his post in a hiking group bragging about his speed. Let’s just say… I was not impressed.
If any speedy hikers are reading this I will pull over when it’s safe! Promise!


The Final Stretch
Before ducking back into the trees, you get one last stunning view of the ridge you just crossed. That “we just did that” moment? Pretty awesome.
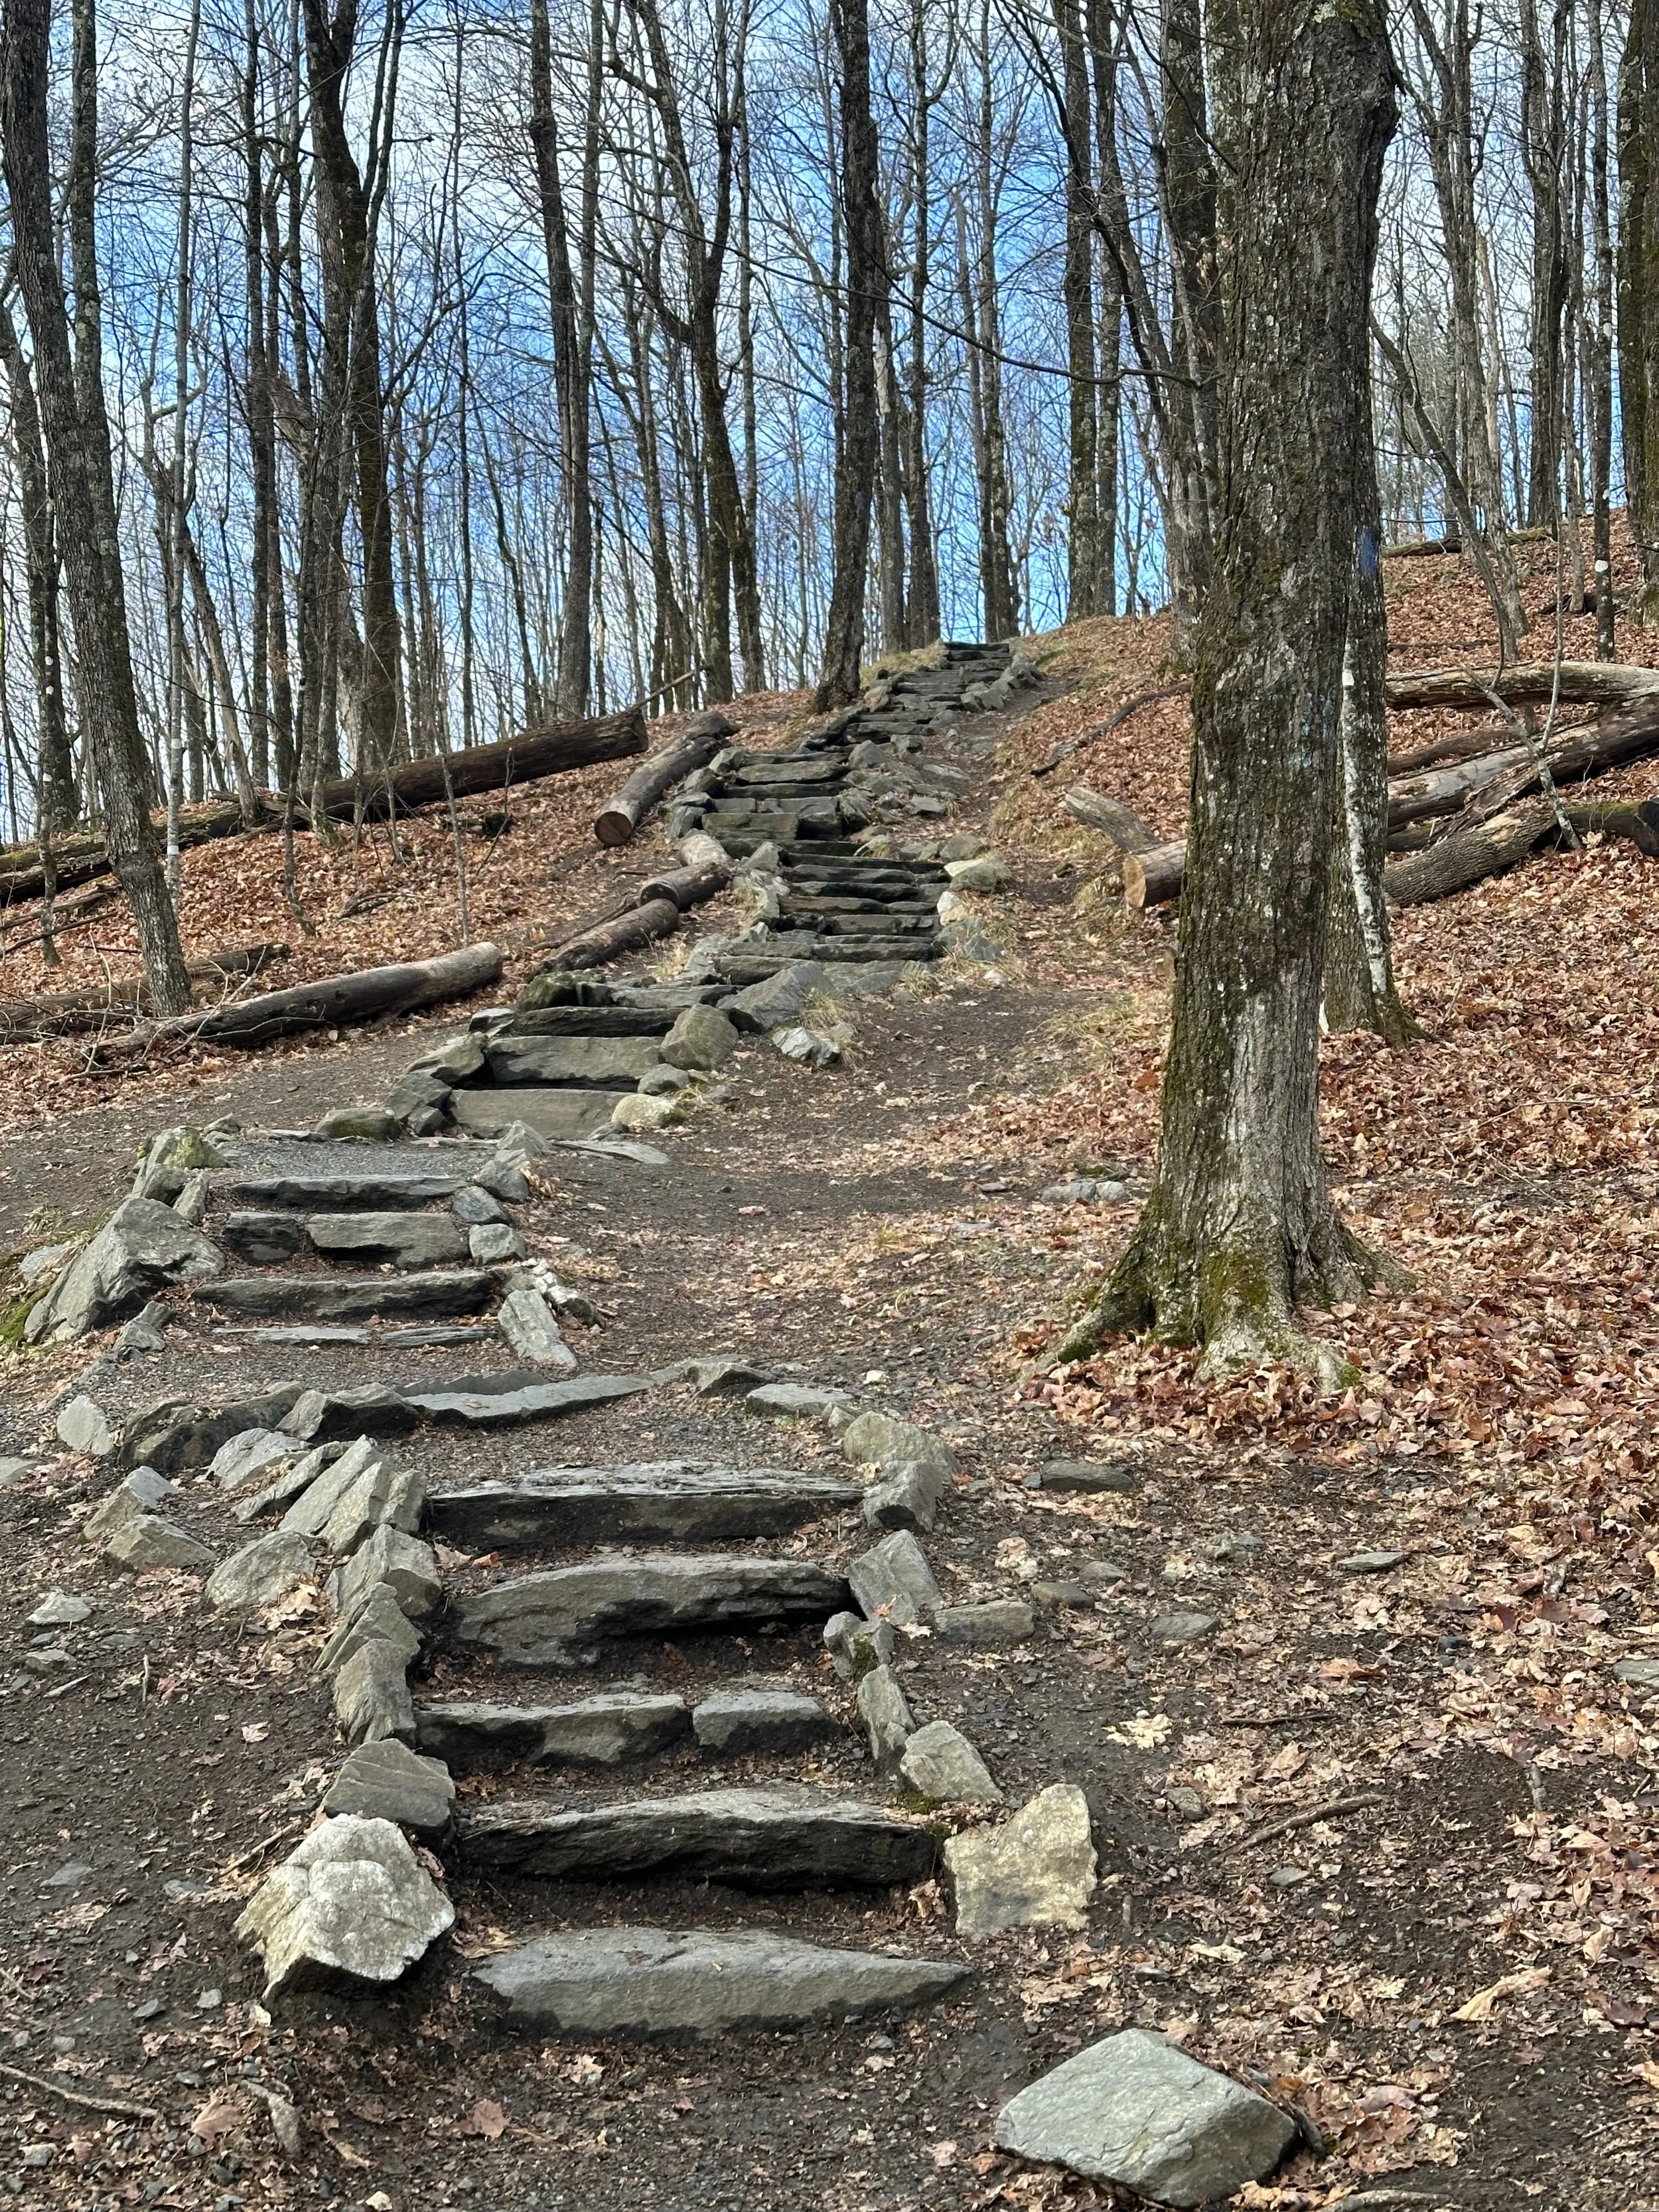
At around 7.3 miles, you’re back in the woods and even though you think you’re almost done, there’s still 1.6 miles to go. The stairs on the descent tricked me into thinking we were close… but nope. Isn’t that always the case?
When we finally reached the parking lot, we saw the hiker shuttle vans that run between Cannon Mountain and the trailhead , a great option if the main lot is full (which it usually is on busy weekends).

What we just hiked behind us: Lincoln & Lafayette
Final Thoughts
This hike was absolutely amazing and I can’t wait to do it again, hopefully on a weekday next time.
Ratings:
⭐️ Views: 10/10 — jaw-dropping the entire way
💪 Difficulty: 9.5/10 — tough but not soul-crushing
🐶 Dog-friendly: For experienced hiking pups
🚻 Bathrooms: At the trailhead and at Greenleaf Hut
👧 Kid-friendliness: Not a beginner hike, best for experienced hikers or adventurous teens
If you love challenging hikes with unbeatable views, Lincoln & Lafayette deserve a top spot on your list.

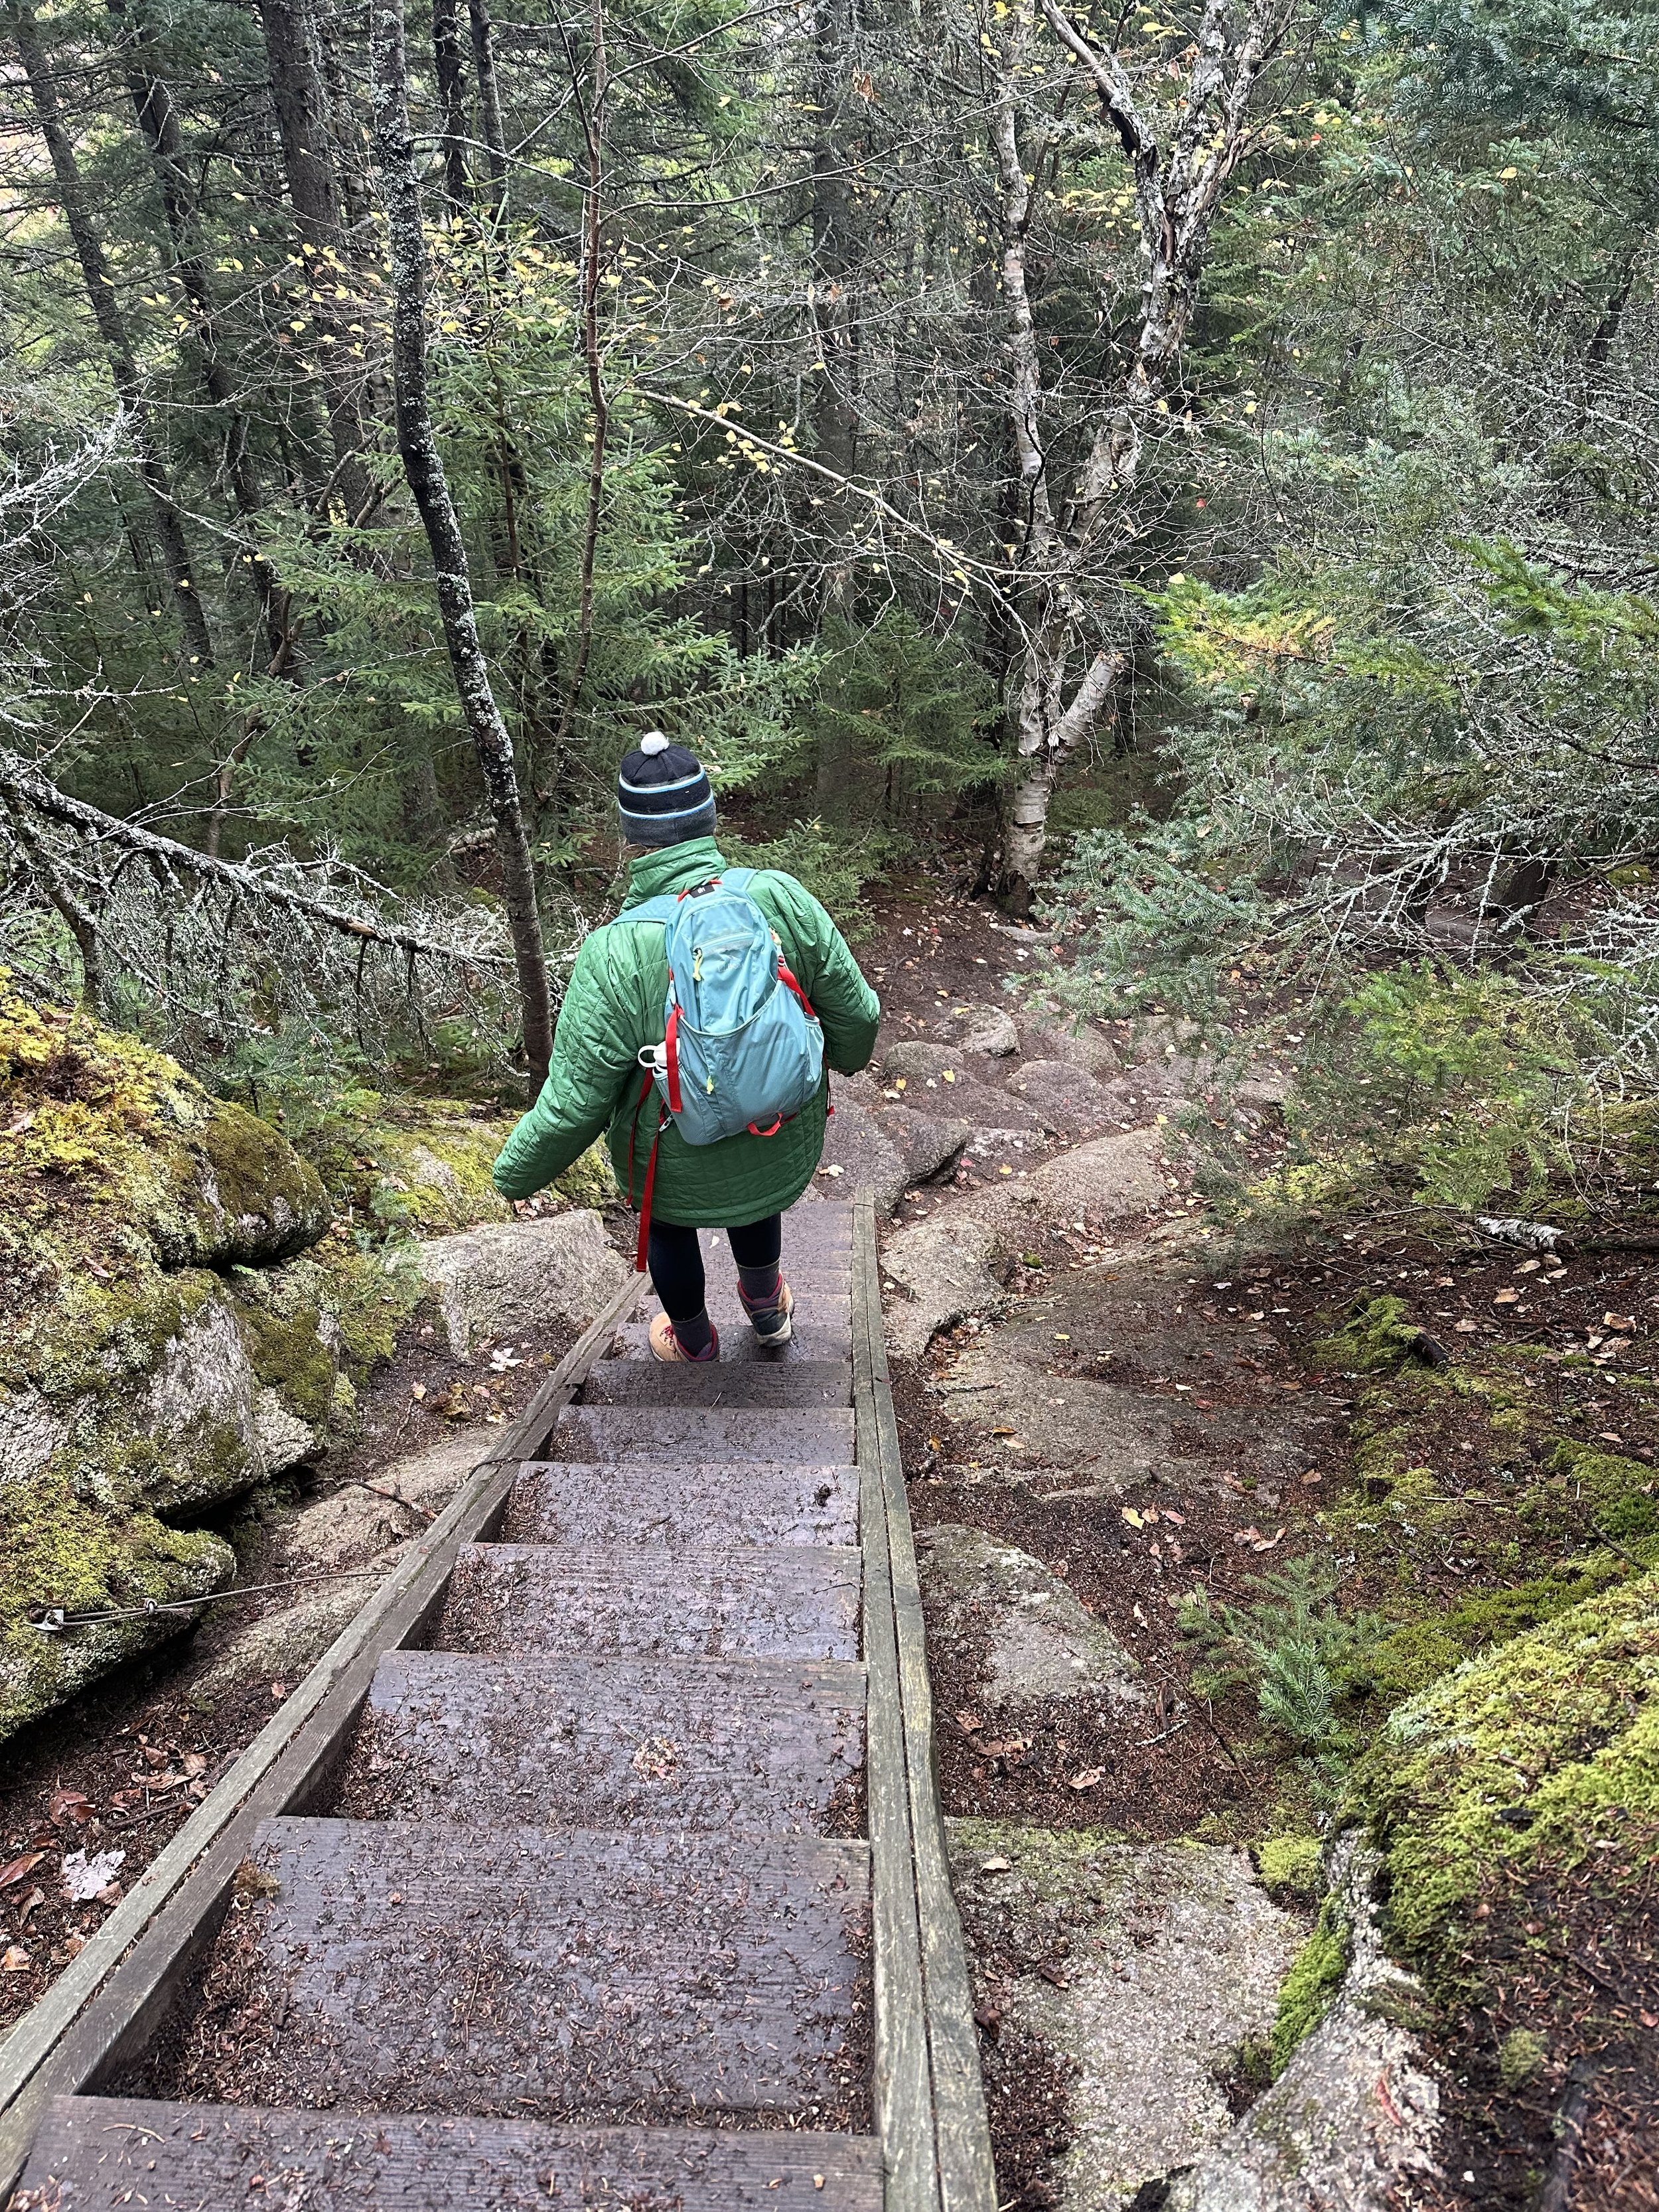
Winter Hiking Essentials For Beginner Hikers
Must have winter hiking essentials for beginners
Must-Have Winter Hiking Gear for Beginners:
This winter, We have rediscovered the joy and challenges of winter hiking in New England. When properly prepared, winter hiking is an incredible experience—fewer crowds, stunning snow-covered landscapes, and crisp, fresh air. But it also comes with challenges like freezing temperatures, icy trails, and unpredictable weather. If you’re new to winter hiking, like we were this year, having the right gear can make all the difference between an enjoyable trek and a miserable (or even dangerous) one. Admittedly, we are still building up our gear, but here is what we have found works for us.
Here’s a breakdown of essential winter hiking gear to keep you warm, dry, and safe on the trails.

Proper Footwear: Warm, Waterproof Boots
Your summer hiking boots won’t cut it in the snow. Look for:
Insulated, waterproof hiking boots – Brands like Salomon, Merrell, or Oboz make great winter options. I use Sorels because they are waterproof and insulated.
Gaiters – Keep snow from getting into your boots, especially if hiking through deep snow. Nothing worse than having snow get in your boots!
Wool socks – Avoid cotton; wool (like Smartwool or Darn Tough) will keep your feet warm even if damp.

Traction: Microspikes & Snowshoes
Regardless of what the conditions are at the trailhead, the trail will be snow or ice-covered eventually:
Microspikes – Perfect for icy trails or packed snow. Kahtoola MICROspikes are a solid choice. Different brands are also available for less money. These are so important, we always carry extras, as learned on our first winter hike of the season. You can listen to that episode here: Around New England Podcast Link.
Snowshoes – Necessary for deeper, powdery snow to avoid post-holing (sinking with every step).
Trekking poles with snow baskets – Help with balance and prevent slipping.

Layering: Stay Warm Without Overheating
The key to winter hiking is layering so you don’t overheat and sweat (which can lead to dangerous chills). Consider how much layering you will shed and need to store during part of the hike and chose an appropriate size bag. Use the three-layer system:
Base Layer (Moisture-Wicking): A lightweight wool or synthetic thermal top and bottom (avoid cotton).
Insulating Layer (Traps Heat): A fleece or down jacket.
Outer Shell (Waterproof & Windproof): A breathable, waterproof jacket and pants (GORE-TEX or similar).
Layering is key!
Hand & Head Protection: Keep Extremities Warm
Gloves or Mittens: A two-layer system works best (thin liners + insulated waterproof mittens). I like to bring a spare dry pair.
Hat & Neck Gaiter/Balaclava: Heat escapes from your head quickly—keep it covered! Even if you prefer to hike without a hat because you get too warm too quickly, keeping one in the bag for an emergency is essential!
Essentials for Safety & Comfort:
Headlamp (with extra batteries): Winter days are short—always be prepared for darkness.
Zip Ties. Great to have to temporarily fix to hold a backpack together, or to fix a broken set of spikes.
Insulated Water Bottles (or bottle covers): Hydration is key, but uninsulated bottles can freeze.
High-Calorie Snacks: Your body burns more energy in the cold—pack trail mix, protein bars, or peanut butter sandwiches.
Emergency Gear: A space blanket, whistle, and small first-aid kit can be lifesavers.
Navigation Tools: A paper map & compass (in case your phone or GPS dies in the cold).
Final Tips for Winter Hiking Beginners
Check the weather & trail conditions before heading out.
Start early—winter days are short, and you don’t want to get caught in the dark.
Know the signs of frostbite & hypothermia—if you start feeling numbness or confusion, turn back! The mountains will always be there to try again another day!
Tell someone your plan and estimated return time.
Start off the hike slightly cooler, you will warm up fast! I bring my larger backpack for the winter hikes for the layers we shed.
With the right gear and preparation, winter hiking can be one of the most rewarding outdoor experiences in New England. So layer up, grab your microspikes, and enjoy the snowy trails!
What’s your go-to piece of winter hiking gear? Is there anything we should have listed but we didn’t? We are still learning too! Let us know in the comments!l

Different hikes and different seasons require different size bags.

My Most Challenging Hike…so far
My most challenging hike so far
The most challenging hike we have done… so far. I don’t know what was wrong with me that day. I had done this hike a few times before—granted, the last time was over 20 years ago. I mean, how much can change in 20 years? Okay, everything can, but I digress. Out of all the hikes we did in the last year or so, this was the hardest on my body and mind.

Mt. Chocorua—this gorgeous, distinctive mountain you see as you’re driving up Route 16 to North Conway—definitely taunted me this time. Some facts before I get into the day: 2,582 feet of elevation gain with over 7 miles of hiking. We hiked on August 23, 2024, and took the Brook Trail up and the Liberty Trail down.

It started like any other hike—lots of walking. What I love about this trail is that it follows a brook for a good part of the hike, making it truly stunning and enjoyable. The ascent is gradual at first and then nonstop up. We got lost a few times as the trail markings weren’t obvious, so we just went the most obvious way - up.

The views from the top are stunning—a full 360-degree panorama that helps with the exhausted feeling. At this point in the hike, I was tired. Like, you know that feeling when your body just wants to melt into the couch? That is how I felt about 3.5-ish miles from the car. Oh, and I had to go to the bathroom. Luckily, there is a toilet (if you will) not far from the summit. With a little relief, we started the slow descent down.

The Liberty Trail was a great trail to descend. It wasn’t hard on the knees, and even with no babbling brook to see and listen to, it was still gorgeous. But with every step closer to the car, I just wanted to be done. And you know when you’re taking a different trail down, you have those doubts like, "Are we going the right way?" But mostly, "Are we there yet?" Towards the end, I was dragging my poles, ready to see the car—most importantly, our car. Mike was a little ahead of me and broke the good news: he saw the car. Still doubting him, I asked, "Our car?" Yes, he assured me, our car. It was the best thing I saw all day!

Since then, we have hiked Mt. Osceola—a 4,000-foot mountain—and the previous year, we hiked to the Hermit Lake Shelter on Mt. Washington. So, I wasn’t a total rookie, but this hike made me feel like it. Earlier in the year, I was diagnosed with Graves' disease. I’ve spoken a little about my health issues on our podcast, and this is it: Graves'. Lovely name for an autoimmune disease, huh? At this point, my doctor had been working on dialing in my medication. Each month, she would either increase or lower my dosage, and it just throws me off each month. It’s hard to explain other than feeling like garbage and not myself. I had told her my energy levels were off—like, really low. I didn’t run any road races last summer after flopping a 10K, I’ve done many times before, in June. I was just not feeling normal. The hard part is that this day started off alright. I woke up with no warning signs that my energy was going to check out. Just before the peak, I started to feel tired as my energy dipped, and no amount of snacks or water made me feel better immediately.

We made it home, and Mike helped me out so much that day—okay, all the days—but I really appreciated him being the one to get the food. I felt so worn out after this hike that I just wanted to go home and get takeout. You know it was bad when I didn’t want to stop for food. So, we ordered burgers from one of our favorite spots, BRGR BAR. Legit, their burgers and fries are the best, in my opinion, and just what I needed to make myself feel better. They’ve been my go-to spot for burgers after every half marathon or anytime I really want a real, good, hearty burger. They also have adult milkshakes if you eat in house that are pretty delicious in my opinion.
After all that, would I do this hike again? 100% yes! I might try a different trail, as I’ve done this one a few times. Next time, I think I would hydrate with electrolytes better and fuel like I was running a half marathon. Here’s hoping my Graves' disease is in better control this year too! I have a lot of big & little hikes I want to do.

Want to hear more details about this hike and others? Check out our podcast: Around New England.

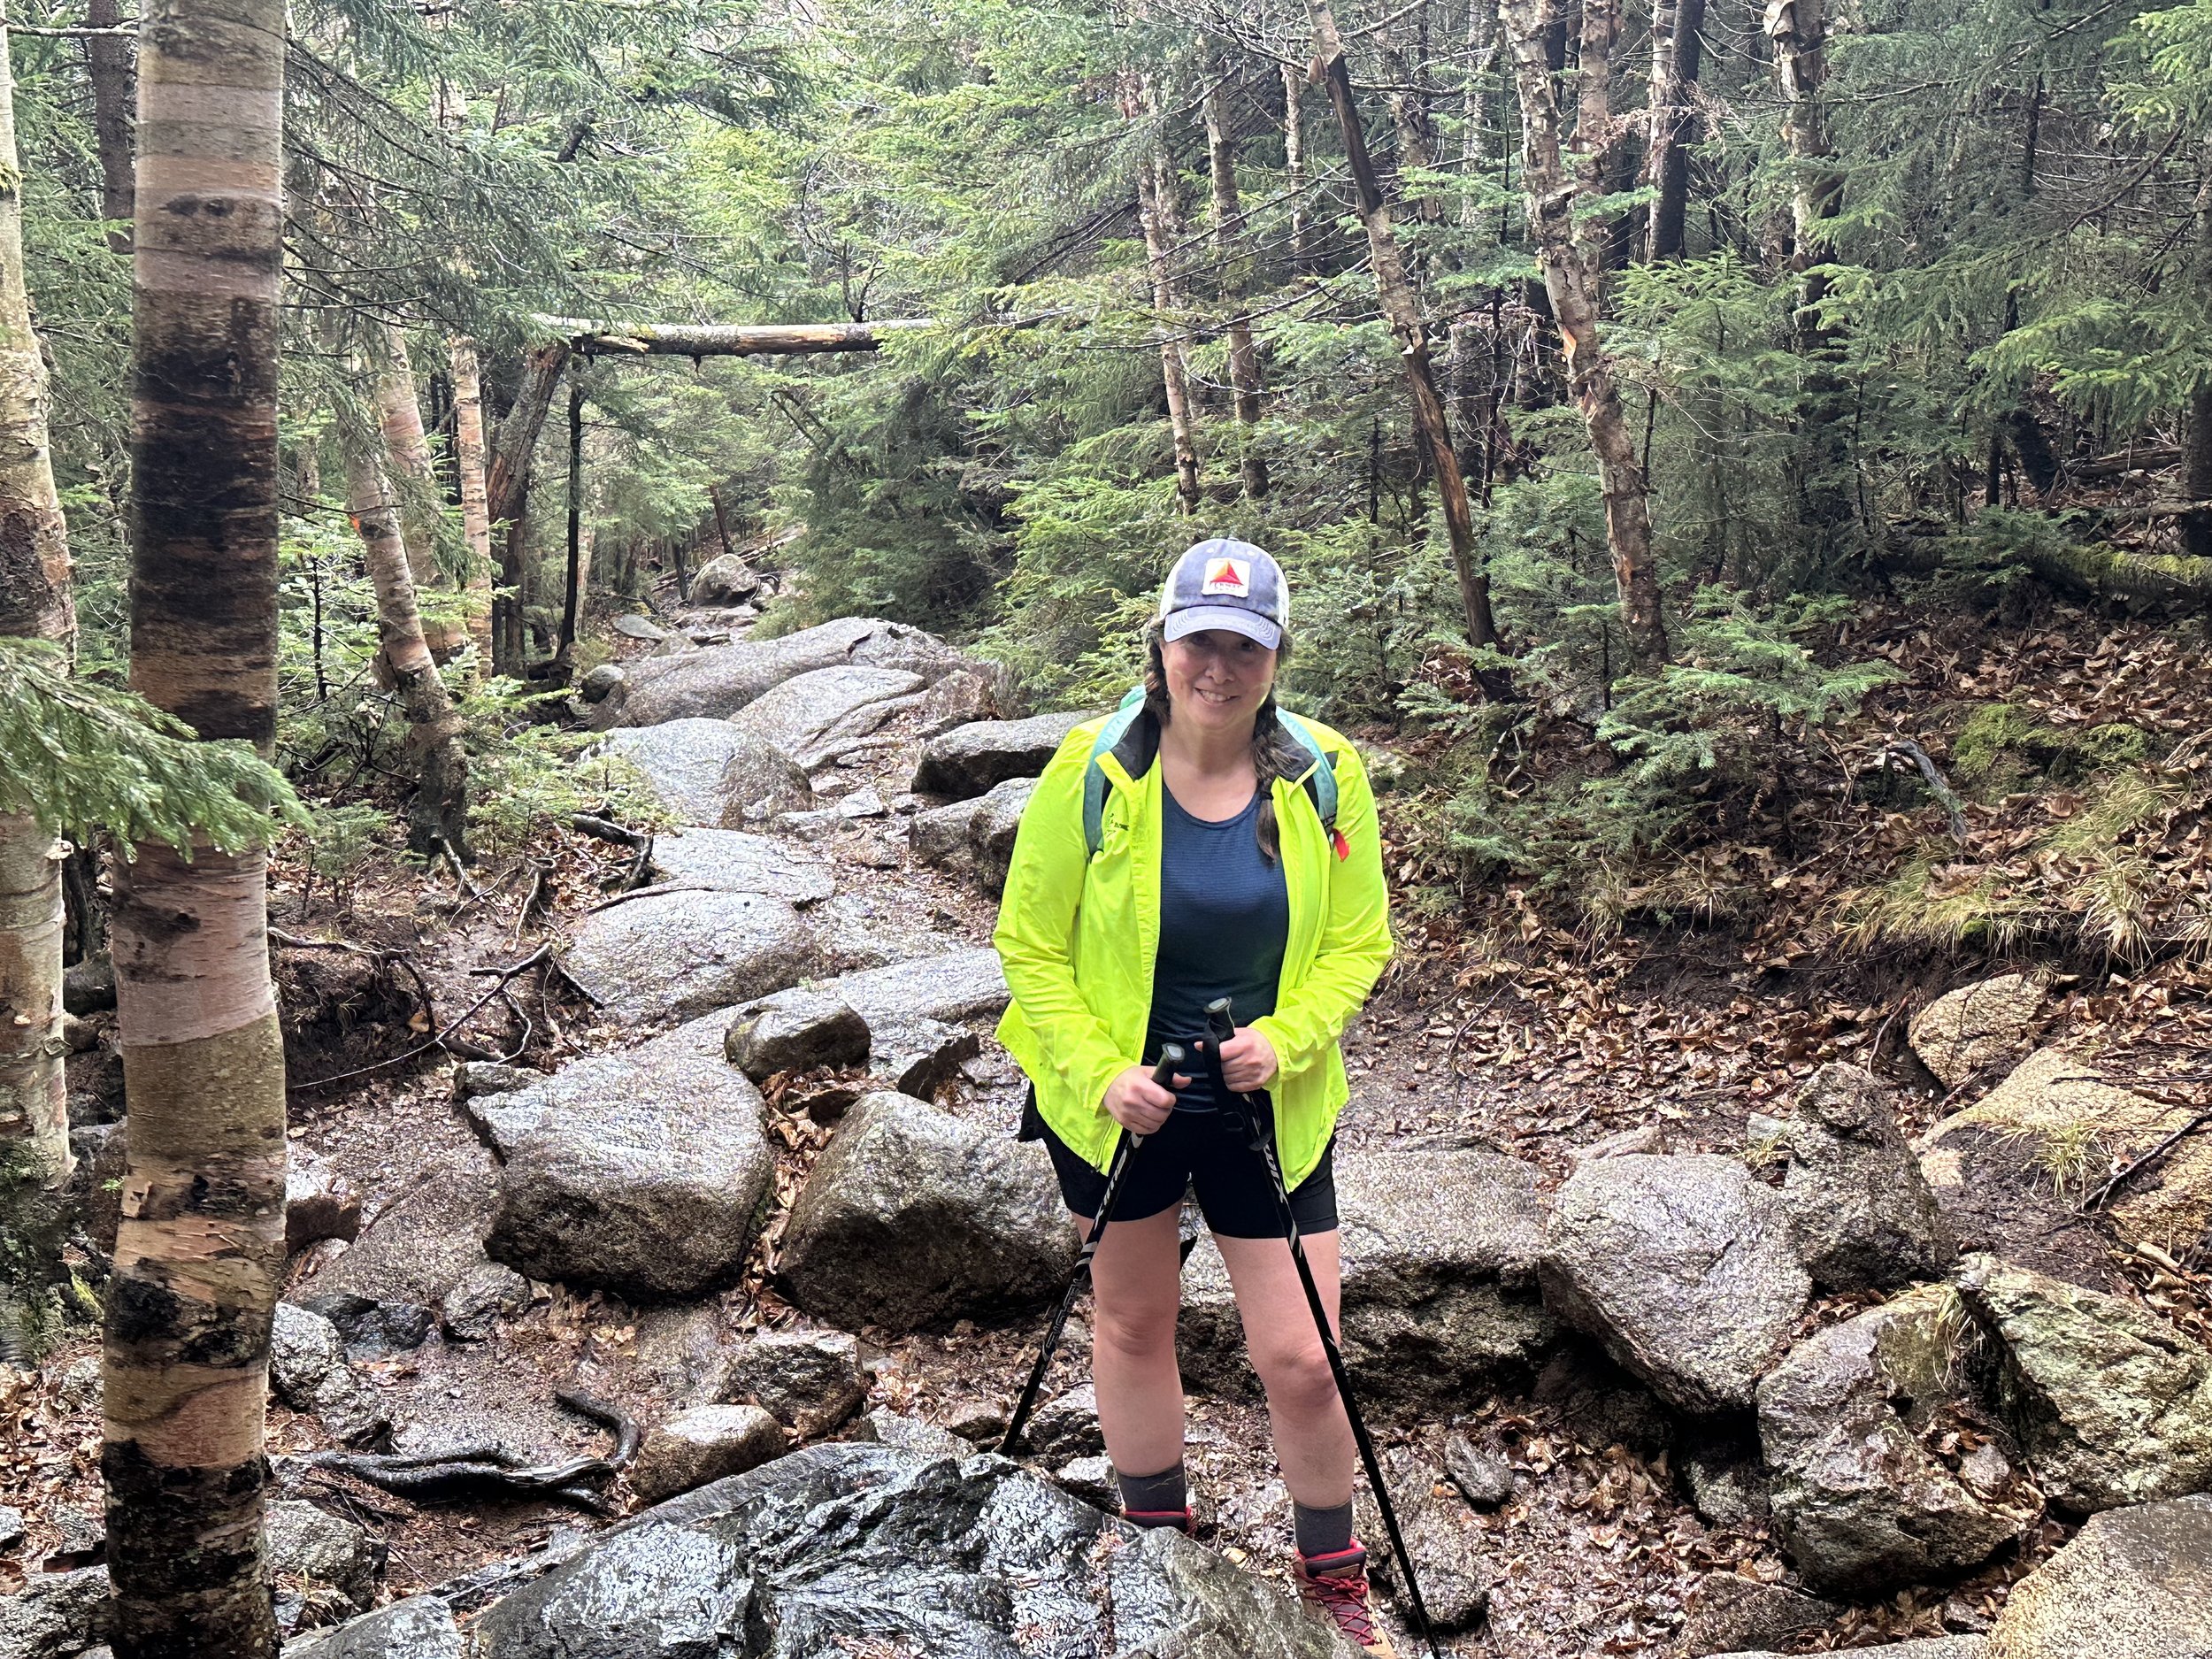
How We Plan Our Hikes
How to plan a successful day hiking in New England
If you're planning a trip to New England and want to explore the beautiful outdoors we call home, we're here to help! We don't do anything too fancy when planning our hikes, but a little preparation goes a long way toward having a safe and successful day. Plus, at our age, it's all about staying safe and finding the best food afterward!
Mt Pemigewasset
Step 1: Decide the Day's Plan
First things first—how much time do we have? Are there any commitments that mean we need to be home by a certain time? If not, we're free to follow where the trails (and the weather) lead us—with the promise of delicious food at the end.
I keep a running list of hikes: some challenging, some moderate, and some easy. My go-to sources for finding new trails have always been books. One of my favorites is Foghorn Outdoors: New England Hiking - The Complete Guide to More Than 380 Hikes by Michael Lanza. This book is over 20 years old, so I double-check things like road closures, but the detailed descriptions and honest ratings make it a gem. Each hike is rated on a scale of 1-10 for views and difficulty—because let's be honest, isn't that why we hike?
Another book I recently picked up is New Hampshire's 52 With a View: A Hiker's Guide. by Ken MacGray It focuses solely on New Hampshire mountains under 4,000 feet. Some trails are still challenging, but all offer incredible views without the grueling climb—a definite win-win.
Mt Osceola
Step 2: Plan the Post-Hike Meal
Food is a key part of our hiking adventures. We always research dining options before we leave because cell service at the trailhead can be spotty. Where we go depends on what time we finish the hike. If we wrap up early, we're on the hunt for a cozy local coffee shop. If it's closer to lunch or dinner, we love finding a local restaurant for a well-earned meal and a refreshing drink.

Bonus Step: Use the AllTrails App
In addition to books, we rely on the AllTrails app for planning. I love checking recent trail reviews and photos to know what to expect. It's a lifesaver when it comes to gear decisions—because nothing ruins a hike faster than being unprepared. Huge thanks to all the hikers who share their trail updates!

Tuckerman Ravine trail
The Night Before: Prep is Everything
A little prep the night before makes for a smoother morning. We pack our gear, lay out our clothes, and make peanut butter and jelly sandwiches in advance. That way, in the morning, Mike can toast my bagel (he's the morning person, not me) while I get ready. There's something so peaceful about hitting the trail early, so this routine helps us get out the door without a hitch.
If the weather looks iffy, we throw rain gear in the car—better to have it and not need it than the other way around. We also wear comfy shoes to the trailhead and pack our hiking boots to change into when we arrive. In the summer, we even keep an extra set of clothes in the car just in case we get too sweaty and want to freshen up before heading to eat.
Middle & North Sugarloaf
Want more tips and stories? Tune in to our podcast, Around New England, where we share all the details about our hikes and adventures. Let us know what you'd like to hear next—and happy hiking!

Mt Chocorua